flutter知识点总结
1.Windows搭建Flutter Android运行环境
(1)电脑上安装配置java JDK
(2)电脑上安装Android Studio
(3)电脑上安装配置Flutter SDK
(4)电脑上配置Flutter国内镜像
FLUTTER_STORAGE_BASE_URL:https://storage.flutter-io.cn
PUB_HOSTED_URL:https://pub.flutter-io.cn
(5)运行flutter doctor命令检查环境是否配置成功
(6)打开Android studio安装Flutter Dart插件
(7)创建Flutter项目
(8)Android Studio中导入运行Flutter项目
(9)运行Flutter项目
flutter run
r键:点击后热加载,R键:重新编译
p键:显示网络布局
o键:切换Android与ios预览模式
q键:退出预览模式
2.文件夹说明
android:android平台相关代码
ios:ios平台相关代码
lib:flutter相关代码,我们主要编写也在这个文件夹
test:主要用于存放测试代码
pubspec.yaml:配置文件,一般存放一些第三方库的依赖
3.Flutter把内容单独抽离成一个组件
在Flutter中自定义组件其实就是一个类,这个类需要继承StatelessWidget/StatefulWidget
StatelessWidget:无状态组件,状态不可变的widget
StatefulWidget:有状态组件,持有的状态可能在widget生命周期改变
4.MaterialApp和Scaffold
来源:https://segmentfault.com/a/1190000018445793?utm_source=tag-newest
MaterialApp:MaterialApp是一个方便的widget,它封装了应用程序实现Material Desgin所需要的一些Widget,一般作为顶层的widget使用
属性:
title:String类型,该属性在Android应用管理器的App上方显示,对于ios是没有效果的
home:Widget类型,这是在应用程序正常启动时首先显示的Widget,除非指定了initialRoute。如果initialRoute显示失败,也该显示该Widget。
需要注意的是, 如果你指定了home属性,则在routes的路由表中不允许出现/的命名路由
routes:Map类型,是应用的顶级路由表。当我们再使用Navigator.pushNamed进行命名路由的跳转时,会在此路表中进行查找并跳转。如果你的应用程序只有一个页面,则无需使用routes,直接指定home对应的Widget即可
theme:主题
theme: ThemeData(
primarySwatch: Colors.yellow
)
Scaffold:Scaffold通常被用作MaterialApp的子Widget,它会填充可用空间,占据整个窗口或设备屏幕。Scaffold提供了大多数应用程序都应该具备的功能,例如顶部的appBar,底部的bottomNavigationBar,隐藏的侧边栏drawer等。
属性:
appBar:PreferredSizeWidget类型,显示在Scaffold的顶部区域。
drawer:Widget drawer类型,通常用来形成一个汉堡包按钮显示其侧边栏
bottomNavigationBar:Widget bottomNavigationBar类型,用户显示底部的tab栏,items必须大于2个
body:Widget类型,Scaffold的主体内容
如:
import 'package:flutter/material.dart';
void main(){
runApp(MyApp());
}
//自定义组件
class MyApp extends StatelessWidget{
@override
Widget build(BuildContext context){
return MaterialApp(
title: '王清最帅',
home: Scaffold(
appBar: AppBar(
title: Text('Flutter Demo')
),
body: HomeContent(),
),
theme: ThemeData(
primarySwatch: Colors.yellow
),
);
}
}
class HomeContent extends StatelessWidget{
@override
Widget build(BuildContext context) {
return Center(
child: Text(
'你好,flutter,我叫王清呀',
textDirection: TextDirection.ltr,
style: TextStyle(
// 所有数字都应该是double类型
fontSize: 40.0,
color: Colors.blue,
// color: Color.fromRGBO(200, 200, 200, 0.6)
),
),
);
}
}
5.Container组件、Text组件
Container(
// 设置子元素
child: Text(
// 内容
'王清最帅',
// 文字居中显示
textAlign: TextAlign.center,
// 文本超出显示省略号
overflow: TextOverflow.ellipsis,
// 文本显示最大行数
maxLines: 1,
// 文字显示倍率
textScaleFactor: 1.5,
// 文字的样式设置
style: TextStyle(
fontSize: 20.0,
color: Colors.blue,
// 字间隙
letterSpacing:5,
// 字体样式 italic 斜体
fontStyle: FontStyle.italic,
// 字体加粗
fontWeight: FontWeight.w300,
// 文字装饰线 lineThrough 删除线 overline 上划线 underline 下划线
decoration: TextDecoration.underline,
// 文字下划线颜色
decorationColor: Colors.black,
// 下划线风格 dashed dotted 虚线 double 两根线 solid 一根实线 wavy 波浪线
decorationStyle: TextDecorationStyle.wavy,
// 单词间隙
wordSpacing: 10
),
),
// 高度
height: 300.0,
// 宽度
width: 300.0,
// 设置背景颜色,但是不能与BoxDecoration同时设置
// color: Colors.black,
// 背景装饰:设置边框、背景色、背景图片、圆角等属性
decoration:
BoxDecoration(
// 背景色
color: Colors.yellow,
// 边框设置
border: Border.all(
// 边框颜色
color: Colors.blue,
// 边框宽度
width: 2.0
),
// 设置圆角
borderRadius: BorderRadius.all(
Radius.circular(10)
)
),
// 内边距
// padding: EdgeInsets.all(10),
padding: EdgeInsets.fromLTRB(10, 10, 10, 10),
// 外边距
margin: EdgeInsets.fromLTRB(10, 10, 10, 10),
// 转换
// transform: Matrix4.translationValues(100, 0, 0),
transform: Matrix4.rotationZ(0.1),
// 内部内容显示的位置
alignment: Alignment.bottomLeft,
)
6.图片组件
Image.asset 本地图片
Image.network 远程图片
Image.network基本属性:
child: Image.network(
// 链接src
'https://timgsa.baidu.com/timg?image&quality=80&size=b9999_10000&sec=1588676390324&di=fc02867b89bc67ad7ede0ebd95cbdfe3&imgtype=0&src=http%3A%2F%2F5b0988e595225.cdn.sohucs.com%2Fimages%2F20180227%2Fcf96af3dc6a348c18d60064de6c4f88d.png',
// 图片的对齐方式
alignment: Alignment.center,
// 设置图片区域颜色,单独设置之后将图片覆盖
color: Colors.blue,
colorBlendMode: BlendMode.colorBurn,
// 控制图片的拉伸和挤压,是根据父容器来的
/*
* BoxFit.fill:全图显示,图片会被拉伸并且充满父容器
* BoxFit.contain:全图显示,按照原比例
* BoxFit.cover:图片要充满整个容器,还不变形
* BoxFit.fitWidth:横向充满
* BoxFit.fitHeight:纵向充满
* BoxFit.scaleDown:此属性不允许显示超过原图片大小,可小不可大
* */
fit: BoxFit.scaleDown,
// 平铺
repeat: ImageRepeat.repeatY,
// width 和 height属性一般结合ClipOval才能看到效果
width: 300
)
实现圆角以及圆形图片:
第一种方式:
child: Container(
width: 300.0,
height: 300.0,
decoration: BoxDecoration(
color: Colors.yellow,
borderRadius: BorderRadius.circular(150),
image: DecorationImage(
image: NetworkImage('https://timgsa.baidu.com/timg?image&quality=80&size=b9999_10000&sec=1588676390324&di=fc02867b89bc67ad7ede0ebd95cbdfe3&imgtype=0&src=http%3A%2F%2F5b0988e595225.cdn.sohucs.com%2Fimages%2F20180227%2Fcf96af3dc6a348c18d60064de6c4f88d.png'),
fit: BoxFit.cover
)
),
)
第二种方式:
child: Container(
child: ClipOval(
child: Image.network(
'https://timgsa.baidu.com/timg?image&quality=80&size=b9999_10000&sec=1588676390324&di=fc02867b89bc67ad7ede0ebd95cbdfe3&imgtype=0&src=http%3A%2F%2F5b0988e595225.cdn.sohucs.com%2Fimages%2F20180227%2Fcf96af3dc6a348c18d60064de6c4f88d.png',
width: 300,
height: 300,
),
),
)
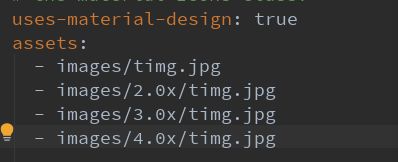
Image.asset 本地图片:
1.在根目录新建images目录,在目录下新建2.0x、3.0x、4.0x目录,在每个文件夹引入需要的图片
如下图1;
2.修改pubspec.yaml声明一下添加的图片文件
如下图2;
3.引用
child: Container(
child: Image.asset('images/timg.jpg'),
)
7.ListView基础列表组件、水平列表组件、图表组件
ListView:Flutter中通过ListView来定义列表项,支持水平方向和垂直方向,通过一个属性即可,列表分类:
垂直列表、垂直图文列表、水平列表、动态列表、矩阵式列表
参数:
scrollDirection:
Axis.horizontal 水平列表
Axis.Vertical 垂直列表
padding: 内边距
reverse: 组件反向排序
children: 列表元素
基本列表实例:
ListView(
padding: EdgeInsets.all(10),
children: [
ListTile(
// 左边设置图标
leading: Icon(
Icons.subtitles,
color: Colors.yellow,
size: 30,
),
title: Text('王清帅帅哒1'),
subtitle: Text('王清将会越来越帅啦'),
),
ListTile(
title: Text('王清帅帅哒2'),
subtitle: Text('王清将会越来越帅啦'),
// 右边设置图标
trailing: Icon(Icons.chevron_right),
),
ListTile(
leading: Image.network('https://timgsa.baidu.com/timg?image&quality=80&size=b9999_10000&sec=1588676390324&di=fc02867b89bc67ad7ede0ebd95cbdfe3&imgtype=0&src=http%3A%2F%2F5b0988e595225.cdn.sohucs.com%2Fimages%2F20180227%2Fcf96af3dc6a348c18d60064de6c4f88d.png'),
title: Text('王清帅帅哒3'),
subtitle: Text('王清将会越来越帅啦')
)
],
)
8.动态列表
方法一:
class HomeContent extends StatelessWidget{
// 自定义方法
List getData(){
return ['王清最帅1','王清最帅2','王清最帅3','王清最帅4'].map((item){
return ListTile(
title: Text(item),
);
}).toList();
}
@override
Widget build(BuildContext context) {
return ListView(
children: this.getData(),
);
}
}
方法二:
class HomeContent extends StatelessWidget{
// 自定义方法
List getData(){
return ['王清最帅1','王清最帅2','王清最帅3','王清最帅4'];
}
@override
Widget build(BuildContext context) {
return ListView.builder(
itemCount: this.getData().length,
itemBuilder: (context,index){
return ListTile(
title: Text(this.getData()[index]),
);
}
);
}
}
9.网格列表(GridView)
scrollDirection 滚动方向
padding 内边距
resolve 组件反向排序 bool
crossAxisSpacing 水平子Widget之间间距
mainAxisSpacing 垂直子Widget之间间距
crossAxisCount 一行的Widget数量
childAspectRatio 子Widget宽高比例
children []
gridDelegate 控制布局主要用在GridVIew.builder里面
方法一:通过GridView.count实现网格布局
class HomeContent extends StatelessWidget{
// 自定义方法
List getData(){
List list = ['图片1','图片2','图片3'];
return list.map((item){
return Container(
// Column组件会垂直方向布局
child: Column(
children: [
Image.network(
'https://timgsa.baidu.com/timg?image&quality=80&size=b9999_10000&sec=1588676390324&di=fc02867b89bc67ad7ede0ebd95cbdfe3&imgtype=0&src=http%3A%2F%2F5b0988e595225.cdn.sohucs.com%2Fimages%2F20180227%2Fcf96af3dc6a348c18d60064de6c4f88d.png',
),
// 增加图片和文字之间的距离
SizedBox(height: 10),
Text(item)
],
),
alignment: Alignment.center,
decoration: BoxDecoration(
border: Border.all(
color: Colors.red,
width: 1
)
),
);
}).toList();
}
@override
Widget build(BuildContext context) {
return GridView.count(
crossAxisCount: 2,
crossAxisSpacing: 10,
mainAxisSpacing: 10,
children: this.getData(),
childAspectRatio: 1.2
);
}
}
方法二:通过GridView.builder实现网格布局
class HomeContent extends StatelessWidget{
// 自定义方法
List getData(){
List list = ['图片1','图片2','图片3'];
return list;
}
@override
Widget build(BuildContext context) {
return GridView.builder(
padding: EdgeInsets.all(10),
itemCount: this.getData().length,
gridDelegate: SliverGridDelegateWithFixedCrossAxisCount(
crossAxisCount: 2,
mainAxisSpacing: 10,
crossAxisSpacing: 10
),
itemBuilder: (context, index){
return Container(
// Column组件会垂直方向布局
child: Column(
children: [
Image.network(
'https://timgsa.baidu.com/timg?image&quality=80&size=b9999_10000&sec=1588676390324&di=fc02867b89bc67ad7ede0ebd95cbdfe3&imgtype=0&src=http%3A%2F%2F5b0988e595225.cdn.sohucs.com%2Fimages%2F20180227%2Fcf96af3dc6a348c18d60064de6c4f88d.png',
),
// 增加图片和文字之间的距离
SizedBox(height: 10),
Text(this.getData()[index])
],
),
alignment: Alignment.center,
decoration: BoxDecoration(
border: Border.all(
color: Colors.red,
width: 1
)
),
);
},
);
}
}
10. Padding、Row、Colomn、Expanded组件
Padding:有的组件没有Padding属性,就可以使用Padding组件去替代
属性:padding:内边距值 child:子widget
如:
Padding(
padding: EdgeInsets.all(10),
child: Image.network(
'https://timgsa.baidu.com/timg?image&quality=80&size=b9999_10000&sec=1588676390324&di=fc02867b89bc67ad7ede0ebd95cbdfe3&imgtype=0&src=http%3A%2F%2F5b0988e595225.cdn.sohucs.com%2Fimages%2F20180227%2Fcf96af3dc6a348c18d60064de6c4f88d.png',
fit: BoxFit.fill
),
)
Row/Column:水平/垂直布局组件
属性:mainAxisAlignment 主轴的排序方式
crossAxisAlignment 次轴的排序方式
children 组件子元素
实例:
class HomeContent extends StatelessWidget{
@override
Widget build(BuildContext context) {
return Container(
height: 400,
color: Colors.pink,
child: Row /* Column */(
mainAxisAlignment: MainAxisAlignment.spaceEvenly,
crossAxisAlignment: CrossAxisAlignment.start,
children: [
IconContainer(Icons.search),
IconContainer(Icons.home),
IconContainer(Icons.select_all)
],
),
);
}
}
class IconContainer extends StatelessWidget{
double size;
Color color;
IconData icon;
IconContainer(this.icon,{this.color = Colors.white,this.size = 32});
@override
Widget build(BuildContext context) {
return Container(
height: 100,
width: 100,
color: Colors.red,
child: Center(
child: Icon(this.icon,size: this.size,color: this.color),
),
);
}
}
Expanded:类似于web中的Flex布局
属性:
flex 元素占整个父Row/Column的比例
child 子元素
实例:
class HomeContent extends StatelessWidget{
@override
Widget build(BuildContext context) {
return Row(
children: [
Expanded(
flex: 1,
child: IconContainer(Icons.search,color: Colors.yellow,),
),
Expanded(
flex: 2,
child: IconContainer(Icons.home),
),
],
);
}
}
class IconContainer extends StatelessWidget{
double size;
Color color;
IconData icon;
IconContainer(this.icon,{this.color = Colors.red,this.size = 32});
@override
Widget build(BuildContext context) {
return Container(
height: 100,
width: 100,
color: this.color,
child: Center(
child: Icon(this.icon,size: this.size,color: Colors.white),
),
);
}
}
11.Stack层叠组件
Stack组件:
属性: alignment 配置所有子元素的显示位置
children 子组件
实例:
Stack(
// 让元素居中显示
// alignment: Alignment.center,
// 参数分别为x,y轴,值的范围为[-1,1],原点为[0,0]显示为居中
alignment: Alignment(-1,1),
children: [
Container(
height: 400,
width: 300,
color: Colors.red,
),
Container(
height: 200,
width: 150,
color: Colors.yellow,
)
],
)
Align:如果内部包含多个组件则无法定位,需要对每个内部组件单独定位
Container(
height: 400,
width: 300,
color: Colors.red,
child: Stack(
children: [
Align(
alignment: Alignment.topLeft,
child: Icon(Icons.home,size: 32,color: Colors.white),
),
Align(
alignment: Alignment.center,
child: Icon(Icons.search,size: 32,color: Colors.white),
),
Align(
alignment: Alignment.bottomRight,
child: Icon(Icons.send,size: 32,color: Colors.white),
)
],
),
)
Positioned:实现的功能与Align一致
top、bottom、left、right:距离上下左右的距离
child:子组件
实例:
Container(
height: 400,
width: 300,
color: Colors.red,
child: Stack(
children: [
Positioned(
left: 0,
child: Icon(Icons.home,size: 32,color: Colors.white),
),
Positioned(
left: 150,
bottom: 200,
child: Icon(Icons.search,size: 32,color: Colors.white),
),
Positioned(
right: 0,
bottom: 0,
child: Icon(Icons.send,size: 32,color: Colors.white),
)
],
),
)
12.AspectRatio、Card卡片组件
AspectRatio:根据父元素宽高设置去调整子元素的宽高比
属性:
Container(
width: 300,
color: Colors.red,
child: AspectRatio(
aspectRatio: 2,
child: Container(
color: Colors.yellow,
),
),
)
Card:
属性:
margin:外边距
child:子组件
shape:card的阴影效果,默认的阴影效果为圆角的长方形边
color:设置颜色
实例:
ListView(
children: [
Card(
color: Colors.yellow,
shape: RoundedRectangleBorder(
borderRadius: BorderRadius.all(Radius.circular(20.0))
),
margin: EdgeInsets.all(10),
child: Column(
children: [
ListTile(
leading: CircleAvatar(
backgroundImage: NetworkImage('https://www.itying.com/images/flutter/3.png'),
),
title: Text('张三',style: TextStyle(fontSize: 28)),
subtitle: Text('高级工程师'),
)
],
),
)
],
)
13.Wrap组件
Wrap可以实现流布局,单行的Wrap跟Row表现几乎一致,如果宽度不够,则会自动撑开
属性:
direction:主轴的方向,默认水平
alignment:主轴的对其方式
spacing:主轴方向上的间距
textDirection:文字方向
verticalDirection:定义了children摆放顺序,默认为down
runAlignment:run的对齐方式,run可以理解为新的行或者列,可以理解为纵轴排列方式
runSpacing:run的间距,可以理解为纵轴间距
实例:
class HomeContent extends StatelessWidget{
@override
Widget build(BuildContext context) {
return Wrap(
// 主轴上的间距
spacing: 10,
alignment: WrapAlignment.spaceEvenly,
runAlignment: WrapAlignment.spaceEvenly,
children: [
MyButton('第num季'),
MyButton('第一季'),
MyButton('第一季'),
MyButton('第一一季'),
MyButton('第一季'),
MyButton('第一季'),
],
);
}
}
class MyButton extends StatelessWidget{
String text;
MyButton(this.text);
@override
Widget build(BuildContext context) {
return RaisedButton(
child: Text(this.text),
// 获取主题颜色
textColor: Theme.of(context).accentColor,
onPressed: (){
},
);
}
}
14.Flutter中自定义有状态组件
快速生成无状态和有状态组件:
下载flutter snippets插件
实例:
// 有状态组件
class HomePage extends StatefulWidget {
@override
_HomePageState createState() => _HomePageState();
}
class _HomePageState extends State {
int num = 0;
@override
Widget build(BuildContext context) {
return Column(
children: [
Chip(
label: Text('${this.num}'),
),
RaisedButton(
child: Text('点击'),
onPressed: (){
setState(() {
this.num++;
});
},
)
],
);
}
}
15. BottomNavigationBar 底部导航条
属性:
items:底部导航条按钮集合
iconSize:icon
currentIndex:默认选中第几个
onTap:选中变化回调函数
fixedColor:选中的颜色
type:BottomNavigationBarType.fixed/BottomNavigationBarType.shifting
实例:
main.js文件:
import 'package:flutter/cupertino.dart';
import 'package:flutter/material.dart';
import 'pages/Tabs/Tabs.dart';
void main(){
runApp(MyApp());
}
//自定义组件
class MyApp extends StatelessWidget{
@override
Widget build(BuildContext context){
return MaterialApp(
title: '王清最帅',
home: Tabs(),
theme: ThemeData(
primarySwatch: Colors.blue
),
);
}
}
Tabs.js文件:
import 'package:flutter/material.dart';
import 'Home.dart';
import 'Category.dart';
import 'Setting.dart';
class Tabs extends StatefulWidget {
@override
_TabsState createState() => _TabsState();
}
class _TabsState extends State {
int _currentIndex = 0;
List _pageList = [
HomePage(),
Category(),
Setting()
];
List _pageName = [
{
"icon": Icon(Icons.home),
"title": Text('首页')
},
{
"icon": Icon(Icons.category),
"title": Text('分类')
},
{
"icon": Icon(Icons.settings),
"title": Text('设置')
},
];
@override
Widget build(BuildContext context) {
return Scaffold(
appBar: AppBar(
title: _pageName[_currentIndex]['title']
),
body: this._pageList[this._currentIndex],
bottomNavigationBar: BottomNavigationBar(
currentIndex: this._currentIndex,
fixedColor: Colors.red,
// 如果底部按钮超过3个就需要设置type
type: BottomNavigationBarType.fixed,
items: _pageName.map((value){
return BottomNavigationBarItem(
icon: value['icon'],
title: value['title']
);
}).toList(),
onTap: (int index){
print(index);
setState(() {
this._currentIndex = index;
});
},
),
);
}
}
16.路由
在Flutter中通过Navigator组件管理路由导航,并提供了管理堆栈的方法,如:Navigator.push和Navigator.pop
配置理由跳转的方式:1.基本路由 2.命名路由
1.基本路由(实例:Home.dart跳转至SearchPage.dart页面)
Home.dart:
import 'package:flutter/material.dart';
import '../SearchPage.dart';
class HomePage extends StatefulWidget {
@override
_HomePageState createState() => _HomePageState();
}
class _HomePageState extends State {
@override
Widget build(BuildContext context) {
return Container(
child: Center(
child: RaisedButton(
child: Text('跳转到搜索页面'),
onPressed: (){
// 路由跳转
Navigator.of(context).push(
MaterialPageRoute(
// 传值
builder: (context)=> SearchPage(content: '王清最帅')
)
);
},
color: Theme.of(context).accentColor,
textTheme: ButtonTextTheme.primary,
),
),
);
}
}
SearchPage.dart:
import 'package:flutter/material.dart';
class SearchPage extends StatelessWidget {
String content;
SearchPage({this.content="搜索页"});
@override
Widget build(BuildContext context) {
return Scaffold(
floatingActionButton: FloatingActionButton(
child: Text('返回'),
onPressed: (){
// 返回上级页面
Navigator.of(context).pop();
},
),
appBar: AppBar(
title: Text('搜素页')
),
body: Column(
children: [
Text(this.content),
],
),
);
}
}
2.命名路由
(1)不传参的命名路由
main.dart:
import 'pages/Search.dart';
import 'pages/Tabs.dart';
class MyApp extends StatelessWidget{
@override
Widget build(BuildContext context){
return MaterialApp(
title: '王清最帅',
home: Tabs(),
routes: {
'/search': (context) => SearchPage()
},
);
}
}
Home.dart:
import 'package:flutter/material.dart';
class HomePage extends StatefulWidget {
@override
_HomePageState createState() => _HomePageState();
}
class _HomePageState extends State {
@override
Widget build(BuildContext context) {
return Container(
child: Center(
child: RaisedButton(
child: Text('跳转到搜索页面'),
onPressed: (){
// 跳转路由,但是不可以传参
Navigator.pushNamed(context, '/search');
},
color: Theme.of(context).accentColor,
textTheme: ButtonTextTheme.primary,
),
),
);
}
}
(2)传参的命名路由
新建route.dart:
import 'package:flutter/material.dart';
import 'pages/Search.dart';
import 'pages/Tabs.dart';
final routes = {
'/': (context,{arguments}) => Tabs(arguments: arguments),
'/search': (context,{arguments}) => SearchPage(arguments: arguments)
};
var onGenerateRoute = (RouteSettings settings) {
final String name = settings.name;
final Function pageContentBuilder = routes[name];
if (pageContentBuilder != null) {
if (settings.arguments != null) {
final Route route = MaterialPageRoute(
builder: (context) =>
pageContentBuilder(context, arguments: settings.arguments));
return route;
} else {
final Route route = MaterialPageRoute(
builder: (context) => pageContentBuilder(context)
);
return route;
}
}
};
main.dart:
import 'package:flutter/material.dart';
import 'pages/Tabs/Tabs.dart';
import 'route.dart';
void main(){
runApp(MyApp());
}
//自定义组件
class MyApp extends StatelessWidget{
@override
Widget build(BuildContext context){
return MaterialApp(
title: '王清最帅',
initialRoute: '/',
onGenerateRoute: onGenerateRoute
);
}
}
Home.dart:
import 'package:flutter/material.dart';
class HomePage extends StatefulWidget {
@override
_HomePageState createState() => _HomePageState();
}
class _HomePageState extends State {
@override
Widget build(BuildContext context) {
return Container(
child: Center(
child: RaisedButton(
child: Text('跳转到搜索页面'),
onPressed: (){
// 跳转路由携带参数
Navigator.pushNamed(context, '/search', arguments:{
"id": '1234567'
});
},
color: Theme.of(context).accentColor,
textTheme: ButtonTextTheme.primary,
),
),
);
}
}
(1)无状态组件获取参数
Search.dart:
import 'package:flutter/material.dart';
class SearchPage extends StatelessWidget {
final arguments;
SearchPage({this.arguments});
@override
Widget build(BuildContext context) {
return Scaffold(
floatingActionButton: FloatingActionButton(
child: Text('返回'),
onPressed: (){
// 返回上级页面
Navigator.of(context).pop();
},
),
appBar: AppBar(
title: Text('搜素页')
),
body: Text('id:${this.arguments['id']}')
);
}
}
(2)有状态组件获取参数
import 'package:flutter/material.dart';
class SearchPage extends StatefulWidget {
Map arguments;
Search({Key key, this.arguments}) : super(key: key);
@override
_SearchState createState() => _SearchState(arguments: this.arguments);
}
class _SearchState extends State {
Map arguments;
_SearchState({this.arguments});
@override
Widget build(BuildContext context) {
return Scaffold(
appBar: AppBar(
title: Text('搜索'),
),
body: Container(
child: Text('id: ${this.arguments["id"]}'),
),
);
}
}
3.不使用命名路由的新方法
Home.dart:
import 'package:flutter/material.dart';
import '../Search.dart';
class HomePage extends StatefulWidget {
@override
_HomePageState createState() => _HomePageState();
}
class _HomePageState extends State {
@override
Widget build(BuildContext context) {
return Container(
child: Center(
child: FlatButton(
child: Text('跳转到搜索页面'),
onPressed: (){
Navigator.of(context).push(
MaterialPageRoute(
builder: (context){
return Search();
},
settings: RouteSettings(arguments: {"id": 'abc'}),
fullscreenDialog: true
)
);
},
color: Theme.of(context).accentColor,
textTheme: ButtonTextTheme.primary,
),
),
);
}
}
Search.dart:
import 'package:flutter/material.dart';
class Search extends StatefulWidget {
@override
_SearchState createState() => _SearchState();
}
class _SearchState extends State {
@override
Widget build(BuildContext context) {
Map args = ModalRoute.of(context).settings.arguments;
return Scaffold(
appBar: AppBar(
title: Text('搜索'),
),
body: Container(
child: Text('id: ${args["id"]}'),
),
);
}
}
17.路由替换 返回到根目录
路由替换:
作用:返回的时候可以直接跳转到进入的页面
RaisedButton(
child: Text('再次跳转'),
onPressed: (){
Navigator.pushReplacementNamed(context, '/');
},
)
返回根目录:
Navigator.of(context).pushAndRemoveUntil(
MaterialPageRoute(
builder: (context) => Tabs(index: 1)
),
(route) => route == null
)
18. AppBar自定义顶部导航 TabBar定义顶部Tab切换
AppBar:
属性:
leading:在标题前面显示的图标
title:标题
actions:通常使用IconButton来表示
bottom:通常放tabBar,标题下面显示一个Tab导航栏
backgroundColor:导航背景颜色
iconTheme:图标样式
textTheme:文字样式
centerTitle:标题是否居中显示
实例:
import 'package:flutter/material.dart';
class AppBarDemo extends StatelessWidget {
@override
Widget build(BuildContext context) {
return Scaffold(
appBar: AppBar(
title: Text('AppBarDemo'),
// 标题是否居中显示
centerTitle: true,
// 背景颜色
backgroundColor: Colors.red,
// 左边的图标
leading: IconButton(
icon: Icon(Icons.menu, color: Colors.white),
onPressed: (){
Navigator.pop(context);
},
),
// 右边的图标
actions: [
IconButton(
icon: Icon(Icons.search),
onPressed: (){
print('search');
},
),
IconButton(
icon: Icon(Icons.home),
onPressed: (){
print('home');
},
)
],
),
body: Text('AppBarDemo'),
);
}
}
Tab切换第一种方式:
TabBar:
import 'package:flutter/material.dart';
class AppBarDemo extends StatelessWidget {
@override
Widget build(BuildContext context) {
return DefaultTabController(
length: 7,
child: Scaffold(
appBar: AppBar(
title: Text('今日头条'),
// 标题是否居中显示
centerTitle: true,
// 背景颜色
backgroundColor: Colors.deepOrange,
bottom: TabBar(
// 是否可滚动
isScrollable: true,
// 下划线颜色
indicatorColor: Colors.yellow,
// 下划线高度
indicatorWeight: 4,
// label字体颜色
labelColor: Colors.amberAccent,
// 未选中颜色
unselectedLabelColor: Colors.white,
// 下划线与文字等宽
indicatorSize: TabBarIndicatorSize.label,
tabs: [
Tab(text: "关注"),
Tab(text: "热门"),
Tab(text: "推荐"),
Tab(text: "上海"),
Tab(text: "精品课"),
Tab(text: "职场"),
Tab(text: "视频"),
]
),
),
// TabBarView里面的内容是跟TabBar中的内容一一对应的
body: TabBarView(
children: [
Text('关注'),
Text('热门'),
Text('推荐'),
Text('上海'),
Text('精品课'),
Text('职场'),
Text('视频'),
],
),
),
);
}
}
实现头条样式:
import 'package:flutter/material.dart';
class AppBarDemo extends StatelessWidget {
@override
Widget build(BuildContext context) {
return DefaultTabController(
length: 7,
child: Scaffold(
appBar: AppBar(
title: TabBar(
// 是否可滚动
isScrollable: true,
// 下划线颜色
indicatorColor: Colors.yellow,
// 下划线高度
indicatorWeight: 4,
// label字体颜色
labelColor: Colors.amberAccent,
tabs: [
Tab(text: "关注"),
Tab(text: "热门"),
Tab(text: "推荐"),
Tab(text: "上海"),
Tab(text: "精品课"),
Tab(text: "职场"),
Tab(text: "视频"),
]
),
// 标题是否居中显示
centerTitle: true,
// 背景颜色
backgroundColor: Colors.deepOrange
),
// TabBarView里面的内容是跟TabBar中的内容一一对应的
body: TabBarView(
children: [
Text('关注'),
Text('热门'),
Text('推荐'),
Text('上海'),
Text('精品课'),
Text('职场'),
Text('视频'),
],
),
),
);
}
}
Tab切换的第二种方式:
import 'package:flutter/material.dart';
class AppBarDemo extends StatefulWidget {
@override
_AppBarDemoState createState() => _AppBarDemoState();
}
class _AppBarDemoState extends State with SingleTickerProviderStateMixin {
TabController _tabController;
@override
void initState() {
super.initState();
_tabController = new TabController(
// Tab的个数
length: 2,
vsync: this
);
_tabController.addListener((){
// 打印当前的tab index
print(_tabController.index);
});
}
// 组件销毁的声明周期函数
@override
void dispose() {
super.dispose();
_tabController.dispose();
}
@override
Widget build(BuildContext context) {
return Scaffold(
appBar: AppBar(
title: Text('今日头条'),
bottom: TabBar(
controller: this._tabController,
tabs: [
Tab(text: '热销'),
Tab(text: '推荐')
],
),
),
body: TabBarView(
controller: this._tabController,
children: [
Text('热销'),
Text('推荐')
],
),
);
}
}
19.按钮组件
常见的按钮组件:
RaisedButton:凸起的按钮,其实就是Material Design风格的按钮
FlatButton:扁平化按钮
OutlineButton:线框按钮
IconButton:图标按钮
ButtonBar:按钮组
FloatingActionButton:浮动按钮
属性:
onPressed:点击回调
child:文本组件
textColor: 文本颜色
color:按钮颜色
disabledTextColor:按钮禁用时的文字颜色
disabledColor:按钮禁用时的按钮颜色
splashColor:点击按钮时的水波纹的颜色
highlightColor:长按按钮后的颜色
elevation:阴影的范围
padding:内边距
shape:按钮的形状
(1)给按钮设置宽高
Container(
height: 60,
width: 200,
child: RaisedButton(
child: Text('跳转到AppBAr'),
color: Colors.blue,
textColor: Colors.white,
elevation: 20,
onPressed: (){
},
),
)
(2)设置全屏按钮
Row(
children: [
Expanded(
child: Container(
margin: EdgeInsets.fromLTRB(10, 0, 10, 0),
height: 60,
child: RaisedButton(
child: Text('跳转到AppBAr'),
color: Colors.blue,
textColor: Colors.white,
elevation: 20,
onPressed: (){
},
),
),
)
],
)
(3)给按钮加图标
RaisedButton.icon(
// 代表按钮disabled
onPressed: null,
icon: Icon(Icons.search),
label: Text('图标按钮')
)
(4)设置按钮的形状(圆角、圆形)
圆角按钮:
RaisedButton(
child: Text('按钮'),
color: Colors.blue,
onPressed: (){},
shape: RoundedRectangleBorder(
borderRadius: BorderRadius.circular(10)
),
)
圆形按钮:
Container(
height: 80,
child: RaisedButton(
child: Text('按钮'),
color: Colors.blue,
onPressed: (){},
shape: CircleBorder(
side: BorderSide(
color: Colors.blue
)
),
),
)
(5)按钮组
Container(
child: Row(
children: [
ButtonBar(
children: [
RaisedButton(
child: Text('按钮1'),
onPressed: (){}
),
RaisedButton(
child: Text('按钮2'),
onPressed: (){}
),
RaisedButton(
child: Text('按钮2'),
onPressed: (){}
)
]
)
],
)
(6)FloatingActionButton
属性:
child:一般为Icon
tooltip:被长按时显示
backgroundColor:背景颜色
elevation:未点击的阴影
highlightElevation:点击时阴影值
shape:形状
mini:是否为mini类型,默认false
实例:(实现咸鱼底部)
import 'package:flutter/material.dart';
import 'Home.dart';
import 'Category.dart';
import 'Setting.dart';
class Tabs extends StatefulWidget {
final index;
Tabs({this.index =0});
@override
_TabsState createState() => _TabsState(this.index);
}
class _TabsState extends State {
int _currentIndex;
_TabsState(this._currentIndex);
List _pageList = [
HomePage(),
Category(),
Setting()
];
List _pageName = [
{
"icon": Icon(Icons.home),
"title": Text('首页')
},
{
"icon": Icon(Icons.category),
"title": Text('分类')
},
{
"icon": Icon(Icons.settings),
"title": Text('设置')
},
];
@override
Widget build(BuildContext context) {
return Scaffold(
appBar: AppBar(
title: _pageName[_currentIndex]['title']
),
body: this._pageList[this._currentIndex],
floatingActionButton: Container(
height: 65,
width: 65,
padding: EdgeInsets.all(5),
decoration: BoxDecoration(
borderRadius: BorderRadius.circular(40),
color: Colors.white
),
child: FloatingActionButton(
child: Icon(Icons.add),
backgroundColor: Colors.amber,
onPressed: (){
setState(() {
this._currentIndex = 1;
});
},
),
),
floatingActionButtonLocation: FloatingActionButtonLocation.centerDocked,
bottomNavigationBar: BottomNavigationBar(
currentIndex: this._currentIndex,
fixedColor: Colors.red,
type: BottomNavigationBarType.fixed,
items: _pageName.map((value){
return BottomNavigationBarItem(
icon: value['icon'],
title: value['title']
);
}).toList(),
onTap: (int index){
print(index);
setState(() {
this._currentIndex = index;
});
},
),
);
}
}
20.Drawer侧边栏
Drawer/endDrawer:左侧边栏/右侧边栏
DrawerHeader:
属性:
decoration:设置顶部背景颜色
child:配置子元素
padding:内边距
margin:外边距
实例:
Drawer(
child: Column(
children: [
Row(
children: [
Expanded(
child: DrawerHeader(
child: Text(''),
decoration: BoxDecoration(
image: DecorationImage(
image: NetworkImage('https://www.itying.com/images/flutter/1.png'),
fit: BoxFit.cover
)
),
),
)
],
),
ListTile(
leading: CircleAvatar(
child: Icon(Icons.home),
),
title: Text('我的空间'),
onTap: (){
// 侧边栏隐藏
Navigator.of(context).pop();
Navigator.pushNamed(context, '/login');
},
),
ListTile(
leading: CircleAvatar(
child: Icon(Icons.account_circle),
),
title: Text('我的好友'),
)
],
),
)
UserAccountsDrawerHeader:
属性:
decoration:设置顶部背景颜色
accountName:账号名称
accountEmail:账户邮箱
currentAccountPicture:用户头像
otherAccountsPictures:用来设置当前用户的其他头像
margin:外边距
实例:
Drawer(
child: Column(
children: [
Row(
children: [
Expanded(
child: UserAccountsDrawerHeader(
accountName: Text('王清'),
accountEmail: Text('[email protected]'),
currentAccountPicture: CircleAvatar(
backgroundImage: NetworkImage(
'https://www.itying.com/images/flutter/1.png'
),
),
decoration: BoxDecoration(
image: DecorationImage(
image: NetworkImage('https://www.itying.com/images/flutter/2.png'),
fit: BoxFit.cover
)
),
otherAccountsPictures: [
Image.network('https://www.itying.com/images/flutter/3.png'),
Image.network('https://www.itying.com/images/flutter/4.png')
],
),
)
],
),
ListTile(
leading: CircleAvatar(
child: Icon(Icons.home),
),
title: Text('我的空间'),
),
ListTile(
leading: CircleAvatar(
child: Icon(Icons.account_circle),
),
title: Text('我的好友'),
)
],
),
)
21.表单组件
TextField组件:
maxLines:设置此参数可以把文本框改为多行文本框
onChanged:文本框改变的时候触发的事件
decoration:
hintText:类似于html中的placeholder
border:配置文本框边框 OutlineInputBorder配合使用
labelText:label名称
labelStyle:配置label的样式
obscureText:把文本框改为密码框
controller:结合TextEditingController可以配置表单显示默认内容
实例:
import 'package:flutter/material.dart';
class Category extends StatefulWidget {
@override
_CategoryState createState() => _CategoryState();
}
class _CategoryState extends State {
// 初始化赋值的时候才需要定义TextEditingController
var username = new TextEditingController();
var password;
@override
void initState() {
super.initState();
this.username.text = '王清';
}
@override
Widget build(BuildContext context) {
return Container(
child: Padding(
padding: EdgeInsets.all(10),
child: Column(
children: [
TextField(
// 密码框
// obscureText: true,
decoration: InputDecoration(
// 标签前面的Icon
//icon:Icon(Icons.airplanemode_active),
hintText: "用户名",
// 显示边框
// border: OutlineInputBorder(),
// labelText: "用户名",
),
controller: this.username,
onChanged: (value){
setState(() {
this.username.text = value;
});
},
),
TextField(
obscureText: true,
decoration: InputDecoration(
hintText: "密码"
),
onChanged: (value){
setState(() {
this.password = value;
});
},
),
Container(
width: double.infinity,
child: RaisedButton(
child: Text('登录'),
color: Colors.blue,
onPressed: (){
print(this.username.text);
print(this.password);
},
),
)
],
),
),
);
}
}
Checkbox组件:
属性:
value:true或者false
onChanged:改变的时候触发事件
activeColor:选中的颜色
checkColor:选中的里面对号的颜色
实例:
import 'package:flutter/material.dart';
class Category extends StatefulWidget {
@override
_CategoryState createState() => _CategoryState();
}
class _CategoryState extends State {
var flag = true;
@override
Widget build(BuildContext context) {
return Container(
child: Padding(
padding: EdgeInsets.all(10),
child: Column(
children: [
Checkbox(
activeColor: Colors.yellow,
checkColor: Colors.red,
value: this.flag,
onChanged: (value){
setState(() {
this.flag = value;
});
},
)
],
),
),
);
}
}
CheckboxListTile:
value:true或者false
onChanged:改变的时候触发的事件
activeColor:选中的颜色
title:标题
subtitle:二级标题
secondary:配置图标或者图片
selected:选中时候的文字颜色是否跟着变化
实例:
import 'package:flutter/material.dart';
class Category extends StatefulWidget {
@override
_CategoryState createState() => _CategoryState();
}
class _CategoryState extends State {
var flag = true;
@override
Widget build(BuildContext context) {
return Container(
child: Padding(
padding: EdgeInsets.all(10),
child: Column(
children: [
CheckboxListTile(
title: Text('标题'),
subtitle: Text('子标题'),
// 设置图标
secondary: Icon(Icons.settings),
value: this.flag,
selected: true,
onChanged: (value){
setState(() {
this.flag = value;
});
},
)
],
),
),
);
}
}
Radio:
属性:
value:单选的值
onchanged:改变时触发
activeColor:选中的颜色
groupValue:选择组的值
实例:
import 'package:flutter/material.dart';
class Category extends StatefulWidget {
@override
_CategoryState createState() => _CategoryState();
}
class _CategoryState extends State {
var sex = 1;
@override
Widget build(BuildContext context) {
return Container(
child: Padding(
padding: EdgeInsets.all(10),
child: Column(
children: [
Radio(
value: 1,
onChanged: (value){
setState(() {
this.sex = value;
});
},
groupValue: this.sex,
),
Radio(
value: 2,
onChanged: (value){
setState(() {
this.sex = value;
});
},
groupValue: this.sex,
)
],
),
),
);
}
}
RadioListTile:
属性:
value:单选的值
onChanged:改变的时候触发的事件
activeColor:选中的颜色
title:标题
subtitle:二级标题
secondary:配置图标或者图片
groupValue:选择组的值
实例:
import 'package:flutter/material.dart';
class Category extends StatefulWidget {
@override
_CategoryState createState() => _CategoryState();
}
class _CategoryState extends State {
var sex = 1;
@override
Widget build(BuildContext context) {
return Container(
child: Padding(
padding: EdgeInsets.all(10),
child: Column(
children: [
RadioListTile(
value: 1,
groupValue: this.sex,
title: Text('标题'),
subtitle: Text('子标题'),
secondary: Icon(Icons.settings),
onChanged: (value){
setState(() {
this.sex = value;
});
},
),
RadioListTile(
value: 2,
groupValue: this.sex,
title: Text('标题'),
subtitle: Text('子标题'),
secondary: Icon(Icons.settings),
onChanged: (value){
setState(() {
this.sex = value;
});
},
)
],
),
),
);
}
}
Switch/SwitchListTile:
实例:
import 'package:flutter/material.dart';
class Category extends StatefulWidget {
@override
_CategoryState createState() => _CategoryState();
}
class _CategoryState extends State {
var flag = false;
@override
Widget build(BuildContext context) {
return Container(
child: Padding(
padding: EdgeInsets.all(10),
child: Column(
children: [
Switch(
value: this.flag,
onChanged: (value){
setState(() {
this.flag = value;
});
},
),
SwitchListTile(
value: this.flag,
title: Text('标题'),
subtitle: Text('子标题'),
secondary: Icon(Icons.flag),
onChanged: (value){
setState(() {
this.flag = value;
});
},
)
],
),
),
);
}
}
22.时间组件
汉化:
第一步: 配置pubspec.yaml
dependencies:
flutter:
sdk: flutter
flutter_localizations:
sdk: flutter
第二步:配置入口文件
import 'package:flutter_localizations/flutter_localizations.dart';
class MyApp extends StatelessWidget{
@override
Widget build(BuildContext context){
return MaterialApp(
title: '王清最帅',
initialRoute: '/',
onGenerateRoute: onGenerateRoute,
// 配置多语言
localizationsDelegates: [
GlobalMaterialLocalizations.delegate,
GlobalWidgetsLocalizations.delegate
],
supportedLocales: [
const Locale("zh", "CH"),
const Locale("en", "US")
]
);
}
}
第三步:
locale: Locale("zh")
日期转时间戳:
var now = new DateTime.now();
print(now.millisecondsSinceEpoch); // 单位毫秒
时间戳转日期
DateTime.fromMillisecondsSinceEpoch(时间戳);
时间格式转换:
第三方库 date_format
配置pubspec.yaml:
dependencies:
flutter:
sdk: flutter
date_format: ^1.0.6
使用:
import 'package:date_format/date_format.dart';
print(formatDate(DateTime.now(), [yyyy,'年',mm,'月',dd, '日']));
flutter自带时间组件:
日期选择 showDatePicker
时间选择 showTimePicker
实例:
import 'package:flutter/material.dart';
import 'package:date_format/date_format.dart';
class Category extends StatefulWidget {
@override
_CategoryState createState() => _CategoryState();
}
class _CategoryState extends State {
DateTime nowDate = DateTime.now();
var timeDate = TimeOfDay(hour: 12, minute: 20);
_showDatePicker() async{
// 第一种方式获取日期
// showDatePicker(
// context: context,
// // 初始化日期
// initialDate: this.nowDate,
// // 起始日期
// firstDate: DateTime(1980),
// // 结束日期
// lastDate: DateTime(2020,10,10)
// ).then((result){
// print(result);
// });
// 第二种方式获取日期
var result = await showDatePicker(
context: context,
// 初始化日期
initialDate: this.nowDate,
// 起始日期
firstDate: DateTime(1980),
// 结束日期
lastDate: DateTime(2020,10,10)
);
setState(() {
this.nowDate = result;
});
}
_showTimePicker() async{
var result = await showTimePicker(
context: context,
initialTime: this.timeDate
);
setState(() {
this.timeDate = result;
});
}
@override
Widget build(BuildContext context) {
return Container(
child: Padding(
padding: EdgeInsets.all(10),
child: Column(
mainAxisAlignment: MainAxisAlignment.center,
children: [
// 相当于bottom,但是不显示组件
InkWell(
child: Row(
mainAxisAlignment: MainAxisAlignment.center,
children: [
Text(formatDate(this.nowDate, [yyyy,'年',mm,'月',dd, '日'])),
Icon(Icons.keyboard_arrow_down)
],
),
onTap: this._showDatePicker,
),
InkWell(
child: Row(
mainAxisAlignment: MainAxisAlignment.center,
children: [
Text(this.timeDate.format(context)),
Icon(Icons.keyboard_arrow_down)
],
),
onTap: this._showTimePicker,
)
],
),
),
);
}
}
23. 第三方库的日期选择器(flutter_cupertino_date_picker)
flutter_cupertino_date_picker: ^1.0.24
实例:
import 'package:flutter/material.dart';
import 'package:date_format/date_format.dart' as date_format;
import 'package:flutter_cupertino_date_picker/flutter_cupertino_date_picker.dart';
class Category extends StatefulWidget {
@override
_CategoryState createState() => _CategoryState();
}
class _CategoryState extends State {
var dateTime = DateTime.now();
_showDatePicker(){
DatePicker.showDatePicker(
context,
onMonthChangeStartWithFirstDate: true,
pickerTheme: DateTimePickerTheme(
showTitle: true,
confirm: Text('确定', style: TextStyle(color: Colors.red)),
cancel: Text('取消', style: TextStyle(color: Colors.cyan)),
),
minDateTime: DateTime.parse('1980-01-01'),
maxDateTime: DateTime.parse('2100-01-01'),
initialDateTime: DateTime.now(),
// 只显示日期
// dateFormat: 'yyyy-MMMM-dd',
// 显示时分秒的时候加上
dateFormat: 'yy年M月d日 EEE,H时:m分',
pickerMode: DateTimePickerMode.datetime,
locale: DateTimePickerLocale.zh_cn,
onClose: () => print("----- onClose -----"),
onCancel: () => print('onCancel'),
onChange: (dateTime, List index) {
print('dateTime1 $dateTime $index');
setState(() {
this.dateTime = dateTime;
});
},
onConfirm: (dateTime, List index) {
print('dateTime2 $dateTime $index');
setState(() {
this.dateTime = dateTime;
});
},
);
}
@override
Widget build(BuildContext context) {
return Container(
child: Padding(
padding: EdgeInsets.all(10),
child: Column(
children: [
Row(
mainAxisAlignment: MainAxisAlignment.center,
children: [
InkWell(
child: Row(
children: [
Text(date_format.formatDate(this.dateTime, ['yyyy','-','mm','-','dd',' ','HH',':','nn'])),
Icon(Icons.arrow_drop_down)
],
),
onTap: _showDatePicker,
)
],
)
],
)
),
);
}
}
24.轮播图
第三方组件:flutter_swiper
实例:
import 'package:flutter/material.dart';
import 'package:flutter_swiper/flutter_swiper.dart';
class Category extends StatefulWidget {
@override
_CategoryState createState() => _CategoryState();
}
class _CategoryState extends State {
@override
Widget build(BuildContext context) {
return Container(
child: AspectRatio(
aspectRatio: 16/9,
child: new Swiper(
itemBuilder: (BuildContext context,int index){
return new Image.network(
"https://www.itying.com/images/flutter/1.png",
fit: BoxFit.fill
);
},
itemCount: 3,
pagination: new SwiperPagination(),
control: new SwiperControl(),
),
),
);
}
}
25.Dialog
import 'package:flutter/material.dart';
class Category extends StatefulWidget {
@override
_CategoryState createState() => _CategoryState();
}
class _CategoryState extends State {
_alertDialog() async{
var result = await showDialog(
context: context,
builder: (context){
return AlertDialog(
title: Text('提示'),
content: Text('您确定要删除吗?'),
actions: [
FlatButton(
child: Text('取消'),
onPressed: (){
Navigator.pop(context,'cancel');
},
),
FlatButton(
child: Text('确定'),
onPressed: (){
Navigator.pop(context,'ok');
},
)
],
);
}
);
print('result $result');
}
_simpleDialog() async{
var result = await showDialog(
context: context,
builder: (context){
return SimpleDialog(
title: Text('选择内容'),
children: [
SimpleDialogOption(
child: Text('option A'),
onPressed: (){
Navigator.pop(context,'A');
},
),
SimpleDialogOption(
child: Text('option B'),
onPressed: (){
Navigator.pop(context,'B');
},
),
SimpleDialogOption(
child: Text('option C'),
onPressed: (){
Navigator.pop(context,'C');
},
)
],
);
}
);
print(result);
}
_showModalBottomSheet() async{
var result = await showModalBottomSheet(
context: context,
builder: (context){
return Container(
height: 200,
child: Column(
children: [
ListTile(
title: Text('分享A'),
onTap: (){
Navigator.pop(context,'A');
},
),
ListTile(
title: Text('分享B'),
onTap: (){
Navigator.pop(context,'B');
}
),
ListTile(
title: Text('分享C'),
onTap: (){
Navigator.pop(context,'C');
}
)
],
),
);
}
);
print(result);
}
@override
Widget build(BuildContext context) {
return Container(
child: Column(
children: [
RaisedButton(
child: Text('AlertDialog'),
onPressed: this._alertDialog,
),
RaisedButton(
child: Text('SimpleDialog'),
onPressed: this._simpleDialog,
),
RaisedButton(
child: Text('ShowModalBottomSheet'),
onPressed: this._showModalBottomSheet,
)
],
),
);
}
}
注意:有时候我们需要通过组件传递数据到类似于ShowModalBottomSheet组件中,如果原数据发生变化,而ShowModalBottomSheet无法改变,就需要使用StatefulBuilder
showModalBottomSheet(
context: context,
builder: (context){
return StatefulBuilder(
builder: (BuildContext buildContext, setBottomState){
return Stack(
children: [
ListView(
children: [
Column(
crossAxisAlignment: CrossAxisAlignment.start,
children: this.getAttrWiget(setBottomState),
)
],
),
Positioned(
bottom: 0,
width: MediaQuery.of(context).size.width,
height: 40,
child: Row(
children: [
Expanded(
flex: 1,
child: BuyButton(
color: Color.fromRGBO(253, 1, 0, 0.9),
text: "加入购物车",
callback: (){
print('加入购物车');
},
),
),
Expanded(
flex: 1,
child: BuyButton(
color: Color.fromRGBO(255, 165, 0, 0.9),
text: "立即购买",
callback: (){
print('立即购买');
},
),
)
],
),
)
],
);
},
);
}
)
26.Toast
第三方组件:fluttertoast
实例:
import 'package:flutter/material.dart';
import 'package:fluttertoast/fluttertoast.dart';
class Category extends StatefulWidget {
@override
_CategoryState createState() => _CategoryState();
}
class _CategoryState extends State {
_showToast(){
Fluttertoast.showToast(
msg: '王清最帅',
toastLength: Toast.LENGTH_LONG,
// 显示位置(顶部、居中、底部)
gravity: ToastGravity.CENTER,
timeInSecForIos: 1,
backgroundColor: Colors.red,
textColor: Colors.white,
fontSize: 16
);
}
@override
Widget build(BuildContext context) {
return Container(
child: Column(
children: [
RaisedButton(
child: Text('Toast'),
onPressed: this._showToast,
)
],
),
);
}
}
27.自定义Dialog
import 'package:flutter/material.dart';
import 'dart:async';
class MyDialog extends Dialog{
String title;
String content;
MyDialog(this.title,this.content);
_showTimer(context){
// 定时器
Timer.periodic(
Duration(milliseconds: 2000),
(t){
Navigator.pop(context);
//取消定时器,避免无限回调
t.cancel();
t = null;
}
);
}
@override
Widget build(BuildContext context) {
_showTimer(context);
return Material(
type: MaterialType.transparency,
child: Center(
child: Container(
width: 200,
height: 200,
color: Colors.white,
child: Column(
children: [
Padding(
padding: EdgeInsets.all(10),
child: Stack(
children: [
Align(
alignment: Alignment.center,
child: Text(this.title),
),
Align(
alignment: Alignment.topRight,
child: InkWell(
child: Icon(Icons.close),
onTap: (){
// Navigator.pop(context);
},
),
),
],
),
),
Divider(),
Container(
padding: EdgeInsets.only(left: 10),
width: double.infinity,
child: Text(this.content,textAlign: TextAlign.left),
)
],
),
),
),
);
}
}
28. http get post请求
知识点:
JSON字符串转换为Map:
import 'dart:convert';
var str = '{"name":"wq","age":23}';
var mapStr = json.decode(str);
print(mapStr["name"]);
Map转化为字符串:
var map = {"name":"wq"};
print(json.encode(map));
Http:
配置依赖:
dependencies:
http: ^0.12.1
实例:
import 'package:flutter/material.dart';
import 'dart:convert';
import 'package:http/http.dart' as http;
class Category extends StatefulWidget {
@override
_CategoryState createState() => _CategoryState();
}
class _CategoryState extends State {
// Get请求数据
_getData() async{
var apiUrl = 'http://a.itying.com/api/productlist';
var result = await http.get(apiUrl);
if(result.statusCode == 200){
print(json.decode(result.body));
} else {
print(result.statusCode);
}
}
// POST提交数据
_postData() async{
var apiUrl = 'http://www.baidu.com/post';
var result = await http.post(
apiUrl,
body: {
"name": "wq",
"age": 23
}
);
print(result);
}
@override
Widget build(BuildContext context) {
return Container(
child: Column(
children: [
RaisedButton(
child: Text('GET请求'),
onPressed: (){
this._getData();
},
),
RaisedButton(
child: Text('POST请求'),
onPressed: (){
this._postData();
},
)
],
),
);
}
}
29. Dio实现网络请求
配置依赖:
dio: ^3.x.x
实例:
import 'package:flutter/material.dart';
import 'package:dio/dio.dart';
class Category extends StatefulWidget {
@override
_CategoryState createState() => _CategoryState();
}
class _CategoryState extends State {
// Get请求数据
_getData() async{
var apiUrl = 'http://a.itying.com/api/productlist';
Response response = await Dio().get(apiUrl);
print(response.data);
}
// POST提交数据
_postData() async{
var apiUrl = 'http://a.itying.com/api/productlist';
Response response = await Dio().post(apiUrl, data: {"name":"wq"});
print(response);
}
@override
Widget build(BuildContext context) {
return Container(
child: Column(
children: [
RaisedButton(
child: Text('GET请求'),
onPressed: (){
this._getData();
},
),
RaisedButton(
child: Text('POST请求'),
onPressed: (){
this._postData();
},
)
],
),
);
}
}4
30. Menu
(1)组件方式PopupMenuButton
PopupMenuButton(
offset: Offset(0,100),
icon: Icon(Icons.more_horiz),
onSelected: (String value) {
print("valeeueu $value");
},
itemBuilder: (BuildContext context) => >[
PopupMenuItem(
child: Row(
mainAxisAlignment: MainAxisAlignment.spaceEvenly,
children: [
Icon(Icons.home, color: Colors.black54,),
Text('首页')
],
),
value: 'home',
),
PopupMenuItem(
child: Row(
mainAxisAlignment: MainAxisAlignment.spaceEvenly,
children: [
Icon(Icons.search, color: Colors.black54,),
Text('搜索')
],
),
value: 'search',
)
])
(2)点击事件方式(showMenu)
onPressed:(){
showMenu(
context:context,
position: RelativeRect.fromLTRB(10,0,0,0),
items: [
PopupMenuItem(
child: Row(
mainAxisAlignment: MainAxisAlignment.spaceEvenly,
children: [
Icon(Icons.home, color: Colors.black54,),
Text('首页')
],
),
value: 'home',
)
]
)
}