用最短的CSS样式,勾勒大数据演示屏
前段时间撸了一个演示平台,输入任一手机号,可追踪其行迹,类似《人民的名义》追踪丁义珍的效果,很明显涉密了,因此特意克隆了一个,并把后端阉割了,目前查询号码写死为我的号码,数据替换为静态的:
演示地址(阉割后端)
本文github地址,持续更新......
效果预览


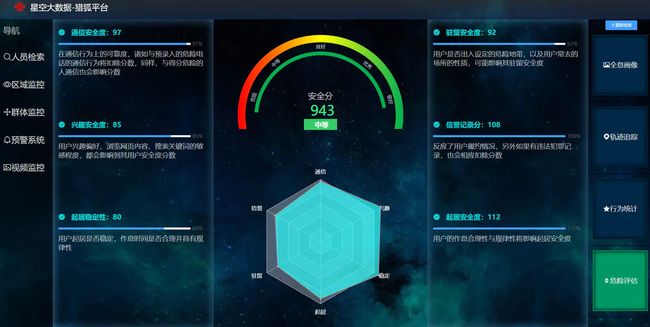
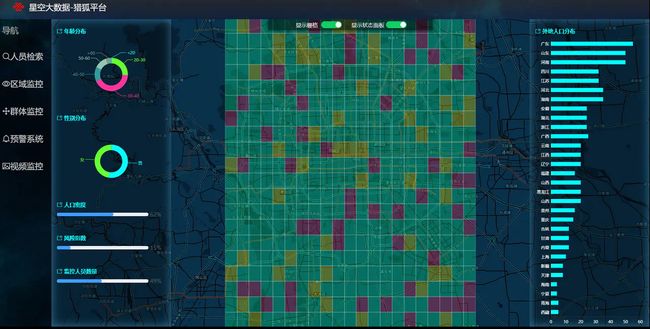
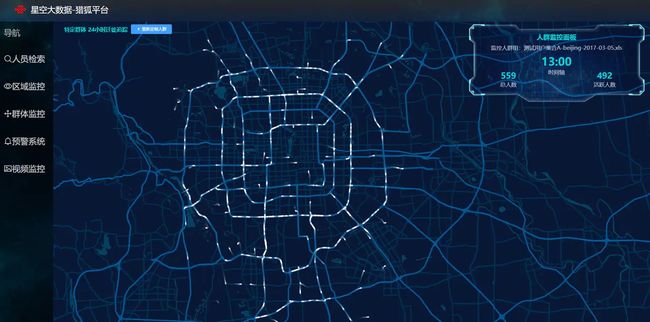
↓↓↓ 动画效果总览:GIF 加载需要稍等一下 ↓↓↓
常用效果的实现(最精简的代码)
再漂亮的设计,也可以拆解成基础效果的组合,在这里,我把一些常用的效果进行了罗列,并附加代码
优雅的呈现
蒙版文字
覆盖一层蒙版,并在蒙版上书写文字。需要2层,从低到上为图片层、蒙版层(上面可写字)

<div class='box' >
	<div class='back'>div>
	<div class='modal'>div>
div>
<style>
.box{
	position: relative;
	height: 200px; width: 300px
}
.back{
	background-image: url(http://www.imaoda.com/s/img/github/21.jpg);
	height: 100%; width: 100%;
}
.modal, .desc{
	position:absolute;
	height: 20%; width: 100%;
	bottom: 0; color: white
}
.modal{
	background: rgba(0,0,0,.5)
}
style>
复制代码
毛玻璃蒙版
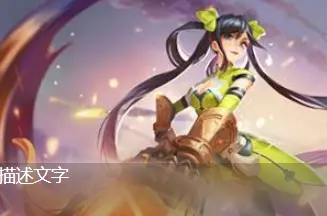
毛玻璃蒙版,本质上讲是两层图,底层图清晰完整,顶层图模糊残缺,并且两者位移完全一致,因此叠加到一起后像是一张图。为了确保位移一致,我们用了 background : fixed ,他能使背景图片相对于浏览器进行固定。
<div class='box'>
	<div class='blur-modal'>div>
	<div class='black-modal'> 描述文字 div>
div>
<style>
.box{
	position: relative; height:200px; width:300px;
	background: fixed url(http://www.imaoda.com/s/img/github/21.jpg);
}
.blur-modal{
	position: absolute; height:50px; width:300px;
	top: 150px;
	background: fixed url(http://www.imaoda.com/s/img/github/21.jpg);
	filter:blur(1rem)
}
.black-modal{
	position: absolute; height:50px; width:300px;
	top: 150px;
	background: rgba(0,0,0,.2);
	color: white
}
style>
复制代码
高斯模糊背景图
电影介绍的时候,其背景色跟海报差不多,其实就是放大了海报的一个角落 + 高斯模糊 + 黑色半透明蒙版的效果


<div class='suit' >
	<div class='figure'>div>
	<div class='modal'>
		功夫熊猫
	div>
div>
<style>
.suit{
	position: relative
}
.figure{
	background: url(http://www.imaoda.com/s/img/github/21.jpg);
	background-size: 200%;
	height: 200px; width: 400px;
	filter: blur(16px)
}
.modal{
	position: absolute;
	height: 200px; width: 400px; top: 0px; left: 0px;
	background: rgba(0,0,0,.5);
	color: white; text-align: center
}
style>
复制代码
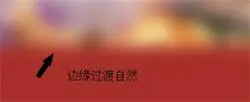
filter 的还有一个特效是能让图像在边缘地带跟背景很自然的过渡到一块去
图片边框
过去做背景边框,div嵌套,外层的背景用图片,内层略小居中,但这种方法需要精准度量。更方便的方法是使用 border-image
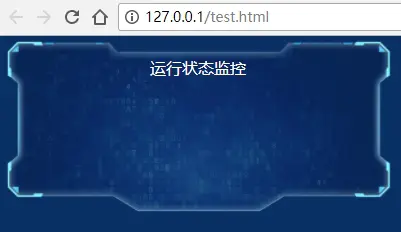
<div class='back'><br> 运行状态监控 div>
<style>
body{
	background: #003366;
}
.back{
	height: 180px;width: 400px;
	background: url(http://www.imaoda.com/s/img/tpl/content-frame1.png) no-repeat;
	background-size: contain;
	background-position: center;
	color: white;
	text-align: center;
}
style>
复制代码
科技感内发光边框
边框内发光可以带来一种 未来科技感(配上动画效果更棒)
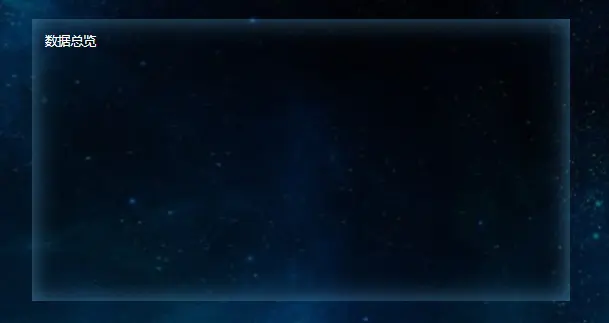
<div class='box'>
	数据总览
div>
<style>
body{
	background: black;padding: 10px
}
.box{
	height: 20rem; width: 40rem; color:white; padding: 1rem;
	box-shadow: 0 0 3rem rgba(100,200,255,.5) inset;
	background: rgba(0,0,0,.3);
}
style>
复制代码
科技感图片边框
选用图片边框,可以实现更多效果,当然代价就是需要先在PS里设计一下

border-image 的 5% 决定了边框的厚度
<div class='panel'>正常div>
<br><br><br>
<div class='panel'>外发光div>
<style>
.panel{
	height: 10rem; width: 20rem; color:rgba(255,255,255,.9);
	border: 20px solid transparent;
	border-image: url(http://www.imaoda.com/s/img/tpl/border.png) 5%;
	background:rgba(0,0,0,.3);
}
.panel:last-child{
	box-shadow:  0 0 5rem rgb(0,110,150)
}
style>
复制代码
科技感图片边框2
这个有点像是游戏中的边框,效果偏重一些

<style>
body{
	background: rgb(22,22,22); padding:10rem
}
.box{
    height: 10rem; width: 30rem;
    border: 1.5rem solid transparent;
    border-image: url(http://www.imaoda.com/s/img/tpl/border1.png) 15% 5%;
}
style>
复制代码
半透明面板
科幻片里的未来科技,都是半透明的
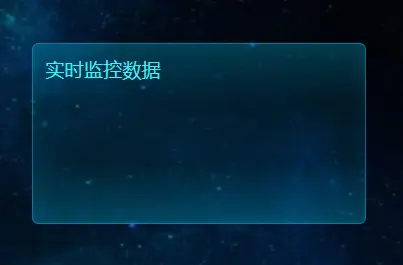
主要利用透明度的渐变,少量的内发光可增加立体感
<div class='panel'>实时监控数据div>
<style>
.body{
    background: url(http://www.imaoda.com/s/img/tpl/sky1.jpg); padding: 10rem
}
.panel{
	height: 12rem; width: 24rem; color:rgba(60,240,250,1); font-size: 1.5rem; padding:1rem;
	border-radius: .5rem;
	border: 1px solid rgba(0,180,220,0.5);
	background: linear-gradient(180deg,rgba(0,180,220,0.3),rgba(0,180,220,0.1),rgba(0,180,220,0.1),rgba(0,180,220,0.3));
	box-shadow: 0 0 2rem rgba(0,180,220,.1) inset
}
style>
复制代码
立体感面板-带标题栏

- 面板头采用上深下浅过渡,面板采用半透明黑
- 侧滑弹出动画效果更佳
<div class='panel'>
	<div class='panel-head'>用户行为分析div>
	<div class='panel-body'>div>
div>
<style>
.panel{
	display: flex; flex-flow: column nowrap;
	height: 23rem; width: 40rem;
	box-shadow: 0 0 1rem rgba(0,0,0,.5);
}
.panel-head{
	flex: 0 0 3rem; font-size: 1.5rem; color: rgba(255,255,255,.7); line-height: 3rem; text-align: center;
	background: linear-gradient(rgb(0,20,30), rgb(0,40,70));
	border: 2px solid rgba(0,90,120,.3);

}
.panel-body{
	flex: 1 0 auto;
	background: rgba(0,0,0,.3);
	border: 2px solid rgba(0,90,120,.4);
	border-top:none
}
.panel:hover{
	filter:brightness(1.2)
}
style>
复制代码
角标面板
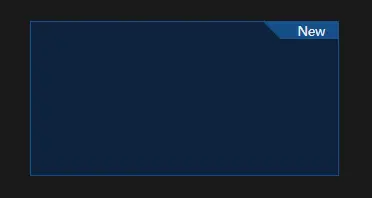
- 角标与边框同色
- 缺角矩形利用了 linear-gradient 透明效果
<div class='panel' data-corner='New'>div>
<style>
body{
	padding: 10rem;background: rgba(0,0,0,.9)
}
.panel{
	height: 12rem; width: 24rem;
	border: 1px solid rgba(22,78,137,1);
	background: rgba(13,35,61,1);
	position: relative;
}
.panel::after{
	content: attr(data-corner);
	display: block; position: absolute; top: 0; right: 0;
	width: 5rem; padding: 0 1rem; overflow: hidden; text-align: right; color: rgba(255,255,255,.9);
	background: linear-gradient(45deg,transparent 0% , transparent 30%,  rgba(22,78,137,1) 30%,  rgba(22,78,137,1) 100%)
}
style>
复制代码
弧面屏卡牌
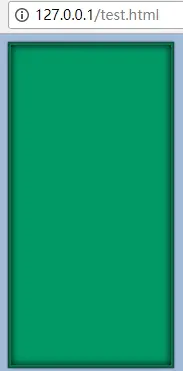
用到内阴影凸显卡牌的立体感和边框感
<div class='box'>
	<div class='card'>div>
div>
<style>
.box{
	height: 406px; width: 206px;
	background: linear-gradient(180deg,#116448,#116448);
	overflow: hidden;
	border: 1px solid rgba(0,0,0,.2);
	box-shadow: 0 0 1px black
}
.card{
	height: 400px; width: 200px; margin: 2px; border: 1px solid rgba(0,0,0,.2);
	box-shadow: 0 0 15px black inset;
	background: #009966;
}
style>
style>
复制代码
动态旋转边框

- 图中两个外围的圆环采用 absolute 定位,background-position:center 居中,background-size 调整大小,并添加 animation 使其动起来
- 任务图像靠外层的 flex 布局实现居中
<div class='box'>
    <div class='ring-outer'>div>
    <div class='ring-inner'>div>
    <div class='avatar'>div>
div>
<style>
.box{
  position: relative; width: 220px; height: 220px;
  display: flex; justify-content: center; align-items: center
}
.ring-inner{
  height: 220px; width: 220px; position: absolute;
  background: url(http://www.imaoda.com/s/img/tpl/ring-inner.png) no-repeat;
  background-size: 90%; background-position: center;
  animation: clockwise 3s linear infinite;
}
.ring-outer{
  height: 220px; width: 220px; position: absolute;
  background: url(http://www.imaoda.com/s/img/tpl/ring-outer.png) no-repeat;
  background-size: 100%;
  background-position: center;
  animation: anti-clockwise 3s linear infinite;
}
.avatar{
  height: 160px; width: 160px;
  background: url(http://www.imaoda.com/s/img/lessons/92.jpg);
  background-size: cover;
  border-radius: 50%
}
@keyframes clockwise{
  100%{
    transform: rotate(360deg)
  }
}
@keyframes anti-clockwise{
  0%{
    transform: rotate(360deg)
  }
}
style>
复制代码
元素背景(框)


- 承载背景的外层,其长宽比和图近似
- 背景图片采用
background-position: center; background-size: contain;实现自适应大小居中 - 内层用来承载内容,略小于外框,通过外框的flex实现居中
- 要让文字清晰于各种背景:白色文字带黑色发光,黑色文字带白色发光
<ul>
	<li> <div class='content'> 第一名 div> li>
	<li> <div class='content'> 第二名 div> li>
	<li> <div class='content'> 第三名 div> li>
ul>
<style>
body{
	background: linear-gradient(0deg,#006666,#003333)
}
ul{
	margin: 20px 10px;
	display: flex
}
li{
	list-style: none; margin: 10px; height: 150px; width: 200px;
	background: url(http://www.imaoda.com/s/img/github/31.png) no-repeat;
	background-position: center; background-size: 100%;
	color: white; text-shadow: 0 0 2px #222222;
	display: flex; justify-content: center; align-items: center
}
.content{
	height: 80px; width: 120px;
}
style>
复制代码
渐变色边框
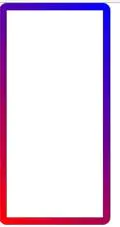
虽然用到了border-image,但是实际传递的只是linear-gradient
.box{
	height: 400px; width: 400px;
	border: 30px solid transparent;
	border-image: linear-gradient(45deg,red,blue) 10%
}
复制代码
上述方法无法实现 border-radius,可采用双层 div 的方式,底层渐变层,上层内容层。缺点是大小需要精确度量。
<div class='border'>
	<div class='content'>div>
div>
<style>
.border{
	width: 300px; height: 600px; border-radius: 20px;
	background: linear-gradient(45deg,red,blue);
	overflow: hidden
}
.content{
	width: 260px; height: 560px;
	background: white;
	margin: 20px;
}
style>
复制代码
水晶导航侧栏
这里主要做了一套左侧的nav,涉及以下要点:
- 白色文字带黑阴影,可避免背景过白显示不清
- ul 统一带右侧 border (比按钮最暗色rgb+10) 和右侧 1px #222222 深灰色阴影
- li采用下暗上亮的方式;hover后采用更亮的左暗右亮
- 字体采用darkgray,hover后采用白色,带上阴影
- hover 后也可采用 brightness 方案
- li 的过渡是为了显示出3d效果,因此过渡为[暗,暗,亮]
- li:hover为了凸显,过渡效果为[暗,亮,亮]
<style>
body{
	background: rgb(14,28,44)
}
ul {
	text-align: center; width: 6rem; color: darkgray;
	border-right:1px solid rgb(41,51,3);
	box-shadow: 1px 0 0px #222222 ;
}
li {
	list-style: none; font-size: 2rem;
	border-top:1px solid rgb(91,101,123);
	background: linear-gradient(180deg,rgb(51,61,83),rgb(31,41,63),rgb(31,41,63));
}
li:hover{
	background: linear-gradient(90deg,rgb(34,54,86),rgb(36,171,232) ,rgb(36,171,232));
	color: white;
	text-shadow: 1px 1px 1px black
}
style>
复制代码
hover浮出导航侧栏
内发光能给人凸起的感觉,菜单高亮时也可采用该效果,不过,只要上下两侧发光(用渐变背景实现)

渐变采用180,亮暗暗亮,其中亮的部分三通道亮度加20即可
<style>
li{
	height: 3rem; width:10rem; line-height: 3rem;
	color: rgba(255,255,255,.8); cursor: pointer; list-style: none;
	padding-left: 1rem;
	background: rgb(8,21,37);
	border-bottom: 3px solid rgba(0,0,0,.5);
	transition: margin-left .5s;
}
li:last-child{
	border: none
}
li:hover{
	background: linear-gradient(180deg,rgb(28,41,57),rgb(8,21,37),rgb(8,21,37),rgb(28,41,57));
	margin-left: 2rem;
}
style>
复制代码
立体按钮按压效果
按压前,按钮浮起,有阴影;按压后,按钮下去,阴影消失,体积缩小(离视野更远)

.box{
	height: 100px; width: 300px; background: green; margin: 2rem;
	box-shadow: 0 0 1rem gray;
	cursor: pointer;
	transition: all .3s;
	border-radius: 50px;
}
.box:active{
	box-shadow: 0 0 0px gray; transform: scale(0.99)
}
复制代码
金属质感过渡

45度角,两侧深,中间浅
.box{
	height: 3rem; width: 5rem;
	border-radius: 1rem;
	background: linear-gradient(45deg, rgb(31,89,146),rgb(35,175,230),rgb(29,136,203) )
}
复制代码
所以需要仔细斟酌按钮过渡,按钮按下时,可将外阴影改为内阴影,同时scale(0.95)。加上.1s的过渡,效果更佳
<style>
.box{
	height: 3rem; width: 3rem;
	line-height: 2.8rem; text-align: center;
	color: white;
	text-shadow: 1px 1px 5px black;
	font-weight: bold;
	font-size: 2rem;
	border-radius: .5rem;
	background: linear-gradient(225deg, rgb(31,89,146),rgb(31,89,146) 10% ,rgb(35,175,230) 60%,rgb(35,175,230) 70%,rgb(29,136,203) );
	box-shadow: 0 0 5px black
}
.box:hover{
	box-shadow: 0 0 5px gray inset;
	transform: scale(.95)
}
style>
复制代码
质感进度条
进度条要中间亮,两边暗,显得圆鼓鼓的,进度条容器要有内阴影,显示出凹进去的感觉

<div class='box'>
	<div class='progress'>div>
div>
<style>
.box{
	height: 2rem; width: 30rem;
	box-shadow: 0 0 5px white inset;
	border: 1px solid black;
	background:#003366
}
.progress{
	width: 1rem;
	height: 2rem;
	background: linear-gradient(180deg, #00CCCC,#00CCCC,#009999);
	transition: all 3s;
	box-shadow: 0 0px 5px white
}
.box:hover .progress{
	width: 30rem
}
style>
复制代码
黄金色惊喜字体
.box{
	color: rgb(253,219,94); font-size: 3rem;
	text-shadow: 1px 2px 2px black
}
复制代码
分界线
有时候我们的边框,只需要一根分界线,而且颜色不能太显眼。


- 可以直接利用一侧的 border
- 边框颜色为黑色,但是透明度只有 0.2 (以便溶于底色中)
<ul>
	<li> 第一名 li>
	<li> 第二名 li>
	<li> 第三名 li>
ul>
<style>
body{
	background: linear-gradient(0deg,#006666,#003333)
}
ul{
	margin: 20px 10px;
	display: flex
}
li{
	list-style: none; width: 100px; line-height: 40px; color: white; text-align: center;
	border-right: 2px solid rgba(255,255,255,.2);
}
style>
复制代码
列表前置短竖线

- 用伪类 before 为 title 添加一个前置子元素
- 这个子元素采用 inline-block 布局,尺寸用 em 度量
<div class='title'>
	用户数据
div>
<style>
body{
	background: linear-gradient(0deg,#006666,#003333)
}
.title{
	font-size: 2rem; line-height: 5rem; color: white
}
.title::before{
	content: '';
	display: inline-block;
	width: .2em; background: yellow;
	height: .8em; margin-right: .5em;
}
style>
复制代码
文字颜色
文字颜色用纯白、纯黑,太醒目突兀。通常我们会选择“不那么白”或者“不那么黑”的颜色,让文字更柔和。如果嫌选颜色麻烦,可以用纯黑或者纯白,加上透明度,融入背景中,显得柔和很多。
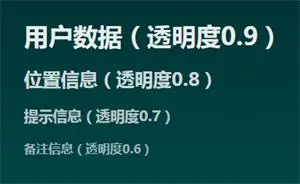
rgba(255,255,255,.9)
复制代码
提示效果
区域凸显
让区域高亮一般用于凸显用户选择,常用方法如下:
- 修改 background 的 RGBA 颜色,适量调高每个分量(或A分量调整背景透明度)|| 修改 filter: brightness 的值
- 可考虑用 transfrom: scale(1.1) 放大凸显 && 增加阴影
- 加上极少量的 transition 增加过渡效果
区域暗淡
暗淡部分区域,降低用户注意力,比如已完成,或者未解锁的:
- 修改 background 的 RGBA 颜色,适量降低每个分量 || 修改 filter: brightness
- 绝对定义一张黑色半透明蒙版(屏蔽点击)置于其上,可用半透明+高斯模糊加强效果,通过after/before 伪类实现(attr)批量设置
旋转光芒效果
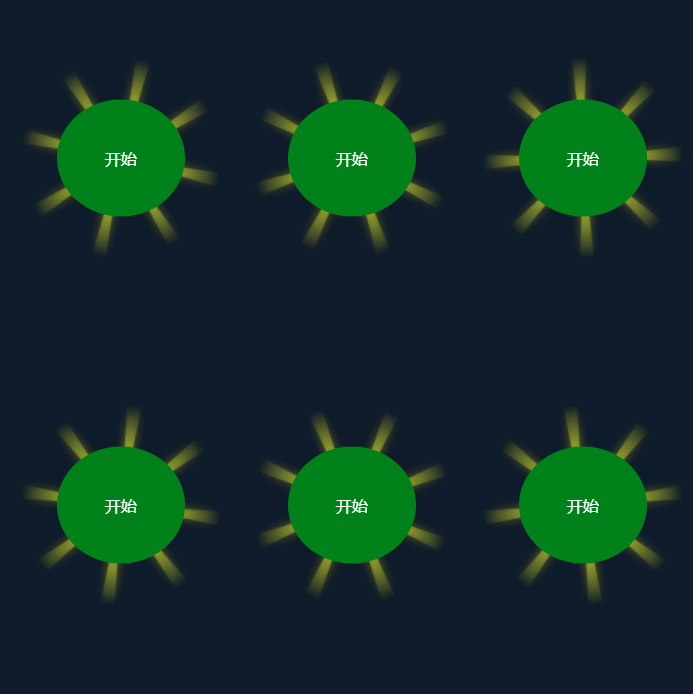

如果有现成的PS制作的光芒更好,低配版的光芒制作方法:
- 在ppt中创建一个三角,选择线性过渡,顶部黄色,底部黄色透明
- 三角复制成两份,做成8子形状,然后复制n个8,旋转成光芒
旋转光芒利用了2个要素,animation:my 5s linear 0s infinite ,transform:rotate(360deg)。动态修改动画持续时间,如改成2s,可以实现旋转加速
<div class='box'>
	<img class='light' src="http://www.imaoda.com/s/img/tpl/light.png" alt="">
	<div class='btn'>开始div>
div>
<style>
body{
	background: rgb(14,28,44)
}
.box{
	position: relative; height: 400px; width: 400px;
	display: flex; justify-content: center; align-items: center;
}
.light{
	width: 200px; height: 200px;
	filter: drop-shadow(0 0 5px yellow);
	animation: rotate linear 3s infinite;
}
.btn{
	position: absolute;
	top: 50%; left: 50%; transform: translate(-50%,-50%); padding:3rem;
	background:green; color: white; border-radius: 50%;
}
@keyframes rotate{
	100%{
		transform: rotate(360deg)
	}
}
复制代码- 光芒元素用 static 定位,flex 居中,如果用 top/left+tranlate 居中,与旋转 rotate 冲突
- 按钮元素用 absolute 定位,top/left+tranlate 居中 (因为 absolute 元素不被 flex 控制)
聚光效果

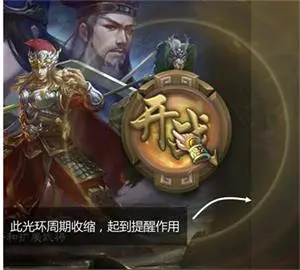
一个外放光的圆形 border 逐渐缩小的动画:
- 外层固定大小,采用flex布局确定内层绝对居中
- 对长宽进行动画
- border-radius: 50% 百分比固定,保持圆形
<div class='box'>
	<div class='circle'>div>
	<div class='btn'>开始div>
div>
<style>
.box{
	position: relative;
	height: 300px; width: 300px;
	display: flex; justify-content: center; align-items: center;
}
.circle{
	height: 200px; width: 200px;
	border-radius: 50%;
	border: 10px solid yellow;
	filter: drop-shadow(0 0 10px white);
	animation: shrink 1s infinite;
}
.btn{
	position: absolute;
	top: 50%; left: 50%; transform: translate(-50%,-50%); padding:3rem;
	background:green; color: white; border-radius: 50%;
}
@keyframes shrink{
	100%{
		height: 10px; width: 10px;
	}
}
style>
复制代码
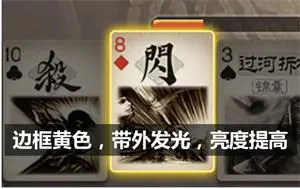
亮框提示
用户点击或者 hover 的时候,边框高亮、发光,以起到提示作用
<ul>
	<li>li>
	<li>li>
	<li>li>
ul>
<style>
li{
	display: inline-block; height: 200px; width: 150px;
	background: url(http://www.imaoda.com/s/img/github/sgs.jpg);
	background-size: 100%;
	box-shadow: 0 2px 2px #222222;
	border: 2px solid transparent;
	border-radius: 5px;
	filter: brightness(.7);
	cursor: pointer;
	transition: all .2s
}
li:hover{
	box-shadow: 0 0 30px yellow;
	border: 2px solid yellow;
	transform: translate(0,-10%);
	filter: brightness(1);
}
style>
复制代码
最后再巩固一下其中的基础知识
RGBA 颜色
可以在常规 RGB 颜色后面,增加透明度 0 为全完透明,1 为完全不透明。可用在:
- color
- background
- gradient
- box-shadow
- text-shadow
rgba(123,222,22,.5)
复制代码
渐变
线性渐变:角度,颜色1,颜色2,...,颜色n。可后面追加%,如果省略,则均分
linear-gradient(45deg,rgba(0,0,255,.1) 0%,rgba(0,255,0,.1) 90%,rgba(255,0,0,.6) 100%)
复制代码
辐射渐变:颜色1,颜色2,...,颜色n。可后面追加%,如果省略,则均分
linear-gradient(rgba(0,0,255,.1) 0%,rgba(0,255,0,.1) 90%,rgba(255,0,0,.6) 100%)
复制代码
filter 滤镜
filter 会对当前元素的全部内容(含子元素,含图文边框等)进行滤镜。如果想只对图片滤镜,那么需要使用 position 将文字元素定位到其上方。
filter: blur(.1rem) grayscale(.5);
复制代码
常用滤镜包括:
- blur:失焦感的高斯模糊,默认0rem
- opacity:透明度,默认1,全透明0
- brightness:亮度,默认1,全黑0,曝光过度2+
- saturate:饱和度,默认1,灰色0,艳丽2+
- contrast:对比度,默认1,全灰0,黑白分明2+
- grayscale:叠加灰度,默认0,灰色1
- sepia:叠加褐色,默认0,褐色1
- invert:反色,默认0,全灰0.5,反色1
- drop-shadow:透明区域无阴影的 box-shadow
border-image 图片边框
以前要实现 border-image 的效果,需要用一个稍微大一圈的图片打底
border: 30px solid transparent;
border-image: url(b.png) 10%;
复制代码
background-attachment 固定背景
如果是fixed,背景不跟随scroll滚动
background-blend-mode
multiply 正片叠底
部分圆角矩形
border-radius 可针对左上、右上、右下、左下进行分别设置。因此可以设定出部分圆角矩形
.box{
height: 400px; width: 400px; background: green;
border-radius: 0 2rem 0 2rem
}
复制代码
物质阴影/发光
box-shadow 可设置 右侧阴影、下方阴影、高斯模糊、颜色。其中阴影是实色,层次感稍强,一般添加模糊即可。模糊会向四个方向进行扩散,与
.box{
height: 400px; width: 400px; background: black; margin: 2rem; padding: 2rem; color: lightgreen; font-size: 28px;
box-shadow: 0 0 1rem gray;
}
复制代码
发光和阴影本质一样,只不过颜色用浅色系(white/yellow等),所处环境为深色,加上 border-radius 效果更自然
内阴影,能够凸显出凹陷的感觉,只需在 box-shadow 的最后加上 inset 关键词
字体发光/黑框
text-shadow,只需模糊即可,白光可让字体发光,黑光可让白色字体能适应图片背景
.box{
	height: 400px; width: 400px; background: black; margin: 2rem; padding: 2rem; color: lightgreen; font-size: 28px;
	text-shadow: 0 0 .5rem yellow
}
复制代码
作者:maodayeyeye