Mask Rcnn 实践小结 —— 训练自己的数据集
周末跑了一下Mask RCNN 模型,花了两天半,终于把基础模型搞定了,现在回忆一下做的步骤和遇到的坑
训练代码是基于 https://github.com/matterport/Mask_RCNN 里的 samples/shapes/train_shape.ipynb 改的。整个模型是用python实现的,所以相较去年尝试过的 darknet,整个 model 的代码是易读的,有问题可以直接看 model 源码。
比如 evaluation 这部分,源代码制求了 mAP 值,但是我希望同时获得 IOU 值以便评估。看 evaluation 部分代码
# Compute VOC-Style mAP @ IoU=0.5
# Running on 10 images. Increase for better accuracy.
image_ids = np.random.choice(dataset_val.image_ids, 10)
APs = []
for image_id in image_ids:
    # Load image and ground truth data
    image, image_meta, gt_class_id, gt_bbox, gt_mask =\
        modellib.load_image_gt(dataset_val, inference_config,
                               image_id, use_mini_mask=False)
    molded_images = np.expand_dims(modellib.mold_image(image, inference_config), 0)
    # Run object detection
    results = model.detect([image], verbose=0)
    r = results[0]
    # Compute AP
    AP, precisions, recalls, overlaps =\
        utils.compute_ap(gt_bbox, gt_class_id, gt_mask,
                         r["rois"], r["class_ids"], r["scores"], r['masks'])
    APs.append(AP)

print("mAP: ", np.mean(APs))
发现计算 mAP 使用了 utils.py 下的函数 compute_ap,于是猜测该文件下也有其他评估的函数,果然找到了评估 IOU 的函数。而我一开始试图 Google 找到解却失败了,在做 Mask RCNN 调试的时候我也反复遇到这个问题:有些问题直接 Google 搜不到解答,但是静下心看源码却很容易发现问题。
训练数据准备
我使用了 Labelme 标注数据
Labelme 标注结束后,会每张图片对应生成一个json文件,我们需要把这个文件转成 Mask RCNN 适用的格式
使用 sh 脚本可以进行批量转化
#!/bin/bash
let i=1
path=./        	# json文件路径,将sh文件放到json同目录下为 ./
cd ${path}
for file in *.json                # 依次查找json文件
do
    labelme_json_to_dataset ${file}	 #在当前目录下将json文件转换为图片,
    let i=i+1
done
每个json文件对应生成一个含五个文件的文件夹
其中,img.png、info.yaml、label.png 是我们所需要的
我们要把这三个文件提取出来,存放到三个文件夹中
我写了一个简单的 python 脚本
使用的时候路径和文件名按需调整
import os
import shutil
filename = "mask"  # 存放json转化得到的文件夹名称
fileList = os.listdir(filename)
fileList.remove(".DS_Store")

for i in range(len(fileList)):
    img_source = "mask/" + fileList[i] + "/img.png"
    mask_source = "mask/" + fileList[i] + "/label.png"
    yaml_source = "mask/" + fileList[i] + "/info.yaml"

    img_target = "pic/img_{}.png".format(i)
    mask_target = "orig_mask/label_{}.png".format(i)
    yaml_target = "yaml/info_{}.yaml".format(i)

    shutil.copy(img_source, img_target)
    shutil.copy(mask_source, mask_target)
    shutil.copy(yaml_source, yaml_target)
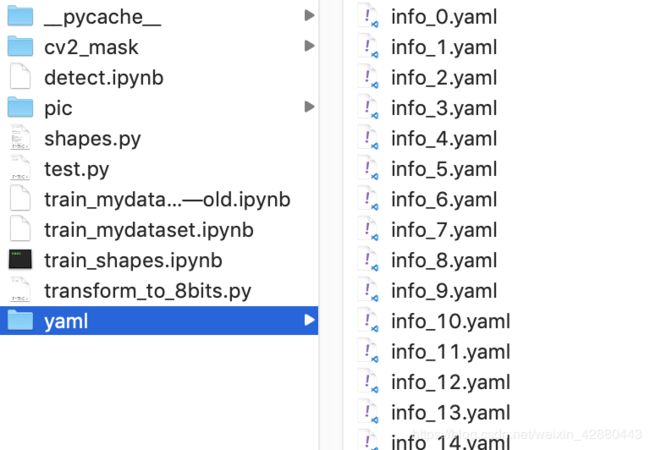
得到如图 pic、cv2_mask、yaml 三个文件夹

pic、cv2_mask 文件夹里面文件的排布情况同 yaml
cv2_mask 里的 png 格式 mask 需要由 16bits 转化为 8 bits
python 转化脚本
from PIL import Image
import numpy as np
import shutil
import os

src_dir = "orig_mask"
dest_dir = "cv2_mask"

for label_name in os.listdir(src_dir):
    old_mask = src_dir + "/" + label_name
    img = Image.open(old_mask)
    img = Image.fromarray(np.uint8(np.array(img)))
    new_mask = os.path.join(dest_dir, label_name)
    img.save(new_mask)
到这一步训练数据就准备好了
标注数据时遇到的坑
一开始我把图片里的每个同类物体都标注为了一个名称,比如多把手术刀,都标注为了 “tool”。在训练过程中,模型会把这多把手术刀看作一个整体进行识别,而不是识别每把手术刀,这就会造成显而易见的错误。最后我花了一个半小时重标了120多个样本,同类物体用“1”,“2”…区别,例如“tool1",“tool2"
在主程序 train_shape.ipynb 中,load_mask 函数用于读取 mask 信息
for i in range(len(labels)):
	if labels[i].find("tool") != -1:
		# print "box"
		labels_form.append("tool")
在这里我们使用了 find 函数,因为"tool1" “tool2” 都包含了字符串 “tool”,所以在实际读取 mask 时,会把在标注时用末尾数字区别的同类物体看作一类
开始训练
代码(基于 samples/shapes/train_shape.ipynb 修改)
import part
import os
import sys
import random
import math
import re
import time
import numpy as np
import cv2
import matplotlib
import matplotlib.pyplot as plt

import yaml
from PIL import Image

# Root directory of the project
ROOT_DIR = os.path.abspath("../")
#print(ROOT_DIR)
#print(os.listdir(ROOT_DIR))

# Import Mask RCNN
sys.path.append(ROOT_DIR)  # To find local version of the library
from mrcnn.config import Config
from mrcnn import utils
import mrcnn.model as modellib
from mrcnn import visualize
from mrcnn.model import log

%matplotlib inline

# Directory to save logs and trained model
MODEL_DIR = os.path.join(ROOT_DIR, "logs")

# Local path to trained weights file
COCO_MODEL_PATH = os.path.join(ROOT_DIR, "mask_rcnn_coco.h5")
# Download COCO trained weights from Releases if needed
if not os.path.exists(COCO_MODEL_PATH):
    utils.download_trained_weights(COCO_MODEL_PATH)
configuration
要改的只有这一行
NUM_CLASSES = 1 + 1 # background + 1 shapes
我是在1080ti上跑的,“nvidia-smi” 发现 IMAGES_PER_GPU = 8 不多不少正好
class ShapesConfig(Config):
    """Configuration for training on the toy shapes dataset.
    Derives from the base Config class and overrides values specific
    to the toy shapes dataset.
    """
    # Give the configuration a recognizable name
    NAME = "one_tool"

    # Train on 1 GPU and 8 images per GPU. We can put multiple images on each
    # GPU because the images are small. Batch size is 8 (GPUs * images/GPU).
    GPU_COUNT = 1
    IMAGES_PER_GPU = 8

    # Number of classes (including background)
    NUM_CLASSES = 1 + 1  # background + 1 shapes

    # Use small images for faster training. Set the limits of the small side
    # the large side, and that determines the image shape.
    IMAGE_MIN_DIM = 128
    IMAGE_MAX_DIM = 128

    # Use smaller anchors because our image and objects are small
    RPN_ANCHOR_SCALES = (8, 16, 32, 64, 128)  # anchor side in pixels

    # Reduce training ROIs per image because the images are small and have
    # few objects. Aim to allow ROI sampling to pick 33% positive ROIs.
    TRAIN_ROIS_PER_IMAGE = 32

    # Use a small epoch since the data is simple
    STEPS_PER_EPOCH = 100

    # use small validation steps since the epoch is small
    VALIDATION_STEPS = 5

config = ShapesConfig()
config.display()
Dataset
class DrugDataset(utils.Dataset):
    #得到该图中有多少个实例(物体)
    def get_obj_index(self, image):
        n = np.max(image)
        return n

    #解析labelme中得到的yaml文件,从而得到mask每一层对应的实例标签
    def from_yaml_get_class(self,image_id):
        info = self.image_info[image_id]
        with open(info['yaml_path']) as f:
            temp = yaml.load(f.read())
            labels = temp['label_names']
            del labels[0]
        return labels

    #重新写draw_mask
    def draw_mask(self, num_obj, mask, image, image_id):
        info = self.image_info[image_id]
        for index in range(num_obj):
            for i in range(info['width']):
                for j in range(info['height']):

                    at_pixel = image.getpixel((i, j))
                    if at_pixel == index + 1:
                        mask[j, i, index] = 1
        return mask
    #在self.image_info信息中添加了path、mask_path 、yaml_path
    def load_shapes(self, count, img_floder, mask_floder, imglist, dataset_root_path):
        """Generate the requested number of synthetic images.
        count: number of images to generate.
        height, width: the size of the generated images.
        """
        # Add classes
        self.add_class("shapes", 1, "tool")
        for i in range(count):
            mask_path = "{}/label_{}.png".format(mask_floder, i)
            yaml_path = "{}/info_{}.yaml".format(yaml_floder, i)
            cv_img = cv2.imread("{}/img_{}.png".format(img_floder, i))
            self.add_image("shapes", image_id=i, path = "{}/img_{}.png".format(img_floder, i),
                           width = cv_img.shape[1], height=cv_img.shape[0], mask_path=mask_path, yaml_path=yaml_path)

    def load_mask(self, image_id):
        """Generate instance masks for shapes of the given image ID.
        """
        global iter_num
        print("image_id", image_id)
        info = self.image_info[image_id]
        count = 1  # number of object
        img = Image.open(info['mask_path'])
        num_obj = self.get_obj_index(img)
        mask = np.zeros([info['height'], info['width'], num_obj], dtype=np.uint8)
        mask = self.draw_mask(num_obj, mask, img, image_id)
        occlusion = np.logical_not(mask[:, :, -1]).astype(np.uint8)
        for i in range(count - 2, -1, -1):
            mask[:, :, i] = mask[:, :, i] * occlusion

            occlusion = np.logical_and(occlusion, np.logical_not(mask[:, :, i]))
        labels = []
        labels = self.from_yaml_get_class(image_id)
        labels_form = []
        for i in range(len(labels)):
            if labels[i].find("tool") != -1: # 修改成自己的标签
                labels_form.append("tool")
        class_ids = np.array([self.class_names.index(s) for s in labels_form])
        return mask, class_ids.astype(np.int32)
 mask_path = "{}/label_{}.png".format(mask_floder, i)
 yaml_path = "{}/info_{}.yaml".format(yaml_floder, i)
 cv_img = cv2.imread("{}/img_{}.png".format(img_floder, i))
这个就是之前“训练数据准备”这一步提取出来的三个文件夹
训练集和验证集导入
dataset_root_path = ROOT_DIR + "/train_dataset"
img_floder = os.path.join(dataset_root_path, "pic")
mask_floder = os.path.join(dataset_root_path, "cv2_mask")
yaml_floder = os.path.join(dataset_root_path, "yaml")
# yaml_floder = dataset_root_path
imglist = os.listdir(img_floder)
count = len(imglist)
# os.listdir(mask_floder)

# train与val数据集准备
dataset_train = DrugDataset()
dataset_train.load_shapes(count, img_floder, mask_floder, imglist, dataset_root_path)
dataset_train.prepare()

dataset_val = DrugDataset()
dataset_val.load_shapes(7, img_floder, mask_floder, imglist, dataset_root_path)
dataset_val.prepare()
同样注意路径按需调整
这里注意我在测试的时候为了偷懒,把验证集设成了和训练集一样,这在理论上是非常严重的错误
剩下部分和源代码完全相同
获得的训练权重在 logs 文件夹中
源码可以贴,如果有同学有需求的话,现在暂时不贴了
下一步会讲怎么把训练好的 Mask RCNN 用做非实时检测视频
6.25 于海宁
12.1 更新于 Illinois:
GitHub源码:https://github.com/CharlieZhaoyl/SRTP_maskRCNN
时隔半年,再看当时的代码风格,感觉很糟糕