Android进阶-Android动画机制与使用技巧
-
-
- Android View动画框架
- Android属性动画分析
- Android布局动画
- Interpolators插值器
- 自定义动画
- Android5X SVG矢量动画机制
- 动画案例
- Android动画特效
-
Android View动画框架
Android动画又分为:
视图动画:又称视图动画、又称补间动画、又称Tween动画(常用)
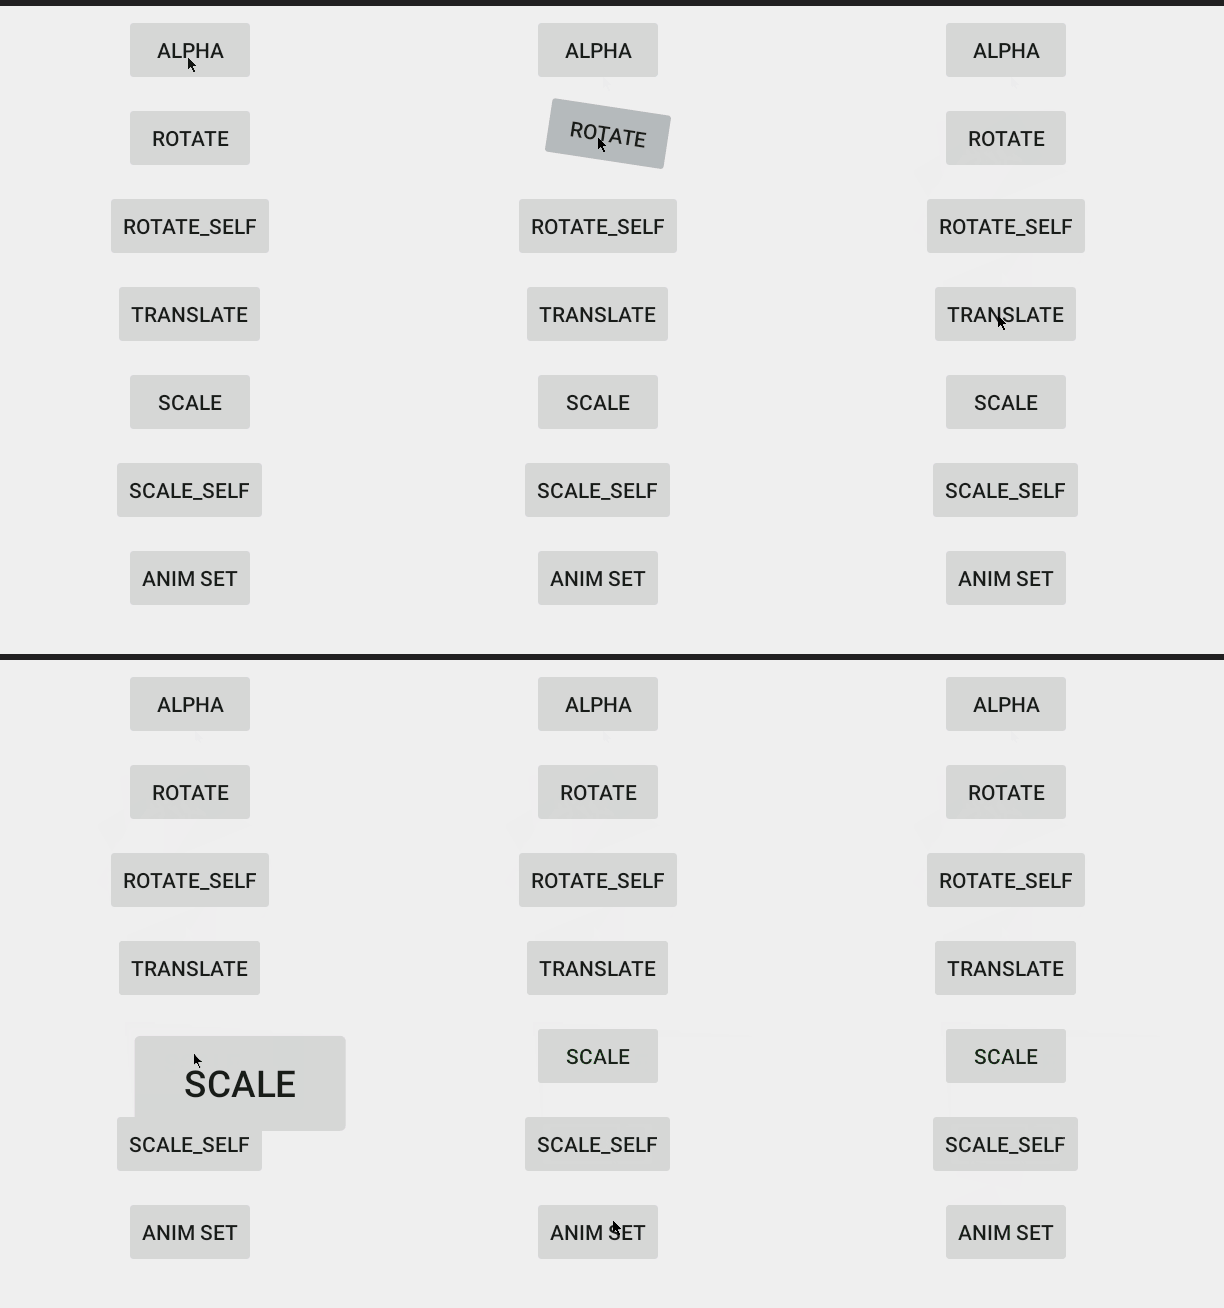
属性动画:通过改变属性值产生动画Android视图动画使用简单,效果丰富,它提供了AlphaAnimation、RotateAnimation、TranslateAnimation、ScaleAnimation四种动画,并提供了AnimationSet动画集合。
实现原理是每次绘制视图是View所在的ViewGroup中的drawChild函数获取该View的Animation的Transformation值,然后调用canvas.concat(transformToApply.getMatrix()),通过矩阵运算完成动画帧。
- 透明动画
            AlphaAnimation aa = new AlphaAnimation(0, 1);
            aa.setDuration(1000);
view.startAnimation(aa);- 旋转动画
            RotateAnimation ra = new RotateAnimation(0, 360, 100, 100);
            ra.setDuration(1000);
            view.startAnimation(ra);
其参数分别为旋转的其实角度和旋转中心点的坐标,当然,可以通过设置参数来控制旋转动画的参考系
 RotateAnimation ra = new RotateAnimation(0, 360,
                    RotateAnimation.RELATIVE_TO_SELF, 0.5F,
RotateAnimation.RELATIVE_TO_SELF, 0.5F);- 位移动画
 TranslateAnimation ta = new TranslateAnimation(0, 200, 0, 300);
            ta.setDuration(1000);
view.startAnimation(ta);- 缩放动画
ScaleAnimation sa = new ScaleAnimation(0, 2, 0, 2);
            sa.setDuration(1000);
            view.startAnimation(sa);
与旋转动画一样,缩放动画也可以设置缩放的中心点
            ScaleAnimation sa = new ScaleAnimation(0, 1, 0, 1,
                    Animation.RELATIVE_TO_SELF, 0.5F,
Animation.RELATIVE_TO_SELF, 0.5F);- 动画集合
AnimationSet as = new AnimationSet(true);
            as.setDuration(1000);

            AlphaAnimation aa = new AlphaAnimation(0, 1);
            aa.setDuration(1000);
            as.addAnimation(aa);

            TranslateAnimation ta = new TranslateAnimation(0, 100, 0, 200);
            ta.setDuration(1000);
            as.addAnimation(ta);

            RotateAnimation ra = new RotateAnimation(0, 360,
                    RotateAnimation.RELATIVE_TO_SELF, 0.5F,
                    RotateAnimation.RELATIVE_TO_SELF, 0.5F);
            ra.setDuration(1000);
            as.addAnimation(ra);

            ScaleAnimation saa = new ScaleAnimation(0, 1, 0, 1,
                    Animation.RELATIVE_TO_SELF, 0.5F,
                    Animation.RELATIVE_TO_SELF, 0.5F);
            saa.setDuration(1000);
            as.addAnimation(saa);

            view.startAnimation(as);
对于动画事件,Android也提供了对应的监听回调,要添加相应的监听方法:
animation.setAnimationListener(new Animation.AnimationListener() {
    @Override
    public void onAnimationStart(Animation animation) {
    }
    @Override
    public void onAnimationEnd(Animation animation) {
    }
    @Override
    public void onAnimationRepeat(Animation animation) {
    }
});Android属性动画分析
在Animator框架中使用最多的就是AnimationSet和ObjectAnimator配合,使用ObjectAnimator进行更精细化控制,值控制一个对象的一个属性值,而使用多个ObjectAnimator组合到AnimationSet形成一个动画。
ObjectAnimator
ObjectAnimator是属性动画框架中最重要的实行类,创建一个ObjectAnimator秩序通过他的静态工厂类直接返回一个ObjectAnimator对象。参数包括一个对象和对象的属性名字,但这个属性必须有get和set函数,内部会通过java反射机制来调用set函数修改对象属性值。同样,也可以调用setInterpolator设置相应的差值器。
旧的视图动画所产生的动画,并不能改变事件响应的位置,只是单纯的修改了显示,按钮的实际点击有效区依然在原来的地方。而属性动画则不同,它是真实地改变一个View的属性,视图区域发生改变,事件相应区域也随之改变。
ObjectAnimator animator = ObjectAnimator.ofFloat(view,"translationX",300);
animator.setDuration(300);
animator.start();
参数说明:
第一个参数:需要操作的View
第二个参数:要操作的属性
第三个参数:这是一个可变参数,需要传递去该属性变化的一个取值过程
在使用ObjectAnimator的时候,有一点非常重要,那就是要操纵的属性必须具有get、set方法,不然ObjectAnimator就无法起效。下面就是以下常用的,可以直接使用属性动画的属性值。
- translationX和translationY:这两个属性作为一种增量来控制着View对象从它布局容器的左上角坐标偏移的位置。
- rotation、rotationX和rotationY:这三个属性控制View对象围绕支点进行2D和3D旋转。
- scaleX和scaleY:这两个属性控制着View对象围绕它的支点进行2D缩放。
- pivotX和pivotY:这两个属性控制着View对象的支点位置,围绕这个支点进行旋转和缩放变换处理。默认情况下,该支点的位置就是View对象的中心点。
- x和y:这是两个简单实用的属性,它描述了View对象在它的容器中的最终位置,它是最初的左上角坐标和translationX、translationY值的累积和。
- alpha:它表示View对象的alpha透明值。默认是1(不透明),0代表完全透明(不可见)。
如果一个属性没有get、set方法,可以通过下面两种方法来实现:
- 通过自定义一个属性或者包装类,来间接地给这个属性增加get、set方法;
- 通过ValueAnimator来实现,后面会讲到。
先来看看如何使用包装类的方法给一个属性增加get、set方法:
private static class WrapperView {
    private View mTarget;
    public WrapperView(View target) {
        mTarget = target;
    }
    public int getWidth() {
        return mTarget.getLayoutParams().width;
    }
    public void setWidth(int width) {
        mTarget.getLayoutParams().width = width;
        mTarget.requestLayout();
    }
}
使用时只需操作包装类就可以间接调用到get、set方法了:
WrapperView wrapper = new WrapperView(mButton);
ObjectAnimator.ofInt(wrapper ,"width",500).setDuration(5000).start();
PropertyValuesHolder
类似视图动画中的AnimationSet,在属性动画中,如果针对一个对象的多个属性,要同是作用多种动画,可以使用PropertyValuesHolder来实现。如果需要在平移过程中,同时改变X、Y轴的缩放,可以这样实现
PropertyValuesHolder pvh1 = PropertyValuesHolder.ofFloat("translationX",300f);
PropertyValuesHolder pvh2 = PropertyValuesHolder.ofFloat("scaleX",1f,0,1f);
PropertyValuesHolder pvh3 = PropertyValuesHolder.ofFloat("scaleY",1f,0,1f);
ObjectAnimator.ofPropertyValuesHolder(view,pvh1,pvh2,pvh3).setDuration(1000).start();
ValueAnimator
ValueAnimator在属性动画中占有非常重要的地位,虽然不像ObjectAnimator那样耀眼,但它却是属性动画的核心所在,ObjectAnimator也是继承自ValueAnimator。
ValueAnimator本身不提供任何动画效果,它更像一个数值发生器,用来产生具有一定规律的数字,从而让调用者来控制动画的实现过程。通常情况下在ValueAnimator的AnimatorUpdateListener中监听数值的变换。
ValueAnimator animator = ValueAnimator.ofFloat(0,100);
animator.setTarget(view);
animator.setDuration(1000).start();
animator.addUpdateListener(new ValueAnimator.AnimatorUpdateListener() {
    @Override
    public void onAnimationUpdate(ValueAnimator animation) {
        float value = (float) animation.getAnimatedValue();
        //TODO use the value
    }
});
动画事件的监听
一个完整的动画具有Start、Repeat、End、Cancel四个过程,通过Android提供了接口,很方便地监听到这四个事件:
ObjectAnimator anim = ObjectAnimator.ofFloat(view,"alpha",0.5f);
anim.addListener(new Animator.AnimatorListener() {
    @Override
    public void onAnimationStart(Animator animation) {
    }
    @Override
    public void onAnimationEnd(Animator animation) {
    }
    @Override
    public void onAnimationCancel(Animator animation) {
    }
    @Override
    public void onAnimationRepeat(Animator animation) {
    }
});
当然,Android也提供了一个AnimatorListenerAdapter来让我们选择必要的时间进行监听:
anim.addListener(new AnimatorListenerAdapter() {
    @Override
    public void onAnimationEnd(Animator animation) {

    }
});
AnimatorSet
对于一个属性同时作用多个属性动画效果,前面已经用PropertyValuesHolder实现了这样的效果。而AnimatorSet不仅能实现这样的效果,同时还能实现更为精确的顺序控制。同样是PropertyValuesHolder演示的动画效果,用AnimatorSet来实现。
ObjectAnimator animator1 = ObjectAnimator.ofFloat(view, "translationX", 300f);
ObjectAnimator animator2 = ObjectAnimator.ofFloat(view, "scaleX", 1f, 0, 1f);
ObjectAnimator animator3 = ObjectAnimator.ofFloat(view, "scaleY", 1f, 0, 1f);
AnimatorSet set = new AnimatorSet();
set.setDuration(1000);
set.playTogether(animator1,animator2,animator3);
set.start();
在属性动画中,AnimatorSet正是通过playTogether()、playSequentially()、animSet.play().with()、before()、after()这些方法来控制多个动画的协同工作方式,从而做到对动画播放顺序的精确控制。
在XML中使用属性动画
属性动画同视图动画一样,也可以直接写在XML文件中:
<objectAnimator
    xmlns:android="http://schemas.android.com/apk/res/android"
    android:duration="1000"
    android:propertyName="scaleX"
    android:valueFrom="1.0"
    android:valueTo="2.0"
    android:valueType="floatType">
objectAnimator>
在程序中使用XML定义的属性动画也非常简单:
private void scaleX(View view){
    Animator anim = AnimatorInflater.loadAnimator(this,R.animator.scaleX);
    anim.setTarget(mMv);
    anim.start();
}
View的animate方法
Google给View增加了animate方法来直接驱动属性动画,可以发现,animate方法可以认为是属性动画的一种简写方式。
animate.animate().alpha(0).y(300).setDuration(300).withStartAction(new Runnable() {
    @Override
    public void run() {
    }
}).withEndAction(new Runnable() {
    @Override
    public void run() {
        runOnUiThread(new Runnable() {
            @Override
            public void run() {
            }
        });
    }
}).start();
Android布局动画
所谓布局动画是指作用在ViewGroup上,给ViewGroup增加View时添加一个动画过渡的效果。
最简单的布局动画是在ViewGroup的XML中,这个效果是系统默认的,且无法使用自定义动画来替换这个效果。
android:animateLayoutChanges="true"另外还可以通过使用LayoutAnimationController类来自定义一个子View的过渡效果。通过下面的代码,给LinearLayout增加一个视图动画,让子View在出现的时候,有一个缩放的动画效果:
LinearLayout ll = (LinearLayout) findViewById(R.id.ll);
//设置过渡动画
ScaleAnimation sa = new ScaleAnimation(0, 1, 0, 1);
sa.setDuration(2000);
//设置布局动画的显示属性
LayoutAnimationController lac = new LayoutAnimationController(sa, 0.5F);
lc.setOrder(LayoutAnimationController.ORDER_NORMAL);
//为ViewGroup设置布局动画
ll.setLayoutAnimation(lac);
LayoutAnimationController的第一个参数,是需要作用的动画。而第二个参数,则是每个子View显示的delay。当delay时间不为0时,可以设置子View显示的顺序:
- LayoutAnimationController.ORDER_NORMAL:顺序
- LayoutAnimationController.ORDER_RANDOM:随机
- LayoutAnimationController.ORDER_REVEESE:反序
Interpolators(插值器)
插值器是动画中一个非常重要的概念,通过插值器(Interpolators),可以定义动画变换速率,这一点非常类似物理中的加速度,其作用主要是控制目标变量的变化值进行对应的变化。常见的插值器有:
- LinearInterpolator:线性插值器,匀速运动
- AccelerateDecelerateInterpolator:加速减速插值器,动画两头慢中间快
- DecelerateInterpolator:减速插值器,动画越来越慢
- BounceInterpolator:弹跳插值器,动画结束时有个弹跳效果
自定义动画
创建自定义动画非常简单,只需要实现它的applyTransformation的逻辑就可以了,不过通常情况下,还需要覆盖父类的initalize方法来实现一些初始化工作
@Override
protected void applyTransformation(float interpolatedTime, Transformation t) {
    super.applyTransformation(interpolatedTime, t);
}
参数说明:
第一个参数:interpolatedTime就是插值器的时间因子,由动画当前完成的百分比和当前时间所对应的插值器所计算得来的。取值范围为0到1.0。
第二个参数:Transformation是矩阵的封装类,一般使用该类获取当前的矩阵对象
final Matrix matrix = t.getMatrix();通过改变获得的matrix对象,可以将动画效果实现出来,而对于matrix的变换操作,基本可以实现任何效果的动画。下面模拟电视机的关闭效果:
@Override
protected void applyTransformation(float interpolatedTime, Transformation t) {
    final Matrix matrix = t.getMatrix();
    matrix.preScale(1, 1 - interpolatedTime, mCenterwidth,mCenterheight);
    super.applyTransformation(interpolatedTime, t);
}
android.graphics.Camera中的Camera类,它封装了openGL的3D动画,从而可以非常方便地创建3D效果。当物体固定在某处是,只要移动摄像机就能拍摄到具有立体感的图像,因此通过它可以实现各种3D效果:
@Override
public void initialize(int width, int height, int parentWidth, int parentHeight) {
    super.initialize(width, height, parentWidth, parentHeight);
    //设置默认时长
    setDuration(2000);
    //设置动画结束后保留状态
    setFillAfter(true);
    //设置默认插值器
    setInterpolator(new BounceInterpolator());
    mCenterWidth = width / 2;
    mCenterHeight = height / 2;
}
@Override
protected void applyTransformation(float interpolatedTime, Transformation t) {
    final Matrix matrix = t.getMatrix();
    mCamera.save();
    //使用Camera设置旋转的角度
    mCamera.rotateY(mRotateY * interpolatedTime);
    //将旋转变换作用到matrix上
    mCamera.getMatrix(matrix);
    mCamera.restore();
    //通过pre方法设置矩形作用前的偏移量来改变旋转中心
    matrix.preTranslate(mCenterWidth, mCenterHeight);
    matrix.postTranslate(-mCenterWidth, -mCenterHeight);
}
点击后开始动画,这样一个Button会在设置的时长内,使用相应的插值器来完成动画。

Android5.X SVG矢量动画机制
google在Android 5.X中增加了对SVG矢量图形的支持,这对于创建新的高效率动画具有非常重大的意义,了解一下什么是SVG:
- 可伸缩矢量图形(Scalable Vector Graphics)
- 定义用于网络的基于矢量的图形
- 使用XML格式定义图形
- 图片在放大或改变尺寸的情况下其图形质量不会有所损失
- 万维网联盟的标准
- 与诸如DOM和XSL之类的W3C标准是一个整体
在Android 5.X之后,Android中添加了对SVG的标签的支持,其优点有:
- 对Bitmap放大不会失真;
- Bitmap需要为不同分辨率设计多套图标,而矢量图则不需要。
<path>标签
使用<path>标签所支持的指令有一下几种:
- M = moveto(M X,Y):将画笔移动到指定的坐标位置,但未发生绘制
- L = lineto(L X,Y):画直线到指定的坐标位置
- H = horizontal lineto( H X):画水平线到指定的X坐标位置
- V = vertical lineto(V Y ):画垂直线到指定的Y坐标
- C = curveto(C ,X1,Y1,X2,Y2,ENDX,ENDY):三次贝塞尔曲线
- S = smooth curveto(S X2,Y2,ENDX,ENDY):三次贝塞尔曲线
- Q = quadratic Belzier curve(Q X Y,ENDX,ENDY):二次贝塞尔曲线
- T = smooth quadratic Belzier curvrto(T,ENDX,ENDY):映射前面路径的终点
- A = elliptical Are(A RX,RY,XROTATION,FLAG1FLAG2,X,Y):弧线
- Z = closepath():关闭路径
在使用上面的指令时,需要注意以下几点:
- 坐标轴以(0,0)为中心,X轴水平向右,Y轴水平向下。
- 所有指令大小写均可。大写绝对你定位,参照全局坐标系;小写相对定位,参照父容器坐标系。
- 指令和数据键的空格可以省略。
- 同一指令出现多次可以只用一个。
SVG常用指令
- L
绘制直线的指令是”L”,代表从当前点绘制直线到给定点。”L”之后的参数是一个点坐标,如”L 200 400”绘制直线。同时,还可以使用”H”和”V”指令绘制水平、竖直线,后面参数是x坐标、或y坐标
- M
M指令类似Android绘图中path类的moveTo方法,即代表将画笔移动到某一点,但并不发生绘制动作。
- A
A指令用来绘制一段弧线,且允许弧线不闭合。可以把A命令绘制的弧线想象成是椭圆的某一段,A指令以下有七个参数:
- RX,RY:指所在的椭圆的半轴大小
- XROTATION:指椭圆的X轴与水平方向顺时针方向的夹角,可以想象成一个水平的椭圆饶中心点顺时针旋转XROTATION 的角度
- FLAG1:只有两个值,1表示大角度弧度,0为小角度弧度
- FLAG2:只有两个值,确定从起点到终点的方向1顺时针,0逆时针
- X,Y轴:为终点坐标
SVG编辑器
SVG参数的写法固定而且复杂,因此完全可以使用程序来实现,所以一般通过SVG编辑器来编辑SVG图形。
- 在线可视化SVG编辑器官网:http://editor.method.ac/
- 优秀的离线SVG编辑器:Inkscape
Android中使用SVG
google在Android 5.X中提供了下面两个新的API来帮助支持SVG:
- VectorDrawable:可以创建基于XML的SVG图形
- AnimatedVectorDrawable:给VectorDrawable提供动画效果
VectorDrawable的使用:
VectorDrawable首先需要在XML中通过<vector>标签赖生明对SVG的使用:
<vector
    xmlns:android="http://schemas.android.com/apk/res/android"
    android:width="200dp"
    android:height="200dp"
    android:viewportHeight="100"
    android:viewportWidth="100">
vector>
属性说明:
- height:表示SVG的高度200dp
- width:表示SVG的宽度200dp
- viewportHeight:表示SVG图形被划分成100份
- viewportWidth:表示SVG图形被划分成100份
- 如果在绘图中使用坐标(50,50),则意味着该坐标为正中间
接下来,给<vector>标签增加显示path:
<vector
    xmlns:android="http://schemas.android.com/apk/res/android"
    android:width="200dp"
    android:height="200dp"
    android:viewportHeight="100"
    android:viewportWidth="100">
    <group
        android:name="test"
        android:rotation="0">
        <path
            android:fillColor="@android:color/holo_blue_light"
            android:pathData="
                M 25 50
                a 25,25 0 1,0 50,0" />
    group>
vector>
最后就可以在布局文件中直接使用:
<ImageView
     android:layout_width="wrap_content"
     android:layout_height="wrap_content"
android:src="@drawable/vector" />如果要绘制一个非填充的图形,使用下面的代码:
<path
    android:pathData="
        M 25 50
        a 25,25 0 1,0 50,0"
    android:strokeColor="@android:color/holo_blue_light"
    android:strokeWidth="2"
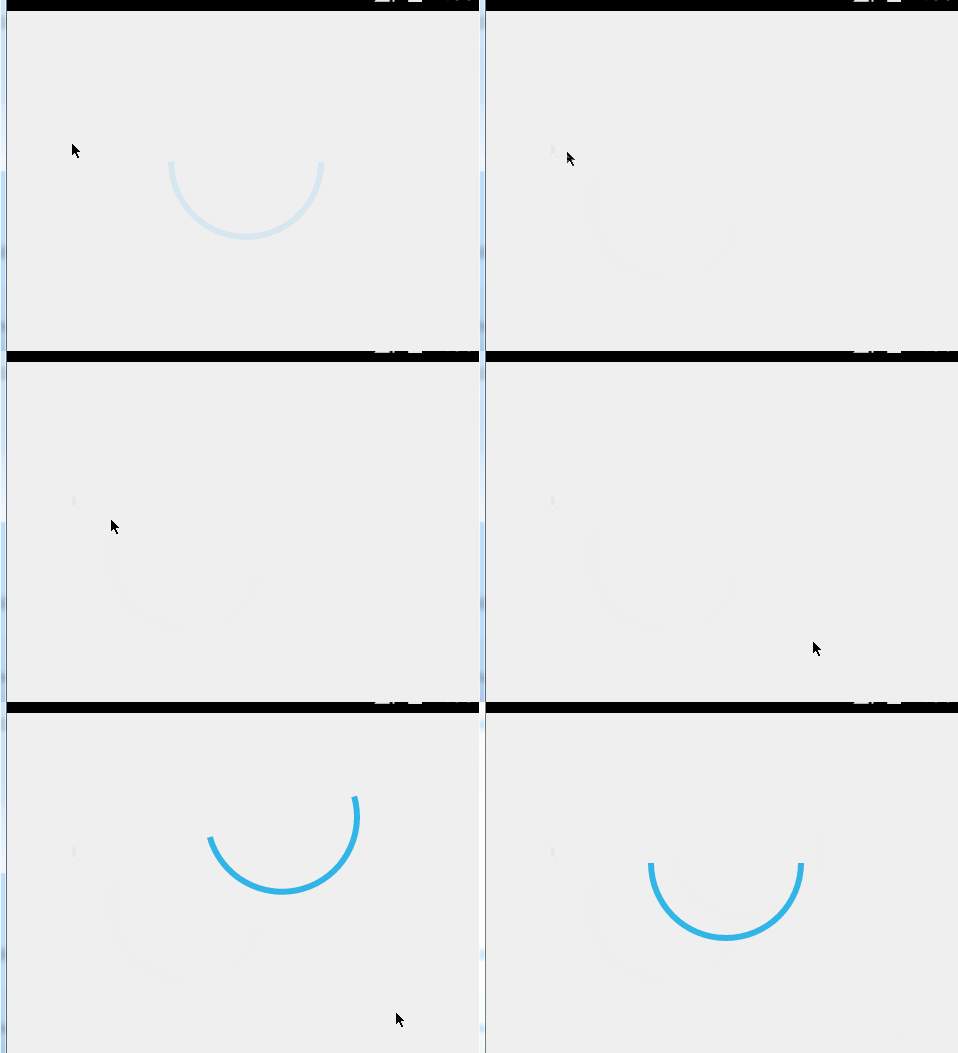
/>AnimatedVectorDrawable的使用
AnimatedVectorDrawable的作用就是给VectorDrawable提供动画效果。Google的工程师将其比喻为一个胶水,通过其来连接静态的VectorDrawable和动态的objectAnimator
首先在XML文件中通过<animated-vector>标签来声明对AnimatedVectorDrawable的使用:
<animated-vector
    xmlns:android="http://schemas.android.com/apk/res/android"
    android:drawable="@drawable/vector">
    <target
        android:name="test"
        android:animation="@anim/anim_path" />
animated-vector>
这里特别注意的是:target里面的name属性要和VectorDrawable的name属性保持一致,animation属性和动画资源文件名保持一致。
对应的vector即为静态的VectorDrawable文件:
<vector
    xmlns:android="http://schemas.android.com/apk/res/android"
    android:width="200dp"
    android:height="200dp"
    android:viewportHeight="100"
    android:viewportWidth="100">
    <group
        android:name="test"
        android:rotation="0">
        <path
            android:pathData="
                M 25 50
                a 25,25 0 1,0 50,0"
            android:strokeColor="@android:color/holo_blue_light"
            android:strokeWidth="2"
           />
    group>
vector>
对应的animation文件:
<objectAnimator
    xmlns:android="http://schemas.android.com/apk/res/android"
    android:duration="4000"
    android:propertyName="rotation"
    android:valueFrom="0"
android:valueTo="360" />需要注意的是:在<group>标签和<path>标签中添加了rotate、fillColor、pathData等属性,那么在objectAnimator中,就可以通过指定android:propertyName=”XXXX”属性来选择控制哪一种属性,通过android:valueFrom=”0”和android:valueTo=”360”属性来控制动画的起始值。唯一需要注意的是,如果指定属性为pathData,那么需要添加一个属性—android:valueType=”pathType”来告诉系统进行pathData变换。
布局文件中使用:
<ImageView
    android:id="@+id/image"
    android:layout_centerInParent="true"
    android:layout_width="wrap_content"
    android:layout_height="wrap_content"
    android:src="@drawable/anim_vector" />
在程序中使用:
ImageView image = (ImageView) findViewById(R.id.image);
((Animatable)image.getDrawable()).start();动画案例
线性动画
先定义VectorDrawable
<vector xmlns:android="http://schemas.android.com/apk/res/android"
    android:height="200dp"
    android:viewportHeight="100"
    android:viewportWidth="100"
    android:width="200dp" >

    <group>
        <path
            android:name="path1"
            android:pathData="
            M 20,80
            L 50,80 80,80"
            android:strokeColor="@android:color/holo_green_dark"
            android:strokeLineCap="round"
            android:strokeWidth="5" />
        <path
            android:name="path2"
            android:pathData="
            M 20,20
            L 50,20 80,20"
            android:strokeColor="@android:color/holo_green_dark"
            android:strokeLineCap="round"
            android:strokeWidth="5" />
    group>

vector>
再定义两个Path的objectAnimator,path1:
<objectAnimator xmlns:android="http://schemas.android.com/apk/res/android"
    android:duration="5000"
    android:interpolator="@android:anim/bounce_interpolator"
    android:propertyName="pathData"
    android:valueFrom="
            M 20,80
            L 50,80 80,80"
    android:valueTo="
            M 20,80
            L 50,50 80,80"
    android:valueType="pathType" />
path2:
<objectAnimator xmlns:android="http://schemas.android.com/apk/res/android"
    android:duration="5000"
    android:interpolator="@android:anim/bounce_interpolator"
    android:propertyName="pathData"
    android:valueFrom="
            M 20,20
            L 50,20 80,20"
    android:valueTo="
            M 20,20
            L 50,50 80,20"
    android:valueType="pathType" />
最后定义AnimatedVectorDrawable连接VectorDrawable和objectAnimator:
<animated-vector xmlns:android="http://schemas.android.com/apk/res/android"
    android:drawable="@drawable/trick" >

    <target
        android:name="path1"
        android:animation="@anim/anim_path1" />
    <target
        android:name="path2"
        android:animation="@anim/anim_path2" />

animated-vector>
在布局中使用:
    <ImageView
        android:id="@+id/iv_anim"
        android:layout_width="match_parent"
        android:layout_height="match_parent"
        android:src="@drawable/trick_anim" />
代码启动动画:
        ImageView image = (ImageView) findViewById(R.id.iv_anim);
        Drawable drawable = image.getDrawable();
        if (drawable instanceof Animatable) {
            ((Animatable) drawable).start();
}模拟三球仪
同样的,先定义VectorDrawable
<vector xmlns:android="http://schemas.android.com/apk/res/android"
    android:height="200dp"
    android:viewportHeight="100"
    android:viewportWidth="100"
    android:width="200dp" >

    <group
        android:name="sun"
        android:pivotX="60"
        android:pivotY="50"
        android:rotation="0" >
        <path
            android:name="path_sun"
            android:fillColor="@android:color/holo_blue_light"
            android:pathData="
                M 50,50
                a 10,10 0 1,0 20,0
                a 10,10 0 1,0 -20,0" />

        <group
            android:name="earth"
            android:pivotX="75"
            android:pivotY="50"
            android:rotation="0" >
            <path
                android:name="path_earth"
                android:fillColor="@android:color/holo_orange_dark"
                android:pathData="
                    M 70,50
                    a 5,5 0 1,0 10,0
                    a 5,5 0 1,0 -10,0" />

            <group>
                <path
                    android:fillColor="@android:color/holo_green_dark"
                    android:pathData="
                        M 90,50
                        m -5 0
                        a 4,4 0 1,0 8 0
                        a 4,4 0 1,0 -8,0" />
            group>
        group>
    group>

vector>
定义两个objectAnimator,代码一样,文件名称分别是anim_sun、和anim_earth:
<objectAnimator xmlns:android="http://schemas.android.com/apk/res/android"
    android:duration="4000"
    android:propertyName="rotation"
    android:valueFrom="0"
    android:valueTo="360" />
最后定义AnimatedVectorDrawable连接VectorDrawable和objectAnimator:
<animated-vector xmlns:android="http://schemas.android.com/apk/res/android"
    android:drawable="@drawable/earth_moon_system">
    <target
        android:name="sun"
        android:animation="@anim/anim_sun" />
    <target
        android:name="earth"
        android:animation="@anim/anim_earth" />
animated-vector>
布局中使用:
    <ImageView
        android:id="@+id/iv_anim"
        android:layout_width="match_parent"
        android:layout_height="match_parent"
        android:src="@drawable/sun_system" />
代码启动动画:
        ImageView image = (ImageView) findViewById(R.id.iv_anim);
        Drawable drawable = image.getDrawable();
        if (drawable instanceof Animatable) {
            ((Animatable) drawable).start();
}轨迹动画
先定义VectorDrawable
<vector xmlns:android="http://schemas.android.com/apk/res/android"
    android:height="30dp"
    android:viewportHeight="30"
    android:viewportWidth="160"
    android:width="160dp" >

    <path
        android:name="search"
        android:pathData="M141 , 17 A9 ,9 0 1 , 1 ,142 , 16 L149 ,23"
        android:strokeAlpha="0.8"
        android:strokeColor="#ff3570be"
        android:strokeLineCap="square"
        android:strokeWidth="2" />
    <path
        android:name="bar"
        android:pathData="M0,23 L149 ,23"
        android:strokeAlpha="0.8"
        android:strokeColor="#ff3570be"
        android:strokeLineCap="square"
        android:strokeWidth="2" />

vector>
定义一个objectAnimator:
<objectAnimator xmlns:android="http://schemas.android.com/apk/res/android"
    android:duration="1000"
    android:interpolator="@android:interpolator/accelerate_decelerate"
    android:propertyName="trimPathStart"
    android:valueFrom="0"
    android:valueTo="1"
    android:valueType="floatType" />
最后定义AnimatedVectorDrawable连接VectorDrawable和objectAnimator:
<animated-vector xmlns:android="http://schemas.android.com/apk/res/android"
    android:drawable="@drawable/searchbar" >

    <target
        android:name="search"
        android:animation="@anim/anim_searchbar" />

animated-vector>
布局中使用:
<ImageView
        android:id="@+id/iv_anim"
        android:layout_width="match_parent"
        android:layout_height="match_parent"
        android:src="@drawable/search_anim" />
代码启动动画:
ImageView image = (ImageView) findViewById(R.id.iv_anim);
        Drawable drawable = image.getDrawable();
        if (drawable instanceof Animatable) {
            ((Animatable) drawable).start();
}Android动画特效
灵动菜单
布局文件:
<RelativeLayout xmlns:android="http://schemas.android.com/apk/res/android"
    xmlns:tools="http://schemas.android.com/tools"
    android:layout_width="match_parent"
    android:layout_height="match_parent"
    android:gravity="center_horizontal"
    tools:context="com.itman.animationdemo.anim.PropertyTestActivity" >

    <ImageView
        android:id="@+id/imageView_b"
        android:layout_width="wrap_content"
        android:layout_height="wrap_content"
        android:layout_centerHorizontal="true"
        android:layout_centerVertical="true"
        android:src="@drawable/b" />

    <ImageView
        android:id="@+id/imageView_c"
        android:layout_width="wrap_content"
        android:layout_height="wrap_content"
        android:layout_centerHorizontal="true"
        android:layout_centerVertical="true"
        android:src="@drawable/c" />

    <ImageView
        android:id="@+id/imageView_d"
        android:layout_width="wrap_content"
        android:layout_height="wrap_content"
        android:layout_centerHorizontal="true"
        android:layout_centerVertical="true"
        android:src="@drawable/d" />

    <ImageView
        android:id="@+id/imageView_e"
        android:layout_width="wrap_content"
        android:layout_height="wrap_content"
        android:layout_centerHorizontal="true"
        android:layout_centerVertical="true"
        android:src="@drawable/e" />

    <ImageView
        android:id="@+id/imageView_a"
        android:layout_width="wrap_content"
        android:layout_height="wrap_content"
        android:layout_centerHorizontal="true"
        android:layout_centerVertical="true"
        android:src="@drawable/a" />

RelativeLayout>
activity代码:
public class PropertyTestActivity extends ActionBarActivity implements
        View.OnClickListener {
    private int[] mRes = { R.id.imageView_a, R.id.imageView_b,
            R.id.imageView_c, R.id.imageView_d, R.id.imageView_e };
    private List mImageViews = new ArrayList();
    private boolean mFlag = true;

    @Override
    protected void onCreate(Bundle savedInstanceState) {
        super.onCreate(savedInstanceState);
        setContentView(R.layout.activity_property_test);
        for (int i = 0; i < mRes.length; i++) {
            ImageView imageView = (ImageView) findViewById(mRes[i]);
            imageView.setOnClickListener(this);
            mImageViews.add(imageView);
        }
    }

    @Override
    public void onClick(View v) {
        switch (v.getId()) {
        case R.id.imageView_a:
            if (mFlag) {
                startAnim();
            } else {
                closeAnim();
            }
            break;
        default:
            Toast.makeText(PropertyTestActivity.this, "" + v.getId(),
                    Toast.LENGTH_SHORT).show();
            break;
        }
    }

    private void closeAnim() {
        ObjectAnimator animator0 = ObjectAnimator.ofFloat(mImageViews.get(0),
                "alpha", 0.5F, 1F);
        ObjectAnimator animator1 = ObjectAnimator.ofFloat(mImageViews.get(1),
                "translationY", 200F, 0);
        ObjectAnimator animator2 = ObjectAnimator.ofFloat(mImageViews.get(2),
                "translationX", 200F, 0);
        ObjectAnimator animator3 = ObjectAnimator.ofFloat(mImageViews.get(3),
                "translationY", -200F, 0);
        ObjectAnimator animator4 = ObjectAnimator.ofFloat(mImageViews.get(4),
                "translationX", -200F, 0);
        AnimatorSet set = new AnimatorSet();
        set.setDuration(500);
        set.setInterpolator(new BounceInterpolator());
        set.playTogether(animator0, animator1, animator2, animator3, animator4);
        set.start();
        mFlag = true;
    }

    private void startAnim() {
        ObjectAnimator animator0 = ObjectAnimator.ofFloat(mImageViews.get(0),
                "alpha", 1F, 0.5F);
        ObjectAnimator animator1 = ObjectAnimator.ofFloat(mImageViews.get(1),
                "translationY", 200F);
        ObjectAnimator animator2 = ObjectAnimator.ofFloat(mImageViews.get(2),
                "translationX", 200F);
        ObjectAnimator animator3 = ObjectAnimator.ofFloat(mImageViews.get(3),
                "translationY", -200F);
        ObjectAnimator animator4 = ObjectAnimator.ofFloat(mImageViews.get(4),
                "translationX", -200F);
        AnimatorSet set = new AnimatorSet();
        set.setDuration(500);
        set.setInterpolator(new BounceInterpolator());
        set.playTogether(animator0, animator1, animator2, animator3, animator4);
        set.start();
        mFlag = false;
    }
} 计时器动画
布局文件:
<RelativeLayout xmlns:android="http://schemas.android.com/apk/res/android"
    xmlns:tools="http://schemas.android.com/tools"
    android:layout_width="match_parent"
    android:layout_height="match_parent"
    tools:context="com.itman.animationdemo.anim.TimerTestActivity" >

    <TextView
        android:layout_width="wrap_content"
        android:layout_height="wrap_content"
        android:layout_centerHorizontal="true"
        android:layout_centerVertical="true"
        android:onClick="tvTimer"
        android:text="Click Me"
        android:textSize="60sp" />

RelativeLayout>
activity代码:
public class TimerTestActivity extends ActionBarActivity {

    @Override
    protected void onCreate(Bundle savedInstanceState) {
        super.onCreate(savedInstanceState);
        setContentView(R.layout.activity_timer_test);
    }

    public void tvTimer(final View view) {
        ValueAnimator valueAnimator = ValueAnimator.ofInt(0, 100);
        valueAnimator
                .addUpdateListener(new ValueAnimator.AnimatorUpdateListener() {
                    @Override
                    public void onAnimationUpdate(ValueAnimator animation) {
                        ((TextView) view).setText("$ "
                                + (Integer) animation.getAnimatedValue());
                    }
                });
        valueAnimator.setDuration(3000);
        valueAnimator.start();

    }
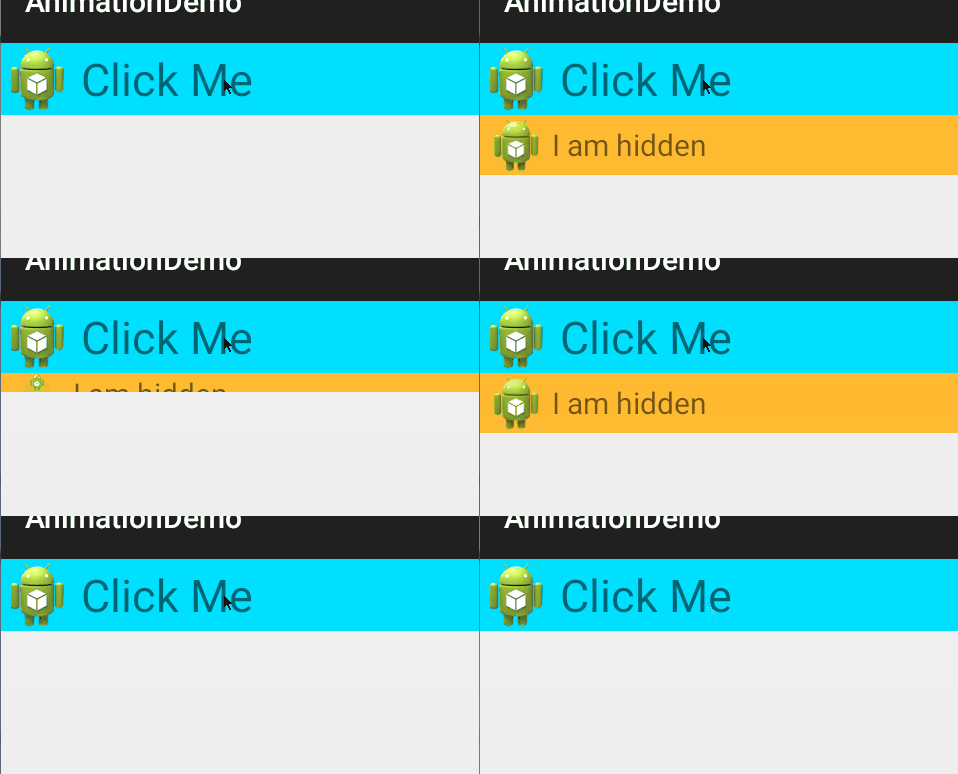
}下拉展开动画
布局文件:
<LinearLayout xmlns:android="http://schemas.android.com/apk/res/android"
    xmlns:tools="http://schemas.android.com/tools"
    android:layout_width="match_parent"
    android:layout_height="match_parent"
    android:orientation="vertical"
    tools:context="com.itman.animationdemo.anim.DropTestActivity" >

    <LinearLayout
        android:layout_width="fill_parent"
        android:layout_height="wrap_content"
        android:background="@android:color/holo_blue_bright"
        android:gravity="center_vertical"
        android:onClick="llClick"
        android:orientation="horizontal" >

        <ImageView
            android:id="@+id/app_icon"
            android:layout_width="wrap_content"
            android:layout_height="wrap_content"
            android:layout_gravity="center"
            android:src="@drawable/ic_launcher" />

        <TextView
            android:layout_width="wrap_content"
            android:layout_height="wrap_content"
            android:layout_marginLeft="5dp"
            android:gravity="left"
            android:text="Click Me"
            android:textSize="30sp" />
    LinearLayout>

    <LinearLayout
        android:id="@+id/hidden_view"
        android:layout_width="match_parent"
        android:layout_height="40dp"
        android:background="@android:color/holo_orange_light"
        android:gravity="center_vertical"
        android:orientation="horizontal"
        android:visibility="gone" >

        <ImageView
            android:layout_width="wrap_content"
            android:layout_height="wrap_content"
            android:layout_gravity="center"
            android:src="@drawable/ic_launcher" />

        <TextView
            android:id="@+id/tv_hidden"
            android:layout_width="wrap_content"
            android:layout_height="match_parent"
            android:gravity="center"
            android:text="I am hidden"
            android:textSize="20sp" />
    LinearLayout>

LinearLayout>
activity代码:
public class DropTestActivity extends ActionBarActivity {

    private LinearLayout mHiddenView;
    private float mDensity;
    private int mHiddenViewMeasuredHeight;

    @Override
    protected void onCreate(Bundle savedInstanceState) {
        super.onCreate(savedInstanceState);
        setContentView(R.layout.activity_drop_test);
        mHiddenView = (LinearLayout) findViewById(R.id.hidden_view);
        // 获取像素密度
        mDensity = getResources().getDisplayMetrics().density;
        // 获取布局的高度
        mHiddenViewMeasuredHeight = (int) (mDensity * 40 + 0.5);
    }

    public void llClick(View view) {
        if (mHiddenView.getVisibility() == View.GONE) {
            // 打开动画
            animateOpen(mHiddenView);
        } else {
            // 关闭动画
            animateClose(mHiddenView);
        }
    }

    private void animateOpen(final View view) {
        view.setVisibility(View.VISIBLE);
        ValueAnimator animator = createDropAnimator(view, 0,
                mHiddenViewMeasuredHeight);
        animator.start();
    }

    private void animateClose(final View view) {
        int origHeight = view.getHeight();
        ValueAnimator animator = createDropAnimator(view, origHeight, 0);
        animator.addListener(new AnimatorListenerAdapter() {
            public void onAnimationEnd(Animator animation) {
                view.setVisibility(View.GONE);
            }
        });
        animator.start();
    }

    private ValueAnimator createDropAnimator(final View view, int start, int end) {
        ValueAnimator animator = ValueAnimator.ofInt(start, end);
        animator.addUpdateListener(new ValueAnimator.AnimatorUpdateListener() {

            @Override
            public void onAnimationUpdate(ValueAnimator valueAnimator) {
                int value = (Integer) valueAnimator.getAnimatedValue();
                ViewGroup.LayoutParams layoutParams = view.getLayoutParams();
                layoutParams.height = value;
                view.setLayoutParams(layoutParams);
            }
        });
        return animator;
    }
}源码下载


