Google Colab 免费 GPU 使用教程
Google Colab 使用说明
原文地址:Google Colab Free GPU Tutorial
我只是大致地翻译了一下,一些地方也加入了我在使用中的理解。
原文说是会不断更新(上次更新2018-01-26),可以关注一下。
我并没有验证文中全部的方法(因为有的没有用到),所以若遇到问题或者有更好的方法,欢迎交流讨论,共同进步。
文章目录
- Google Colab 使用说明
- Google Colab
- 开始使用
- 在Google Drive创建文件夹
- 创建新的Colab Notebook
- 设置GPU
- 运行测试
- 导入或运行.py文件(挂载Google Drive)[最常用]
- 下载Titanic数据集(.csv)并展示
- 克隆Github仓库到Colab
- 一些技巧
- 1.安装所需的库
- Keras
- PyTorch
- MxNet
- OpenCV
- XGBoost
- GraphViz
- 7zip Reader
- 其他第三方库
- 2.GPU是否在工作
- Tensorflow
- Pytorch
- 3.查看使用的GPU
- 4.查看RAM
- 5.查看CPU
- 6.改变工作路径
- 7.“No backend with GPU available“ 错误
- 8.清除所有输出
- 9.“apt-key output should not be parsed (stdout is not a terminal)” 警告
- 10.在Colab使用Tensorboard
- 11.重启Colab
- 12.在Colab添加表单(Form)
- 13.查看函数的参数
- 14.将大文件从 Colab 发送到 Google Drive
- 15.在CoLab中运行Tensorboard
Google Colab
Google Colab 是一个免费的云端科学计算实验平台,它现在支持免费的GPU!
你可以:
- 锻炼Python编程能力
- 使用流行的深度学习库,例如Keras, Tensorflow,Pytorch,OpenCV。
将Colab与其他免费云服务相比最重要的特点就是:提供永久免费的GPU。
更多详细的介绍请了解官方Q&A,Colaboratory
开始使用
在Google Drive创建文件夹
我们可以在自己的Google Drive中使用Colab,使用时可以创建一个文件夹来专门存放所要用到的文件。文中事例文件夹为"app"。
创建新的Colab Notebook
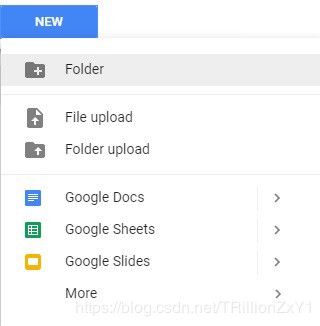
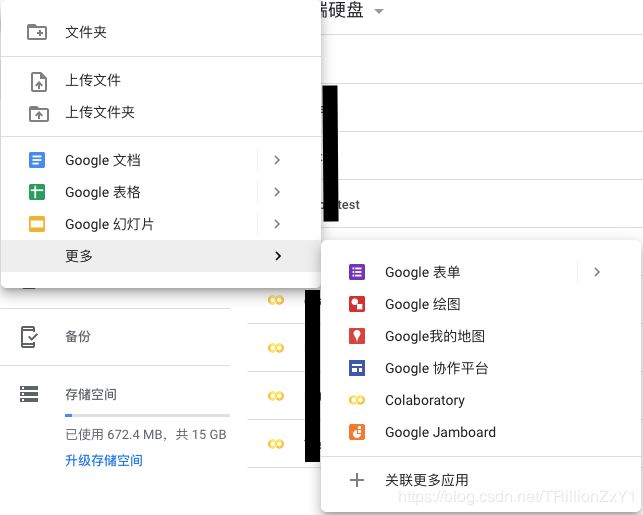
左上角:新建 ——> 更多 ——> Colaboratory
(备注:如果首次使用Drive可能没有Colaboratory,只需要点击关联更多应用,在其中找到Colaboratory即可。)
Colaboratory本质上就是云端的Jupyter Notebook,操作基本相同。
可以点击文件名重命名

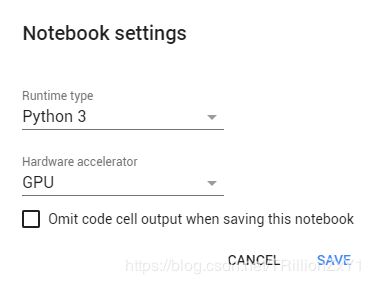
设置GPU
在Colab页面菜单栏,修改——笔记本设置——硬件加速器——保存
运行测试
运行一些简单的Python语句,运行快捷键(Shift + Enter)
导入或运行.py文件(挂载Google Drive)[最常用]
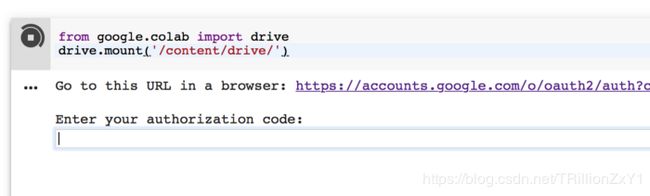
from google.colab import drive
drive.mount('/content/drive/')
运行,得到下图内容,点击链接,出现授权Google Cloud SDK界面,同意后获得一串码,复制粘贴到下图指定位置,完成挂载后会出现Mounted at /content/drive。
通过命令进入你的Google Drive目录(在Colab中,通过在命令前添加!来运行shell命令)
!ls "/content/drive/My Drive/"
下载mnist_cnn.py到"app"文件夹(事例文件夹),运行文件,路径为你的实际存储路径
!python3 "/content/drive/My Drive/app/mnist_cnn.py"
每个epoch只需要11s。
下载Titanic数据集(.csv)并展示
在colab中下载数据集到指定文件夹(如果之前已经进入某个目录下,直接下载就会下载在当前目录)
!wget https://raw.githubusercontent.com/vincentarelbundock/Rdatasets/master/csv/datasets/Titanic.csv -P "/content/drive/My Drive/app"
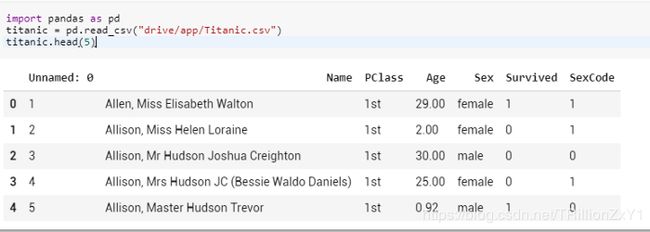
展示数据文件的前五行
import pandas as pd
titanic = pd.read_csv(“/content/drive/My Drive/app/Titanic.csv”)
titanic.head(5)
克隆Github仓库到Colab
直接clone到当前目录下,有时可能会由于网络原因克隆失败,也可以克隆到本地,再将项目上传到Google Drive。
!git clone https://github.com/wxs/keras-mnist-tutorial.git
如果项目中包含.ipynb文件,可以直接用Colab打开运行。
一些技巧
1.安装所需的库
我使用时发现主流深度学习框架是安好的,如果想使用第三方库,直接在colab中安装即可。以下安装没有测试,直接翻译过来了。
Keras
!pip install -q keras
import keras
PyTorch
from os import path
from wheel.pep425tags import get_abbr_impl, get_impl_ver, get_abi_tag
platform = '{}{}-{}'.format(get_abbr_impl(), get_impl_ver(), get_abi_tag())
accelerator = 'cu80' if path.exists('/opt/bin/nvidia-smi') else 'cpu'
!pip install -q http://download.pytorch.org/whl/{accelerator}/torch-0.3.0.post4-{platform}-linux_x86_64.whl torchvision
import torch
或者尝试
!pip3 install torch torchvision
MxNet
!apt install libnvrtc8.0
!pip install mxnet-cu80
import mxnet as mx
OpenCV
!apt-get -qq install -y libsm6 libxext6 && pip install -q -U opencv-python
import cv2
XGBoost
!pip install -q xgboost==0.4a30
import xgboost
GraphViz
!apt-get -qq install -y graphviz && pip install -q pydot
import pydot
7zip Reader
!apt-get -qq install -y libarchive-dev && pip install -q -U libarchive
import libarchive
其他第三方库
!pip install xxxx
!apt-get install xxxx
2.GPU是否在工作
要查看当前是否在Colab中使用GPU,可以运行以下代码以进行交叉检查:
Tensorflow
import tensorflow as tf
tf.test.gpu_device_name()

Pytorch
import torch
torch.cuda.is_available()
3.查看使用的GPU
!/opt/bin/nvidia-smi
使用不同的节点连接会分配不同的GPU,最好的是Tesla T4(15G),一般的是K80。
4.查看RAM
!cat /proc/meminfo

5.查看CPU
!cat /proc/cpuinfo

6.改变工作路径
使用ls查看文件,使用cd改变目录。
可以在一开始直接使用os将工作目录变更到指定目录(app为事例文件夹)
import os
os.chdir("drive/app")
运行后再使用ls查看,就直接进入了drive/app目录下。
7.“No backend with GPU available“ 错误
如果你遇到这个错误:
Failed to assign a backend No backend with GPU available. Would you like to use a runtime with no accelerator?
# 指定后端失败。没有可用的 GPU 后端。可以接受没有加速器运行吗?
出现此错误是很多人在同时使用GPU,GPU资源被占满了,可以稍后再次尝试。
8.清除所有输出
修改——>清除所有输出项
9.“apt-key output should not be parsed (stdout is not a terminal)” 警告
如果你遇到这个警告:
Warning: apt-key output should not be parsed (stdout is not a terminal)
# 警告:apt-key输出无法解析(当前stdout不是终端)
这代表之前那个连接验证已经完成,直接挂载Google Drive即可
!mkdir -p drive
!google-drive-ocamlfuse drive
10.在Colab使用Tensorboard
推荐参看GitHub项目:
https://github.com/mixuala/colab_utils
11.重启Colab
!kill -9 -1
12.在Colab添加表单(Form)
为了避免每次在代码中更改超参数,可以在 Google Colab 中添加表单。
(点击单元格右边的“三点”按钮)
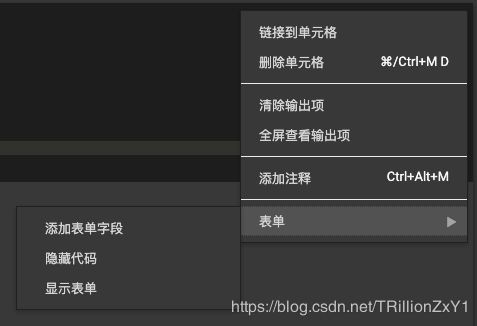
例如,添加了一个包含有 learning_rate(学习率) 变量和 optimizer(优化器) 字符串的表单。

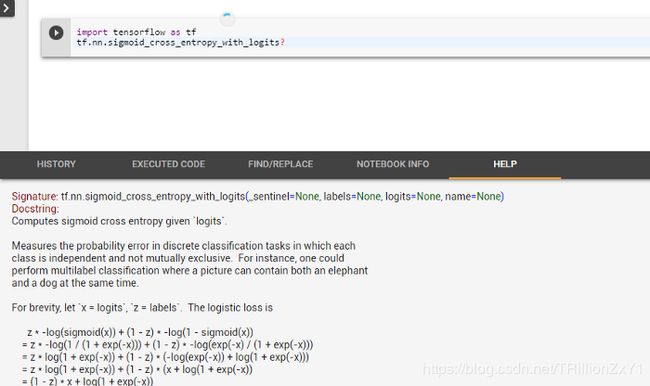
13.查看函数的参数
在 TensorFlow、Keras 等框架中查看方法的参数,可以直接在名称后面添加问号标识符(?),这样不需要点击 TensorFlow 的网站就可以看到原始文档。
14.将大文件从 Colab 发送到 Google Drive
# 需要发送的文件
file_name = "REPO.tar"

from googleapiclient.http import MediaFileUpload
from googleapiclient.discovery import build

auth.authenticate_user()
drive_service = build('drive', 'v3')

def save_file_to_drive(name, path):
  file_metadata = {'name': name, 'mimeType': 'application/octet-stream'}
  media = MediaFileUpload(path, mimetype='application/octet-stream', resumable=True)
  created = drive_service.files().create(body=file_metadata, media_body=media, fields='id').execute()

  return created

save_file_to_drive(file_name, file_name)
15.在CoLab中运行Tensorboard
在 Google Colab 中运行 Tensorboard,需要运行下面的代码。
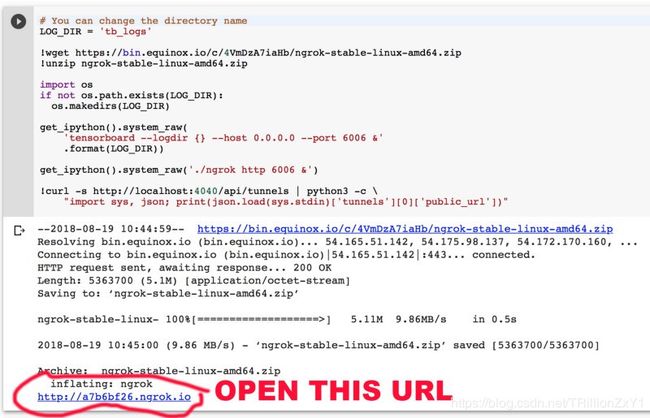
# 你可以改变文件夹名称
LOG_DIR = 'tb_logs'

!wget https://bin.equinox.io/c/4VmDzA7iaHb/ngrok-stable-linux-amd64.zip
!unzip ngrok-stable-linux-amd64.zip

import os
if not os.path.exists(LOG_DIR):
  os.makedirs(LOG_DIR)

get_ipython().system_raw(
    'tensorboard --logdir {} --host 0.0.0.0 --port 6006 &'
    .format(LOG_DIR))

get_ipython().system_raw('./ngrok http 6006 &')

!curl -s http://localhost:4040/api/tunnels | python3 -c \
    "import sys, json; print(json.load(sys.stdin)['tunnels'][0]['public_url'])"
可以使用创建ngrok.io的URL方法追踪Tensorboard,你可以在输出的最后找到这个 URL 链接。
Tensorboard日志保存在tb_logs目录,你可以选择它要保存的路径。
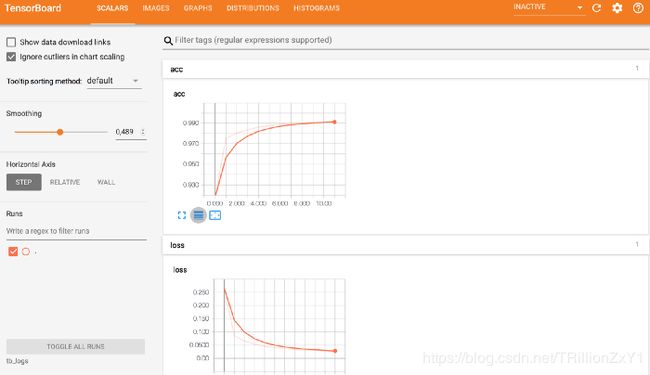
之后,我们就可以看到 Tensorboard 了!运行下面的代码,可以通过 ngrok URL 链接来追踪 Tensorboard 日志。
from __future__ import print_function
import keras
from keras.datasets import mnist
from keras.models import Sequential
from keras.layers import Dense, Dropout, Flatten
from keras.layers import Conv2D, MaxPooling2D
from keras import backend as K
from keras.callbacks import TensorBoard

batch_size = 128
num_classes = 10
epochs = 12

# input image dimensions
img_rows, img_cols = 28, 28

# the data, shuffled and split between train and test sets
(x_train, y_train), (x_test, y_test) = mnist.load_data()

if K.image_data_format() == 'channels_first':
    x_train = x_train.reshape(x_train.shape[0], 1, img_rows, img_cols)
    x_test = x_test.reshape(x_test.shape[0], 1, img_rows, img_cols)
    input_shape = (1, img_rows, img_cols)
else:
    x_train = x_train.reshape(x_train.shape[0], img_rows, img_cols, 1)
    x_test = x_test.reshape(x_test.shape[0], img_rows, img_cols, 1)
    input_shape = (img_rows, img_cols, 1)

x_train = x_train.astype('float32')
x_test = x_test.astype('float32')
x_train /= 255
x_test /= 255
print('x_train shape:', x_train.shape)
print(x_train.shape[0], 'train samples')
print(x_test.shape[0], 'test samples')

# convert class vectors to binary class matrices
y_train = keras.utils.to_categorical(y_train, num_classes)
y_test = keras.utils.to_categorical(y_test, num_classes)

model = Sequential()
model.add(Conv2D(32, kernel_size=(3, 3),
                 activation='relu',
                 input_shape=input_shape))
model.add(Conv2D(64, (3, 3), activation='relu'))
model.add(MaxPooling2D(pool_size=(2, 2)))
model.add(Dropout(0.25))
model.add(Flatten())
model.add(Dense(128, activation='relu'))
model.add(Dropout(0.5))
model.add(Dense(num_classes, activation='softmax'))

model.compile(loss=keras.losses.categorical_crossentropy,
              optimizer=keras.optimizers.Adadelta(),
              metrics=['accuracy'])


tbCallBack = TensorBoard(log_dir=LOG_DIR,
                         histogram_freq=1,
                         write_graph=True,
                         write_grads=True,
                         batch_size=batch_size,
                         write_images=True)

model.fit(x_train, y_train,
          batch_size=batch_size,
          epochs=epochs,
          verbose=1,
          validation_data=(x_test, y_test),
          callbacks=[tbCallBack])
score = model.evaluate(x_test, y_test, verbose=0)
print('Test loss:', score[0])
print('Test accuracy:', score[1])
Tensorboard ?