windows10上安装单机版hbase到使用eclipse连接简单使用hbase
一、首先要安装hadoop 我使用的是hadoop-2.7.4 安装过程网上有很多教程 这里就不写了。
二、首先去官网下载hbase 我下载的是hbase-1.3.0-bin.tar.gz
三、下载好后,选择一个目录解压。我是直接解压到d盘

四、打开hbase解压目录 修改conf/hbase-site.xml文件添加如下内容到hbase-site.xml文件的configuration标签下
<property>
<name>hbase.mastername>
<value>localhost:6000value>
property>
<property>
<name>hbase.master.maxclockskewname>
<value>180000value>
property>
<property>
<name>hbase.rootdirname>
<value>hdfs://localhost:9000/hbasevalue>
property>
<property>
<name>hbase.cluster.distributedname>
<value>falsevalue>
property>
<property>
<name>hbase.zookeeper.quorumname>
<value>localhostvalue>
property>
<property>
<name>hbase.zookeeper.property.dataDirname>
<value>/hbasevalue>
property>
<property>
<name>dfs.replicationname>
<value>1value>
property>
修改 conf/hbase-env.cmd,设置JAVA_HOME,类似于部署hadoop。在文件中添加 set JAVA_HOME=%JAVA_HOME%(我的JDK安装路径设置过环境变量,并且安装路径下没有空格)
添加set HADOOP_HOME=%HADOOP_HOME%(同样也是我设置了hadoop的环境变量,如果没有设置,直接添加hadoop的安装路径)
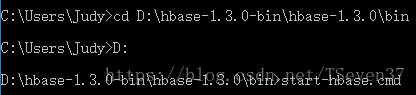
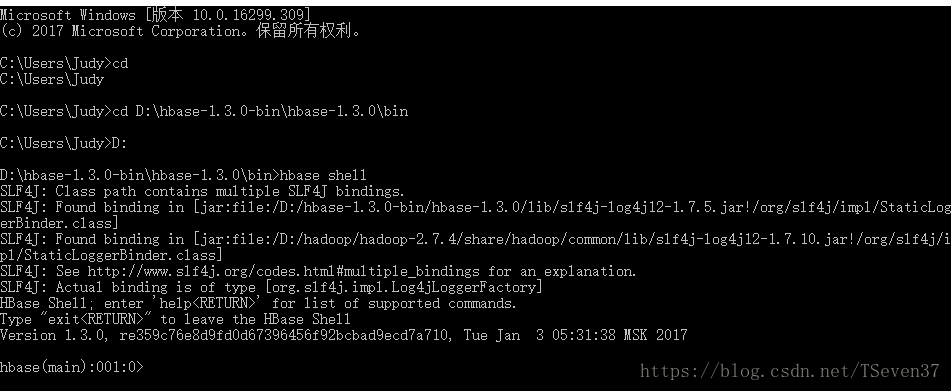
五、打开cmd命令行,
因为配置了环境变量,所以直接使用hadoop namenode -format 格式化hadoop(因为网上的启动hbase教程有这一步 但是我觉得因为后面会导致报错,所以应该不需要执行这一步了吧,但是我没有试过)

选择Y 格式化hadoop

使用start-all.cmd启动hadoop
![]()
但是会报错::::

格式化了再启动Hadoop会报错 是因为namenode 和 datanode里面的clusterID不一样


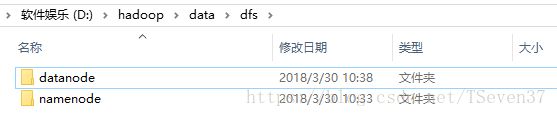


打开datanode和namenode文件夹里面的VERSION
![]()
两个文件里面的这个写成一样,然后再次启动Hadoop。 使用hadoop namenode -format 命令是选择N
![]()
在使用start-all.cmd命令打开个节点就发现不会报错了。

这样hadoop就算是启动成功了
接着在hbase安装目录下的bin目录下执行相关操作。
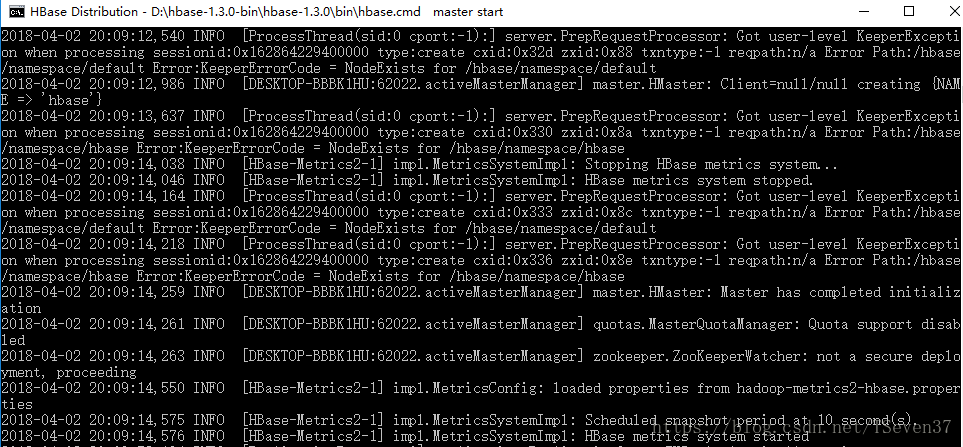
使用start-hbase.cmd 启动hbase的master
![]() 启动habse rest
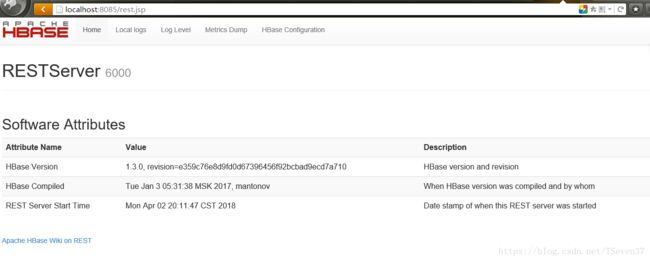
启动habse rest
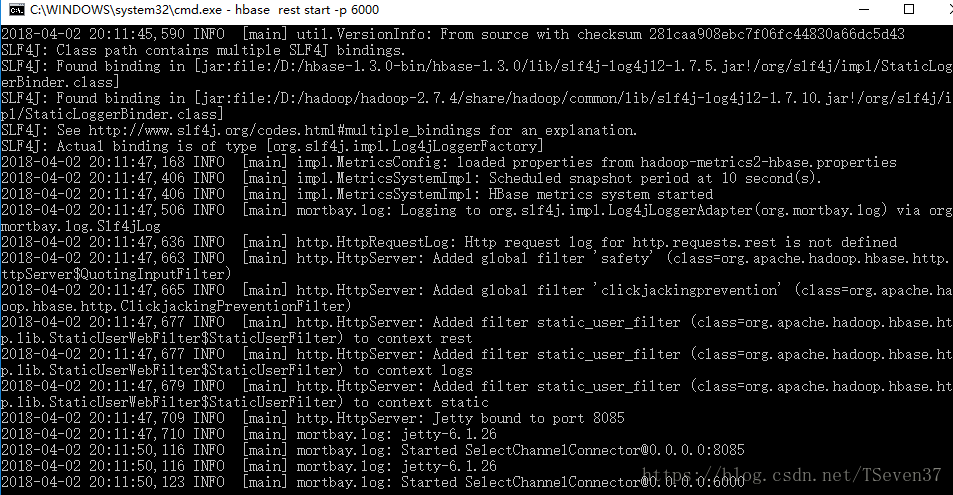
使用localhost:8085访问如下页面表示启动成功。
在eclipse里面创建一个java项目


通过Add External JARs将hbase安装目录下面的lib目录下的jar包按需要导入。还有hadoop安装目录下面的share/tools/lib里面的jar包导入
新建一个conf文件夹 然后将hbase/conf目录下的hbase-site.xml文件添加进去。在执行上面个图片中的Add Class Folder选择这个conf文件夹就可以了。
然后直接上代码 因为我是要交作业写的一个简单的程序
package com.experence.one;
import java.io.IOException;
import java.util.ArrayList;
import org.apache.hadoop.conf.Configuration;
import org.apache.hadoop.hbase.Cell;
import org.apache.hadoop.hbase.CellUtil;
import org.apache.hadoop.hbase.HBaseConfiguration;
import org.apache.hadoop.hbase.HColumnDescriptor;
import org.apache.hadoop.hbase.HTableDescriptor;
import org.apache.hadoop.hbase.MasterNotRunningException;
import org.apache.hadoop.hbase.ZooKeeperConnectionException;
import org.apache.hadoop.hbase.client.Delete;
import org.apache.hadoop.hbase.client.Get;
import org.apache.hadoop.hbase.client.HBaseAdmin;
import org.apache.hadoop.hbase.client.HTable;
import org.apache.hadoop.hbase.client.Put;
import org.apache.hadoop.hbase.client.Result;
import org.apache.hadoop.hbase.client.ResultScanner;
import org.apache.hadoop.hbase.client.Scan;
import org.apache.hadoop.hbase.filter.BinaryComparator;
import org.apache.hadoop.hbase.filter.BinaryPrefixComparator;
import org.apache.hadoop.hbase.filter.CompareFilter.CompareOp;
import org.apache.hadoop.hbase.filter.FamilyFilter;
import org.apache.hadoop.hbase.filter.RowFilter;
import org.apache.hadoop.hbase.util.Bytes;
public class Depart {
//声明静态配置 HBaseConfiguration
static Configuration cfg=null;
static HBaseAdmin admin = null;
/**
*
* 方法功能说明: 连接hbase数据库
* 创建:2018年3月30日 by Judy void
* @throws IOException
* @throws ZooKeeperConnectionException
* @throws MasterNotRunningException
*
*/
public static void setUp() throws Exception {
cfg=HBaseConfiguration.create();
cfg.set("hbase.zookeeper.quorum","localhost");
cfg.set("hbase.zookeeper.property.clientPort","2081");
// 建立客户端程序与HBase集群的connection
admin = new HBaseAdmin(cfg);
System.out.println("连接hbase数据库成功");
}
/**
*
* 方法功能说明: 创建一张表,通过HBaseAdmin HTableDescriptor来创建
* 创建:2018年3月30日 by Judy
* @param tableName
* @param columnFamilies
* @throws Exception
* void
*
*/
public static void creat(String tableName,ArrayList
System.out.println("开始创建表");
HBaseAdmin admin = new HBaseAdmin(cfg);
if (admin.tableExists(tableName)) {
System.out.println("table Exists!");
System.exit(0);
}
else{
HTableDescriptor tableDesc = new HTableDescriptor(tableName);
for(String columnFamily:columnFamilies) {
tableDesc.addFamily(new HColumnDescriptor(columnFamily));
}
admin.createTable(tableDesc);
System.out.println("create table "+tableName+" success!");
}
}
/**
*
* 方法功能说明: 向数据表中插入数据
* 创建:2018年3月30日 by Judy
* @param tableName
* @throws Exception void
*
*/
public static void insertData(String tableName,ArrayList
HTable table = new HTable(cfg,tableName);
ArrayList
//增加顶级部门
//添加行键
Put put = new Put(Bytes.toBytes("0_000"));
//添加base:name=开发部
put.add(Bytes.toBytes("base"),Bytes.toBytes("name"),Bytes.toBytes("createbu"));
for(int i=1;i<10;i++) {
put.add(Bytes.toBytes("subdept"),Bytes.toBytes("1_00"+i),Bytes.toBytes("1_00"+i));
}
puts.add(put);
//一级部门
for(int i=1;i<10;i++) {
put = new Put(Bytes.toBytes("1_00"+i));
put.add(Bytes.toBytes("base"),Bytes.toBytes("name"),Bytes.toBytes(rowkeys.get(i)+"bu"));
put.add(Bytes.toBytes("base"),Bytes.toBytes("pid"),Bytes.toBytes("0_000"));
//二级部门
for(int j=1;j<=30;j++)
{
Put subPut = null;
int bianhao = (i-1)*30+j;
//设置父部门下的子部门编号
if(bianhao < 10) {
put.add(Bytes.toBytes("subdept"),Bytes.toBytes("2_00"+bianhao),Bytes.toBytes("2_00"+bianhao));
subPut = new Put(Bytes.toBytes("2_00"+bianhao));
}else if(10<=bianhao && bianhao < 100) {
put.add(Bytes.toBytes("subdept"),Bytes.toBytes("2_0"+bianhao),Bytes.toBytes("2_0"+bianhao));
subPut = new Put(Bytes.toBytes("2_0"+bianhao));
}
else {
put.add(Bytes.toBytes("subdept"),Bytes.toBytes("2_"+bianhao),Bytes.toBytes("2_"+bianhao));
subPut = new Put(Bytes.toBytes("2_"+bianhao));
}
//设置小组pid
subPut.add(Bytes.toBytes("base"),Bytes.toBytes("pid"),Bytes.toBytes("1_00"+i));
//设置小组name
subPut.add(Bytes.toBytes("base"),Bytes.toBytes("name"),Bytes.toBytes(rowkeys.get(i)+j+"zu"));
puts.add(subPut);
}
puts.add(put);
}
table.put(puts);
}
/**
*
* 方法功能说明: 查询所有没有父部门的顶级部门
* 创建:2018年3月30日 by Judy
* @param tableName void
* @throws Exception
*
*/
public static void selectTopDepart(String tableName) throws Exception {
HTable table = new HTable(cfg, tableName);
//行键过滤器 匹配行键值从0_开始为顶级部门
RowFilter rf = new RowFilter(CompareOp.EQUAL,new BinaryPrefixComparator(Bytes.toBytes("0_")));
Scan s = new Scan();
s.setFilter(rf);
ResultScanner rs = table.getScanner(s);
for(Result r:rs){
System.out.println("Scan: "+r.toString());
System.out.println("rowkey: "+r.getRow().toString());
for(Cell cell:r.rawCells()) {
System.out.println(Bytes.toString(CellUtil.cloneFamily(cell)));
System.out.println(Bytes.toString(CellUtil.cloneQualifier(cell)));
System.out.println(Bytes.toString(CellUtil.cloneRow(cell)));
System.out.println(Bytes.toString(CellUtil.cloneValue(cell)));
}
}
}
/**
*
* 方法功能说明: 已知rowkey,查询该部门的所有(直接)子部门信息
* 创建:2018年3月30日 by Judy
* @param tableName
* @param rowKey void
* @throws Exception
*
*/
public static void selectAllsubdept(String tableName,String rowKey) throws Exception {
HTable table = new HTable(cfg, tableName);
//得到行键下该列族的数据
Get get = new Get(Bytes.toBytes(rowKey));
get.addFamily(Bytes.toBytes("subdept"));
Result r = table.get(get);
for(Cell cell:r.rawCells()) {
//获取子部门信息
Get getce=new Get(CellUtil.cloneValue(cell));
Result rc = table.get(getce);
System.out.println(rc.toString());
}
}
/**
*
* 方法功能说明: 已知rowkey,向该部门增加一个子部
* 创建:2018年3月30日 by Judy
* @param tableName
* @param rowKey void
* @throws Exception
*
*/
public static void addNewSubdept(String tableName,String rowKey) throws Exception {
HTable table = new HTable(cfg, tableName);
//添加子部门 在subdept里面添加一个列
Put put = new Put(Bytes.toBytes(rowKey));
put.add(Bytes.toBytes("subdept"),Bytes.toBytes("2_271"),Bytes.toBytes("2_271"));
table.put(put);
//新增子部门信息 pid为传过来的rowkey
put = new Put(Bytes.toBytes("2_271"));
put.add(Bytes.toBytes("base"),Bytes.toBytes("name"),Bytes.toBytes("money31zu"));
put.add(Bytes.toBytes("base"),Bytes.toBytes("pid"),Bytes.toBytes(rowKey));
table.put(put);
System.out.println("添加成功");
}
/**
*
* 方法功能说明: 已知rowkey(且该部门存在子部门),删除该部门信息,该部门所有(直接)子部门被调整到其他部门中
* 创建:2018年3月30日 by Judy
* @param tableName
* @param rowKey void s
* @throws Exception
*
*/
public static void deleteDept(String tableName,String rowKey , String rowKey2) throws Exception {
HTable table = new HTable(cfg, tableName);
//先查询出该部门下所有的子部门编号
Get get = new Get(Bytes.toBytes(rowKey));
get.addFamily(Bytes.toBytes("subdept"));
Result r = table.get(get);
for(Cell cell:r.rawCells()) {
//修改子部门的pid
Put put = new Put(CellUtil.cloneValue(cell));
put.add(Bytes.toBytes("base"),Bytes.toBytes("pid"),Bytes.toBytes(rowKey2));
table.put(put);
//将这些子部门添加到新的部门中
put = new Put(Bytes.toBytes(rowKey2));
put.add(Bytes.toBytes("subdept"),CellUtil.cloneValue(cell),CellUtil.cloneValue(cell));
table.put(put);
}
Delete delete = new Delete(Bytes.toBytes(rowKey));
table.delete(delete);
System.out.println("删除成功");
}
public static void main(String [] args) throws Exception {
// 创建连接
setUp();
String tableName = "dept";
// 创建表
// ArrayList
// columnFamilies.add("base");
// columnFamilies.add("subdept");
// creat(tableName,columnFamilies);
//使用循环向表中插入200条数据
ArrayList
rowkeys.add("create");
rowkeys.add("test");
rowkeys.add("sell");
rowkeys.add("product");
rowkeys.add("people");
rowkeys.add("net");
rowkeys.add("manage");
rowkeys.add("message");
rowkeys.add("ad");
rowkeys.add("money");
insertData(tableName,rowkeys);
System.out.println("插入数据成功");
// //查询顶级部门 0_开始为顶级部门
// selectTopDepart(tableName);
// //已知rowkey 查询子部门信息
// selectAllsubdept(tableName,"1_001");
// //增加新部门
// addNewSubdept(tableName,"1_009");
// //删除部门 迁移子部门
// deleteDept(tableName,"1_009","1_008");
//// 关闭connection
admin.close();
}
}
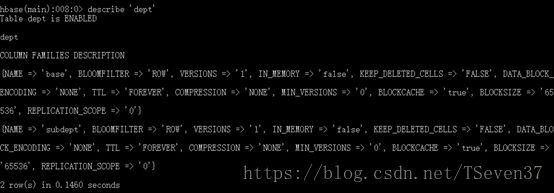
首先list发现没有表

在main方法中执行以上函数后:

其实在运行过程中应该不会这么顺利 错误的情况下次再贴上来吧////
当然最后要感谢那些帮助到我的博客 因为找不到连接了 所以就不能贴上来