ubuntu19 环境下 vscode 配置c++
vscode是一个文本编辑器,类似于editplus, 在上面有很多插件,在无法使用正版visual studio的情况下是一个比较常见的C++ 开发替代选择,但请注意,他并不能完全等同于IDE.
- 安装vscode
windows下下载安装包,按一般软件的方式安装
下载地址:
https://code.visualstudio.com...
linux下可以使用命令直接安装,也可以下载.deb包安装
sudo apt-get update
sudo apt-get install ubuntu-make

sudo umake ide visual-studio-code
2.安装cpptools 插件
正常情况下,无论是在windows还是在linux,点击vscode下的extensions的标签,然后输入cpptools,会自动帮你找到这个插件
但我的linux死活连不上extension marketplace, vscode里面配置好了代理依然不行,可以试试下面这个命令
code --install-extension ms-vscode.cpptools
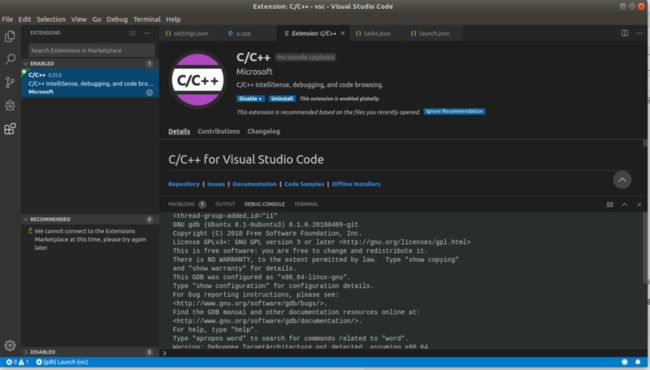
安装完成以后如图所示,extensions里面有一个c/c++的插件
3.安装C++的编译器/库
在windows下需要安装一个叫mingw的东西
下载地址:
https://sourceforge.net/proje...
会让你下载一个叫minw-get-setup.exe的东西
这里假设你把MingGW安装在C盘根目录下
安装完成后需要在环境变量的Path里面加入 C:MinGWbin
在ubuntu下只需要执行命令
sudo apt install gcc安装完成以后在windows命令行或者linux的terminal窗口运行gcc -v 确认是否安装成功
4.添加配置
创建一个文件夹,添加一个测试用的文件test.cpp
#include
using namespace std;

int main() {
    cout << "!!!Hello World!!!" << endl; // prints !!!Hello World!!!
    getchar();
    return 0;
}
到这里,你如果参考网上的教程,可能会感觉到有点怪异,因为我们以前使用IDE的时候,直接找两个按钮或者菜单,编译,运行/调试,就可以跑起来了,但那是IDE.
vscode 只是一个文本编辑器,在vscode里面,需要通过插件来完成编译,运行的流程
所以需要额外增加两个配置文件来完成这个事情,这两个配置文件要放在一个叫.vscode目录下面,你可以在你的workspace目录下创建这个目录
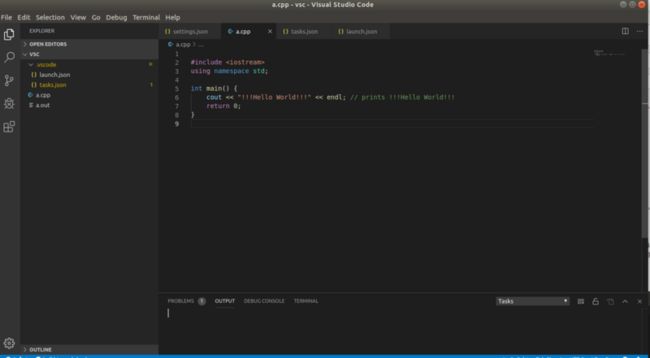
你可以在菜单栏里面选择Terminal-->Configure Tasks,会自动帮你生成这个.vscode目录
在.vscode目录下面添加一个文件launch.json
launch.json (linux)
{
    "version": "0.2.0",
    "configurations": [
        {
            "name": "(gdb) Launch",
            "type": "cppdbg",
            "request": "launch",
            "program": "${workspaceFolder}/${fileBasenameNoExtension}.out",
            "args": [],
            "stopAtEntry": false,
            "cwd": "${workspaceFolder}",
            "environment": [],
            "externalConsole": true,
            "MIMode": "gdb",
            "preLaunchTask":"build",
            "setupCommands": [
                {
                    "description": "Enable pretty-printing for gdb",
                    "text": "-enable-pretty-printing",
                    "ignoreFailures": true
                }
            ]
        }
    ]
}
windows下大同小异,注意下文件目录的格式,这里要注意的是miDebuggerPath项要和你上一步mingw安装目录一致
launch.json (windows)
{
    "version": "0.2.0",
    "configurations": [
        {
            "name": "(gdb) Launch",
            "type": "cppdbg",
            "request": "launch",
            "program": "${workspaceFolder}/${fileBasenameNoExtension}.exe",
            "args": [],
            "stopAtEntry": false,
            "cwd": "${workspaceFolder}",
            "environment": [],
            "externalConsole": true,
            "MIMode": "gdb",
            "miDebuggerPath":"C:\\MinGW\\bin\\gdb.exe",
            "preLaunchTask":"build",
            "setupCommands": [
                {
                    "description": "Enable pretty-printing for gdb",
                    "text": "-enable-pretty-printing",
                    "ignoreFailures": true
                }
            ]
        }
    ]
}
这个launch.json就是告诉vscode,你在点运行的时候要干点啥。这里我们是调用之前的cpptools插件, 在linux下他会执行test.out文件,在windows下会起一个CMD窗口运行一个test.exe文件.
这里运行哪个文件是program那一项决定的,这个文件怎么来的呢,当然要先编译,所以这里就需要另一个配置文件tasks.json
preLaunchTask这一项要配置成task的label
tasks.json (linux)
{
    "tasks": [
        {
            "label": "build",
            "type": "shell",
            "command": "g++",
            "args": ["-g", "${file}", "-std=c++11", "-o", "${fileBasenameNoExtension}.out"]
        }
     ]
}
tasks.json(windows)
{
    "tasks": [
        {
            "label": "build",
            "version": "0.1.0",
            "command": "g++",
            "args": ["-g","-std=c++11","${file}","-o","${fileDirname}\\${fileBasenameNoExtension}.exe"],
            "problemMatcher": {
                "owner": "cpp",
                "fileLocation": ["relative", "${workspaceRoot}"],
                "pattern": {
                    "regexp": "^(.*):(\\d+):(\\d+):\\s+(warning|error):\\s+(.*)$",
                "file": 1,
                "line": 2,
                "column": 3,
                "severity": 4,
                "message": 5
                }
            }
        }
     ]
}
5 执行
这时候按F5,顺利的话会看到vscode会帮我们编译这个cpp文件,并在当前目录下生成.out(linux)/.exe(windows)文件
这里实质上是调用的gcc -g test.cpp -std=c++11 -o test.out,这个编译命令就是在tasks里面配置的
如果编译失败,没有生成对应的out/exe文件,就会弹出一个窗口说这个文件找不到


