部署Nginx搭建HTTPS服务器
文章目录
- 安装Nginx
- 1. 下载源码
- 2. 编译安装
- 3. 验证
- 4. 创建软连接
- 5. 设置Nginx开机自启动
- 搭建HTTPS服务器
- 1. 修改Nginx配置
- 2. 通过openssl生成证书
- 3. 配置nginx,支持https访问
- 4. 启动nginx并访问
安装Nginx
本次安装的nginx版本为1.15.9,基于CentOS7.7系统默认自带的OpenSSL 1.0.2k-fips
1. 下载源码
# 下载
[root@baihl baihl]# wget http://nginx.org/download/nginx-1.15.9.tar.gz

#解压
[root@baihl baihl]# tar -xvf nginx-1.15.9.tar.gz
2. 编译安装
#进入解压后的nginx源码目录
[root@baihl baihl]# cd nginx-1.15.9/

#配置参数,配置参数中增加--with-http_ssl_module,为了支持ssl
./configure  --prefix=/usr/local/nginx --with-http_stub_status_module --with-http_ssl_module

#编译
[root@baihl baihl]# make

#安装
[root@baihl baihl]# make install
3. 验证
安装完成之后,则可以在刚才指定的安装目录/usr/local/nginx中查看到,如下:

可以执行如下命令,查看下nginx的版本等信息进行验证:
[root@baihl baihl]# /usr/local/nginx/sbin/nginx -V
nginx version: nginx/1.15.9
built by gcc 4.8.5 20150623 (Red Hat 4.8.5-39) (GCC)
built with OpenSSL 1.0.2k-fips  26 Jan 2017
TLS SNI support enabled
configure arguments: --prefix=/usr/local/nginx --with-http_stub_status_module --with-http_ssl_module
4. 创建软连接
[root@baihl baihl]# ln -s /usr/local/nginx/sbin/nginx /usr/bin/nginx
5. 设置Nginx开机自启动
- 在系统服务目录里创建nginx.service文件
vi /usr/lib/systemd/system/nginx.service
- 在文件中写如下内容:
[Unit]
Description=nginx
After=network.target

[Service]
Type=forking
ExecStart=/usr/local/nginx/sbin/nginx
ExecReload=/usr/local/nginx/sbin/nginx -s reload
ExecStop=/usr/local/nginx/sbin/nginx -s quit
PrivateTmp=true

[Install]
WantedBy=multi-user.target
[Unit] : 服务的说明
Description:描述服务
After:描述服务类别
[Service]服务运行参数的设置
Type=forking是后台运行的形式
ExecStart为服务的具体运行命令
ExecReload为重启命令
ExecStop为停止命令
PrivateTmp=True表示给服务分配独立的临时空间
注意:[Service]的启动、重启、停止命令全部要求使用绝对路径[Install]运行级别下服务安装的相关设置,可设置为多用户,即系统运行级别为3
- 设置开机自启动
[root@baihl baihl]# systemctl enable nginx.service
- 重启设备
重启设备,看设置的自启动是否生效
[root@baihl baihl]# reboot
- 查看nginx状态
设备启动后查看nginx服务状态
[root@baihl ~]# systemctl status nginx.service
● nginx.service - nginx
   Loaded: loaded (/usr/lib/systemd/system/nginx.service; enabled; vendor preset: disabled)
   Active: active (running) since 二 2020-02-18 16:26:54 CST; 1min 16s ago
  Process: 1534 ExecStart=/usr/local/nginx/sbin/nginx (code=exited, status=0/SUCCESS)
 Main PID: 1547 (nginx)
    Tasks: 2
   CGroup: /system.slice/nginx.service
           ├─1547 nginx: master process /usr/local/nginx/sbin/nginx
           └─1549 nginx: worker process

2月 18 16:26:54 baihl systemd[1]: Starting nginx...
2月 18 16:26:54 baihl systemd[1]: Started nginx.
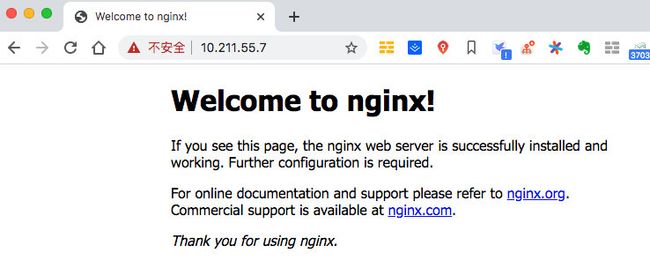
- 使用浏览器访问nginx

可以正常访问。
注意:如果使用其他设备的浏览器无法访问nginx问题,连接失败等报错,可以尝试关闭CentOS的防火墙
#关闭防火墙
[root@baihl ~]# systemctl stop firewalld.service

#设置防火墙开机不启动
[root@baihl ~]# systemctl disable firewalld.service
Removed symlink /etc/systemd/system/multi-user.target.wants/firewalld.service.
Removed symlink /etc/systemd/system/dbus-org.fedoraproject.FirewallD1.service.
搭建HTTPS服务器
完成上边步骤之后,只能通过HTTP访问nginx,但无法使用HTTPS访问,下边具体配置HTTPS访问Nginx
1. 修改Nginx配置
nginx的配置文件路径在/usr/local/nginx/conf,主要关注nginx.conf文件,打开nginx.conf如下
#运行nginx的用户
#user  nobody;
#启动进程设置成和CPU数量相等
worker_processes  1;

#全局错误日志及PID文件的位置
#error_log  logs/error.log;
#error_log  logs/error.log  notice;
#error_log  logs/error.log  info;

#pid        logs/nginx.pid;

#工作模式及连接数上限
events {
    #单个后台work进程最大并发数设置为1024
    worker_connections  1024;
}


http {
    include       mime.types;
    default_type  application/octet-stream;

    #log_format  main  '$remote_addr - $remote_user [$time_local] "$request" '
    #                  '$status $body_bytes_sent "$http_referer" '
    #                  '"$http_user_agent" "$http_x_forwarded_for"';

    #access_log  logs/access.log  main;

    sendfile        on;
    #tcp_nopush     on;

    #keepalive_timeout  0;
    keepalive_timeout  65;

    #gzip  on;

    server {
        listen       80;
        server_name  localhost;

        #charset koi8-r;

        #access_log  logs/host.access.log  main;

        location / {
            root   html;
            index  index.html index.htm;
        }

        #error_page  404              /404.html;

        # redirect server error pages to the static page /50x.html
        #
        error_page   500 502 503 504  /50x.html;
        location = /50x.html {
            root   html;
        }

        # proxy the PHP scripts to Apache listening on 127.0.0.1:80
        #
        #location ~ \.php$ {
        #    proxy_pass   http://127.0.0.1;
        #}

        # pass the PHP scripts to FastCGI server listening on 127.0.0.1:9000
        #
        #location ~ \.php$ {
        #    root           html;
        #    fastcgi_pass   127.0.0.1:9000;
        #    fastcgi_index  index.php;
        #    fastcgi_param  SCRIPT_FILENAME  /scripts$fastcgi_script_name;
        #    include        fastcgi_params;
        #}

        # deny access to .htaccess files, if Apache's document root
        # concurs with nginx's one
        #
        #location ~ /\.ht {
        #    deny  all;
        #}
    }


    # another virtual host using mix of IP-, name-, and port-based configuration
    #
    #server {
    #    listen       8000;
    #    listen       somename:8080;
    #    server_name  somename  alias  another.alias;

    #    location / {
    #        root   html;
    #        index  index.html index.htm;
    #    }
    #}


    # HTTPS server
    #
    #server {
    #    listen       443 ssl;
    #    server_name  localhost;

    #    ssl_certificate      cert.pem;
    #    ssl_certificate_key  cert.key;

    #    ssl_session_cache    shared:SSL:1m;
    #    ssl_session_timeout  5m;

    #    ssl_ciphers  HIGH:!aNULL:!MD5;
    #    ssl_prefer_server_ciphers  on;

    #    location / {
    #        root   html;
    #        index  index.html index.htm;
    #    }
    #}

}
可以看到,上边server只监听了80端口,即HTTP访问端口。可以看到最后的几行被注释的就是HTTPS的配置。在配置https之前。我们需要拥有自己的证书和私钥,最后需要把证书和私钥添加到配置中。
2. 通过openssl生成证书
- 设置server.key,这里需要设置两遍密码:
openssl genrsa -des3 -out server.key 1024
- 参数设置,首先这里需要输入之前设置的密码:
openssl req -new -key server.key -out server.csr
然后需要输入如下的信息,大概填一下就可以了,反正是测试用的
[root@baihl ssl]# openssl req -new -key server.key -out server.csr
Enter pass phrase for server.key:
You are about to be asked to enter information that will be incorporated
into your certificate request.
What you are about to enter is what is called a Distinguished Name or a DN.
There are quite a few fields but you can leave some blank
For some fields there will be a default value,
If you enter '.', the field will be left blank.
-----
Country Name (2 letter code) [XX]:CN
State or Province Name (full name) []:Beijing
Locality Name (eg, city) [Default City]:Beijing
Organization Name (eg, company) [Default Company Ltd]:venus
Organizational Unit Name (eg, section) []:venus
Common Name (eg, your name or your server's hostname) []:baihl
Email Address []:[email protected]

Please enter the following 'extra' attributes
to be sent with your certificate request
A challenge password []:123456
An optional company name []:venus
- 写RSA秘钥(这里也要求输入之前设置的密码):
openssl rsa -in server.key -out server_nopwd.key
这里获取出来的server_nopwd.key就是私钥,未加密的私钥
- 导出证书
openssl x509 -req -days 365 -in server.csr -signkey server_nopwd.key -out server.crt
完成这一步之后就得到了我们需要的证书文件和私钥了
- server.crt
- server_nopwd.key
3. 配置nginx,支持https访问
把刚才生成的server.crt和server_nopwd.key拷贝到/usr/local/nginx/conf/ssl目录下,修改nginx.conf文件中的https配置如下:
# HTTPS server
 server {
     listen       443 ssl;
     server_name  localhost;

     #增加ssl
     #ssl on;  #如果强制HTTPS访问,这行要打开
     ssl_certificate      ./ssl/server.crt;
     ssl_certificate_key  ./ssl/server_nopwd.key;

     #指定缓存大小为1m
     ssl_session_cache    shared:SSL:1m;
     #指定缓存时间为1分钟
     ssl_session_timeout  1m;
     #关闭默认开启的ssl_session_tickets
     ssl_session_tickets off;

     #设定支持的TLS协议版本
     ssl_protocols TLSv1 TLSv1.1 TLSv1.2;
     #配置密码套件
     ssl_ciphers  HIGH:!aNULL:!MD5:!ADH:!RC4:!DH:!DHE:!ECDHE;
     ssl_prefer_server_ciphers  on;

     location / {
         root   html;
         index  index.html index.htm;
     }
 }
上述配置中,由于目前开发测试需求,暂时屏蔽了RC4、DH、DHE、ECDHE这几个算法
4. 启动nginx并访问
完成上述配置以后,保存退出,使用如下命令检查配置的正确性:
[root@baihl ssl]# nginx -t
nginx: the configuration file /usr/local/nginx/conf/nginx.conf syntax is ok
nginx: configuration file /usr/local/nginx/conf/nginx.conf test is successful
如果配置没问题,则需要重新加载启动nginx,执行如下命令:
[root@baihl ssl]# nginx -s reload
完成以后下边可以在浏览器中使用https访问nginx了,首次访问,由于我们使用的是自签名的证书,会出现如下错误:

在如上页面中直接点击“继续前往”就可以访问了