Android & MCU之间的串口通信(收发数据)
最近一个项目是android和MCU之间的串口指令数据通信,捣鼓了很久,也找了很多网上的资料。最后将实现的总结记录下来。
使用的是GitHub中的一个项目,下载地址:https://github.com/cepr/android-serialport-api
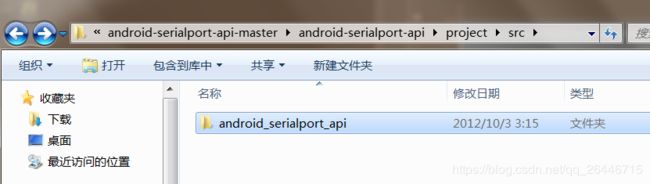
下载解压后会出现两个文件夹,我们使用的是这个,如图:
复制整个文件夹到项目的java目录下,不要变更名字,名字是跟里面的东西相关的,变更后会报错,如图:

再将android_serialport_api下的除了drawable下的其他资源文件复制粘贴到项目中对应的文件下,如图:

再将jni和lib下的文件也都复制到项目中,如图:


接下来配置model的build.gradle
在android下的defaultConfig 添加ndk,如图:

ndk{
    abiFilters "armeabi-v7a"
}
ndk{
    moduleName "serial_port"
    abiFilters "armeabi", "armeabi-v7a", "x86"
}
ndk{
    ldLibs "log"
}
在android下添加,引用jni:
sourceSets{
    main{
        jni.srcDirs = []
    }
}注:targetSdkVersion版本要22以下,22以上会报错奔溃
至此,配置完成。接下来就是打开和使用串口通信了
串口使用到的数据定义:
/**
 * 标记当前串口状态(true:打开,false:关闭)
 **/
public static boolean isFlagSerial = false;
public static SerialPort serialPort = null;
public static InputStream inputStream = null;
public static OutputStream outputStream = null;
public static Thread receiveThread = null;
public static String strData = "";
打开串口,在oncreate()中调用open(),可根据返回值来确认串口是否打开成功,需要注意的是
serialPort = new SerialPort(new File("/dev/ttyS2"), 9600, 0);
/dev/ttyS2 : 表示串口号,根据自身设备更换,一般为ttyS2,ttyS3
9600 : 波特率,根据模块设定而更换
0 : 校验位,固定为0即可
/**
 * 打开串口
 */
public boolean open() {
    boolean isopen = false;
    if (isFlagSerial) {
        Log.i("1111111", "串口已经打开,打开失败");
        return false;
    }
    try {
        serialPort = new SerialPort(new File("/dev/ttyS2"), 9600, 0);
        inputStream = serialPort.getInputStream();
        outputStream = serialPort.getOutputStream();
        receive();
        isopen = true;
        isFlagSerial = true;
    } catch (IOException e) {
        e.printStackTrace();
        isopen = false;
    }
    return isopen;
}
关闭串口没什么好说明的,顾名思义,在退出应用时调用
/**
 * 关闭串口
 */
public boolean close() {
    if (isFlagSerial) {
        Log.i("1111111", "串口关闭失败");
        return false;
    }
    boolean isClose = false;
    Log.i("1111111", "关闭串口");
    try {
        if (inputStream != null) {
            inputStream.close();
        }
        if (outputStream != null) {
            outputStream.close();
        }
        isClose = true;
        isFlagSerial = false;//关闭串口时,连接状态标记为false
    } catch (IOException e) {
        e.printStackTrace();
        isClose = false;
    }
    return isClose;
}
发送串口指令,这个是android下发数据到mcu时调用,一般用于mcu上发数据给android端,android发特定指令回应指令发送给mcu。
data : 为string类型,定义下发指令时为byte[]类型,需要转换成string
十进制指令:byte data[] = new byte[]{104, 81, 03, 00, 00, 25, 85};十六进制指令:byte data[] = new byte[]{0x68, 0x51, 0x03, 0x00, 0x00, 0x19, 0x55};
sendString(ByteUtil.getSum16(ms, ms.length)); //发送指令我一般使用的是十进制指令,因为十六进制指令有时是0xBA这种两个字母时,会出错。使用十进制指令要将mcu给的指令转成
十进制,因为mcu给的都会是十六进制的数值。byte[]转string的工具类会在文章末贴出,网上也很容易找到
/**
 * 发送串口指令
 */
public void sendString(String data) {
    Toast.makeText(MainActivity.this, "发送串口指令 : " + data, Toast.LENGTH_SHORT).show();
    if (!isFlagSerial) {
        Log.i("1111111", "串口未打开,发送失败" + data);
        return;
    }
    try {
        outputStream.write(ByteUtil.hex2byte(data));
        outputStream.flush();
        Log.i("1111111", "sendSerialData:" + data);
    } catch (IOException e) {
        e.printStackTrace();
        Log.i("1111111", "发送指令出现异常");
    }
}
接收串口数据,此方法为接收mcu上发给android的指令数据方法。
strData : 上发的数据,根据数据进行处理,实现各需功能
/**
 * 接收串口数据的方法
 */
public void receive() {
    if (receiveThread != null && !isFlagSerial) {
        return;
    }
    receiveThread = new Thread() {
        @Override
        public void run() {
            while (isFlagSerial) {
                try {
                    byte[] readData = new byte[32];
                    if (inputStream == null) {
                        return;
                    }
                    int size = inputStream.read(readData);
                    if (size > 0 && isFlagSerial) {
                        strData = ByteUtil.byteToStr(readData, size);
                        Message msg = new Message();
                        msg.what = 0x10;
                        msg.obj = strData;
                        handler.sendMessage(msg);
                        Log.i("1111111", "readSerialData:" + strData);
                    }
                } catch (IOException e) {
                    e.printStackTrace();
                }
            }
        }
    };
    receiveThread.start();
}
串口通信类,复制粘贴即可使用,我这里是将这些方法写在MainActivity下,也可以写成一个工具类调用,由你们决定。下面将byte[]和string的转换工具类贴一下出来
public class ByteUtil {

    /**
     * 字符串转化成为16进制字符串
     *
     * @param s
     * @return
     */
    public static String strTo16(String s) {
        String str = "";
        for (int i = 0; i < s.length(); i++) {
            int ch = (int) s.charAt(i);
            String s4 = Integer.toHexString(ch);
            str = str + s4;
        }
        return str;
    }
    /**
     * 16进制转换成为string类型字符串
     *
     * @param s
     * @return
     */
    public static String hexStringToString(String s) {
        if (s == null || s.equals("")) {
            return null;
        }
        s = s.replace(" ", "");
        byte[] baKeyword = new byte[s.length() / 2];
        for (int i = 0; i < baKeyword.length; i++) {
            try {
                baKeyword[i] = (byte) (0xff & Integer.parseInt(s.substring(i * 2, i * 2 + 2), 16));
            } catch (Exception e) {
                e.printStackTrace();
            }
        }
        try {
            s = new String(baKeyword, "UTF-8");
            new String();
        } catch (Exception e1) {
            e1.printStackTrace();
        }
        return s;
    }
    /**
     * 向串口发送数据转为字节数组
     */
    public static byte[] hex2byte(String hex) {
        String digital = "0123456789ABCDEF";
        String hex1 = hex.replace(" ", "");
        char[] hex2char = hex1.toCharArray();
        byte[] bytes = new byte[hex1.length() / 2];
        byte temp;
        for (int p = 0; p < bytes.length; p++) {
            temp = (byte) (digital.indexOf(hex2char[2 * p]) * 16);
            temp += digital.indexOf(hex2char[2 * p + 1]);
            bytes[p] = (byte) (temp & 0xff);
        }
        return bytes;
    }
    /**
     * 接收到的字节数组转换16进制字符串
     */
    public static String bytes2HexString(byte[] b, int size) {
        String ret = "";
        for (int i = 0; i < size; i++) {
            String hex = Integer.toHexString(b[i] & 0xFF);
            if (hex.length() == 1) {
                hex = '0' + hex;
            }
            ret += hex.toUpperCase();
        }
        return ret;
    }
    public static String bytesToHexString(byte[] src) {
        StringBuilder stringBuilder = new StringBuilder("");
        if (src == null || src.length <= 0) {
            return null;
        }
        for (int i = 0; i < src.length; i++) {
            int v = src[i] & 0xFF;
            String hv = Integer.toHexString(v);
            if (hv.length() < 2) {
                stringBuilder.append(0);
            }
            stringBuilder.append(hv);
        }
        return stringBuilder.toString();
    }
    /**
     * 接收到的字节数组转换16进制字符串
     */
    public static String byteToStr(byte[] b, int size) {
        String ret = "";
        for (int i = 0; i < size; i++) {
            String hex = Integer.toHexString(b[i] & 0xFF);
            if (hex.length() == 1) {
                hex = '0' + hex;
            }
            ret += hex.toUpperCase();
        }
        return ret;
    }

    /**
     * 计算CRC16校验码
     * 逐个求和
     *
     * @param bytes 字节数组
     * @return {@link String} 校验码
     * @since 1.0
     */
    public static String getCRC_16(byte[] bytes) {
        int CRC = 0x0000ffff;
        int POLYNOMIAL = 0x0000a001;
        int i, j;
        for (i = 0; i < bytes.length; i++) {
            CRC ^= ((int) bytes[i] & 0x000000ff);
            for (j = 0; j < 8; j++) {
                if ((CRC & 0x00000001) != 0) {
                    CRC >>= 1;
                    CRC ^= POLYNOMIAL;
                } else {
                    CRC >>= 1;
                }
            }
        }
        if (Integer.toHexString(CRC).toUpperCase().length() == 2) {
            return byteToStr(bytes, bytes.length) + "00" + Integer.toHexString(CRC).toUpperCase();
        } else if (Integer.toHexString(CRC).toUpperCase().length() == 3) {
            return byteToStr(bytes, bytes.length) + "0" + Integer.toHexString(CRC).toUpperCase();
        }
        return byteToStr(bytes, bytes.length) + Integer.toHexString(CRC).toUpperCase();
    }

    /**
     * 指令校验和,并取出后两位字节
     * */
    public static String getSum16(byte[] msg, int length) {
        long mSum = 0;
        byte[] mByte = new byte[length];

        /** 逐Byte添加位数和 */
        for (byte byteMsg : msg) {
            long mNum = ((long) byteMsg >= 0) ? (long) byteMsg : ((long) byteMsg + 256);
            mSum += mNum;
        } /** end of for (byte byteMsg : msg) */

        /** 位数和转化为Byte数组 */
        for (int liv_Count = 0; liv_Count < length; liv_Count++) {
            mByte[length - liv_Count - 1] = (byte) (mSum >> (liv_Count * 8) & 0xff);
        } /** end of for (int liv_Count = 0; liv_Count < length; liv_Count++) */
        return byteToStr(msg, length) + byteToStr(mByte, mByte.length).substring(byteToStr(mByte,       mByte.length).length() - 4, byteToStr(mByte, mByte.length).length());
    }

}
至此,END。