使用奥比中光Orbbec Astra Pro在ROS下跑orb_slam2
使用奥比中光Orbbec Astra Pro在ROS下跑orb_slam2
- 一、奥比中光摄像头驱动
- 1. Install ROS
- 1) Create a ROS Workspace(if you don't have one)
- 2) Create a .sh documentation
- 2. Install dependences
- 3. Pull the repository into your ROS workspace
- 4.Create astra udev rule
- 5. Go to catkin workspace and compile astra_camera
- 6. Run astra_camera
- 7. 查看rostopic
- 8. 打开rviz查看图像
- 无法显示rgb图的解决方案
- 1) 使用libuvc
- 2) 更改product ID号
- 二、安装ORB_SLAM2
- 1. 编译
- 2.使用TUM数据集测试
- 三、运行实时ORB_SLAM2
- 1. 编译ROB_SLAM2的ros程序
- 2. 实时运行
- 3.标定摄像头(为了防止镜头下的图片发生畸变)
学习视觉slam摄像图是必须的,由于学校的INDEMIND模组没有的带回家,所以就整了一个奥比中光Orbbec Astra Pro摄像头,先跑一下历程试试。记录一下自己的配置过程!!!
一、奥比中光摄像头驱动
首先安装摄像头驱动,参照这个网址进行配置:https://github.com/orbbec/ros_astra_camera
1. Install ROS
1) Create a ROS Workspace(if you don’t have one)
mkdir -p ~/catkin_ws/src
cd ~/catkin_ws/
catkin_make
source devel/setup.bash
2) Create a .sh documentation
cd ~/catkin_ws
touch install.sh
将以下代码复制到install.sh文件中
#!/bin/bash

# Varibles
rosversion="kinetic"
# Install the ros

if [ `id -u` == 0 ]; then
	echo "Don't running this use root(sudo)."
	exit 0
fi

echo "Start to install the ros, http://wiki.ros.org/$rosversion/Installation/Ubuntu"
echo "Update the software list"
sudo sh -c '. /etc/lsb-release && echo "deb http://mirrors.ustc.edu.cn/ros/ubuntu/ $DISTRIB_CODENAME main" > /etc/apt/sources.list.d/ros-latest.list'
sudo apt-key adv --keyserver hkp://ha.pool.sks-keyservers.net:80 --recv-key 421C365BD9FF1F717815A3895523BAEEB01FA116
sudo apt-get update

echo "Install the ros from apt"
sudo apt-get install ros-$rosversion-desktop-full -y
sudo rosdep init
rosdep update

echo "Setup the ROS environment variables"
echo -e "if [ -f /opt/ros/kinetic/setup.bash ]; then\n\tsource /opt/ros/kinetic/setup.bash\nfi" >> ~/.bashrc
echo "source ~/racecar/devel/setup.bash" >> ~/.bashrc
source ~/.bashrc

echo "Install the rosinstall"
sudo apt-get install python-rosinstall -y

echo "Install the ssh"
sudo apt-get install ssh -y

echo "Install the ntpdate"
sudo apt-get install ntpdate -y

echo "Install the chrony"
sudo apt-get install chrony -y

# Install the dependecies for the project
echo "Start to config for the project"

#echo "Install the python dependecies"
#sudo apt-get install python-numpy python-scipy python-matplotlib ipython ipython-notebook python-pandas python-sympy python-nose -y

#echo "Install the eigen3"
#sudo apt install libeigen3-dev -y

#echo "Install the nlopt"
#sudo apt install libnlopt* -y


echo "Install the ROS package for art_racecar"
sudo apt-get install ros-$rosversion-joy -y
sudo apt-get install ros-$rosversion-move-base -y
sudo apt-get install ros-$rosversion-mrpt* -y
sudo apt-get install ros-$rosversion-geographic-msgs -y
sudo apt-get install ros-$rosversion-map-server -y
sudo apt-get install ros-$rosversion-gmapping -y
sudo apt-get install ros-$rosversion-amcl -y
sudo apt-get install ros-$rosversion-rviz-imu-plugin -y
sudo apt-get install ros-$rosversion-dwa-local-planner -y

echo "--Finish"
然后给予install.sh文件权限,并运行,该过程需要下载一些文件,可能会比较耗时,视网速而定!!!
sudo chmod +x ./install.sh
./install.sh
运行结束输入以下命令进行验证
roscore
若出现一下情况则说明安装成功

此时查看bashrc文件发现ros与当前的ros工作空间已加入文档中

2. Install dependences
sudo apt install ros-$ROS_DISTRO-rgbd-launch ros-$ROS_DISTRO-libuvc ros-$ROS_DISTRO-libuvc-camera ros-$ROS_DISTRO-libuvc-ros
3. Pull the repository into your ROS workspace
cd ~/catkin_ws/src
git clone https://github.com/orbbec/ros_astra_camera
4.Create astra udev rule
roscd astra_camera
./scripts/create_udev_rules
5. Go to catkin workspace and compile astra_camera
cd ~/catkin_ws
catkin_make --pkg astra_camera
6. Run astra_camera
roslaunch astra_camera astra.launch
7. 查看rostopic
rostopic list
8. 打开rviz查看图像
rviz
查看深度图


查看rgb图

发现没有rgb图像!!!

有以下两种解决方案:
无法显示rgb图的解决方案
1) 使用libuvc
打开launch文件夹下的astra.launch文件,加入以下代码
       <node pkg="uvc_camera" type="uvc_camera_node" name="uvc_camera" output="screen" 	/>
        <param name="width" type="int" value="320" />
        <param name="height" type="int" value="240" />
        <param name="fps" type="int" value="30" />
        <param name="frame" type="string" value="wide_stereo" />

        <param name="auto_focus" type="bool" value="False" />
        <param name="focus_absolute" type="int" value="1" />
    <!-- other supported params: auto_exposure, exposure_absolute, brightness, power_line_frequency -->

        <param name="device" type="string" value="/dev/video2" />
        <param name="camera_info_url" type="string" value="file://$(find uvc_camera)/example.yaml" />
保存并重新编译,运行查看
2) 更改product ID号
在astrapro.launch中有如下代码
  <!-- Push down all topics/nodelets into "camera" namespace -->
  <group ns="$(arg camera)">
  <node pkg="astra_camera" type="camera_node" name="$(arg camera)_rgb">
      <!-- Parameters used to find the camera -->
      <param name="vendor" value="0x2bc5"/>
      <param name="product" value="0x0501"/>
      <param name="serial" value="0"/>
      <!-- If the above parameters aren't unique, choose the first match: -->
      <param name="index" value="$(arg index)"/>
可以看到这里是通过vendor向量和product ID号来确定打开的设备
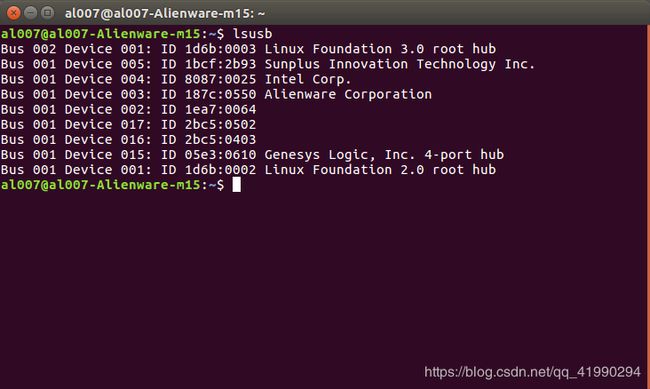
查看我们设备的信息
lsusb

其中2bc5:0403是深度摄像头的,2bc5:0502是rgb摄像头的
将次句的0x0501改为我们设备的0x0502
<param name="product" value="0x0501"/> //更改前
<param name="product" value="0x0502"/> //更改后
保存编译,运行测试
roslaunch astra_camera astrapro.launch
二、安装ORB_SLAM2
1. 编译
cd catkin_ws/src
git clone https://github.com/raulmur/ORB_SLAM2.git ORB_SLAM2
cd ORB_SLAM2
./build.sh
2.使用TUM数据集测试
rgbd_dataset_freiburg1_xyz(提取码: 6gmw)
运行RGB-D测试程序,查看REANME.md,给出以下参考命令
./Examples/RGB-D/rgbd_tum Vocabulary/ORBvoc.txt Examples/RGB-D/TUMX.yaml PATH_TO_SEQUENCE_FOLDER ASSOCIATIONS_FILE
因为我使用的是rgbd_dataset_freiburg1_xyz序列,所以将TUMX.yaml改为 TUM1.yaml。
我的序列存储路径为:
PATH_TO_SEQUENCE_FOLDER = Data/rgbd_dataset_freiburg1_xyz
ASSOCIATIONS_FILE = Data/rgbd_dataset_freiburg1_xyz/associate.txt
三、运行实时ORB_SLAM2
1. 编译ROB_SLAM2的ros程序
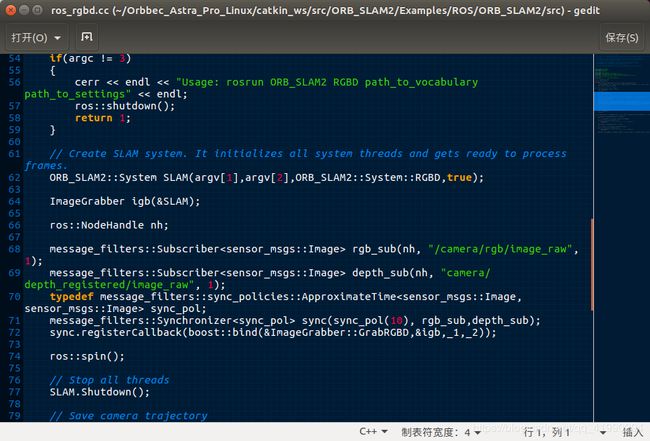
由于代码默认订阅的话题跟我们摄像头发布的话题可能不同,所以需要更改ORB_SLAM2订阅的ros话题
cd ~/catkin_ws/src/ORB_SLAM2/Examples/ROS/ORB_SLAM2/src
gedit ros_rgbd.cc

将/camera/rgb/image_raw更改为我们摄像头的发布的rgb话题
将camera/depth_registered/image_raw更改为我们摄像头的发布的depth话题
更改完保存编译
cd ORB_SLAM2
./build_ros.sh
2. 实时运行
打开摄像头
roslaunch astra_camera astrapro.launch
运行RGB-D,查看REANME.md,给出以下参考命令
rosrun ORB_SLAM2 RGBD PATH_TO_VOCABULARY PATH_TO_SETTINGS_FILE
我的序列存储路径为:
PATH_TO_VOCABULARY = /home/al007/Orbbec_Astra_Pro_Linux/catkin_ws/src/ORB_SLAM2/Vocabulary/ORBvoc.txt
PATH_TO_SETTINGS_FILE = /home/al007/Orbbec_Astra_Pro_Linux/catkin_ws/src/ORB_SLAM2/Examples/ROS/ORB_SLAM2/Asus.yaml
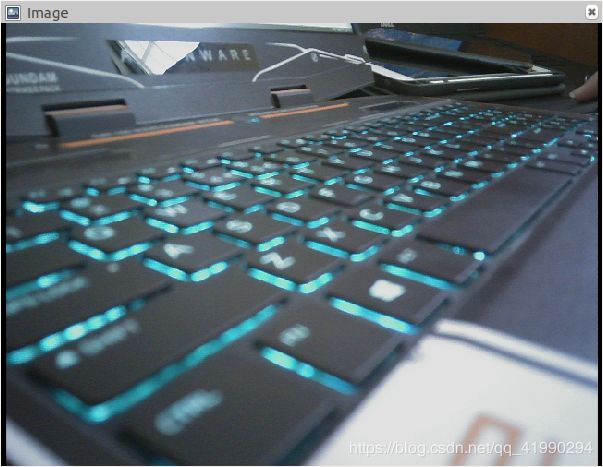
运行结果如下:

3.标定摄像头(为了防止镜头下的图片发生畸变)
1)摄像头标定时所处的平面位置一旦改变,一般会影响相机内参,需重新标定
2)将标定后的参数替换相机原有的内参,重新跑一遍即可
参考博客:
https://blog.csdn.net/qq_36219010/article/details/100084777
https://blog.csdn.net/u010312937/article/details/78759107?depth_1-utm_source=distribute.pc_relevant.none-task&utm_source=distribute.pc_relevant.none-task
https://blog.csdn.net/qq_36219010/article/details/96559248?depth_1-utm_source=distribute.pc_relevant.none-task&utm_source=distribute.pc_relevant.none-task


