Linux使用Geth创建以太坊私链
@[TOC]Linux使用Geth创建以太坊私链
Linux使用Geth创建以太坊私链
最近在帮助一位博士师姐跑区块链实验,要搭建一条以太坊私链,在网上找的教程不知道什么原因,用genesis.json文件生成创世区块总是会出下图所示问题。

于是请教了另一位博士师兄,学长教了另外一种创建私链的方法,终于成功创建了私链,在此对师兄师姐表示感谢。不对的地方还请读者指教,欢迎各位留言讨论。
附上邮箱地址:[email protected]
一、参考博客
在写这篇博客时以下三篇作了重要参考,对三位博主表示感谢,以下附上三篇文章的链接:
【1】https://blog.csdn.net/kevinyankai/article/details/98623397.
【2】https://learnblockchain.cn/2017/11/29/geth_cmd_options/.
【3】https://blog.csdn.net/Keith003/article/details/80179992.
二、环境介绍
系统:Ubuntu18.04
三、条件准备
1.安装git
输入以下命令以安装git:
leonidas@time-fly:~$ sudo add-apt-repository ppa:git-core/ppa
leonidas@time-fly:~$ sudo apt-get update
leonidas@time-fly:~$ sudo apt-get install git
输入git --version查看版本号以确定是否安装好
leonidas@time-fly:~$ git --version
git version 2.17.1
2.安装geth
输入以下命令以安装geth
leonidas@time-fly:~$ sudo apt-get install software-properties-common
leonidas@time-fly:~$ sudo add-apt-repository -y ppa:ethereum/ethereum
leonidas@time-fly:~$ sudo apt-get update
leonidas@time-fly:~$ sudo apt-get install ethereum
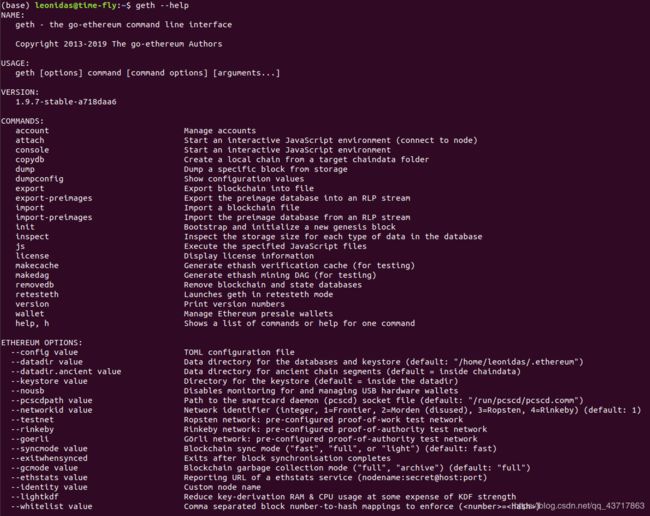
输入geth --help以确定是否安装好geth
leonidas@time-fly:~$ geth --help
四、搭建私链
1.创建文件夹用于存储私链数据文件
首先打开终端,进入/home/user/目录
leonidas@time-fly:~$ cd /home/leonidas
然后在该目录下创建文件夹private_chain
leonidas@time-fly:~$ mkdir private_chain
进入创建的文件夹private_chain
leonidas@time-fly:~$ cd private_chain
2.使用命令行生成genesis.json文件
在上一步进入创建的文件夹后,输入如下命令
leonidas@time-fly:~/private_chain$ puppeth
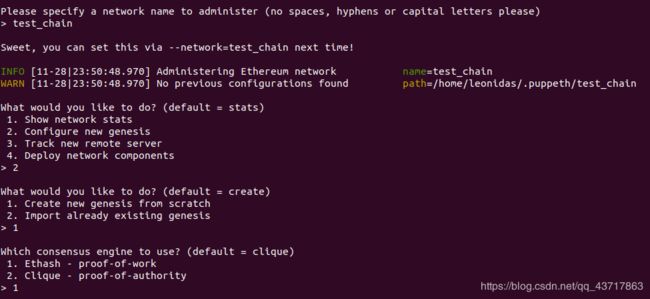
出现如下界面

在这里输入自定义一个网络名字,博主的叫test_chain
> test_chain
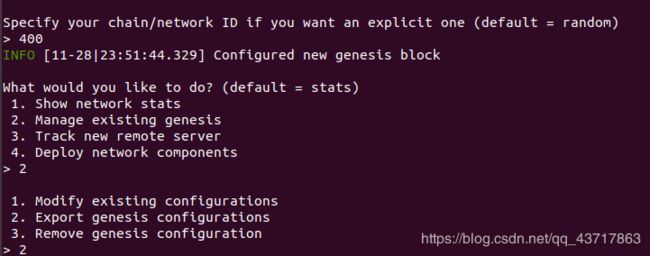
下面一系列选择按照图表来即可

下面出现的两个均按回车即可

下面出现的输入自定义私链ID,这里我定义为400,然后继续一路按图操作

出现如图所示,按回车即可,文件夹private_chian下便生成了四个json文件
按CTRL+C退出到private_chian文件夹

输入ls查看当前目录文件

至此,文件夹private_chian下生成了四个json文件
3.使用生成的json文件创建创世区块
在private_chain文件夹下创建data文件夹用以存储私链产生的数据
leonidas@time-fly:~/private_chain$ mkdir data
输入以下命令生成创世区块
leonidas@time-fly:~/private_chain$ geth --datadir ./data init test_chain.json
进入data目录会发现多了两个文件夹
leonidas@time-fly:~/private_chain$ cd data
leonidas@time-fly:~/private_chain/data$ ls
geth keystore
退出到上一目录
leonidas@time-fly:~/private_chain/data$ cd ..
输入以下命令进入控制台
leonidas@time-fly:~/private_chain$ geth --port 30303 --rpc --rpcaddr="0.0.0.0" --rpccorsdomain="*" --rpcport 8100 --ws --wsaddr="0.0.0.0" --wsport="12000" --wsapi="db,eth,net,web3,personal" --wsorigins="*" --allow-insecure-unlock --syncmode "full" --nodiscover --maxpeers '1000' --maxpendpeers '1000' --networkid '400' --datadir ./data console
命令详介见博客https://learnblockchain.cn/2017/11/29/geth_cmd_options/.
这里对使用的参数作简单介绍:
1.console:启动交互式JavaScript环境
2.–rpc:启用HTTP-RPC服务器
3.–port value:网卡监听端口(默认值:30303)
4.–rpcaddr value:HTTP-RPC服务器接口地址(默认值:“localhost”)
5.–rpccorsdomain value:允许跨域请求的域名列表(逗号分隔)(浏览器强制)
6.–rpcport value:HTTP-RPC服务器监听端口(默认值:8545)
7.–wsport value:WS-RPC服务器监听端口(默认值:8546)
8.–wsapi value:基于WS-RPC的接口提供的API
9.–wsorigins value:websockets请求允许的源
10.–syncmode “fast”:同步模式 (“fast”, “full”, or “light”)
11.–nodiscover:禁用节点发现机制(手动添加节点)
12.–maxpeers value:最大的网络节点数量(如果设置为0,网络将被禁用)(默认值:25)
13.–maxpendpeers value:最大尝试连接的数量(如果设置为0,则将使用默认值)(默认值:0)
14.–networkid value:网络标识符(整型, 1=Frontier, 2=Morden (弃用), 3=Ropsten, 4=Rinkeby) (默认: 1)
15.–datadir “xxx”:数据库和keystore密钥的数据目录

