springboot实操初尝试
一.前言
昨天正好有同学联系我,同学是做java的,顺便问了下他们现在用的什么技术。他就提到了springboot,还有分布式微服务这些在我们这边的Java团队中也听过,就对此产生了兴趣,下面开始准备实操一下。
二.IDEA下从零开始搭建SpringBoot工程
SpringBoot的具体介绍可以参看其他网上介绍,这里就不多说了,就这几天的学习,个人理解,简而言之:
(1)它是Spring的升级版,Spring容器能做到的事情,它都能做到,而且更简便,从配置形式上来说,SpringBoot完全抛弃了繁琐的XML文件配置方式,而是替代性地用注解方式来实现,虽然本质来说,是差不多的(类似包扫描,注解扫描,类加载之类)。
(2)SpringBoot集成的插件更多,从而使用很多服务,都只是引入一个依赖,几个注解和Java类就可以用了,具体的参考相关手册。
(3)在Web应用开发这一块,之前的应用一般来说是打包成war包,再发布到相关服务器容器下(例如Tomcat),虽然SpringBoot也可以这么做,但在SpringBoot下更常见的形式是将SpringBoot应用打包成可执行jar包文件。之所以这么做,源于你可以直接将SpringBoot应用看成是一个Java Application,其Web应用可以没有webapp目录(更不用说web.xml了),它推荐使用html页面,并将其作为静态资源使用。
下面具体记录一下,如何在IDEA下从零开始,一步步搭建SpringBoot Web应用,这里采用的是maven作依赖管理,新手起步,有任何疑问,请参考SpringBoot官网。
需要说明的是SpringBoot依赖的JDK版本为1.8及以上。
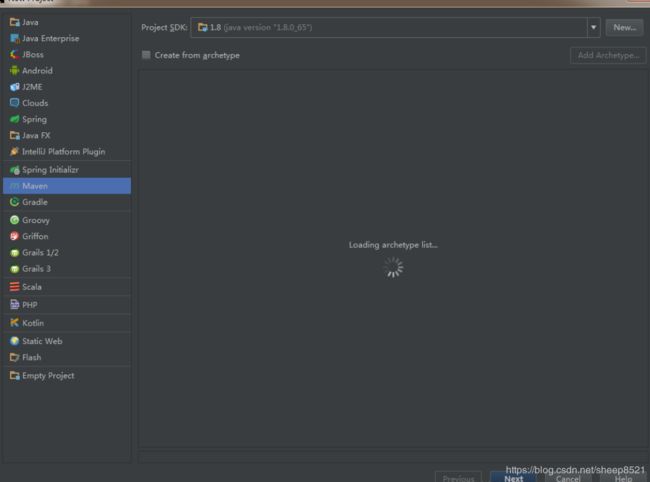
- File->new,选择maven,创建一个空项目,直接next.
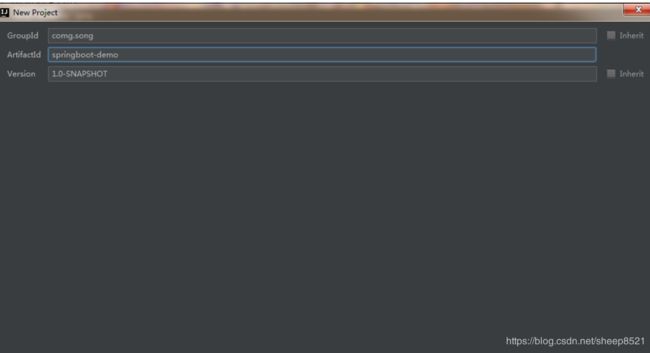
- 填写工程名
- next到底,成果创建一个基于maven的空Java项目,其目录结构是这样的:
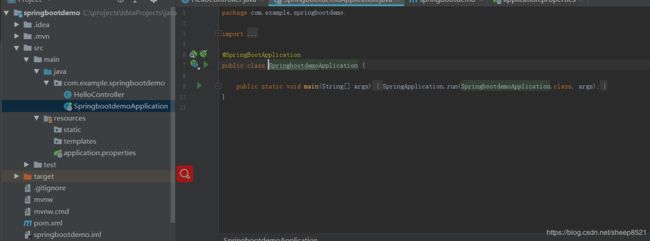
其中SpringBootWebApplication.java是自动生成的。是程序启动入口。
注意到,这里有一个main函数,再联想到前面说的,SpringBoot应用一般是打包成可执行jar包来发布的,这个main函数就是整个项目的入口。而之所以能这么做,是因为SpringBoot连Tomcat8作为一个插件都集成进去了,所以就不必跟之前的SSM架构下一样,还需要去在Tomcat下配置war包才能运行。直接点击运行该main函数,再浏览器链接栏,输入地址http://localhost:8080/,就可以看到打印的字符串”Hello World!”了。这就是官网提供的一个最基本的基于SpringBoot的Web应用,如此便捷。
三.正式项目
当然,一个基本的Web应用,结构肯定不会这么简单。下面要说的是,如何在上面的基础上,搭建一个具有MVC结构的完整的Web应用,其中数据库采用的是Mysql,ORM采用的是Spring Data JPA,前端页面采用js+html5。(当然还有其他的方式,例如ORM框架采用mybatis等,见其他文章。)
1.pom文件中添加依赖
        org.springframework.boot
        spring-boot-starter-parent
        2.0.6.RELEASE


            org.springframework.boot
            spring-boot-starter-web


            org.springframework.boot
            spring-boot-starter-test
            test
- 在resource目录下新建一个application.properties文件(或yml文件),命名与位置为SpringBoot默认的配置文件。在该文件中,记录着所有的模块配置内容。例如Tomcat的端口(默认8080)以及编码方式等:
#记录所有的模块配置
server.port=8080
server.tomcat.uri-encoding=utf-8
#MySQL
spring.datasource.driver-class-name=com.mysql.jdbc.Driver
spring.datasource.url=jdbc:mysql://localhost:3306/test?characterEncoding=utf8
spring.datasource.username=****
spring.datasource.password=****
- 引入本项目中所需要的相关依赖(MySQL连接驱动 以及Spring Data JPA,thymeleaf模板引擎)
注意:Thymeleaf是一个Java模板引擎开发库,可以处理和生成HTML、XML、JavaScript、CSS和文本,在Web和非Web环境下都可以正常工作。
            mysql
            mysql-connector-java
            5.1.39


            org.springframework.boot
            spring-boot-starter-thymeleaf


            org.springframework.boot
            spring-boot-starter-data-jpa
- 在application.properties中配置Spring Data JPA
这一段的意思就是说,数据库类型为MYSQL,日志信息打印具体执行的sql语句,表更新策略以及Java类到数据库表字段的映射规则等,具体查看网络资料。
#Spring Data JPA
spring.jpa.database=MYSQL
spring.jpa.show-sql=true
spring.jpa.hibernate.ddl-auto=update
# Naming strategy
spring.jpa.hibernate.naming-strategy = org.hibernate.cfg.ImprovedNamingStrategy
# stripped before adding them to the entity manager)
spring.jpa.properties.hibernate.dialect = org.hibernate.dialect.MySQL5Dialect
- 编写一个实体类User
@Table标签,指定数据库中对应的表名,id配置为主键,生成策略为自动生成。当然这里的类名User 也可以不和表名保持一致。
import javax.persistence.*;
@Entity
//name=数据库要查询的表的名字
@Table(name = "user")
public class User {
    public long getId() {
        return id;
    }
    public void setId(long id) {
        this.id = id;
    }
    public void setName(String name) {
        this.name = name;
    }
    public void setPassword(String password) {
        this.password = password;
    }

    public String getName() {
        return name;
    }
    public String getPassword() {
        return password;
    }
    @Id
//    生成策略为自动生成
//   方式一: @GeneratedValue(strategy = GenerationType.IDENTITY)
//   方式二:就是对每个字段进行阐述@Column(name = "id")
    @Column(name = "id")
    private long id;
    @Column(name = "name")
    private String name;
    @Column(name = "password")
    private String password;
}
注意:
1)错误1
Caused by: org.springframework.data.mapping.PropertyReferenceException: No property findOne found fo
解决:这是因为JPA自带的方法没有findOne,换成readBy**()或者getBy**()就好了。
2)错误2
org.hibernate.AnnotationException: No identifier specified for entity: com.example.domain.p.User
解决:发现是我import的包出现了错误,正确的应该是import javax.persistence.Id 而我却导入了org.springframework.data.annotation.Id
6. 基于JPA,实现DAO层(即数据库数据的增删改查操作)
新建UserRepositoty.java接口文件,源代码如下:
import com.example.springbootdemo.entity.User;
import org.springframework.cache.annotation.Cacheable;
import org.springframework.data.jpa.repository.JpaRepository;
import org.springframework.data.jpa.repository.Query;
import org.springframework.data.repository.query.Param;
import org.springframework.stereotype.Repository;
@Repository
public interface UserRepository extends JpaRepository {
    //    单表查询时,只需要根据JPA提供的规范去命名
//    @Cacheable
//    User getById(Long id);
//    也可以自定义SQL查询语句
    @Query("select t from User t where t.name = :name")
    User findByUserName(@Param("name") String name);
}
Repository是Spring Data的核心概念。提供有如下接口:
1)CrudRepository:提供基本的增删该查,批量操作接口。
2)PagingAndSortingRepository:集成CrudRepository,提供附加的分页查询功能。
3)JpaRepository:专用于JPA,是重点。
4)Repository
注明:其中Repository为基类,JpaRepository继承自PagingAndSortingRepository接口,两个泛型参数分别代表Java POJO类以及主键数据类型。
我们创建自己的数据库操作接口时,只需继承上述JPA提供的某个接口,即可自动继承相关数据操作方法,而不需要再次实现。例如CrudRepositoty提供了对增删改查操作的实现,PagingAndSortingRepository提供了分页查询方法的实现。
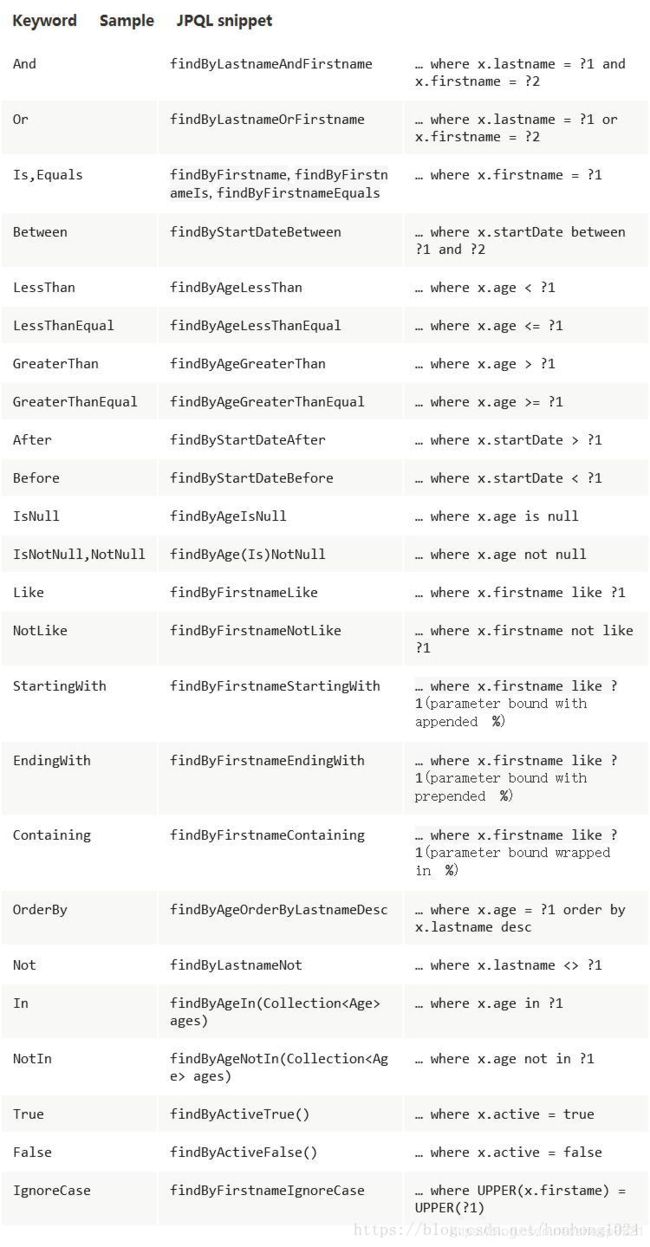
另外JPA提供了一套命名规则例如findBy**(), readById 或者 getBy**()等,这些方法也只需要用户申明而由JPA自动实现了。如果这仍不能满足业务需求,也可以自定义SQL查询语句,例如上述代码所示,采用@Query标签 其中 :字段名语法为引用下面用@Param标识的变量,需要注意的是其中User不是表名字而是Java POJO类名。
1.JPA提供的规范去命名总结:
2.自定义操作
@Query允许SQL更新、删除语句,但必须搭配 @Modifying 使用。示例代码如下:
//查询
 @Query("select t from User t where t.name = :name")
    User findByUserName(@Param("name") String name);
//更新删除
@Modifying
@Query(value = "update User u set u.name = ?1 where u.id = ?2")
int update(String name, Integer id);
- 设计Service层业务代码
新建UserService类,其源代码如下:
import com.example.springbootdemo.entity.User;
import com.example.springbootdemo.repository.UserRepository;
import org.springframework.beans.factory.annotation.Autowired;
import org.springframework.stereotype.Service;

@Service
public class UserService {
    @Autowired
    private UserRepository userRepository;

    public User findUserByName(String name){
        User user = null;
        try{
            user = userRepository.findByUserName(name);
        }catch (Exception e){}
        return user;
    }
    public User getById(Long id){
        User user = null;
        try{
            user = userRepository.getById(id);
        }catch (Exception e){}
        return user;
    }
}
- 新建一个controller 包,用于存放所有的controller,这里跟官方的一样,使用SampleController为第一个测试用例。代码如下:新建一个controller 包,用于存放所有的controller,这里跟官方的一样,使用SampleController为第一个测试用例。代码如下:
import com.example.springbootdemo.entity.User;
import com.example.springbootdemo.service.UserService;
import org.springframework.beans.factory.annotation.Autowired;
import org.springframework.stereotype.Controller;
import org.springframework.web.bind.annotation.RequestMapping;
import org.springframework.web.bind.annotation.RequestParam;
import org.springframework.web.bind.annotation.ResponseBody;

@Controller
@RequestMapping(value = "/user")
public class UserController {
    @Autowired
    private UserService userService;

    @RequestMapping(value = "/index")
    public String index(){
        return "user/index";
    }

    @RequestMapping(value = "/show")
    @ResponseBody
    public String show(@RequestParam(value = "name")String name){
        User user = userService.findUserByName(name);
        if(null != user)
            return user.getId()+"/"+user.getName()+"/"+user.getPassword();
        else return "null";
    }
    @RequestMapping(value = "/show1")
    @ResponseBody
    public String show1(@RequestParam(value = "id")Long id){
        User user = userService.getById(id);
        if(null != user)
            return user.getId()+"/"+user.getName()+"/"+user.getPassword();
        else return "null";
    }
}
9.在application.properties文件中配置页面引擎。这里采用SpringMVC(SpringBoot还提供thymeleaf,freemaker等)。这里需要配置其静态资源(js、css文件、图片文件等)路径,以及html页面文件路径,参考SpringMVC在Spring下的配置。
#视图层控制
spring.mvc.view.prefix=classpath:/templates/
spring.mvc.view.suffix=.html
spring.mvc.static-path-pattern=/static/**
10.在resource目录下新建templates以及static目录,分别用于存放html文件以及(js、css文件、图片)文件。在(13)中返回了一个“user/index”页面,所以在templates下新建user目录,在user目录下新建index.html页面,这里就不写什么了,默认页面,通过相对路径引入js文件,js文件里只做示意,弹出一个alert()。
user/index.html
    Title


    TEST PAGE
static/scripts/test.js
$(document).ready(function (){
    alert("OK TEST");
});
- 配置JPA
新建一个configuration包,用于存放项目配置类。类似SSM架构下,spring需要配置Java POJO类包路径以及DAO层接口路径,以自动扫描相关注解,这里同样需要配置这两项,不同的是Spring采取的是xml配置方式,这里用Java代码+注解方式配置。新建一个JpaConfiguration.java类,其代码如下:
import org.springframework.boot.autoconfigure.domain.EntityScan;
import org.springframework.context.annotation.Bean;
import org.springframework.context.annotation.Configuration;
import org.springframework.core.Ordered;
import org.springframework.core.annotation.Order;
import org.springframework.dao.annotation.PersistenceExceptionTranslationPostProcessor;
import org.springframework.data.jpa.repository.config.EnableJpaRepositories;
import org.springframework.transaction.annotation.EnableTransactionManagement;

@Order(Ordered.HIGHEST_PRECEDENCE)
@Configuration
@EnableTransactionManagement(proxyTargetClass = true)
@EnableJpaRepositories(basePackages = "com.example.repository")
@EntityScan(basePackages = "com.example.entity")
public class JpaConfiguration {
    @Bean
    PersistenceExceptionTranslationPostProcessor persistenceExceptionTranslationPostProcessor(){
        return new PersistenceExceptionTranslationPostProcessor();
    }
}
- 项目main函数的主入口
@SpringBootApplication
public class SpringbootdemoApplication {

    public static void main(String[] args) {
        SpringApplication.run(SpringbootdemoApplication.class, args);

    }
}
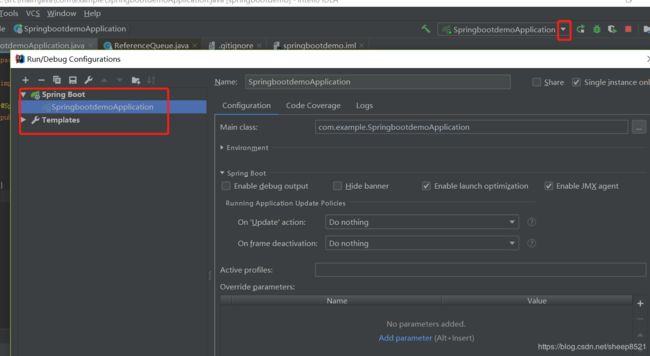
四。小插曲
项目运行过程中我修改了包的目录,本来包的结构是com.example.springboordemo,我后来发现给改成了com.example。再执行类的时候会报错主类不存在。
解决:
1)重新加载modules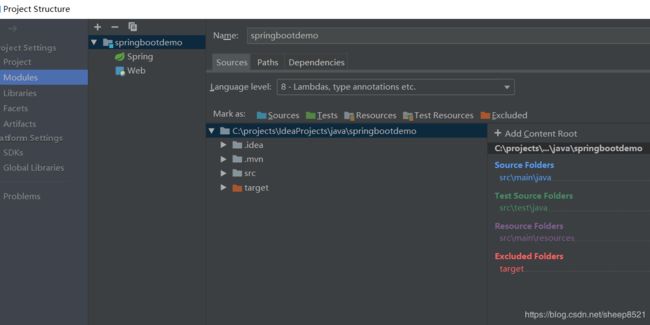
2)mvn先clean 后重新编译
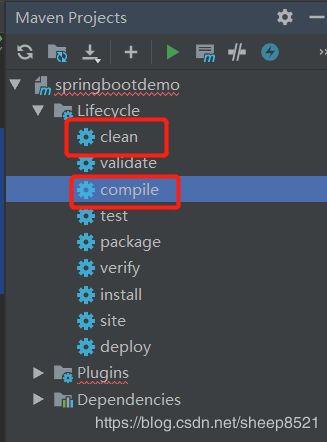
3)重新把编辑一下应用,先清除所有的应用,然后再对应的class右击run。