那些APP活动中的刷量与作弊
本文摘自《九阴真经:iOS黑客攻防秘籍》
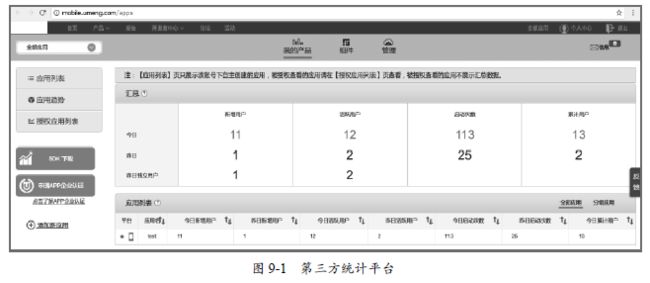
当今移动互联网时代,平台中的App为了增加人气会搞一些优惠活动,但实际上,App的激活、注册、优惠活动都有可能被“刷”。刷量团队利用的方法就是修改手机的信息,让应用获取假的数据,认为老用户就是新的用户。苹果对隐私的保护使开发者不能获取UDID作为设备的唯一标识,所以识别设备的唯一标识的方法都是使用IDFA、OpenUDID以及其他的第三方平台提供的ID,而IDFA是可以在系统设置中进行重置的,OpenUDID和其他第三方平台提供的ID也都有可能被重置。如图9-1所示,是某第三方应用安装统计平台,通过重置ID和修改手机信息进行作弊,实现了刷量的目的,实际是一台手机,统计新增却是11台。
由于将ID存放在沙盒中,应用被卸载掉,沙盒目录的数据会被清空,所以有些应用会将ID信息存在Keychain中,这样即使应用被卸载,数据也不会被清除,但在越狱环境下,Keychain也是可以清除的。
9.1 越狱环境下获取root权限
事实上,在已经越狱的iOS设备上使用Xcode编写的程序也是以mobile用户的身份运行,没有root权限,所以无法访问一些重要的文件和目录。
iOS的应用安装目录有两个,一个是/private/var/mobile/Containers/Bundle/Application,另一个是/Applications,前者存放使用Xcode安装或者在App Store上下载安装的应用,后者一般为系统自带的应用。如果想让应用以root身份运行,可以按以下的步骤来操作。
(1) 在应用的main函数添加如下代码:
setuid(0);
setgid(0);
(2) 将生成的应用上传到/Applications/yourApp.app。
(3) 这时桌面上没有图标,需要登录SSH运行uicache命令,该命令经常用于修复没有图标的问题。
(4) 执行chown root yourApp,更改所有者为root。
(5) 切换到应用的目录,运行chmod u+s yourApp。
这时在手机上点击你的应用,通过ps aux命令查看进程运行的用户就是root,而不是mobile。
(6) 以上方法在iOS 8系统没有问题,如果是iOS 9和iOS 10就得再多一个步骤,由于iOS 9安全限制,不允许具有root权限的应用启动,启动之后,你会发现马上就退出了。可以给原来应用的可执行文件改名,比如改为yourApp_,然后再新建一个yourApp名称的脚本并使用chmod的755命令设置可执行权限。脚本内容如下:
#!/bin/bash
root=$(dirname "$0")
exec "${root}"/yourApp_
相当于yourApp脚本执行之后,会执行yourApp_,这样就正常可以启动了。
9.2 修改手机信息
通过修改手机的信息可以“刷”应用的安装量,可以修改的信息有很多种,其中常见的有UDID、序列号、MAC地址、蓝牙地址、系统版本、机器名称、IDFA、IDFV、SSID、BSSID、DeviceToken、位置信息等。
9.2.1 修改基本信息
修改硬件信息常用的方法是hook MGCopyAnswer,在第6章讲解MSHookFuncation时提到,可以通过hook MGCopyAnswer实现修改本机的序列号。本节有两个目标,一是修改硬件相关的信息,二是修改系统版本、机型、IDFA、IDFV。
首先使用Theos新建工程,命令和参数如下:
exchen$ export THEOS=/opt/theos
exchen$ /opt/theos/bin/nic.pl
NIC 2.0 - New Instance Creator
------------------------------
  ......
  [11.] iphone/tweak
Choose a Template (required): 11
Project Name (required): ChangeiPhoneInfo
Package Name [com.yourcompany.changeiphoneinfo]: net.exchen.ChangeiPhoneInfo
Author/Maintainer Name [boot]: exchen
[iphone/tweak] MobileSubstrate Bundle filter [com.apple.springboard]: com.apple.Preferences
[iphone/tweak] List of applications to terminate upon installation (space-separated, '-' for none) [SpringBoard]: Preferences
Instantiating iphone/tweak in changeiphoneinfo/...
然后编写如下代码:
#include
#import
static CFTypeRef (*orig_MGCopyAnswer)(CFStringRef str);
static CFTypeRef (orig_MGCopyAnswer_internal)(CFStringRef str, uint32_t outTypeCode);
static int (*orig_uname)(struct utsname *);
CFTypeRef new_MGCopyAnswer(CFStringRef str);
CFTypeRef new_MGCopyAnswer_internal(CFStringRef str, uint32_t* outTypeCode);
int new_uname(struct utsname *systemInfo);
int new_uname(struct utsname * systemInfo){
NSLog(@"new_uname");
int nRet = orig_uname(systemInfo);

char str_machine_name[100] = "iPhone8,1";
strcpy(systemInfo->machine,str_machine_name);

return nRet;
}
CFTypeRef new_MGCopyAnswer(CFStringRef str){
//NSLog(@"new_MGCopyAnswer");
//NSLog(@"str: %@",str);

NSString *keyStr = (__bridge NSString *)str;
if ([keyStr isEqualToString:@"UniqueDeviceID"] ) {

    NSString *strUDID = @"57359dc2fa451304bd9f94f590d02068d563d283";
    return (CFTypeRef)strUDID;
}
else if ([keyStr isEqualToString:@"SerialNumber"] ) {

    NSString *strSerialNumber = @"DNPJD17NDTTP";
    return (CFTypeRef)strSerialNumber;
}
else if ([keyStr isEqualToString:@"WifiAddress"] ) {

    NSString *strWifiAddress = @"98:FE:94:1F:30:0A";
    return (CFTypeRef)strWifiAddress;
}
else if ([keyStr isEqualToString:@"BluetoothAddress"] ) {

    NSString *strBlueAddress = @"98:FE:94:1F:30:0A";
    return (CFTypeRef)strBlueAddress;
}
else if([keyStr isEqualToString:@"ProductVersion"]) {

    NSString *strProductVersion = @"10.3.3";
    return (CFTypeRef)strProductVersion;
}
else if([keyStr isEqualToString:@"UserAssignedDeviceName"]) {

    NSString *strUserAssignedDeviceName = @"exchen's iPhone";
    return (CFTypeRef)strUserAssignedDeviceName;
}
return orig_MGCopyAnswer(str);
}
CFTypeRef new_MGCopyAnswer_internal(CFStringRef str, uint32_t* outTypeCode) {
//NSLog(@"new_MGCopyAnswer_internal");
//NSLog(@"str: %@",str);

NSString *keyStr = (__bridge NSString *)str;
if ([keyStr isEqualToString:@"UniqueDeviceID"] ) {

    NSString *strUDID = @"57359dc2fa451304bd9f94f590d02068d563d283";
    return (CFTypeRef)strUDID;
}
else if ([keyStr isEqualToString:@"SerialNumber"] ) {

    NSString *strSerialNumber = @"DNPJD17NDTTP";
    return (CFTypeRef)strSerialNumber;
}
else if ([keyStr isEqualToString:@"WifiAddress"] ) {

    NSString *strWifiAddress = @"98:FE:94:1F:30:0A";
    return (CFTypeRef)strWifiAddress;
}
else if ([keyStr isEqualToString:@"BluetoothAddress"] ) {

    NSString *strBlueAddress = @"98:FE:94:1F:30:0A";
    return (CFTypeRef)strBlueAddress;
}
else if([keyStr isEqualToString:@"ProductVersion"]) {

    NSString *strProductVersion = @"10.3.3";
    return (CFTypeRef)strProductVersion;
}
else if([keyStr isEqualToString:@"UserAssignedDeviceName"]) {

    NSString *strUserAssignedDeviceName = @"exchen's iPhone";
    return (CFTypeRef)strUserAssignedDeviceName;
}

return orig_MGCopyAnswer_internal(str, outTypeCode);
}
void hook_uname(){
NSLog(@"hook_uname");
char str_libsystem_c[100] = {0};
strcpy(str_libsystem_c, "/usr/lib/libsystem_c.dylib");

void *h = dlopen(str_libsystem_c, RTLD_GLOBAL);
if(h != 0){

    MSImageRef ref = MSGetImageByName(str_libsystem_c);
    void * unameFn = MSFindSymbol(ref, "_uname");
    NSLog(@"unameFn");
    MSHookFunction(unameFn, (void *) new_uname, (void **)& orig_uname);
}
else {

    strcpy(str_libsystem_c, "/usr/lib/system/libsystem_c.dylib");
    h = dlopen(str_libsystem_c, RTLD_GLOBAL);
    if(h != 0){

        MSImageRef ref = MSGetImageByName(str_libsystem_c);
        void * unameFn = MSFindSymbol(ref, "_uname");
        NSLog(@"unameFn");
        MSHookFunction(unameFn, (void *) new_uname, (void **)& orig_uname);
    }
    else {

        NSLog(@"%s dlopen error", str_libsystem_c);
    }
}
}
void hookMGCopyAnswer(){
char *dylib_path = (char*)"/usr/lib/libMobileGestalt.dylib";
void *h = dlopen(dylib_path, RTLD_GLOBAL);
if (h != 0) {

    MSImageRef ref = MSGetImageByName([strDylibFile UTF8String]);
    void * MGCopyAnswerFn = MSFindSymbol(ref, "_MGCopyAnswer");

    //64位特征码
    uint8_t MGCopyAnswer_arm64_impl[8] = {0x01, 0x00, 0x80, 0xd2, 0x01, 0x00, 0x00, 0x14};
    //10.3特征码
    uint8_t MGCopyAnswer_armv7_10_3_3_impl[5] = {0x21, 0x00, 0xf0, 0x00, 0xb8};

    //处理64位系统
    if (memcmp(MGCopyAnswerFn, MGCopyAnswer_arm64_impl, 8) == 0) {

        MSHookFunction((void*)((uint8_t*)MGCopyAnswerFn + 8), (void*)new_MGCopyAnswer_internal,
            (void**)&orig_MGCopyAnswer_internal);
    }
    //处理32位10.3到10.3.3系统
    else if(memcmp(MGCopyAnswerFn, MGCopyAnswer_armv7_10_3_3_impl, 5) == 0){

        MSHookFunction((void*)((uint8_t*)MGCopyAnswerFn + 6), (void*)new_MGCopyAnswer_internal,
            (void**)&orig_MGCopyAnswer_internal);
    }
    else{

        MSHookFunction(MGCopyAnswerFn, (void *) new_MGCopyAnswer, (void **)&orig_MGCopyAnswer);
    }
}
}
%hook ASIdentifierManager
//IDFA
-(NSUUID*)advertisingIdentifier{
NSUUID *uuid = [[NSUUID alloc] init];
return uuid;
}
%end
%hook UIDevice
//IDFV
-(NSUUID*)identifierForVendor{
NSUUID *uuid = [[NSUUID alloc] init];
return uuid;
}
%end
%ctor{
hookMGCopyAnswer();
hook_uname();
}
接着在App Store下载iDeviceLite和MyIDFA这两款应用。应用的BundleID是com.sanfriend. ios.iDeviceLite和com.iki.MyIDFA,将应用的BundleID添加到Tweak对应的 .plist文件里,让这两个应用也加载Tweak,如图9-2所示。
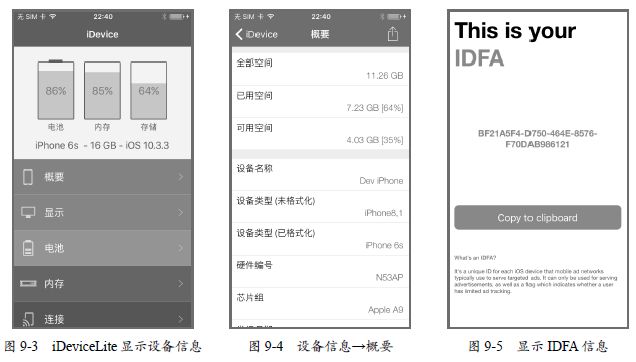
获取UDID、序列号、MAC地址、蓝牙地址使用MGCopyAnswer函数,所以我们hook MGCopyAnswer。代码里定义的new_MGCopyAnswer是32位的,new_MGCopyAnswer_internal是64位的,这两个函数中判断了MGCopyAnswer相应的参数,返回相应的假数据。比如系统版本返回10.3.3,设备名称返回Dev iPhone,而实际的系统版本是10.1.1,设备名称是iPhone,如图9-3和图9-4所示。
接下来对 [ASIdentifierManager advertisingIdentifier] 进行hook随机返回IDFA,对[UIDevice identifierForVendor]进行hook随机返回IDFV,打开MyIDFA应用,会发现每次获取的IDFA数据都是不一样的,如图9-5所示。
uname函数会把获取的信息放到struct utsname结构中,我们对uname函数进行hook,修改了结构体的machine成员数据为iPhone8,1,表示返回iPhone 6s机型。
此时我们将Makefile文件修改,代码如下:
THEOS_DEVICE_IP = 127.0.0.1
THEOS_DEVICE_PORT = 2222
ARCHS = armv7 arm64
include $(THEOS)/makefiles/common.mk
TWEAK_NAME = ChangeiPhoneInfo
ChangeiPhoneInfo_FILES = Tweak.xm
include $(THEOS_MAKE_PATH)/tweak.mk
after-install::
install.exec “killall -9 Preferences”
使用make package install编译并安装,如果提示以下的错误:
$ make package install
ERROR: package name has characters that aren't lowercase alphanums or '-+.'.
说明包名包含其他的特殊符号,需要修改包名才能生成,包名只能包含小写字母及“-”“+”“.”。
由于Xcode没有提供MobileGestalt.h的头文件,所以我从Theos目录下找到MobileGestalt.h头文件,供读者参考MGCopyAnswer的参数:
#ifndef LIBMOBILEGESTALT_H_
#define LIBMOBILEGESTALT_H_
#include
#if __cplusplus
extern “C” {
#endif
#pragma mark - API
CFPropertyListRef MGCopyAnswer(CFStringRef property);

Boolean MGGetBoolAnswer(CFStringRef property);

/*
 * Arguments are still a mistery.
 * CFPropertyListRef MGCopyAnswerWithError(CFStringRef question, int *error, ...);
 */

/* Use 0 for __unknown0. */
CFPropertyListRef MGCopyMultipleAnswers(CFArrayRef questions, int __unknown0);

/*
 * Not all questions are assignable.
 * For example, kMGUserAssignedDeviceName is assignable but
 * kMGProductType is not.
 */
int MGSetAnswer(CFStringRef question, CFTypeRef answer);
#pragma mark - Identifying Information
static const CFStringRef kMGDiskUsage = CFSTR("DiskUsage");
static const CFStringRef kMGModelNumber = CFSTR("ModelNumber");
static const CFStringRef kMGSIMTrayStatus = CFSTR("SIMTrayStatus");
static const CFStringRef kMGSerialNumber = CFSTR("SerialNumber");
static const CFStringRef kMGMLBSerialNumber = CFSTR("MLBSerialNumber");
static const CFStringRef kMGUniqueDeviceID = CFSTR("UniqueDeviceID");
static const CFStringRef kMGUniqueDeviceIDData = CFSTR("UniqueDeviceIDData");
static const CFStringRef kMGUniqueChipID = CFSTR("UniqueChipID");
static const CFStringRef kMGInverseDeviceID = CFSTR("InverseDeviceID");
static const CFStringRef kMGDiagnosticsData = CFSTR("DiagData");
static const CFStringRef kMGDieID = CFSTR("DieId");
static const CFStringRef kMGCPUArchitecture = CFSTR("CPUArchitecture");
static const CFStringRef kMGPartitionType = CFSTR("PartitionType");
static const CFStringRef kMGUserAssignedDeviceName = CFSTR("UserAssignedDeviceName");
#pragma mark - Bluetooth Information
static const CFStringRef kMGBluetoothAddress = CFSTR("BluetoothAddress");
//完整的头文件信息见本书源码中的MobileGestalt.h文件
9.2.2 修改Wi-Fi信息
修改Wi-Fi信息主要通过hook CNCopyCurrentNetworkInfo函数,将SSID和BSSID修改掉,这样看到的Wi-Fi热点的名称就会变化。具体的代码如下:
static CFDictionaryRef (*orig_CNCopyCurrentNetworkInfo) (CFStringRef interfaceName); static CFDictionaryRef new_CNCopyCurrentNetworkInfo (CFStringRef interfaceName){NSLog(@"new_CNCopyCurrentNetworkInfo"); NSString *keyStr = (__bridge NSString *)interfaceName; NSLog(@"interfaceName: %@", keyStr); if ([keyStr isEqualToString:@"en0"] ){ NSDictionary *oldDic = (__bridge NSDictionary*)orig_CNCopyCurrentNetworkInfo(interfaceName); NSMutableDictionary *dic = [[NSMutableDictionary alloc] initWithDictionary:oldDic]; [dic setValue:@"exchen" forKey:@"SSID"]; [dic setValue:@"0:6:f4:ac:2b:81" forKey:@"BSSID"]; [dic setValue:[@"exchen" dataUsingEncoding:NSUTF8StringEncoding] forKey:@"SSIDDATA"]; return (__bridge CFDictionaryRef)dic; } else{ return orig_CNCopyCurrentNetworkInfo(interfaceName); }
}
//hook
MSHookFunction((void*)CNCopyCurrentNetworkInfo, (void*)new_CNCopyCurrentNetworkInfo, (void **)
&orig_CNCopyCurrentNetworkInfo);
9.2.3 修改DeviceToken
DeviceToken主要用于应用的消息推送,有一些应用使用DeviceToken作为识别设备的依据。AppDelegate的didRegisterForRemoteNotificationsWithDeviceToken函数的参数中包含了DeviceToken,所以要想修改DeviceToken,hook该函数即可。但是问题来了,AppDelegate的名称不是固定的,也有可能叫作P1AppDelegate或者是开发者修改过的类名。面对这种情况,我们可以调用objc_getClassList来获取所有类,再对每一个类使用class_conformsToProtocol和class_getInstanceMethod确认其是否为AppDelegate,具体代码如下:
//查找AppDelegate的名称
int numClasses = objc_getClassList(NULL, 0);
Class* list = (Class*)malloc(sizeof(Class) * numClasses);
objc_getClassList(list, numClasses);
for (int i = 0; i < numClasses; i++)
{
if (class_conformsToProtocol(list[i], @protocol(UIApplicationDelegate)) &&
class_getInstanceMethod(list[i],
@selector(application:didRegisterForRemoteNotificationsWithDeviceToken:)))
{
NSLog(@“class %@”, list[i]);
MSHookMessageEx(list[i],
@selector(application:didRegisterForRemoteNotificationsWithDeviceToken:),
(IMP)replaced_didRegisterForRemoteNotificationsWithDeviceToken,
(IMP*)&original_didRegisterForRemoteNotificationsWithDeviceToken);
}
}
这是我们构建的新的didRegisterForRemoteNotificationsWithDeviceToken函数:
static IMP original_didRegisterForRemoteNotificationsWithDeviceToken; void replaced_didRegisterForRemoteNotificationsWithDeviceToken(id self, SEL _cmd, UIApplication* application, NSData* deviceToken) { NSString *strDeviceToken = [[[[deviceToken description] stringByReplacingOccurrencesOfString: @"<" withString: @""] stringByReplacingOccurrencesOfString: @">" withString: @""] stringByReplacingOccurrencesOfString: @" " withString: @""];NSLog(@"deviceToken: %@", strDeviceToken); deviceToken = genDeviceToken(); //获取新的Token original_didRegisterForRemoteNotificationsWithDeviceToken(self, _cmd, application, deviceToken);
}
由于deviceToken参数的类似NSData,不是NSString,所以在这里我们要做一个转换,具体代码如下:
NSData* genDeviceToken(){NSString *strDeviceToken =@"7f0601cd3eca155a836218320cb9ed013ab3ad79bd2e540d66376662c4c9750c"; strDeviceToken = [strDeviceToken stringByReplacingOccurrencesOfString:@" " withString:@""]; NSMutableData *data = [[NSMutableData alloc] init]; unsigned char whole_byte; char byte_chars[3] = {'\0','\0','\0'}; int i; for (i=0; i < [strDeviceToken length]/2; i++) { byte_chars[0] = [strDeviceToken characterAtIndex:i*2]; byte_chars[1] = [strDeviceToken characterAtIndex:i*2+1]; whole_byte = strtol(byte_chars, NULL, 16); [data appendBytes:&whole_byte length:1]; } NSData *newDeviceToken = [[NSData alloc] initWithData:data]; NSLog(@"newDeviceToken %@", newDeviceToken); return newDeviceToken;
}
9.2.4 修改位置信息
修改位置信息的方法是hook CLLocationManager的location方法,以及CLLocation的coordinate方法。代码如下:
//Location
MSHookMessageEx(objc_getClass("CLLocationManager"), @selector(location),
    (IMP)CLLocationManager_location, (IMP *)&_orig_CLLocationManager_location);
MSHookMessageEx(objc_getClass("CLLocation"), @selector(coordinate), (IMP)CLLocation_coordinate,
    (IMP *)&_orig_CLLocation_coordinate);
新的location和coordinate的处理代码如下:
static CLLocation *(* _orig_CLLocationManager_location)(id _self, SEL _cmd1); static CLLocation *CLLocationManager_location(id _self, SEL _cmd1) {NSLog(@"CLLocationManager_location"); CLLocation *location = _orig_CLLocationManager_location(_self, _cmd1); return location;
}
static CLLocationCoordinate2D (* _orig_CLLocation_coordinate)(id _self, SEL _cmd1);
CLLocationCoordinate2D CLLocation_coordinate(id _self, SEL _cmd1) {
NSLog(@"CLLocation_coordinate");

NSString *strLatitude = @"39.98788022"
NSString *strLongitude = @"116.34287412"

if([g_strRandomLocaltion isEqualToString:@"1"]){

    CLLocationCoordinate2D coordinate;
    coordinate.latitude = [strLatitude doubleValue];
    coordinate.longitude = [strLongitude doubleValue];
    return coordinate;
}
else if((strLatitude != nil) && (strLongitude != nil)){

    CLLocationCoordinate2D coordinate;
    coordinate.latitude = [strLatitude doubleValue];
    coordinate.longitude = [strLongitude doubleValue];
    return coordinate;
}
else{

    return _orig_CLLocation_coordinate(_self, _cmd1);
}
}
9.3 清除应用数据
由于iOS应用一般都会将数据保存在沙盒目录,所以只要清空了应用沙盒目录,应用存储的普通数据就都被删除了。这样,应用再次安装时会认为这是一个新的运行环境。
比如要清除微信的沙盒数据,首先要获取微信沙盒目录的路径,调用自定义函数getWeChat- SandboxPath,其中使用了[LSApplicationWorkspace allApplications]等私有API,获取所有应用的安装信息,从安装信息中判断BundleID如果是com.tencent.xin就返回对应的沙盒目录。
cleanBundleContainer清除沙盒数据,清除完成之后记得要以mobile用户的身份创建相应的目录,否则可能会因为权限问题导致再次安装微信之后沙盒目录不可写。代码如下:
-(void)cleanBundleContainer:(NSString*)strBundleDataPath{//判断目录,只有这两个目录才能清除,如果是其他的目录,比如/var/mobile/Documents/ 千万不能清除, //否则可能需要重新激活或产生其他的问题 if ([strBundleDataPath hasPrefix:@"/private/var/mobile/Containers/Data/Application/"] || [strBundleDataPath hasPrefix:@"/var/mobile/Containers/Data/Application"]) { NSFileManager *fm = [NSFileManager defaultManager]; NSString *strDocumentsPath = [strBundleDataPath stringByAppendingPathComponent:@"Documents"]; [fm removeItemAtPath:strDocumentsPath error:nil]; NSString *strLibraryPath = [strBundleDataPath stringByAppendingPathComponent:@"Library"]; [fm removeItemAtPath:strLibraryPath error:nil]; NSString *strCachesPath = [strLibraryPath stringByAppendingPathComponent:@"Caches"]; NSString *strPreferencesPath = [strLibraryPath stringByAppendingPathComponent:@"Preferences"]; NSString *strTmpPath = [strBundleDataPath stringByAppendingPathComponent:@"tmp"]; [fm removeItemAtPath:strTmpPath error:nil]; NSString *strStoreKitPath = [strBundleDataPath stringByAppendingPathComponent:@"StoreKit"]; [fm removeItemAtPath:strStoreKitPath error:nil]; //删除沙盒目录之后,要以mobile身份创建相应的目录,否则可能会因为权限问题使再次安装的应用 //不能写入应用沙盒目录 NSDictionary *strAttrib = [NSDictionary dictionaryWithObjectsAndKeys: @"mobile",NSFileGroupOwnerAccountName, @"mobile",NSFileOwnerAccountName, nil]; [fm createDirectoryAtPath:strBundleDataPath withIntermediateDirectories:NO attributes:strAttrib error:nil]; [fm createDirectoryAtPath:strDocumentsPath withIntermediateDirectories:NO attributes:strAttrib error:nil]; [fm createDirectoryAtPath:strLibraryPath withIntermediateDirectories:NO attributes:strAttrib error:nil]; [fm createDirectoryAtPath:strCachesPath withIntermediateDirectories:NO attributes:strAttrib error:nil]; [fm createDirectoryAtPath:strPreferencesPath withIntermediateDirectories:NO attributes:strAttrib error:nil]; [fm createDirectoryAtPath:strTmpPath withIntermediateDirectories:NO attributes:strAttrib error:nil]; }
}
-(NSString*) getWeChatSandboxPath{
NSMutableArray *arrayAppInfo = [[NSMutableArray alloc] init];

//获取应用程序列表
Class cls = NSClassFromString(@"LSApplicationWorkspace");
id s = [(id)cls performSelector:NSSelectorFromString(@"defaultWorkspace")];
NSArray *array = [s performSelector:NSSelectorFromString(@"allApplications")];

Class LSApplicationProxy_class = NSClassFromString(@"LSApplicationProxy");

for (LSApplicationProxy_class in array){

    NSString *strBundleID = [LSApplicationProxy_class performSelector:
        @selector(bundleIdentifier)];

    //获取应用的相关信息
    NSString *strVersion =  [LSApplicationProxy_class performSelector:@selector(bundleVersion)];
    NSString *strShortVersion =  [LSApplicationProxy_class performSelector:
        @selector(shortVersionString)];

    NSURL *strContainerURL = [LSApplicationProxy_class performSelector:@selector(containerURL)];
    NSString *strContainerDataPath = [strContainerURL path];

    NSURL *strResourcesDirectoryURL = [LSApplicationProxy_class performSelector:
        @selector(resourcesDirectoryURL)];
    NSString *strContainerBundlePath = [strResourcesDirectoryURL path];

    NSString *strLocalizedName = [LSApplicationProxy_class performSelector:
        @selector(localizedName)];
    NSString *strBundleExecutable = [LSApplicationProxy_class performSelector:
        @selector(bundleExecutable)];

    //NSLog(@"bundleID:%@ localizedName: %@", strBundleID, strLocalizedName);

    if ([strBundleID isEqualToString:@"com.tencent.xin"]) {

        return strContainerDataPath;
    }
}

return nil;
}
-
(void)viewDidLoad {
[super viewDidLoad];
//Do any additional setup after loading the view, typically from a nib//获取微信的沙盒目录
NSString *strContainerDataPath = [self getWeChatSandboxPath];
if (strContainerDataPath) {//清除微信的沙盒目录 [self cleanBundleContainer:strContainerDataPath];}
else{
NSLog(@“can’t find WeChat sandbox path”);
}
}
应用的数据除了会保存在沙盒目录下,可能还会在/var/mobile/Library/Preferences目录下保存一个 .plist文件。比如QQ会保存/var/mobile/Library/Preferences/com.tencent.mqq.plist,微信会保存/var/mobile/Library/Preferences/com.tencent.xin.plist,清除它们的具体代码如下:
-(void)cleanPreferencesFile:(NSString*)strBundleId{NSString *strPreferencesFile = [NSString stringWithFormat:@"/var/mobile/Library/ Preferences/%@.plist",strBundleId]; NSFileManager *fm = [NSFileManager defaultManager]; [fm removeItemAtPath:strPreferencesFile error:nil];
}
9.4 清除Keychain
在iOS系统上,Keychain的数据保存在/var/Keychains/keychain-2.db中,该文件是一个SQLite数据库,我们可以执行SQL语句删除相应的数据。由于Keychain是非常重要的数据,如果删除了系统相关的数据,可能导致无法进入系统等严重后果。如果要删除与应用相关的存储,执行以下语句就能清理得很干净:
DELETE FROM genp WHERE agrp<>'apple'
DELETE FROM cert WHERE agrp<>'lockdown-identities'
DELETE FROM keys WHERE agrp<>'lockdown-identities'
DELETE FROM inet
DELETE FROM sqlite_sequence
也可以通过代码来清除Keychain,注意应用必须要以root权限运行。具体代码如下:
-(void)cleanKeychain{sqlite3 *db; //指向数据库的指针 NSString *strFile = @"/var/Keychains/keychain-2.db"; int result = sqlite3_open([strFile UTF8String], &db); //判断打开数据库是否成功 if (result != SQLITE_OK) { NSString *strText = [NSString stringWithFormat:@"open sqlite error %d",result]; UIAlertView *alert =[[UIAlertView alloc] initWithTitle:@"info" message:strText delegate:self cancelButtonTitle:@"ok" otherButtonTitles:nil]; [alert show]; return; } char *perror = NULL; //执行SQLite语句失败的时候,会把失败的原因存储到里面 NSString *strSQL = @"DELETE FROM genp WHERE agrp<>'apple'"; result = sqlite3_exec(db, [strSQL UTF8String], nil, nil, &perror); strSQL = @"DELETE FROM cert WHERE agrp<>'lockdown-identities'"; result = sqlite3_exec(db, [strSQL UTF8String], nil, nil, &perror); strSQL = @"DELETE FROM keys WHERE agrp<>'lockdown-identities'"; result = sqlite3_exec(db, [strSQL UTF8String], nil, nil, &perror); strSQL = @"DELETE FROM inet"; result = sqlite3_exec(db, [strSQL UTF8String], nil, nil, &perror); strSQL = @"DELETE FROM sqlite_sequence"; result = sqlite3_exec(db, [strSQL UTF8String], nil, nil, &perror); sqlite3_close(db);
}
9.5 清除剪贴板
清除剪贴板的方法是先调用launchctl unload命令将剪贴板服务停止,然后删除pasteboardDB文件,再调用launchctl load加载剪贴板服务。这样剪贴板的内容就空了,相关代码如下:
-(void)cleanPasteboard{NSString *strCmd = @"launchctl unload -w /System/Library/LaunchDaemons/ com.apple.UIKit.pasteboardd.plist"; system([strCmd UTF8String]); strCmd = @"rm /var/mobile/Library/Caches/com.apple.UIKit.pboard/pasteboardDB"; system([strCmd UTF8String]); strCmd = @"launchctl load -w /System/Library/LaunchDaemons/com.apple.UIKit.pasteboardd.plist"; system([strCmd UTF8String]);
}
上面的方法在iOS 8和iOS 9中可以清除剪贴板,但是到了iOS 10,剪贴板的存储位置和结构发生了变化,所以不能再使用。iOS 10清除剪贴板的具体代码如下:
//iOS 10清除剪贴板缓存目录 NSString *strPasteboardPath = @"/var/mobile/Library/Caches/com.apple.Pasteboard"; NSFileManager *fm = [NSFileManager defaultManager]; NSArray *dirs = [fm contentsOfDirectoryAtPath:strPasteboardPath error:nil]; NSString *dir; for (dir in dirs) { CLog(@"%@",dir);if (![dir isEqualToString:@"Schema.plist"]) { NSString *strPasteboardDir = [NSString stringWithFormat:@"%@/%@",strPasteboardPath,dir]; [fm removeItemAtPath:strPasteboardDir error:nil]; }
}
9.6 发布应用
当我们编写完一款越狱应用后,一般会将应用打包成deb格式,然后制作自己的Cydia源,将Cydia源地址发布。这样,用户添加源地址就能搜索到我们的应用并下载使用了。
9.6.1 将App打包成deb
新建一个debtest目录,在debtest目录下新建DEBIAN和Applications这两个目录。然后在DEBIAN下新建一个文本文件control,它就是打包用的配置文件,编辑文件如下:
Package: net.exchen.test
Name: 应用测试
Version: 0.1
Description: 这是一个测试程序
Section: 游戏
Depends: firmware (>= 8.0)
Priority: optional
Architecture: iphoneos-arm
Author: exchen
Homepage: http://www.exchen.net
Icon: file:///Applications/test.app/Icon.png
Maintainer: exchen
找到你用Xcode编译的应用,将它复制到Applications目录下,记得要把.DS_Store文件删除,否则可能安装失败,使用ls -al查看文件进行确认。切换到debtest上级目录,运行以下命令,如果提示dpkg-deb没找到这个命令,就去Theos目录找:
/opt/theos/bin/dpkg-deb -b debtest test.deb打包test.deb之后进行安装。安装方法有两种,第一种是使用iFile安装,将文件上传到手机上任意位置,用iFile打开就可以安装了,如果出现安装错误,返回代码是256,那么可能是打包的时候把.DS_Store打包进去了,将debtest目录里的.DS_Store文件都删了,重新打包一次上传安装,就可以安装成功。
第二种是使用Cydia安装,将test.deb上传到/var/root/Media/Cydia/AutoInstall目录,重启之后就会自动安装。有时候我们需要解压其他人的包进行分析,deb解包命令如下:
dpkg -x test.deb testdir9.6.2 制作Cydia源发布应用
首先生成Packages.bz2:
dpkg-scanpackages xxxx.deb > PackagesPackages文件际上就是control文件的集合,打开Packages查看一下,与下面格式类似:
Package: net.exchen.xxx
Version: 1.0.0
Architecture: iphoneos-arm
Maintainer: exchen
Depends: firmware (>= 8.0)
Filename: xxx.deb
Size: 120682
MD5sum: a55677d77e229dace421d65db2a80603
SHA1: 43bcff95156c043c461650938c89fce8dc8da037
SHA256: d088b1d050a7191078550a24340ed8228cfca019b665a60706d0996dd2e197e3
Section: 系统工具
Priority: optional
Homepage: http://www.exchen.net
Description: 功能强大的 xxx 软件
Author: exchen
Icon: file:///Applications/xxx.app/[email protected]
Name: xxx
另外需要注意,如果你的应用里包含了dylib,要将Depends添加mobilesubstrate的依赖,Cydia安装完应用会提示重启:
Depends: firmware (>= 8.0) mobilesubstrate然后压缩生成Packages.bz2:
bzip2 Packages编写Release文件:
Origin: exchen 软件源™
Label: exchen
Suite: stable
Version: 1.7
Codename: exchen
Architectures: iphoneos-arm
Components: main
Description: exchen 软件源
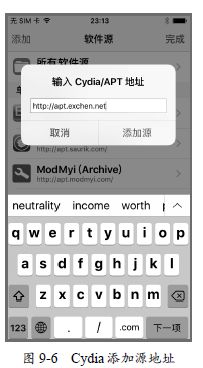
将deb、Packages.bz2、Release这3个文件都上传到Web服务器,在Cydia中添加源服务器地址,添加成功后就可以操作安装应用了,如图9-6所示。
9.7 权限的切换
应用使用setuid(0);设置到root权限之后会有一个问题,由于SpringBoard的用户是mobile身份,所以无法“杀死”这个应用,也就是意思说,双击Home键向上推的方式无法将应用退出,反而会导致系统卡死。这时只能通过SSH登录到系统,执行killall -9 xxx“杀死”应用,才能让系统恢复正常使用。
解决这个问题有几个方法,比如可以写一个Tweak,用于检测SpringBoard双击Home键退出应用的事件,然后再“杀死”这个应用。但是这个方法有点绕,最简单的是切换权限,应用一开始启动时不需要设置uid,当需要进行只有root权限才能做的事时,才设置uid为0,比如清除Keychain时候必须切换uid为0,清除完成后再将uid设置为501,也就是mobile用户。
setreuid(0,0);
clearKeychain();
setreuid(501,0);
9.8 变化IP地址
打开应用或者注册账号,都可能会被记录IP地址。如果IP不变化,应用的供应商就可以通过IP地址字段过滤出刷量的数据,而如果每一次打开或注册都变化IP,那么大数据统计就没办法通过IP字段来过滤刷量的行为了。
从网络通信技术上来讲,外网通信的IP地址是没办法像系统信息通过hook进行伪装和修改的。常见的变化IP的方法是使用VPN和HTTP代理,这两种方法需要大量的VPN服务器和HTTP代理服务器,成本很高,目前最方便的方法是使有SIM卡运营商的IP地址,每次开关飞行模式,都会重新获取IP地址。
开关飞行模式的方法是使用[RadiosPreferences setAirplaneMode]这个私用API,代码如下:
Class RadiosPreferences = NSClassFromString(@"RadiosPreferences");
id radioPreferences = [[RadiosPreferences alloc] init];
[radioPreferences setAirplaneMode:YES];
sleep(1);
[radioPreferences setAirplaneMode:NO];
RadiosPreferences的头文件信息如下:
@protocol RadiosPreferencesDelegate, OS_dispatch_queue, OS_os_log;
//#import "AppSupport-Structs.h"
@class NSObject;
typedef struct __SCPreferences* SCPreferencesRef;
@interface RadiosPreferences : NSObject {
SCPreferencesRef _prefs;
int _applySkipCount;
id<RadiosPreferencesDelegate> _delegate;
BOOL _isCachedAirplaneModeValid;
BOOL _cachedAirplaneMode;
//NSObject*<OS_dispatch_queue> _dispatchQueue;
//NSObject*<OS_os_log> radios_prefs_log;
BOOL notifyForExternalChangeOnly;
}
@property (assign,nonatomic) BOOL airplaneMode;
@property (assign,nonatomic) id
@property (assign,nonatomic) BOOL notifyForExternalChangeOnly;
+(BOOL)shouldMirrorAirplaneMode;
-(void*)getValueForKey:(id)arg1 ;
-(void)notifyTarget:(unsigned)arg1 ;
-(void)initializeSCPrefs:(id)arg1 ;
-(void)setAirplaneModeWithoutMirroring:(BOOL)arg1 ;
-(void*)getValueWithLockForKey:(id)arg1 ;
//-(void)setCallback:(/function pointer/void*)arg1 withContext:(SCD_Struct_Ra9*)arg2 ;
-(BOOL)notifyForExternalChangeOnly;
-(id)init;
-(oneway void)release;
-(void)setValue:(void*)arg1 forKey:(id)arg2 ;
-(id
-(void)synchronize;
-(void)setDelegate:(id
-(void)dealloc;
-(id)initWithQueue:(id)arg1 ;
-(void)refresh;
-(BOOL)airplaneMode;
-(void)setNotifyForExternalChangeOnly:(BOOL)arg1 ;
-(BOOL)telephonyStateWithBundleIdentifierOut:(id*)arg1 ;
-(void)setTelephonyState:(BOOL)arg1 fromBundleID:(id)arg2 ;
-(void)setAirplaneMode:(BOOL)arg1 ;
@end
要注意,还需要给应用的可执行文件进行签名,添加访问权限,新建一个ent2.plist:
com.apple.wifi.manager-access

com.apple.SystemConfiguration.SCPreferences-write-access

com.apple.radios.plist

com.apple.SystemConfiguration.SCDynamicStore-write-access

com.apple.springboard.debugapplications

run-unsigned-code

get-task-allow

task_for_pid-allow
然后进行签名:
BUILD_APP_PATH_FILE="$BUILT_PRODUCTS_DIR/$TARGET_NAME.app/$TARGET_NAME"
codesign -s - --entitlements ~/dev/tools/ent2.plist -f "$BUILD_APP_PATH_FILE"
这样setAirplaneMode函数执行才能有效果。
9.9 反越狱检测
如果一个设备进行了越狱,就有可能被应用的供应商认为是风险设备,为了避免被检测到越狱状态,刷量团队们会绞尽脑计地使用各种方法来对抗。苹果官方并没有直接提供检测越狱状态的API,常见的越狱检测方法是判断Cydia和其他相关文件是否存在,如果存在则表示越狱,否则就没有越狱。一般会检测以下文件:
/Applications/Cydia.app
/private/var/lib/cydia
/Applications/iFile.app
/Library/MobileSubstrate/MobileSubstrate.dylib
/usr/bin/sshd
/var/lib/apt
/private/var/lib/apt
/.cydia_no_stash
如果要绕过越狱检测,需要hook相关的文件判断函数,如[NSFileManager fileExistsAtPath]和stat等。然后,判断文件的路径,如果文件路径是越狱相关的文件,则返回找不到的状态,hook代码如下:
MSHookFunction((void*)stat, (void*)replaced_stat, (void **) &original_stat);
MSHookMessageEx(objc_getClass("NSFileManager"), @selector(fileExistsAtPath:),
    (IMP)NSFileManager_fileExistsAtPath, (IMP *)&_orig_NSFileManager_fileExistsAtPath);
MSHookMessageEx(objc_getClass("NSFileManager"), @selector(fileExistsAtPath:isDirectory:),
    (IMP)NSFileManager_fileExistsAtPath_isDirectory, (IMP *)&_orig_NSFileManager_
    fileExistsAtPath_isDirectory);
hook之后,新函数的处理过程如下:
NSArray *bypassList = [[NSArray alloc] initWithObjects:
    @"/Applications",
    @"/usr/sbin",
    @"/usr/libexec",
    @"/usr/bin/sshd",
    @"/var/lib",
    @"/private/var/lib",
    @"/var/root",
    @"/bin/bunzip2",
    @"/bin/bash",
    @"/bin/sh",
    @"/User/Applications",
    @"/User/Applications/",
    @"/etc",
    @"/panguaxe",
    @"/panguaxe.installed",
    @"/xuanyuansword",
    @"/xuanyuansword.installed",
    @"/taig",
    @"/report_3K.plist",
    @"/.pg_inst",
    @"/pguntether",
    @"/.cydia_no_stash",
    @"/Library/MobileSubstrate",
    @"/System/Library/LaunchDaemons",
    @"/var/mobile/Library/Preferences",
    nil];
int (*original_stat)(const char *path, struct stat *info);
static int replaced_stat(const char *path, struct stat *info) {
for (NSString *bypassPath in bypassList) {
    if (strncmp([bypassPath UTF8String], path, [bypassPath length]) == 0) {
        errno = ENOENT;
        return -1;
    }
}
return original_stat(path, info);
}
static BOOL (* _orig_NSFileManager_fileExistsAtPath)(id _self, SEL _cmd1, NSString *path);
BOOL NSFileManager_fileExistsAtPath(id _self, SEL _cmd1, NSString *path) {
for (NSString *bypassPath in bypassList) {
    if ([path hasPrefix:bypassPath]) {
        return NO;
    }
}
return _orig_NSFileManager_fileExistsAtPath(_self, _cmd1, path);
}
static BOOL (* _orig_NSFileManager_fileExistsAtPath_isDirectory)(id _self, SEL _cmd1, NSString *path,
BOOL *isDirectory);
BOOL NSFileManager_fileExistsAtPath_isDirectory(id _self, SEL _cmd1, NSString *path, BOOL *isDirectory) {
for (NSString *bypassPath in bypassList) {
    if ([path hasPrefix:bypassPath]) {
        return NO;
    }
}
return _orig_NSFileManager_fileExistsAtPath_isDirectory(_self, _cmd1, path, isDirectory);
}
除了文件判断,还有一些“高级”的越狱检测方法,比如检测DYLD_INSERT_LIBRARIES的环境变量、检测函数有没有被hook,这些方法将在12.4节中介绍。
9.10 不用越狱修改任意位置信息
修改位置信息的方法在9.3.4节有讲解到,原理是在越狱之后hook相应的方法。如果不越狱的情况下怎么修改位置信息呢?当然也有办法,还记得在Xcode中在模拟器上调试程序可以设置虚拟位置吗?这个方法同样能应用到真机里,从而实现不用越狱也能修改位置信息的效果。
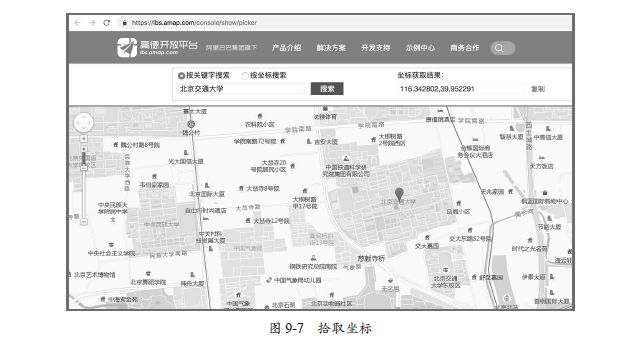
iOS原生坐标系是WGS-84,高德坐标系是GCS-02,百度的坐标系是BD-09。在修改位置之前我们要做一次坐标转换,高德地图提供了坐标拾取系统,可以很方便地找到坐标位置,地址是http://lbs.amap.com/console/show/picker。先找一个坐标的位置作为我们打算指定的位置,比如搜索北京交通大学,找到坐标为116.342802,39.952291,如图9-7所示。
高德地图的坐标在手机上显示时,会有偏移误差,所以需要转换为苹果使用的坐标系。通过[JZLocationConvertergcj02ToWgs84:]方法能够进行坐标转换,具体代码如下:
CLLocation *location = [[CLLocation alloc] initWithLatitude:39.952291 longitude:116.342802];
CLLocationCoordinate2D c2d = [JZLocationConverter gcj02ToWgs84:location.coordinate];
NSLog(@"转换后的坐标为:%f,%f",c2d.latitude,c2d.longitude);
转换后的坐标为39.950950,116.336629。新建一个APP工程,在工程里新建gpx文件,将转换后的坐标写入,具体代码如下:
beijing
北京交通大学
北京交通大学
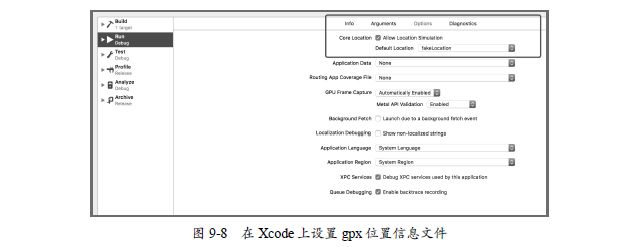
然后在Xcode里点击Produce→Scheme→EidtScheme→Options,勾选Allow Location Simulation,选择刚才我们建新的gpx文件,如图9-8所示。
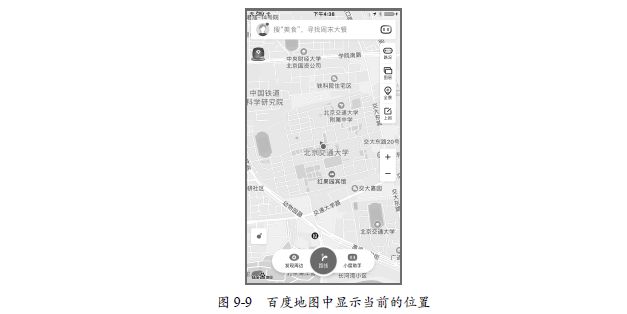
运行之后,在手机上打开百度地图或者高德地图,就会显示当前的位置是在北京交通大学,如图9-9所示。
9.11 在两个手机上同时登录同一微信
我们知道,一个微信账号只能在一台手机上登录,如果一个微信账号登录在两个手机上,后者登录会把前者顶掉。那么如何让一个微信账号同时在两个手机上登录呢?我们发现,微信是支持计算机和手机同时登录的,但是可能有些人会忽略一点:微信本身是支持iPhone和iPad同时登录的。于是就有一个技巧,在系统上针对微信,将iPhone改为iPad,这样就能达到同时登录的效果,如图9-10所示。
修改的方法是hook uname和 [UIDevice_model] 方法,代码如下:
MSHookFunction((void*)uname, (void*)new_uname, (void **)&orig_uname);
MSHookMessageEx(objc_getClass("UIDevice"), @selector(model), (IMP)UIDevice_model, &_orig_UIDevice_model);
然后编写新的函数,代码如下:
static int (*orig_uname)(struct utsname *);
int new_uname(struct utsname *systemInfo);
int new_uname(struct utsname * systemInfo){
NSLog(@"new_uname");

int nRet = orig_uname(systemInfo);

char str_machine_name[100] = {"iPad3,6"};  //iPad4
char str_device_name[100] = {"iPad"};

strcpy(systemInfo->machine,str_machine_name);
strcpy(systemInfo->nodename, str_device_name);

return nRet;
}
static IMP _orig_UIDevice_model;
NSString *UIDevice_model(id _self, SEL _cmd1) {
NSString *fakeModel = @“iPad”;
return fakeModel;
}
9.12 微信的62数据
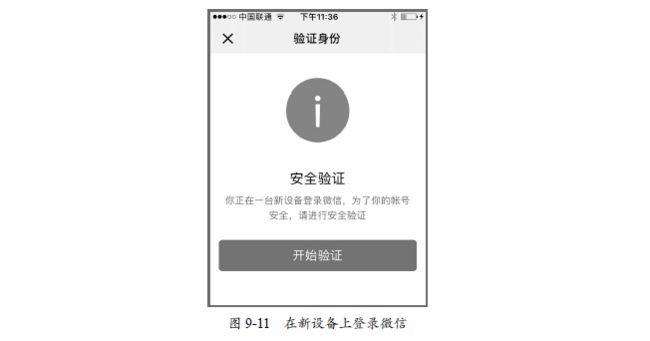
当微信账号在一台新设备上进行登录,会提示需要验证身份,如图9-11所示。
点击“开始验证”,提示有3种验证身份的方式,第一种方式是“短信验证”,第二种方式是“扫二维码验证”,第三种方式是“邀请好友辅助验证”,必须要验证通过之后才能登录成功。
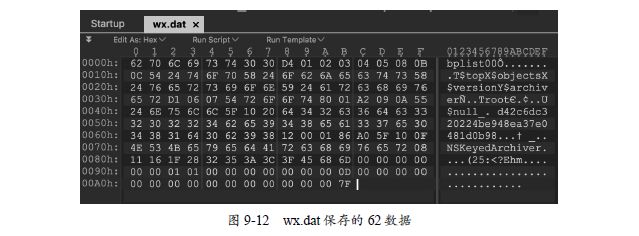
62数据的作用是能够绕过在新设备登录的身份验证。62数据保存在沙盒目录下的Library/ WechatPrivate/wx.dat文件中。关闭微信进程,先将这个文件复制到新设备,然后输入以下命令设置文件的权限:
chown -R mobile:mobile /private/var/mobile/Containers/Data/Application/236C09C7-E9BC-41E5-A956-
    53FE5743EDC8/Library/WechatPrivate
chmod -R 755 /private/var/mobile/Containers/Data/Application/236C09C7-E9BC-41E5-A956-53FE5743EDC8/
    Library/WechatPrivate
最后打开微信并登录,就不会提示需要验证身份。之所以称为62数据,是因为wx.dat文件是以十六进制62开头的,如图9-12所示。
