Spring实战(一)装配Bean
Spring是一个开源框架,最早由Rod Johnson创建。Spring是为了解决企业级应用开发的复杂性而创建的,Spring不仅仅局限于服务器端开发,任何Java应用都能在简单性、可测试性和松耦合等方面从Spring中获益。

虽然Spring用Bean或者JavaBean来表示应用组件,但并不意味着Spring的组件必须要遵循JavaBean规范。一个Spring组件可以是任何形式的POJO。我们将采用JavaBean的广泛定义,即POJO的同义词。
Spring可以做很多事,但归根结底,支撑Spring的仅仅是少数的几个理念,所有的理念都可以追溯到Spring的最根本使命上:简化Java开发。
在基于Spring的应用中,应用对象存在于Spring容器中。

Spring容器负责创建对象,装配它们,配置它们并管理它们的整个生命周期。容器是Spring框架的核心,它会创建相互协作的组件之间的关联。
Spring自带多个容器实现,可以归为两种不同的类型:BeanFactory和ApplicationContext。BeanFactory是最简单的容器,ApplicationContext基于BeanFactory构建,并提供应用框架级别的服务,例如从属性文件中解析文本信息。
Spring自带了多种类型的ApplicationContext。例如:
ApplicationConfigApplicationContext:从一个或多个基于Java的配置类中加载ApplicationContext。ClassPathXmlApplicationContext:从类路径下的一个或多个XML配置文件中加载上下文定义,把ApplicationContext的定义作为类资源。FileSystemXmlApplicationContext:从文件系统下的一个或多个XML配置文件中加载上下文定义。AnnotationConfigWebApplicationContext:从一个或多个基于Java的配置类中加载Spring Web应用上下文。XmlWebApplicationContext:从Web应用下的一个或多个XML配置文件中加载上下文定义。

从上图和多种类型的ApplicationContext名可以看出,我们有多种方法创建Spring容器。
例如:
ApplicationContext context = new ClassPathXmlApplicationContext("applicationContext.xml");
上图中的配置元数据(Configuration Metadata)是应用程序开发人员告诉Spring容器如何实例化、装配应用程序中的对象。所谓的装配(Wiring)是创建应用对象之间协作关系的行为。有三种主要的装配机制(或者说配置元数据的形式):
- 在XML中进行配置
- 在Java类中进行配置
- Bean发现机制和自动装配
下面我们来尝试一下这三种方式。首先在Intellij IDEA中新建一个Maven项目,

在项目中的pom.xml文件中添加如下依赖:
<dependency>
    <groupId>org.springframeworkgroupId>
    <artifactId>spring-contextartifactId>
    <version>5.1.0.RELEASEversion>
dependency>
在项目中新增一个Person类
package com.andy.bean;

public class Person {
    private String name;

    public String getName() {
        System.out.println("Hello, I am " + name);
        return name;
    }

    public void setName(String name) {
        this.name = name;
    }
}
现在我们尝试第一种方式,
###在XML中进行配置
在项目中新建resources目录,并在其目录下添加一个XML配置文件applicationContext.xml,

在配置文件增添如下内容:
<beans xmlns="http://www.springframework.org/schema/beans"
       xmlns:xsi="http://www.w3.org/2001/XMLSchema-instance"
       xsi:schemaLocation="http://www.springframework.org/schema/beans http://www.springframework.org/schema/beans/spring-beans.xsd">

    <bean id="person" class="com.andy.bean.Person">
        <property name="name" value="AndyFree"/>
    bean>

beans>
接下来我们创建一个Spring容器,并从中提取Bean实例,
package com.andy;

import com.andy.bean.Person;
import org.springframework.context.ApplicationContext;
import org.springframework.context.support.ClassPathXmlApplicationContext;

public class App
{
    public static void main(String[] args) {
        ApplicationContext context = new ClassPathXmlApplicationContext("applicationContext.xml");
        Person person = (Person) context.getBean("person");
        person.getName();
    }
}
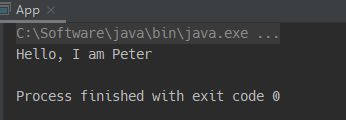
输出如下:

我们从Spring容器中获取到了在applicationContext.xml文件中配置的Bean实例。
在Java类中进行配置
现在我们尝试另外一种方式,新建一个名为AppConfig的类:
package com.andy.config;

import com.andy.bean.Person;
import org.springframework.context.annotation.Bean;
import org.springframework.context.annotation.Configuration;

@Configuration
public class AppConfig {
    @Bean
    public Person getPerson() {
        Person person = new Person();
        person.setName("Lucy");
        return person;
    }
}
Spring的@Configuration注解表明这个类是一个配置类,该类应该包含在Spring应用上下文中如何创建Bean的细节。@Bean方法表明这个方法将会返回一个对象,该对象要注册为Spring应用上下文中的Bean。
接下来我们创建一个Spring容器,并从中提取Bean实例,
package com.andy;

import com.andy.bean.Person;
import com.andy.config.AppConfig;
import org.springframework.context.ApplicationContext;
import org.springframework.context.annotation.AnnotationConfigApplicationContext;
import org.springframework.context.support.ClassPathXmlApplicationContext;

public class App
{
    public static void main(String[] args) {
//        ApplicationContext context = new ClassPathXmlApplicationContext("applicationContext.xml");
        ApplicationContext context = new AnnotationConfigApplicationContext(AppConfig.class);
        Person person = (Person) context.getBean("getPerson");
        person.getName();
    }
}

Bean发现机制和自动装配
现在我们尝试最后一种方式,将Person类改成如下内容:
package com.andy.bean;

import org.springframework.stereotype.Component;

@Component
public class Person {
    private String name = "Peter";

    public String getName() {
        System.out.println("Hello, I am " + name);
        return name;
    }

    public void setName(String name) {
        this.name = name;
    }
}
@Component注解表明该类会作为组件类,并告知Spring要为这个类创建实例。
新建一个名为PersonConfig的类,
package com.andy.bean;

import org.springframework.context.annotation.ComponentScan;
import org.springframework.context.annotation.Configuration;

@Configuration
@ComponentScan
public class PersonConfig {
}
@ComponentScan默认会扫描与配置类相同的包以及其子包(即com.andy.bean包),查找带有@Component注解的类。
当然,如果更喜欢用XML启动组件扫描的话,可以如下修改applicationContext.xml文件:
<beans xmlns="http://www.springframework.org/schema/beans"
       xmlns:xsi="http://www.w3.org/2001/XMLSchema-instance"
       xmlns:context="http://www.springframework.org/schema/context"
       xsi:schemaLocation="http://www.springframework.org/schema/beans http://www.springframework.org/schema/beans/spring-beans.xsd http://www.springframework.org/schema/context http://www.springframework.org/schema/context/spring-context.xsd">


    <context:component-scan base-package="com.andy.bean"/>

beans>
接下来我们依旧创建一个Spring容器,并从中提取Bean实例,
package com.andy;

import com.andy.bean.Person;
import com.andy.bean.PersonConfig;
import com.andy.config.AppConfig;
import org.springframework.context.ApplicationContext;
import org.springframework.context.annotation.AnnotationConfigApplicationContext;
import org.springframework.context.support.ClassPathXmlApplicationContext;

public class App
{
    public static void main(String[] args) {
//        ApplicationContext context = new ClassPathXmlApplicationContext("applicationContext.xml");
        ApplicationContext context = new AnnotationConfigApplicationContext(PersonConfig.class);
        Person person = (Person) context.getBean("person");
        person.getName();
    }
}
到此,我们大概了解了一下三种装配机制。现在,尝试一些更加复杂一点的例子。在此之前,我们先看一个概念——依赖注入(Dependency Injection, DI)。对象的依赖关系将由系统中负责协调各对象的第三方组件在创建对象的时候进行设定。对象无需自行创建或管理它们之间的依赖关系。
CD(Compact Disc)为我们阐述DI如何运行提供了一个很好的样例。如果不将CD插入(注入)到CD播放器中,CD播放器其实没啥用。所以,可以这么说,CD播放器依赖于CD才能发挥其功能。我们先定义一个CompactDisc接口:
package com.andy.soundsystem;

public interface CompactDisc {
    void play();
}
作为接口,它定义了CD播放器对一盘CD所能进行的操作。我们创建YeHuiMei类对其实现:
package com.andy.soundsystem;

import org.springframework.stereotype.Component;

@Component
public class YeHuiMei implements CompactDisc {
    private String title = "晴天";
    private String artist = "周杰伦";

    @Override
    public void play() {
        System.out.println("Playing " + title + " by " + artist);
    }
}
新增一个MediaPlayer接口,
package com.andy.soundsystem;

public interface MediaPlayer {
    void play();
}
CDPlayer类实现MediaPlayer接口,
package com.andy.soundsystem;

import org.springframework.beans.factory.annotation.Autowired;
import org.springframework.stereotype.Component;

@Component("cdPlayer")
public class CDPlayer implements MediaPlayer{
    private CompactDisc compactDisc;

    @Autowired
    public CDPlayer(CompactDisc compactDisc) {
        this.compactDisc = compactDisc;
    }

    @Override
    public void play() {
        compactDisc.play();
    }
}
我们为CDPlayer这个Bean的ID通过@Component("cdPlayer")注解赋值为cdPlayer。这里通过@Autowired注解进行自动装配,其会在Spring应用上下文中寻找匹配某个Bean需求的其他Bean。
我们再新增一个CDPlayerConfig类,
package com.andy.soundsystem;

import org.springframework.context.annotation.ComponentScan;
import org.springframework.context.annotation.Configuration;

@Configuration
@ComponentScan
public class CDPlayerConfig {
}
其用法我们之前看过就不再赘述啦。
接下来,我们可以验证一下是否注入成功,
package com.andy;


import com.andy.soundsystem.*;
import org.springframework.context.ApplicationContext;
import org.springframework.context.annotation.AnnotationConfigApplicationContext;

public class App
{
    public static void main( String[] args )
    {
        ApplicationContext context = new AnnotationConfigApplicationContext(CDPlayerConfig.class);
        MediaPlayer player = (MediaPlayer) context.getBean("cdPlayer");
        player.play();
    }
}

答案是肯定的。
更多关于装配Bean的内容,请阅读《Spring实战第4版》第2章或者官方文档Spring Framework Documentation。
参考
- Spring实战第4版