Tensorflow学习笔记1-利用神经网络对Fashion MNIST数据集分类
这里写自定义目录标题
- 引言
- 1.颜色图像的数组表示
- 2.将数组显示为图像
- 3.Fashion MNIST 数据集
- 4.模型训练、评估及预测
- 5.完整代码
引言
最近尝试学习tensorflow框架,计划按照教程进行操作,理解机制及使用的重要函数。任务1是:训练首个神经网络:基本分类。这一部分是训练神经网络来对fashionminst的服饰图像进行分类,可以借此案例熟悉计算机图像处理的输入输出。
1.颜色图像的数组表示
为理解Fashion MNIST数据集,需先对数字图像有一些基本的认识。
- 数字图像是一个像素(图片元素)的矩形网格,其中每个像素单独定义一种颜色 。例如28x28像素的图片,可表示为一个28x28的矩阵,其中矩阵单元为[r,g,b]。
- 通常使用RGB颜色模型来表示颜色值,即一种颜色由三个取值范围从0到255的整数确定,分别表示颜色的红、绿、蓝分量的强度。其他颜色值通过混合红、绿、蓝分量获得。使用这种模型,可表示2563(大约1670万)种不同的颜色。常见的RGB颜色值如下表所示。
| Red | Green | Blue | 颜色 |
|---|---|---|---|
| 255 | 0 | 0 | Red(红) |
| 0 | 255 | 0 | Green(绿) |
| 0 | 0 | 255 | Blue(蓝) |
| 0 | 0 | 0 | Black(黑) |
| 255 | 255 | 255 | White(白) |
| 255 | 255 | 0 | Yellow(黄) |
3.亮度:亮度的标准公式来源于眼睛对红、绿、蓝的敏感度,它是三种颜色分量强度的线性组合方程:Y=0.299r+0.587g+0.114b
4.灰度:当三种颜色分量的强度相同时,RGB颜色模型具有一种属性,即结果颜色是位于黑(全0)到白(全255)之间的灰度颜色。因此将彩色图像转换为灰度图像最简单的方法是将红、绿、蓝分量值替换成与其单色亮度值相同的颜色。因此灰度图像的像素点只需一个值便可确定,例如表示为[r,r,r]。
5.颜色兼容性:两种颜色的兼容性是指在以一种颜色为背景时另一种颜色的可阅读性。一种被广泛应用的经验法则是,前景色和背景色的亮度差至少应该是128。
2.将数组显示为图像
使用matplotlib.pyplot.imshow()函数将矩阵转化为图像。注意矩阵的输入有三种形式,第一种是标量数据,数组格式为(M,N),第二种是RGB图像,数组格式为(M,N,3),第三种是由RGBA图像,数组格式为(M,N,4);以上M,N分别对应图像的行与列的像素个数。
matplotlib.pyplot.imshow(X, cmap=None, norm=None, aspect=None, interpolation=None, alpha=None, vmin=None, vmax=None, origin=None, extent=None, shape=None, filternorm=1, filterrad=4.0, imlim=None, resample=None, url=None, *, data=None, **kwargs)[source]
Display an image, i.e. data on a 2D regular raster.
Parameters:
X : array-like or PIL image
The image data. Supported array shapes are:
(M, N): an image with scalar data. The data is visualized using a colormap.
(M, N, 3): an image with RGB values (float or uint8).
(M, N, 4): an image with RGBA values (float or uint8), i.e. including transparency.
The first two dimensions (M, N) define the rows and columns of the image.
The RGB(A) values should be in the range [0 .. 1] for floats or [0 .. 255] for integers. Out-of-range values will be clipped to these bounds.
实操案例:
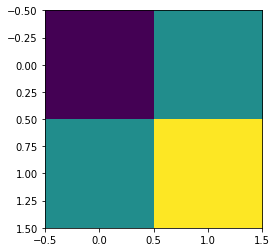
1.数组格式为(M,N)型
a=np.array([[0,125],[125,255]])
plt.imshow(a)
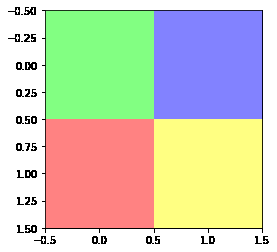
a=np.array([[[0,255,0],[0,0,255]],[[255,0,0],[255,255,0]]])
#绿色:[0,255,0];蓝色:[0,0,255];红色:[255,0,0];黄色:[255,255,0]
plt.imshow(a)
a=np.array([[[0,255,0,125],[0,0,255,125]],[[255,0,0,125],[255,255,0,125]]])
#绿色:[0,255,0];蓝色:[0,0,255];红色:[255,0,0];黄色:[255,255,0];A值取125,中间亮度。
plt.imshow(a)
3.Fashion MNIST 数据集
具备上述数字图像的基本知识,我们来看看训练中使用的Fashion MNIST数据集。一共包含 70000 张灰度图像,涵盖 10 个类别,像素为28*28,对应上述(M,N)型。
由于不能直接按教程操作获取Fashion MNIST数据集,故先下载在本地。一共有四部分:t10k-images-idx3-ubyte.gz、t10k-labels-idx1-ubyte.gz、train-images-idx3-ubyte.gz、train-labels-idx1-ubyte.gz。
定义函数load_data()来导入数据集,此段代码来源于fansszzz的博客。
// An highlighted block
def load_data():
    base = "file:///C:/fashionminst/"
    files = [
        'train-labels-idx1-ubyte.gz', 'train-images-idx3-ubyte.gz',
        't10k-labels-idx1-ubyte.gz', 't10k-images-idx3-ubyte.gz'
        ]
    paths = []
    for fname in files:
        paths.append(get_file(fname, origin=base + fname))
    with gzip.open(paths[0], 'rb') as lbpath:
        y_train = np.frombuffer(lbpath.read(), np.uint8, offset=8) # np.uint8: Unsigned integer (0 to 255);offset =8:Start reading the buffer from this offset (in bytes)
    with gzip.open(paths[1], 'rb') as imgpath:
        x_train = np.frombuffer(
            imgpath.read(), np.uint8, offset=16).reshape(len(y_train), 28, 28) # offset = 16;np.frombuffer: Interpret a buffer as a 1-dimensional array;np.reshape(28,28):Gives a new shape to an array without changing its data
    with gzip.open(paths[2], 'rb') as lbpath:
        y_test = np.frombuffer(lbpath.read(), np.uint8, offset=8)
    with gzip.open(paths[3], 'rb') as imgpath:
        x_test = np.frombuffer(
            imgpath.read(), np.uint8, offset=16).reshape(len(y_test), 28, 28)
    return (x_train, y_train), (x_test, y_test)

(train_images, train_labels), (test_images, test_labels) = load_data()
class_names = ['T-shirt/top', 'Trouser', 'Pullover', 'Dress', 'Coat',
               'Sandal', 'Shirt', 'Sneaker', 'Bag', 'Ankle boot']
对load_data()函数的解读:
函数没有输入参数,返回2个元组,第一个元组是(图片训练集,图片标记),第一个元组是(图片测试集,图片标记)
1.将Fashion Minst数据集存放的完整路径保存到Path列表中,以便gzip来访问
    base = "file:///C:/fashionminst/"
    files = [
        'train-labels-idx1-ubyte.gz', 'train-images-idx3-ubyte.gz',
        't10k-labels-idx1-ubyte.gz', 't10k-images-idx3-ubyte.gz'
        ]
    paths = []
    for fname in files:
        paths.append(get_file(fname, origin=base + fname))
2.调用with gzip.open() as 函数,对train-labels-idx1-ubyte.gz、train-images-idx3-ubyte.gz进行解压缩,由于是二进制文件,因此指定‘rb’。由于图像表示的(r,g,b)值在0-255之间,因此指定np.uint8的数据类型(Unsigned integer 0~255,恰好一个byte能够涵盖)。另需了解train-labels-idx1-ubyte和train-images-idx3-ubyte的数据格式,以便于指定偏移量offset=8(label数据集)或offset=16(image数据集)。特别的,np.frombuffer()函数的返回值为一维数组,对于train-labels-idx1-ubyte文件,由于每张图片的分类结果对应一个0-9之间整数,不需处理,而对于train-images-idx3-ubyte文件,由于每张图片的数字表示是一个矩阵,需使用np.reshape()函数将其转化成矩阵形式。
    with gzip.open(paths[0], 'rb') as lbpath:
        y_train = np.frombuffer(lbpath.read(), np.uint8, offset=8)
    with gzip.open(paths[1], 'rb') as imgpath:
        x_train = np.frombuffer(
            imgpath.read(), np.uint8, offset=16).reshape(len(y_train), 28, 28)
3.经过上述处理,我们可以获得一个x_train是一个shape是60000x28x28的数组,而y_train是一个shape是10000x1的一维数组。
4.模型训练、评估及预测
此部分参考官网教程,讲的非常清楚。
5.完整代码
// An highlighted block
from __future__ import absolute_import, division, print_function
# TensorFlow and tf.keras
import gzip
import tensorflow as tf
from tensorflow import keras
from tensorflow.python.keras.utils import get_file

# Helper libraries
import numpy as np
import matplotlib.pyplot as plt

print(tf.__version__)

def load_data():
    base = "file:///C:/fashionminst/"
    files = [
        'train-labels-idx1-ubyte.gz', 'train-images-idx3-ubyte.gz',
        't10k-labels-idx1-ubyte.gz', 't10k-images-idx3-ubyte.gz'
        ]

    paths = []
    for fname in files:
        paths.append(get_file(fname, origin=base + fname))
    with gzip.open(paths[0], 'rb') as lbpath:
        y_train = np.frombuffer(lbpath.read(), np.uint8, offset=8) # np.uint8: Unsigned integer (0 to 255);offset =8:Start reading the buffer from this offset (in bytes)
    with gzip.open(paths[1], 'rb') as imgpath:
        x_train = np.frombuffer(
            imgpath.read(), np.uint8, offset=16).reshape(len(y_train), 28, 28) # offset = 16;np.frombuffer: Interpret a buffer as a 1-dimensional array;np.reshape(28,28):Gives a new shape to an array without changing its data
    with gzip.open(paths[2], 'rb') as lbpath:
        y_test = np.frombuffer(lbpath.read(), np.uint8, offset=8)
    with gzip.open(paths[3], 'rb') as imgpath:
        x_test = np.frombuffer(
            imgpath.read(), np.uint8, offset=16).reshape(len(y_test), 28, 28)
    return (x_train, y_train), (x_test, y_test)

(train_images, train_labels), (test_images, test_labels) = load_data()
class_names = ['T-shirt/top', 'Trouser', 'Pullover', 'Dress', 'Coat',
               'Sandal', 'Shirt', 'Sneaker', 'Bag', 'Ankle boot']
print(train_images.shape)
print(len(train_labels))
print(train_labels)
print(test_images.shape)
print(len(test_labels))

# pre-processing
print(train_images[0])
plt.figure()
plt.imshow(train_images[0]) #
plt.colorbar()
plt.grid(False)
plt.savefig("1.png")

train_images = train_images / 255.0
test_images = test_images / 255.0

plt.figure(figsize=(10,10))
for i in range(25):
    plt.subplot(5,5,i+1)
    plt.xticks([])
    plt.yticks([])
    plt.imshow(train_images[i], cmap=plt.cm.binary) #plt.imshow:Display an image, i.e. data on a 2D regular raster;cmap=plt.cm.binary : plot in grayscale
    plt.grid(False)
    plt.imshow(train_images[i], cmap=plt.cm.binary)
    plt.xlabel(class_names[train_labels[i]])
plt.savefig('2.png')

#model training
model = keras.Sequential([
    keras.layers.Flatten(input_shape=(28, 28)),
    keras.layers.Dense(128, activation=tf.nn.relu),
    keras.layers.Dense(10, activation=tf.nn.softmax)
])

model.compile(optimizer=tf.train.AdamOptimizer(),
              loss='sparse_categorical_crossentropy',
              metrics=['accuracy'])

model.fit(train_images, train_labels, epochs=5)

#evaluating model
test_loss, test_acc = model.evaluate(test_images, test_labels)
print('Test accuracy:', test_acc)

#model prediction
predictions = model.predict(test_images)
predictions[0]
np.argmax(predictions[0])
test_labels[0]


