使用Keras检测图片中是否包含圣诞老人
项目说明
为了进行Keras对于图像处理的学习而参考[点击此处进入学习]其中包括详细的优化过程(https://www.pyimagesearch.com/2017/12/11/image-classification-with-keras-and-deep-learning/)
数据集来源
数据集包括两部分,一部分是来自Google下抓取的图片461张(包含圣诞老人),【教你如何利用Google图片抓取数据集】另一部分是来自UKBench数据集中随机抽取的461张。
项目详情
网络体系结构定义
定义最简单的Lenet,创建lenet.py
# import the necessary packages
from keras.models import Sequential
from keras.layers.convolutional import Conv2D
from keras.layers.convolutional import MaxPooling2D
from keras.layers.core import Activation
from keras.layers.core import Flatten
from keras.layers.core import Dense
from keras import backend as K
class LeNet:
	@staticmethod
	def build(width, height, depth, classes):
		# initialize the model
		model = Sequential()
		inputShape = (height, width, depth)
		# if we are using "channels first", update the input shape
		if K.image_data_format() == "channels_first":
			inputShape = (depth, height, width)
		# first set of CONV => RELU => POOL layers
		model.add(Conv2D(20, (5, 5), padding="same",
			input_shape=inputShape))
		model.add(Activation("relu"))
		model.add(MaxPooling2D(pool_size=(2, 2), strides=(2, 2)))
		# second set of CONV => RELU => POOL layers
		model.add(Conv2D(50, (5, 5), padding="same"))
		model.add(Activation("relu"))
		model.add(MaxPooling2D(pool_size=(2, 2), strides=(2, 2)))
		# first (and only) set of FC => RELU layers
		model.add(Flatten())
		model.add(Dense(500))
		model.add(Activation("relu"))
		# softmax classifier
		model.add(Dense(classes))
		model.add(Activation("softmax"))
		# return the constructed network architecture
		return model
用Keras训练我们的卷积神经网络图像分类器
# set the matplotlib backend so figures can be saved in the background
import matplotlib
matplotlib.use("Agg")
# import the necessary packages
from keras.preprocessing.image import ImageDataGenerator
from keras.optimizers import Adam
from sklearn.model_selection import train_test_split
from keras.preprocessing.image import img_to_array
from keras.utils import to_categorical
from pyimagesearch.lenet import LeNet
from imutils import paths
import matplotlib.pyplot as plt
import numpy as np
import argparse
import random
import cv2
import os
# construct the argument parse and parse the arguments
ap = argparse.ArgumentParser()
ap.add_argument("-d", "--dataset", required=True,
	help="path to input dataset")
ap.add_argument("-m", "--model", required=True,
	help="path to output model")
ap.add_argument("-p", "--plot", type=str, default="plot.png",
	help="path to output accuracy/loss plot")
args = vars(ap.parse_args())
# initialize the number of epochs to train for, initial learning rate,
# and batch size
EPOCHS = 25
INIT_LR = 1e-3
BS = 32
# initialize the data and labels
print("[INFO] loading images...")
data = []
labels = []
# grab the image paths and randomly shuffle them
imagePaths = sorted(list(paths.list_images(args["dataset"])))
random.seed(42)
random.shuffle(imagePaths)
# loop over the input images
for imagePath in imagePaths:
	# load the image, pre-process it, and store it in the data list
	image = cv2.imread(imagePath)
	image = cv2.resize(image, (28, 28))
	image = img_to_array(image)
	data.append(image)
	# extract the class label from the image path and update the
	# labels list
	label = imagePath.split(os.path.sep)[-2]
	label = 1 if label == "santa" else 0
	labels.append(label)
    # scale the raw pixel intensities to the range [0, 1]
data = np.array(data, dtype="float") / 255.0
labels = np.array(labels)
# partition the data into training and testing splits using 75% of
# the data for training and the remaining 25% for testing
(trainX, testX, trainY, testY) = train_test_split(data,labels, test_size=0.25, random_state=42)
# convert the labels from integers to vectors
trainY = to_categorical(trainY, num_classes=2)
testY = to_categorical(testY, num_classes=2)
# construct the image generator for data augmentation
aug = ImageDataGenerator(rotation_range=30, width_shift_range=0.1,
	height_shift_range=0.1, shear_range=0.2, zoom_range=0.2,
	horizontal_flip=True, fill_mode="nearest")
# initialize the model
print("[INFO] compiling model...")
model = LeNet.build(width=28, height=28, depth=3, classes=2)
opt = Adam(lr=INIT_LR, decay=INIT_LR / EPOCHS)
model.compile(loss="binary_crossentropy", optimizer=opt,
	metrics=["accuracy"])
# train the network
print("[INFO] training network...")
H = model.fit_generator(aug.flow(trainX, trainY, batch_size=BS),
	validation_data=(testX, testY), steps_per_epoch=len(trainX) // BS,
	epochs=EPOCHS, verbose=1)
# save the model to disk
print("[INFO] serializing network...")
model.save(args["model"])
# plot the training loss and accuracy
plt.style.use("ggplot")
plt.figure()
N = EPOCHS
plt.plot(np.arange(0, N), H.history["loss"], label="train_loss")
plt.plot(np.arange(0, N), H.history["val_loss"], label="val_loss")
plt.plot(np.arange(0, N), H.history["acc"], label="train_acc")
plt.plot(np.arange(0, N), H.history["val_acc"], label="val_acc")
plt.title("Training Loss and Accuracy on Santa/Not Santa")
plt.xlabel("Epoch #")
plt.ylabel("Loss/Accuracy")
plt.legend(loc="lower left")
plt.savefig(args["plot"])
打开anaconda prompt终端运行代码,没有使用spyder的方式,因为此处需要传入参数
输入python C:\Users\Aurora\OneDrive\桌面\python_code\senta\train_network.py --dataset images --model santa_not_santa.model运行程序(注意:此处需要对应到py文件的路径),可能出现的问题:
1、ValueError: With n_samples=1, test_size=0.2 and train_size=None, the resulting train set will be,原因是sklearn版本的问题,卸载(pip uninstall sklearn)后重新安装(pip install scikit-learn==0.19.1)
2、ValueError: (‘Input data in NumpyArrayIterator should have rank 4. You passed an array with shape’, (0,)):根据调用函数可知需要输入的四维数组,但是RGB是三维数组。(灰度级的是二维数组)
解决方案:使用pycharm运行(需要其与anaconda结合使用),传入参数的方法,右击py文件-edit configuration-parameters,输入–dataset images --model santa_not_santa.model
测试代码,建立test_network:
#import the necessary packages
from keras.preprocessing.image import img_to_array
from keras.models import load_model
import numpy as np
import argparse
import imutils
import cv2
# construct the argument parse and parse the arguments
ap = argparse.ArgumentParser()
ap.add_argument("-m", "--model", required=True,
	help="path to trained model model")
ap.add_argument("-i", "--image", required=True,
	help="path to input image")
args = vars(ap.parse_args())
# load the image
image = cv2.imread(args["image"])
orig = image.copy()
# pre-process the image for classification
image = cv2.resize(image, (28, 28))
image = image.astype("float") / 255.0
image = img_to_array(image)
image = np.expand_dims(image, axis=0)
# load the trained convolutional neural network
print("[INFO] loading network...")
model = load_model(args["model"])
# classify the input image
(notSanta, santa) = model.predict(image)[0]
# build the label
label = "Santa" if santa > notSanta else "Not Santa"
proba = santa if santa > notSanta else notSanta
label = "{}: {:.2f}%".format(label, proba * 100)
# draw the label on the image
output = imutils.resize(orig, width=400)
cv2.putText(output, label, (10, 25), cv2.FONT_HERSHEY_SIMPLEX,
            0.7, (0, 255, 0), 2)
# show the output image
cv2.imshow("Output", output)
cv2.waitKey(0)
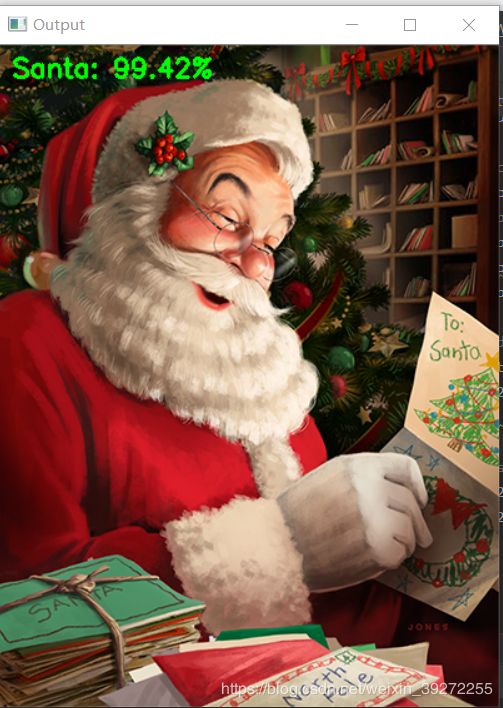
用个别图片测试的结果:


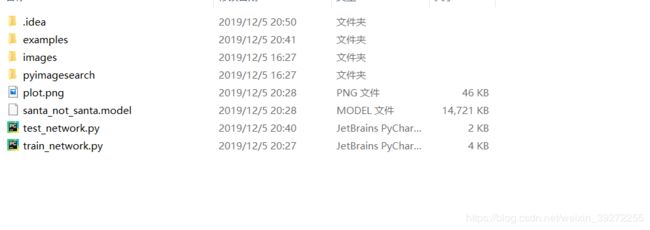
最终的项目目录是
images是我们需要的数据集,examples是测试用到的图片,pyimagesearch是我们定义的网络结构,plot是训练
总结
对于本文的分类器,有一些局限性,输入图像的大小固定为28*28像素,但是我们需要更高分辨率的图像,意味着需要更深层次的网络,需要收集额外的训练数据,并利用计算成本更高的训练过程。
可以改进的方向:
1、收集额外的培训数据(理想情况下,5000多张“圣诞老人”图片)。
2、在训练中使用高分辨率图像。我想64×64像素会产生更高的精度。128×128像素可能是理想的(尽管我没有尝试过)。
3、在培训过程中使用更深层次的网络架构。