Spring5.x源码解析(一)this(),register(),refresh()方法
文章目录
- 1.new AnnotationConfigApplicationContext
- 2.1 this()
- 2.1.1 方法作用
- 2.1.2 如何作用的
- 2.2 register(annotatedClasses)
- 2.2.1 方法作用
- 2.2.1 如何作用的
- 测试:
- 3、 refresh()[较好的参考博文,点击这里](https://blog.csdn.net/csdn_20150804/article/details/100086893#1_refresh_21)
- 3.1作用:
- 3.2测试
- 3.1prepareRefresh()
- 3.2 ConfigurableListableBeanFactory beanFactory = obtainFreshBeanFactory()
- 3.3 prepareBeanFactory(beanFactory)
- 3.3.4 beanFactory.addBeanPostProcessor(new ApplicationContextAwareProcessor(this))
BeanPostProcessor和BeanFactoryPostProcessor的区别,点击这里跳转
参考: 博文1, 博文2
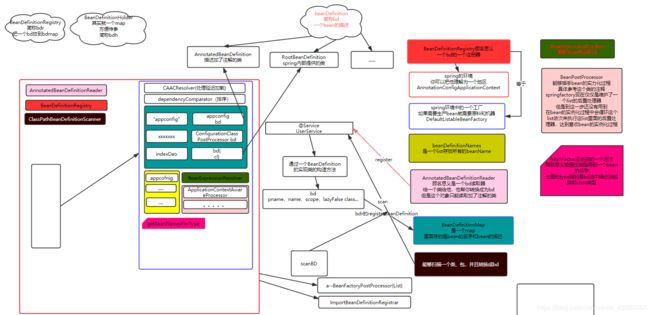

在编译好的源码工程中创建测试model.
注意: 这里Spring源码是用Gradle构建的,所以创建自己的测试model的时候也要用Gradle来创建。
BeanDefinition:类似于java中的Class类,看作是Bean的一个描述器,包含Bean中的信息。
几个测试类,就写在一起了
@ComponentScan("com.wuhuafeng")
@Configuration
public class AppConfig {

}

@Component
public class User {
	public void info(){
		System.out.println("Hello Spring");
	}
}

public class Test {
	public static void main(String[] args) {
		AnnotationConfigApplicationContext ac = new AnnotationConfigApplicationContext(AppConfig.class);
		User user = (User) ac.getBean("user");
		user.info();
	}
}
1.new AnnotationConfigApplicationContext
我们还是继续讲述通过配置类+注解使用spring的方式。
通过上述demo,我们发现,通过new AnnotationConfigApplicationContext一行代码,spring就初始化好了容器。
我们先看下AnnotationConfigApplicationContext的类图:

注意其中两个比较关键的接口ApplicationContext和BeanFactory;
其中,
BeanFactory是最底层接口,作用就是提供了访问bean容器的各种基础方法;
ApplicationContext是BeanFactory扩展,是最核心的接口,像本节讲的AnnotationConfigApplicationContext以及基于xml的ClassPathXmlApplicationContext,都只是它的不同实现。
类图比较复杂,先放在这里,这个需要我们时不时的回顾;
再次回到 new AnnotationConfigApplicationContext(Appconfig.class),进入这个构造方法:
注意:如果子类构造器没有显示使用super调用父类构造器,子类构造器默认会调用父类无参构造器。
public AnnotationConfigApplicationContext(Class<?>... annotatedClasses) {
		//1.会首先调用父类GenericApplicationContext中的构造方法,初始化工厂bean为new DefaultListableBeanFactory()
		//2.调用自己的构造方法,初始化了一个读取器:AnnotatedBeanDefinitionReader reader;一个扫描器:ClassPathBeanDefinitionScanner scanner
		//3.在reader的初始化构造方法中,还注册了6个post processors
		this();
		//注册bean,注册就是把bean都放在某个地方,一个并发map中,Map beanDefinitionMap
		//这调用了AnnotatedBeanDefinitionReader reader的注册方法
		//只注册了6个post process 类
		register(annotatedClasses);
		//实现的bean的初始化;
		//自定义的bean也在这里注册并初始化
		refresh();
	}
此构造方法只执行了3个方法,整体实现的功能就是容器的初始化,包括bean的定义初始化,都在这3步完成;
其中,
- 前两步完成了bean的定义和注册;就是先获取bean的定义描述,比如bean是不是单例,是不是懒加载,bean上的注解信息等等,这些都属于bean的定义,统统封装在一个BeanDefinition类型的bean中;注册,这个就更简单了,就是把BeanDefinition存到某个map中,key就是bean的名字beanName。
- 第3步完成了bean的初始化,就是bean的实例化,包括bean的注入,如果有配置代理,生成代理类。
下面我们逐个方法说明。
2.1 this()
2.1.1 方法作用
这里先直接说明this方法中干了什么,然后在讲怎么干的。
2个作用:
- 指定默认的bean factory
- 注册了6个post processors bean
2.1.2 如何作用的
下面说如何干的:
this是执行自己的构造方法,通过java语法我们知道,在执行自己的构造方法之前,会先执行父类中的构造方法,那我们先看父类的构造方法:
public GenericApplicationContext() {
	//默认的BeanFactory
	this.beanFactory = new DefaultListableBeanFactory();
}
内容不多,就是初始化了自己内部的beanFactory为DefaultListableBeanFactory,后边会用,这个我们先记住就好了。到这里,算是完成了第一个作用。
然后再看如何注册bean的定义的。先提前透漏下,所谓的注册,就是往一个map中存数据,这个map,在容器中(AnnotationConfigApplicationContext)维护。
继续,由于后边调用链路比较深,我们还是分步骤1234吧,不然太深了,容易迷路。
1.自己的this方法,
public AnnotationConfigApplicationContext() {
	//AnnotatedBeanDefinitionReader的构造函数参数是BeanDefinitionRegistry接口类型
	//this实现了BeanDefinitionRegistry接口,所以可以作为参数传入
	this.reader = new AnnotatedBeanDefinitionReader(this);
	this.scanner = new ClassPathBeanDefinitionScanner(this);
}
构造方法中初始化了:
- 一个bean定义读取器:
AnnotatedBeanDefinitionReader reader,就是提供了bean定义相关的操作,比如注册bean的定义。 - 一个扫描器:
ClassPathBeanDefinitionScanner scanner;
其中scanner我们先不看了,不影响我们理解IOC和AOP。
2.new AnnotatedBeanDefinitionReader(this)
到这里,this()方法还没完,我们再继续深入,看下this中的这行代码:
this.reader = new AnnotatedBeanDefinitionReader(this);
在new一个 AnnotatedBeanDefinitionReader的时候,传入了this,也就是本节要讲的AnnotationConfigApplicationContext,点开看:
其中入参是一个注册者BeanDefinitionRegistry,就是说所有注册动发生在这里边。这里传入的是容器AnnotationConfigApplicationContext,因为它实现了BeanDefinitionRegistry接口(回去看类图),所以可以作为入参。
首先进入AnnotatedBeanDefinitionReader一个参数的构造方法,然后调用两个参数的构造方法:
/**
*
 * 传递过来的是:AnnotationConfigApplicationContext对象,
 * 它实现了BeanDefinitionRegistry接口(回去看类图),所以可以作为入参。
 */
public AnnotatedBeanDefinitionReader(BeanDefinitionRegistry registry) {
	this(registry, getOrCreateEnvironment(registry));
}

/**
*
 */
public AnnotatedBeanDefinitionReader(BeanDefinitionRegistry registry, Environment environment) {
	Assert.notNull(registry, "BeanDefinitionRegistry must not be null");
	Assert.notNull(environment, "Environment must not be null");
	this.registry = registry;
	this.conditionEvaluator = new ConditionEvaluator(registry, environment, null);
	AnnotationConfigUtils.registerAnnotationConfigProcessors(this.registry);
}
看最后一行,快找到注册bean postprocess的地方了,继续进入最后一行:进入到AnnotationConfigUtils类中看一下
public static void registerAnnotationConfigProcessors(BeanDefinitionRegistry registry) {
	registerAnnotationConfigProcessors(registry, null);
}

public static Set<BeanDefinitionHolder> registerAnnotationConfigProcessors(
		BeanDefinitionRegistry registry, @Nullable Object source) {
	// 获取到工厂,判断后向工厂中set一些对象
	DefaultListableBeanFactory beanFactory = unwrapDefaultListableBeanFactory(registry);
	if (beanFactory != null) {
		if (!(beanFactory.getDependencyComparator() instanceof AnnotationAwareOrderComparator)) {
			// 添加一个排序器
			beanFactory.setDependencyComparator(AnnotationAwareOrderComparator.INSTANCE);
		}
		if (!(beanFactory.getAutowireCandidateResolver() instanceof ContextAnnotationAutowireCandidateResolver)) {
			// 处理延迟加载的
			beanFactory.setAutowireCandidateResolver(new ContextAnnotationAutowireCandidateResolver());
		}
	}

	Set<BeanDefinitionHolder> beanDefs = new LinkedHashSet<>(8);

	/**
	 * 构造了7个后置处理器的BeanDefinition,放到BeanDefinitionHolder中
	 * BeanDefinitionHolder可以类比为DefaultListableBeanFactory中的beanDefinitionMap
	 * ConfigurationClassPostProcessor会在下一节的3.5方法中用到
	 * invokeBeanFactoryPostProcessors()
	 */
	if (!registry.containsBeanDefinition(CONFIGURATION_ANNOTATION_PROCESSOR_BEAN_NAME)) {
		RootBeanDefinition def = new RootBeanDefinition(ConfigurationClassPostProcessor.class);
		def.setSource(source);
		beanDefs.add(registerPostProcessor(registry, def, CONFIGURATION_ANNOTATION_PROCESSOR_BEAN_NAME));
	}

	if (!registry.containsBeanDefinition(AUTOWIRED_ANNOTATION_PROCESSOR_BEAN_NAME)) {
		RootBeanDefinition def = new RootBeanDefinition(AutowiredAnnotationBeanPostProcessor.class);
		def.setSource(source);
		beanDefs.add(registerPostProcessor(registry, def, AUTOWIRED_ANNOTATION_PROCESSOR_BEAN_NAME));
	}

	if (!registry.containsBeanDefinition(REQUIRED_ANNOTATION_PROCESSOR_BEAN_NAME)) {
		RootBeanDefinition def = new RootBeanDefinition(RequiredAnnotationBeanPostProcessor.class);
		def.setSource(source);
		beanDefs.add(registerPostProcessor(registry, def, REQUIRED_ANNOTATION_PROCESSOR_BEAN_NAME));
	}

	// Check for JSR-250 support, and if present add the CommonAnnotationBeanPostProcessor.
	if (jsr250Present && !registry.containsBeanDefinition(COMMON_ANNOTATION_PROCESSOR_BEAN_NAME)) {
		RootBeanDefinition def = new RootBeanDefinition(CommonAnnotationBeanPostProcessor.class);
		def.setSource(source);
		beanDefs.add(registerPostProcessor(registry, def, COMMON_ANNOTATION_PROCESSOR_BEAN_NAME));
	}

	// Check for JPA support, and if present add the PersistenceAnnotationBeanPostProcessor.
	if (jpaPresent && !registry.containsBeanDefinition(PERSISTENCE_ANNOTATION_PROCESSOR_BEAN_NAME)) {
		RootBeanDefinition def = new RootBeanDefinition();
		try {
			def.setBeanClass(ClassUtils.forName(PERSISTENCE_ANNOTATION_PROCESSOR_CLASS_NAME,
					AnnotationConfigUtils.class.getClassLoader()));
		}
		catch (ClassNotFoundException ex) {
			throw new IllegalStateException(
					"Cannot load optional framework class: " + PERSISTENCE_ANNOTATION_PROCESSOR_CLASS_NAME, ex);
		}
		def.setSource(source);
		beanDefs.add(registerPostProcessor(registry, def, PERSISTENCE_ANNOTATION_PROCESSOR_BEAN_NAME));
	}

	if (!registry.containsBeanDefinition(EVENT_LISTENER_PROCESSOR_BEAN_NAME)) {
		RootBeanDefinition def = new RootBeanDefinition(EventListenerMethodProcessor.class);
		def.setSource(source);
		beanDefs.add(registerPostProcessor(registry, def, EVENT_LISTENER_PROCESSOR_BEAN_NAME));
	}

	if (!registry.containsBeanDefinition(EVENT_LISTENER_FACTORY_BEAN_NAME)) {
		RootBeanDefinition def = new RootBeanDefinition(DefaultEventListenerFactory.class);
		def.setSource(source);
		beanDefs.add(registerPostProcessor(registry, def, EVENT_LISTENER_FACTORY_BEAN_NAME));
	}

	return beanDefs;
}

/**
 * 在上面的方法中被调用,返回BeanDefinitionHolder对象
 * 并将bd注册到工厂中
 * @param registry
 * @param definition
 * @param beanName
 * @return
 * ================================================================================================================!!
 */
private static BeanDefinitionHolder registerPostProcessor(
		BeanDefinitionRegistry registry, RootBeanDefinition definition, String beanName) {

	definition.setRole(BeanDefinition.ROLE_INFRASTRUCTURE);
	registry.registerBeanDefinition(beanName, definition);
	return new BeanDefinitionHolder(definition, beanName);
}
首先进入一个参数的registerAnnotationConfigProcessors()方法,然后调用两个参数的registerAnnotationConfigProcessors()方法,在第二个方法中拿出创建好的工厂设置了一些对象进去,然后创建了一个Set集合,存放的是BeanDefinitionHolder对象。
第二个方法的说明:
代码说明:
方法比较长,其实逻辑比较简单,不同的if判断,注册不同的post processer,所以我们就看一个if判断就行:
if (!registry.containsBeanDefinition(CONFIGURATION_ANNOTATION_PROCESSOR_BEAN_NAME)) {
	RootBeanDefinition def = new RootBeanDefinition(ConfigurationClassPostProcessor.class);
	def.setSource(source);
	beanDefs.add(registerPostProcessor(registry, def, CONFIGURATION_ANNOTATION_PROCESSOR_BEAN_NAME));
}
- 判断registry的beanDefinitionMap中是否已经存在了ConfigurationClassPostProcessor Bean,这个registry就是容器AnnotationConfigApplicationContext;判断是否包含,就是判断其中的map中是否有某个key(bean名字),如果没有就放到map中。
- registerPostProcessor(),就是注册动作;
4.AnnotationConfigUtils#registerPostProcessor
private static BeanDefinitionHolder registerPostProcessor(
		BeanDefinitionRegistry registry, RootBeanDefinition definition, String beanName) {
	definition.setRole(BeanDefinition.ROLE_INFRASTRUCTURE);
	//注册动作
	registry.registerBeanDefinition(beanName, definition);
	return new BeanDefinitionHolder(definition, beanName);
}
看倒数第二行,registry.registerBeanDefinition(beanName, definition):
- registry :就是容器AnnotationConfigApplicationContext;registerBeanDefinition()方法在其父类GenericApplicationContext中。
参数 beanName:就是要注册bean的名字,如果没有特殊指定,就是类型小写;当然这里我们在说那6个post process, - beanName都是有特殊指定的,可以看步骤3中的那些常量。
- 参数 definition:bean的定义描述。
代码继续深入吧!
5.GenericApplicationContext#registerBeanDefinition
public void registerBeanDefinition(String beanName, BeanDefinition beanDefinition)
		throws BeanDefinitionStoreException {
	//DefaultListableBeanFactory
	this.beanFactory.registerBeanDefinition(beanName, beanDefinition);
}
这个beanFactory,就是我们在2.1.2节最开始说的父类构造方法初始化的默认beanFactory。
就剩这一行代码了,到最后了,我们进去看下:
6.DefaultListableBeanFactory#registerBeanDefinition
注意代码中的注释:
public void registerBeanDefinition(String beanName, BeanDefinition beanDefinition)
		throws BeanDefinitionStoreException {

	Assert.hasText(beanName, "Bean name must not be empty");
	Assert.notNull(beanDefinition, "BeanDefinition must not be null");

	if (beanDefinition instanceof AbstractBeanDefinition) {
		try {
			((AbstractBeanDefinition) beanDefinition).validate();
		} catch (BeanDefinitionValidationException ex) {
			throw new BeanDefinitionStoreException(beanDefinition.getResourceDescription(), beanName,
					"Validation of bean definition failed", ex);
		}
	}
	//注册BeanDefinition,就是将BeanDefinition放入一个map中,key是beanName
	//注册之前,先查下是否被注册过
	BeanDefinition existingDefinition = this.beanDefinitionMap.get(beanName);
	//如果已经存在,那么就检查是否允许覆盖,不允许直接跑异常,允许的话就记录一些日志,然后覆盖
	if (existingDefinition != null) {
		//默认允许覆盖
		if (!isAllowBeanDefinitionOverriding()) {
			//如果bean已经被注册了,并且不允许覆盖,那么抛出异常
			throw new BeanDefinitionStoreException(beanDefinition.getResourceDescription(), beanName,
					"Cannot register bean definition [" + beanDefinition + "] for bean '" + beanName +
							"': There is already [" + existingDefinition + "] bound.");
		} else if (existingDefinition.getRole() < beanDefinition.getRole()) {
			// e.g. was ROLE_APPLICATION, now overriding with ROLE_SUPPORT or ROLE_INFRASTRUCTURE
			if (logger.isWarnEnabled()) {
				logger.warn("Overriding user-defined bean definition for bean '" + beanName +
						"' with a framework-generated bean definition: replacing [" +
						existingDefinition + "] with [" + beanDefinition + "]");
			}
		} else if (!beanDefinition.equals(existingDefinition)) {
			if (logger.isInfoEnabled()) {
				logger.info("Overriding bean definition for bean '" + beanName +
						"' with a different definition: replacing [" + existingDefinition +
						"] with [" + beanDefinition + "]");
			}
		} else {
			if (logger.isDebugEnabled()) {
				logger.debug("Overriding bean definition for bean '" + beanName +
						"' with an equivalent definition: replacing [" + existingDefinition +
						"] with [" + beanDefinition + "]");
			}
		}
		this.beanDefinitionMap.put(beanName, beanDefinition);
	} else {
		//检查bean的创建过程是否已经开始了
		//通过判断一个set集合是否为空,因为创建过的bean都会放到那个set中保存下
		if (hasBeanCreationStarted()) {
			// Cannot modify startup-time collection elements anymore (for stable iteration)
			synchronized (this.beanDefinitionMap) {
				this.beanDefinitionMap.put(beanName, beanDefinition);
				//下面4行是更新beanDefinitionNames的list
				List<String> updatedDefinitions = new ArrayList<>(this.beanDefinitionNames.size() + 1);
				updatedDefinitions.addAll(this.beanDefinitionNames);
				updatedDefinitions.add(beanName);
				this.beanDefinitionNames = updatedDefinitions;
				//manualSingletonNames人工注册的单例集合,也要更新
				if (this.manualSingletonNames.contains(beanName)) {
					Set<String> updatedSingletons = new LinkedHashSet<>(this.manualSingletonNames);
					updatedSingletons.remove(beanName);
					this.manualSingletonNames = updatedSingletons;
				}
			}
		} else {
			// Still in startup registration phase:仍然在启动注册阶段
			this.beanDefinitionMap.put(beanName, beanDefinition);
			this.beanDefinitionNames.add(beanName);
			this.manualSingletonNames.remove(beanName);
		}
		this.frozenBeanDefinitionNames = null;
	}

	if (existingDefinition != null || containsSingleton(beanName)) {
		resetBeanDefinition(beanName);
	}
}
方法说明:整体上逻辑比较简单,
- 1.beanDefinitionMap:前边我一直说的注册动作,就是往某个map中的存东西,这个map就是方法中的beanDefinitionMap,是个ConcurrentHashMap;
- 2.放到map之前,先查看map中是否已经存在了,如果已经存在,再判断是否允许覆盖;
- 3.如果 map中不存在,那么就put进去。
到这里,AnnotationConfigApplicationContext构造方法中的3大步骤之一,this()方法就算看完了。
2.2 register(annotatedClasses)
现在继续看3大方法中的第二个,register(annotatedClasses);
2.2.1 方法作用
这个步骤方法叫register,顾名思义,就是进行一些注册相关的操作;这里再说到注册,我们应该很熟悉了,因为上面2.1.2节第4~6步骤,就是注册的核心方法;注册就是往某个map中存东西。
入参annotatedClasse就是我们demo中的AppConfig.class;因此,这一步的作用就是注册AppConfig的bean定义。
在下面测试了一个User.Class对象传入到register()方法中,然后可以看到在Spring框架中注册到了User类,将元信息放入了。
2.2.1 如何作用的
进入方法内部:
public void register(Class<?>... annotatedClasses) {
	Assert.notEmpty(annotatedClasses, "At least one annotated class must be specified");
	this.reader.register(annotatedClasses);
}
调用的是读取器AnnotatedBeanDefinitionReader的注册方法,这个方法的入参支持一个数组,我们这里其实只传入了一个AppConfig.class,继续进入方法,如下:
public void register(Class<?>... annotatedClasses) {
	for (Class<?> annotatedClass : annotatedClasses) {
		registerBean(annotatedClass);
	}
}
因为入参数数组,所以要循环处理,继续进入registerBean如下:
public void registerBean(Class<?> annotatedClass) {
	doRegisterBean(annotatedClass, null, null, null);
}
是个皮包方法,继续进入doRegisterBean如下:
<T> void doRegisterBean(Class<T> annotatedClass, @Nullable Supplier<T> instanceSupplier, @Nullable String name,
							@Nullable Class<? extends Annotation>[] qualifiers, BeanDefinitionCustomizer... definitionCustomizers) {
    //得到bean的描述信息,比如bean的注解,作用范围,是否懒加载,注入方式等
	AnnotatedGenericBeanDefinition abd = new AnnotatedGenericBeanDefinition(annotatedClass);
	//被条件注解@Conditional注释的bean跳过注册
	if (this.conditionEvaluator.shouldSkip(abd.getMetadata())) {
		return;
	}

	abd.setInstanceSupplier(instanceSupplier);
	//解析bean的Scope,比如是否单例singleton还是其他
	ScopeMetadata scopeMetadata = this.scopeMetadataResolver.resolveScopeMetadata(abd);
	abd.setScope(scopeMetadata.getScopeName());
	//生成bean name,默认就是类名小写
	String beanName = (name != null ? name : this.beanNameGenerator.generateBeanName(abd, this.registry));
	//通过判断注解内容,设置一些公共属性,比如是否懒加载,优先级等
	AnnotationConfigUtils.processCommonDefinitionAnnotations(abd);
	if (qualifiers != null) {
		for (Class<? extends Annotation> qualifier : qualifiers) {
			if (Primary.class == qualifier) {
				abd.setPrimary(true);
			} else if (Lazy.class == qualifier) {
				abd.setLazyInit(true);
			} else {
				abd.addQualifier(new AutowireCandidateQualifier(qualifier));
			}
		}
	}
	for (BeanDefinitionCustomizer customizer : definitionCustomizers) {
		customizer.customize(abd);
	}

	BeanDefinitionHolder definitionHolder = new BeanDefinitionHolder(abd, beanName);
	definitionHolder = AnnotationConfigUtils.applyScopedProxyMode(scopeMetadata, definitionHolder, this.registry);
	BeanDefinitionReaderUtils.registerBeanDefinition(definitionHolder, this.registry);
}
方法说明:这个方法整体同样分为3小步(只要是注册BeanDefinition,都是这3步),
1.根据class文件获取BeanDefinition,这里是其实现类 AnnotatedGenericBeanDefinition abd;
2.将BeanDefinition放到BeanDefinitionHolder中进一步封装;
3.最后一行,执行注册动作
测试:
下面测试创建单个对象,注释掉AppConfig类上的@ComponentScan("com.wuhuafeng")注解,和User类上的@Component注解,修改测试方法如下,结果同样输出打印。
public class Test {
	public static void main(String[] args) {
		AnnotationConfigApplicationContext ac = new AnnotationConfigApplicationContext();
		ac.register(User.class);
		ac.refresh();
		User user = (User) ac.getBean("user");
		user.info();
	}
}
打断点看一看

abd对象包含的内容:
Generic bean: class [com.liaoxiang.bean.User]; scope=; abstract=false; lazyInit=false; autowireMode=0; dependencyCheck=0; autowireCandidate=true; primary=false; factoryBeanName=null; factoryMethodName=null; initMethodName=null; destroyMethodName=null
进入到shouldSkip方法,可以看到metada不为null,shouldSkip方法返回false

下面接着设置关于User这个Bean的其他信息

我们先在User类上加一个注解,然后debug,看是否解析到

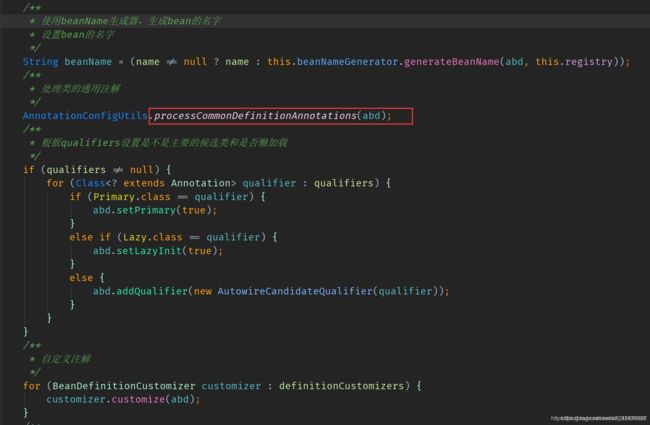
进入AnnotationConfigUtils.processCommonDefinitionAnnotations(abd);

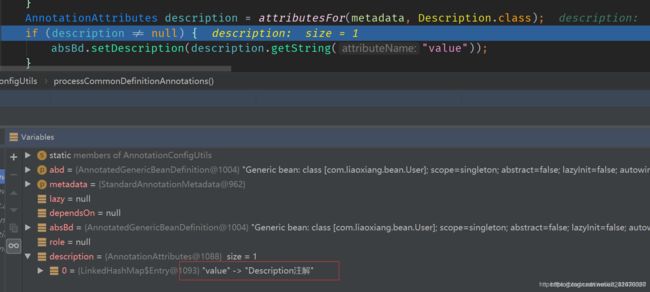
获取到这些注解之后,设置到AnnotationAttributes
接下来回到AnnotatedBeanDefinitionReader的doRegisterBean
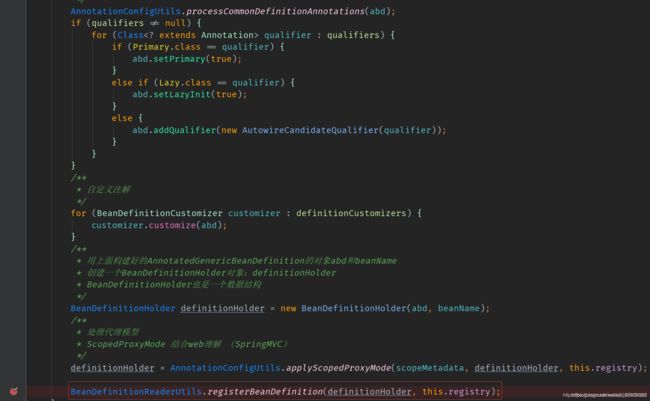
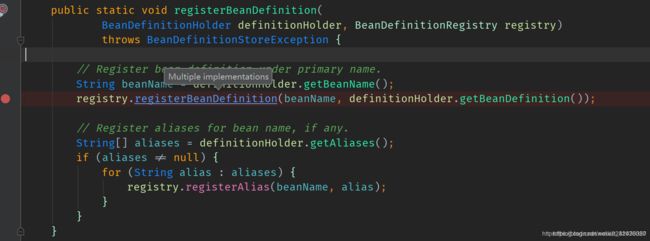
当beanName为user的时候,我们在这停下来

进入到DefaultListableBeanFactory的registerBeanDefinition()方法

接着往下走一点

这里将beanName作为key,将beanDefinition作为value存入beanDefinitionMap
同时将beanName加入beanDefinitionNames
可以看到此时的beanDefinitionMap中已经有7个元素,这些元素就是在上面提到this中加入进去的

到这里可以看到spring通过第一步构造AnnotationConfigApplicationContext的时候初始化了一个AnnotatedBeanDefinitionReader对象,在执行构造方法的时候,来注册spring框架自己的BeanDefinition,然后用创建好的对象来注册一个应用程序中的BeanDefinition
3、 refresh()较好的参考博文,点击这里
3.1作用:
整体上就是实现bean的实例化。包括默认后置处理器,以及的配置类(@Configuration注解修饰的),以及我们自定义的bean(加了@Componet等类似注解的)。
3.2测试
给AppConfig类加上注解@ComponentScan(“com.wuhuafeng”),修改测试主方法,在refresh方法里面打断点
public class Test {
	public static void main(String[] args) {
		AnnotationConfigApplicationContext ac = new AnnotationConfigApplicationContext(AppConfig.class);
		User user = (User) ac.getBean("user");
		user.info();
	}
}
点击进入AbstractApplicationContext类,refresh() 定义如下,给每行代码编个号,方便说明
@Override
public void refresh() throws BeansException, IllegalStateException {
	synchronized (this.startupShutdownMonitor) {
		// Prepare this context for refreshing.
		//1、设置启动时间、是否激活标志位、初始化属性源(property source)配置
		prepareRefresh();

		// Tell the subclass to refresh the internal bean factory.
		// 2、获取register方法流程中的 DefaultListableBeanFactory
		// 初始化bean可以认为是从这里开始的
		ConfigurableListableBeanFactory beanFactory = obtainFreshBeanFactory();

		// 3、Prepare the bean factory for use in this context.
		prepareBeanFactory(beanFactory);

		try {
			// 4、Allows post-processing of the bean factory in context subclasses.
			postProcessBeanFactory(beanFactory);

			// 5、Invoke factory processors registered as beans in the context.
			invokeBeanFactoryPostProcessors(beanFactory);

			// 6、Register bean processors that intercept bean creation.
			registerBeanPostProcessors(beanFactory);

			// 7、Initialize message source for this context.
			initMessageSource();

			// 8、Initialize event multicaster for this context.
			initApplicationEventMulticaster();

			// 9、Initialize other special beans in specific context subclasses.
			onRefresh();

			// 10、Check for listener beans and register them.
			registerListeners();

			// 11、Instantiate all remaining (non-lazy-init) singletons.!!
			finishBeanFactoryInitialization(beanFactory);

			// 12、Last step: publish corresponding event.
			finishRefresh();
		}

		catch (BeansException ex) {
			if (logger.isWarnEnabled()) {
				logger.warn("Exception encountered during context initialization - " +
						"cancelling refresh attempt: " + ex);
			}

			// Destroy already created singletons to avoid dangling resources.
			destroyBeans();

			// Reset 'active' flag.
			cancelRefresh(ex);

			// Propagate exception to caller.
			throw ex;
		}

		finally {
			// Reset common introspection caches in Spring's core, since we
			// might not ever need metadata for singleton beans anymore...
			resetCommonCaches();
		}
	}
}
3.1prepareRefresh()
此方法的主要作用就是前期准备;记录了容器启动时间;容器状态;刷新一些在此方法之前就可能已经存在的监听器;初始化事件集合等。
此方法没有什么特别重要的地方,可以粗略看下,然后跳过。
/**
	 * Prepare this context for refreshing, setting its startup date and
	 * active flag as well as performing any initialization of property sources.
	 */
	protected void prepareRefresh() {
		// Switch to active.
		this.startupDate = System.currentTimeMillis();
		this.closed.set(false);
		this.active.set(true);

		if (logger.isInfoEnabled()) {
			logger.info("Refreshing " + this);
		}

		// Initialize any placeholder property sources in the context environment.
		initPropertySources();

		// Validate that all properties marked as required are resolvable:
		// see ConfigurablePropertyResolver#setRequiredProperties
		getEnvironment().validateRequiredProperties();

		// Store pre-refresh ApplicationListeners...
		if (this.earlyApplicationListeners == null) {
			this.earlyApplicationListeners = new LinkedHashSet<>(this.applicationListeners);
		}
		else {
			// Reset local application listeners to pre-refresh state.
			this.applicationListeners.clear();
			this.applicationListeners.addAll(this.earlyApplicationListeners);
		}

		// Allow for the collection of early ApplicationEvents,
		// to be published once the multicaster is available...
		this.earlyApplicationEvents = new LinkedHashSet<>();
	}
3.2 ConfigurableListableBeanFactory beanFactory = obtainFreshBeanFactory()
拿到上面提到的工厂类:DefaultListableBeanFactory
3.3 prepareBeanFactory(beanFactory)
在拿到工厂之后,对工厂做一些准备工作,加入一些标准配置
准备bean factory,初始化工厂的一些标准固定的容器特性,因为后边一系列容器初始化操作,都是基于beanFactory,所以前期准备得充足。
其中入参通过以下方式得到:
ConfigurableListableBeanFactory beanFactory = obtainFreshBeanFactory();
跟代码进去,最终获取到的是获取到的是DefaultListableBeanFactory,其实在上面的this()中就已经初始化了。
下面看prepareBeanFactory的代码:
protected void prepareBeanFactory(ConfigurableListableBeanFactory beanFactory) {
	// 1、Tell the internal bean factory to use the context's class loader etc.
	beanFactory.setBeanClassLoader(getClassLoader());
	// 2、bean的表达式解释器
	beanFactory.setBeanExpressionResolver(new StandardBeanExpressionResolver(beanFactory.getBeanClassLoader()));
	// 3、
	beanFactory.addPropertyEditorRegistrar(new ResourceEditorRegistrar(this, getEnvironment()));
	// 4、 Configure the bean factory with context callbacks.添加一个bean的后置处理器
	beanFactory.addBeanPostProcessor(new ApplicationContextAwareProcessor(this));

	// 5、
	beanFactory.ignoreDependencyInterface(EnvironmentAware.class);
	// 6、
	beanFactory.ignoreDependencyInterface(EmbeddedValueResolverAware.class);
	// 7、
	beanFactory.ignoreDependencyInterface(ResourceLoaderAware.class);
	// 8、
	beanFactory.ignoreDependencyInterface(ApplicationEventPublisherAware.class);
	// 9、
	beanFactory.ignoreDependencyInterface(MessageSourceAware.class);
	// 10、
	beanFactory.ignoreDependencyInterface(ApplicationContextAware.class);

	// BeanFactory interface not registered as resolvable type in a plain factory.
	// 11、 MessageSource registered (and found for autowiring) as a bean.
	beanFactory.registerResolvableDependency(BeanFactory.class, beanFactory);
	// 12、
	beanFactory.registerResolvableDependency(ResourceLoader.class, this);
	// 13、
	beanFactory.registerResolvableDependency(ApplicationEventPublisher.class, this);
	// 14、
	beanFactory.registerResolvableDependency(ApplicationContext.class, this);

	// 15、Register early post-processor for detecting inner beans as ApplicationListeners.
	beanFactory.addBeanPostProcessor(new ApplicationListenerDetector(this));

	// 16、Detect a LoadTimeWeaver and prepare for weaving, if found.
	if (beanFactory.containsBean(LOAD_TIME_WEAVER_BEAN_NAME)) {
		// 17、
		beanFactory.addBeanPostProcessor(new LoadTimeWeaverAwareProcessor(beanFactory));
		// 18、 Set a temporary ClassLoader for type matching.
		beanFactory.setTempClassLoader(new ContextTypeMatchClassLoader(beanFactory.getBeanClassLoader()));
	}

	// 19、Register default environment beans.
	if (!beanFactory.containsLocalBean(ENVIRONMENT_BEAN_NAME)) {
		beanFactory.registerSingleton(ENVIRONMENT_BEAN_NAME, getEnvironment());
	}
	// 20、
	if (!beanFactory.containsLocalBean(SYSTEM_PROPERTIES_BEAN_NAME)) {
		beanFactory.registerSingleton(SYSTEM_PROPERTIES_BEAN_NAME, getEnvironment().getSystemProperties());
	}
	// 21、
	if (!beanFactory.containsLocalBean(SYSTEM_ENVIRONMENT_BEAN_NAME)) {
		beanFactory.registerSingleton(SYSTEM_ENVIRONMENT_BEAN_NAME, getEnvironment().getSystemEnvironment());
	}
}
3.3.4 beanFactory.addBeanPostProcessor(new ApplicationContextAwareProcessor(this))
addBeanPostProcessor()方法定义在AbstractBeanFactory抽象类中,Spring添加自己定义的后置处理器
@Override
public void addBeanPostProcessor(BeanPostProcessor beanPostProcessor) {
	Assert.notNull(beanPostProcessor, "BeanPostProcessor must not be null");
	// Remove from old position, if any
	this.beanPostProcessors.remove(beanPostProcessor);
	// Track whether it is instantiation/destruction aware
	if (beanPostProcessor instanceof InstantiationAwareBeanPostProcessor) {
		this.hasInstantiationAwareBeanPostProcessors = true;
	}
	if (beanPostProcessor instanceof DestructionAwareBeanPostProcessor) {
		this.hasDestructionAwareBeanPostProcessors = true;
	}
	// Add to end of list
	this.beanPostProcessors.add(beanPostProcessor);
}
最后,后置处理器被加入到一个beanPostProcessors的List集合中,在此时还没有用到这些后置处理器,spring在实例化bean的时候就会循环这个list集合,执行后置处理器中的方法,从而插手bean实例化的过程
![]()
我们来看一下BeanPostProcessor接口
/**
 * Factory hook that allows for custom modification of new bean instances,
 * e.g. checking for marker interfaces or wrapping them with proxies.
 *
 * ApplicationContexts can autodetect BeanPostProcessor beans in their
 * bean definitions and apply them to any beans subsequently created.
 * Plain bean factories allow for programmatic registration of post-processors,
 * applying to all beans created through this factory.
 *
 * Typically, post-processors that populate beans via marker interfaces
 * or the like will implement {@link #postProcessBeforeInitialization},
 * while post-processors that wrap beans with proxies will normally
 * implement {@link #postProcessAfterInitialization}.
 *
 * @author Juergen Hoeller
 * @since 10.10.2003
 * @see InstantiationAwareBeanPostProcessor
 * @see DestructionAwareBeanPostProcessor
 * @see ConfigurableBeanFactory#addBeanPostProcessor
 * @see BeanFactoryPostProcessor
 *
 * 允许自定义修改新 bean实例的工厂钩子,例如 检查标记界面或使用代理包装它们。
 *
 * ApplicationContexts可以在其Bean定义中自动检测BeanPostProcessor Bean,并将其应用于随后创建的任何Bean。
 * 普通bean工厂允许对后置处理器进行程序化注册,适用于通过该工厂创建的所有bean。
 *
 * 通常,通过标记器接口等填充bean的后处理器将实现{@link #postProcessBeforeInitialization},
 * 而使用代理包装bean的后置处理器通常将实现{@link #postProcessAfterInitialization}。
 */
public interface BeanPostProcessor {

	/**
	 * Apply this BeanPostProcessor to the given new bean instance before any bean
	 * initialization callbacks (like InitializingBean's {@code afterPropertiesSet}
	 * or a custom init-method). The bean will already be populated with property values.
	 * The returned bean instance may be a wrapper around the original.
	 * The default implementation returns the given {@code bean} as-is.
	 * @param bean the new bean instance
	 * @param beanName the name of the bean
	 * @return the bean instance to use, either the original or a wrapped one;
	 * if {@code null}, no subsequent BeanPostProcessors will be invoked
	 * @throws org.springframework.beans.BeansException in case of errors
	 * @see org.springframework.beans.factory.InitializingBean#afterPropertiesSet
	 * 在任何bean初始化回调(如InitializingBean的{@code afterPropertiesSet}或自定义的init-method)之前,
	 * 将此BeanPostProcessor应用于给定的新bean实例。
	 * 该bean将已经用属性值填充。
	 * 返回的bean实例可能是原始对象的包装。默认实现按原样返回给定的{@code bean}。
	 */
	@Nullable
	default Object postProcessBeforeInitialization(Object bean, String beanName) throws BeansException {
		return bean;
	}

	/**
	 * Apply this BeanPostProcessor to the given new bean instance after any bean
	 * initialization callbacks (like InitializingBean's {@code afterPropertiesSet}
	 * or a custom init-method). The bean will already be populated with property values.
	 * The returned bean instance may be a wrapper around the original.
	 * In case of a FactoryBean, this callback will be invoked for both the FactoryBean
	 * instance and the objects created by the FactoryBean (as of Spring 2.0). The
	 * post-processor can decide whether to apply to either the FactoryBean or created
	 * objects or both through corresponding {@code bean instanceof FactoryBean} checks.
	 * This callback will also be invoked after a short-circuiting triggered by a
	 * {@link InstantiationAwareBeanPostProcessor#postProcessBeforeInstantiation} method,
	 * in contrast to all other BeanPostProcessor callbacks.
	 * The default implementation returns the given {@code bean} as-is.
	 * @param bean the new bean instance
	 * @param beanName the name of the bean
	 * @return the bean instance to use, either the original or a wrapped one;
	 * if {@code null}, no subsequent BeanPostProcessors will be invoked
	 * @throws org.springframework.beans.BeansException in case of errors
	 * @see org.springframework.beans.factory.InitializingBean#afterPropertiesSet
	 * @see org.springframework.beans.factory.FactoryBean
	 * 在任何bean初始化回调(例如InitializingBean的{@code afterPropertiesSet}或自定义的init-method)之后,
	 * 将此BeanPostProcessor应用于给定的新bean实例
	 * 该bean将已经用属性值填充。
	 * 返回的bean实例可能是原始实例的包装。
	 * 如果是FactoryBean,则将为FactoryBean实例和由FactoryBean创建的对象(从Spring 2.0开始)调用此回调。
	 * 后处理器可以通过相应的{@code bean instanceof FactoryBean}检查来决定是应用到FactoryBean还是创建的对象,还是两者都应用。
	 * 与所有其他BeanPostProcessor回调相比,此回调还将在{@link InstantiationAwareBeanPostProcessor#postProcessBeforeInstantiation}方法触发短路后被调用。
	 * 默认实现按原样返回给定的{@code bean}。
	 */
	@Nullable
	default Object postProcessAfterInitialization(Object bean, String beanName) throws BeansException {
		return bean;
	}

}
通过这个接口,我们可以插手Bean的创建过程,Spring中为这个接口提供了很多的实现类来控制Bean的创建。如果要自定义我们自己的后置处理器,可以直接实现BeanPostProcessor接口,并加入到容器中就可以,下面是简单测试
@Component
public class MyBeanPostProcessor1 implements BeanPostProcessor, PriorityOrdered {
	/**
	 * 这里拿到bean之后可以根据此bean创建一个代理类对象
	 * AOP正是通过BeanPostProcessor和IOC容器建立起了联系
	 * @param bean the new bean instance
	 * @param beanName the name of the bean
	 * @return
	 * @throws BeansException
	 */
	@Override
	public Object postProcessBeforeInitialization(Object bean, String beanName) throws BeansException {
		if (beanName.equals("user")){
			System.out.println("MyBeanPostProcessor的前置处理器执行1");
		}
		return bean;
	}

	@Override
	public Object postProcessAfterInitialization(Object bean, String beanName) throws BeansException {
		if (beanName.equals("user")){
			System.out.println("MyBeanPostProcessor的后置处理器执行1");
		}
		return bean;
	}

	@Override
	public int getOrder() {
		return 102;
	}
}
再定义一个:
@Component
public class MyBeanPostProcessor2 implements BeanPostProcessor, PriorityOrdered {
	/**
	 * 这里拿到bean之后可以根据此bean创建一个代理类对象
	 * AOP正是通过BeanPostProcessor和IOC容器建立起了联系
	 * @param bean the new bean instance
	 * @param beanName the name of the bean
	 * @return
	 * @throws BeansException
	 */
	@Override
	public Object postProcessBeforeInitialization(Object bean, String beanName) throws BeansException {
		if (beanName.equals("user")){
			System.out.println("MyBeanPostProcessor的前置处理器执行2");
		}
		return bean;
	}

	@Override
	public Object postProcessAfterInitialization(Object bean, String beanName) throws BeansException {
		if (beanName.equals("user")){
			System.out.println("MyBeanPostProcessor的后置处理器执行2");
		}
		return bean;
	}

	@Override
	public int getOrder() {
		return 101;
	}
}

后置处理器的优先级通过继承接口:PriorityOrdered重写getOrder()方法来设置,数字越小优先级越高,所以bean后置处理器在AbstractBeanFactory抽象类中放在一个list的集合中,是一个列表,在创建bean的时候依次执行。
再回到3.3.4的方法:
beanFactory.addBeanPostProcessor(new ApplicationContextAwareProcessor(this)),这个方法添加了一个ApplicationContextAwareProcessor后置处理器,它同样实现了BeanPostProcessor接口
/**
 * {@link org.springframework.beans.factory.config.BeanPostProcessor}
 * implementation that passes the ApplicationContext to beans that
 * implement the {@link EnvironmentAware}, {@link EmbeddedValueResolverAware},
 * {@link ResourceLoaderAware}, {@link ApplicationEventPublisherAware},
 * {@link MessageSourceAware} and/or {@link ApplicationContextAware} interfaces.
 *
 * Implemented interfaces are satisfied in order of their mention above.
 *
 * Application contexts will automatically register this with their
 * underlying bean factory. Applications do not use this directly.
 *
 * @author Juergen Hoeller
 * @author Costin Leau
 * @author Chris Beams
 * @since 10.10.2003
 * @see org.springframework.context.EnvironmentAware
 * @see org.springframework.context.EmbeddedValueResolverAware
 * @see org.springframework.context.ResourceLoaderAware
 * @see org.springframework.context.ApplicationEventPublisherAware
 * @see org.springframework.context.MessageSourceAware
 * @see org.springframework.context.ApplicationContextAware
 * @see org.springframework.context.support.AbstractApplicationContext#refresh()
 * 将ApplicationContext传递给实现了
 * {@link EnvironmentAware},{@link EmbeddedValueResolverAware},
 * {@link ResourceLoaderAware},{@link ApplicationEventPublisherAware},
 * {@link MessageSourceAware},{@link ApplicationContextAware}接口的Bean实现。
 */
class ApplicationContextAwareProcessor implements BeanPostProcessor {

	private final ConfigurableApplicationContext applicationContext;

	private final StringValueResolver embeddedValueResolver;


	/**
	 * Create a new ApplicationContextAwareProcessor for the given context.
	 */
	public ApplicationContextAwareProcessor(ConfigurableApplicationContext applicationContext) {
		this.applicationContext = applicationContext;
		this.embeddedValueResolver = new EmbeddedValueResolver(applicationContext.getBeanFactory());
	}


	@Override
	@Nullable
	public Object postProcessBeforeInitialization(final Object bean, String beanName) throws BeansException {
		AccessControlContext acc = null;

		if (System.getSecurityManager() != null &&
				(bean instanceof EnvironmentAware || bean instanceof EmbeddedValueResolverAware ||
						bean instanceof ResourceLoaderAware || bean instanceof ApplicationEventPublisherAware ||
						bean instanceof MessageSourceAware || bean instanceof ApplicationContextAware)) {
			acc = this.applicationContext.getBeanFactory().getAccessControlContext();
		}

		if (acc != null) {
			AccessController.doPrivileged((PrivilegedAction<Object>) () -> {
				invokeAwareInterfaces(bean);
				return null;
			}, acc);
		}
		else {
			invokeAwareInterfaces(bean);
		}

		return bean;
	}

	private void invokeAwareInterfaces(Object bean) {
		if (bean instanceof Aware) {
			if (bean instanceof EnvironmentAware) {
				((EnvironmentAware) bean).setEnvironment(this.applicationContext.getEnvironment());
			}
			if (bean instanceof EmbeddedValueResolverAware) {
				((EmbeddedValueResolverAware) bean).setEmbeddedValueResolver(this.embeddedValueResolver);
			}
			if (bean instanceof ResourceLoaderAware) {
				((ResourceLoaderAware) bean).setResourceLoader(this.applicationContext);
			}
			if (bean instanceof ApplicationEventPublisherAware) {
				((ApplicationEventPublisherAware) bean).setApplicationEventPublisher(this.applicationContext);
			}
			if (bean instanceof MessageSourceAware) {
				((MessageSourceAware) bean).setMessageSource(this.applicationContext);
			}
			/**
			 * spring帮我们set一个applicationContext对象
			 * 当我们自己的类实现了ApplicationContextAware,只需要提供setter方法,就能获取到applicationContext
			 */
			if (bean instanceof ApplicationContextAware) {
				((ApplicationContextAware) bean).setApplicationContext(this.applicationContext);
			}
		}
	}

	@Override
	public Object postProcessAfterInitialization(Object bean, String beanName) {
		return bean;
	}
}


