不能再详细!!!手把手教你用Faster-RCNN训练自己的数据集
接前篇:http://blog.csdn.net/zcy0xy/article/details/79614690
一、环境安装准备
python2.7以及相关的包cython, python-opencv, easydict
Faster-RCNN用的是https://github.com/smallcorgi/Faster-RCNN_TF tensorflow版本
本文假设你已经按照上面的教程完成了安装,并可以运行demo.py
并且可以训练
二、准备自己的数据集
在实际的应用中,这个数据集肯定是自己项目里面拍摄的。
首先,拍摄的图片可能分辨率太大,不利于训练,通过一顿操作把他们差不多缩小到跟voc数据集里的图片差不多大小。
#coding=utf-8
import os  #打开文件时需要
from PIL import Image
import re

Start_path='C:\\Users\\zcy\\Desktop\\transform\\' #你的图片目录
iphone5_width=333 #图片最大宽度
iphone5_depth=500 #图片最大高度

list=os.listdir(Start_path)
#print list
count=0
for pic in list:
    path=Start_path+pic
    print path
    im=Image.open(path)
    w,h=im.size
    #print w,h
    #iphone 5的分辨率为1136*640,如果图片分辨率超过这个值,进行图片的等比例压缩

    if w>iphone5_width:
        print pic
        print "图片名称为"+pic+"图片被修改"
        h_new=iphone5_width*h/w
        w_new=iphone5_width
        count=count+1
        out = im.resize((w_new,h_new),Image.ANTIALIAS)
        new_pic=re.sub(pic[:-4],pic[:-4]+'_new',pic)
        #print new_pic
        new_path=Start_path+new_pic
        out.save(new_path)

    if h>iphone5_depth:
        print pic
        print "图片名称为"+pic+"图片被修改"
        w=iphone5_depth*w/h
        h=iphone5_depth
        count=count+1
        out = im.resize((w_new,h_new),Image.ANTIALIAS)
        new_pic=re.sub(pic[:-4],pic[:-4]+'_new',pic)
        #print new_pic
        new_path=Start_path+new_pic
        out.save(new_path)

print 'END'
count=str(count)
print "共有"+count+"张图片尺寸被修改"
然后命名图片,按照一定的规律——
#coding=utf-8
import os  #打开文件时需要
from PIL import Image
import re

class BatchRename():
    def __init__(self):
        #我的图片文件夹路径
        self.path = 'C:\\Users\\zcy\\Desktop\\transform'

    def rename(self):
        filelist = os.listdir(self.path)
        total_num = len(filelist)
        i = 10000 #图片编号从多少开始,不要跟VOC原本的编号重复了
        n = 6
        for item in filelist:
            if item.endswith('.jpg'):
                n = 6 - len(str(i))
                src = os.path.join(os.path.abspath(self.path), item)
                dst = os.path.join(os.path.abspath(self.path), str(0)*n + str(i) + '.jpg')
                try:
                    os.rename(src, dst)
                    print 'converting %s to %s ...' % (src, dst)
                    i = i + 1
                except:
                    continue
        print 'total %d to rename & converted %d jpgs' % (total_num, i)
if __name__ == '__main__':
    demo = BatchRename()
demo.rename()这里我尝试了各种办法——修改数据接口,自己编辑json分割文件然后转换等等,最后找到了一条最简单的路,用labelImg工具制作。
下载地址 https://github.com/tzutalin/labelImg
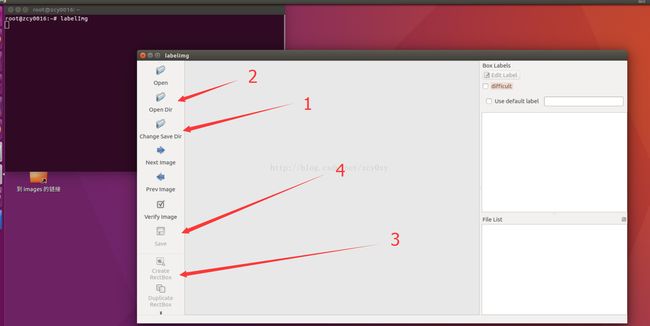
使用方法特别简单,设定xml文件保存的位置,打开你的图片的目录,然后一幅一幅图的标注,就可以了。
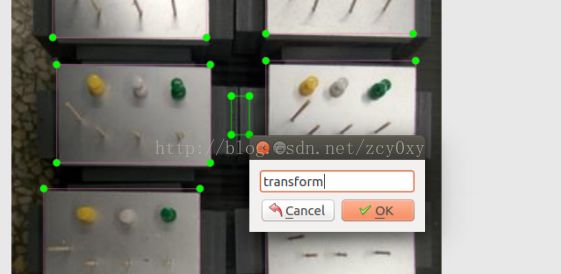
比如这个物体命名为“transform”类。
把所有的图片全部标注完毕,生成了一堆的xml文件。
接下来,来到voc2007的目录这里,把原来的图片和xml删掉,位置分别是:
/home/Faster-RCNN_TF-master/data/VOCdevkit/VOC2007/JPEGImages
/home/Faster-RCNN_TF-master/data/VOCdevkit/VOC2007/Annotations然后把我们的图片放到“/home/Faster-RCNN_TF-master/data/VOCdevkit/VOC2007/JPEGImages”里面来
接下来生成训练和测试需要的txt文件索引,程序是根据这个索引来获取图像的。
# !/usr/bin/python
# -*- coding: utf-8 -*-
import os
import random

trainval_percent = 0.8  #trainval占比例多少
train_percent = 0.7  #test数据集占比例多少
xmlfilepath = 'Annotations'
txtsavepath = 'ImageSets\Main'
total_xml = os.listdir(xmlfilepath)

num=len(total_xml)
list=range(num)
tv=int(num*trainval_percent)
tr=int(tv*train_percent)
trainval= random.sample(list,tv)
train=random.sample(trainval,tr)

ftrainval = open('ImageSets/Main/trainval.txt', 'w')
ftest = open('ImageSets/Main/test.txt', 'w')
ftrain = open('ImageSets/Main/train.txt', 'w')
fval = open('ImageSets/Main/val.txt', 'w')

for i  in list:
    name=total_xml[i][:-4]+'\n'
    if i in trainval:
        ftrainval.write(name)
        if i in train:
            ftrain.write(name)
        else:
            fval.write(name)
    else:
        ftest.write(name)

ftrainval.close()
ftrain.close()
fval.close()
ftest .close() 四个文件,看名字想必就知道意思了。
三、修改源代码
好了,我们终于来最后一步了!
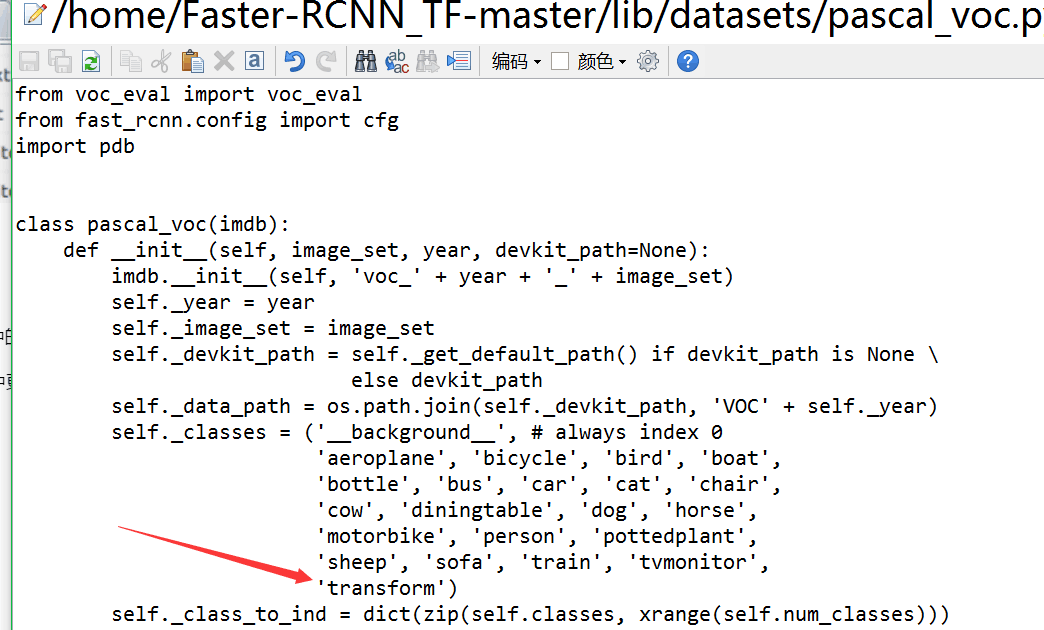
1. lib\datasets\pascal_voc.py中更改self._classes中的类别,添加自己的类名字“transform”
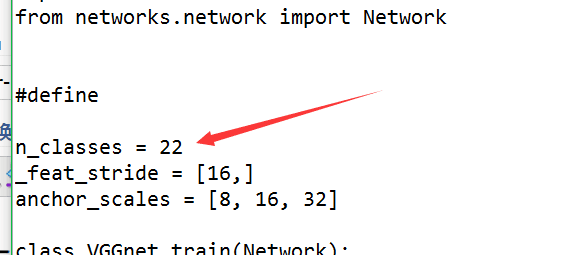
2. lib\networks中VGGnet_train.py和VGG_test.py中更改n_classes为自己的类的个数+1,这里我的是21+1=22
3. tools/demo.py中CLASSES的类别改为自己的类
四、开始训练
跟原来的训练方法一样,这里我们就输入
./experiments/scripts/faster_rcnn_end2end.sh gpu 0 VGG16 pascal_voc我这里是使用GPU的,gpuid为0。
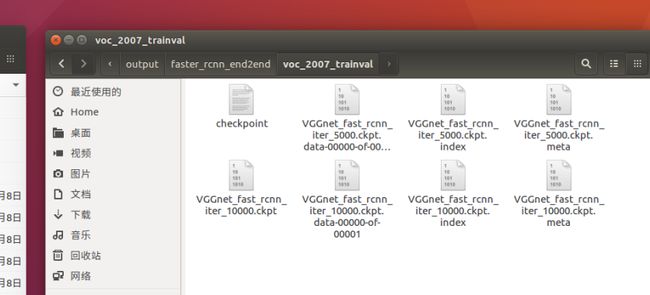
它会训练70000遍,每5000次保存一次在这里“/home/Faster-RCNN_TF-master/output/faster_rcnn_end2end/voc_2007_trainval”
我们可以在1万次时就停止训练,然后把10000那个model后缀名改成“.ckpt”,就可以使用了
五、测试
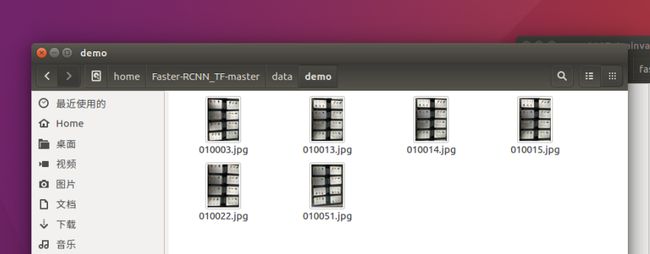
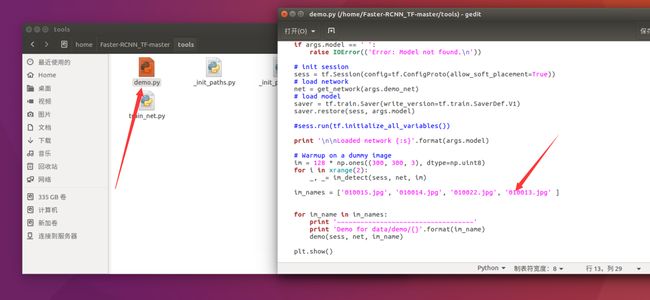
把几张测试图片放到这里来
修改demo里的测试图片名字
最后,运行demo就可以啦!
python ./tools/demo.py --model /home/Faster-RCNN_TF-master/output/faster_rcnn_end2end/voc_2007_trainval/VGGnet_fast_rcnn_iter_10000.ckpt记得模型改成你刚才训练出来的文件名字
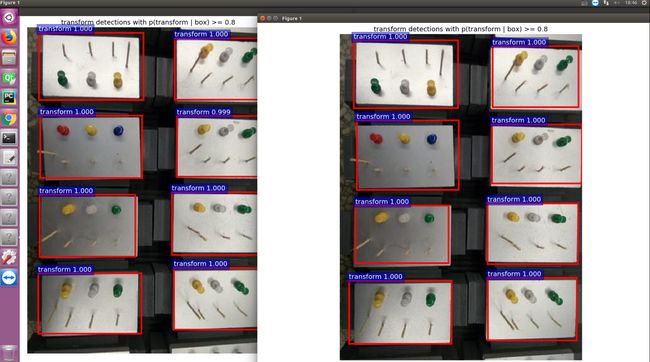
结果看起来还不错
恭喜,大功告成!!!


