基于tensorflow的MNIST入门
要做一个OCR票据识别,虽然有许多现成的接口,但是作为小白,打算先从MINIST入门,逐步深入,记录下一步步过程。
一、在pycharm中导入TensorFlow
1、Anaconda的下载与安装
下载链接:Anaconda下载
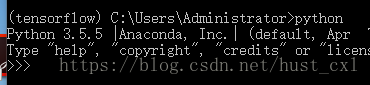
安装好以后在开始菜单栏选择Anaconda prompt,由于anaconda下载的是最新的版本,附带下载的python也是3.6,但是目前windows下TensorFlow只支持python3.5,所以要修改一下python的环境,在Anaconda prompt里运行
conda create -n tensorflow python=3.5再次查看python版本,更换为3.5
2、TensorFlow及其相关包的安装
在Anaconda prompt中开启TensorFlow:
activate tensorflow安装cpu版本:
pip install --upgrade --ignore-installed tensorflow 安装ipython和Spyder:进入anaconda navigator中找到这两个包并下载

测试:在Anaconda prompt中开启TensorFlow,进入python,输入下面代码
import tensorflow as tf
hello = tf.constant('Hello, TensorFlow!')
sess = tf.Session()
print(sess.run(hello))
3、在pycharm中导入TensorFlow
创建工程test,选择File->settings->Project:test->Project InterPreter,在一串路径后选择Add,然后再Base interpreter中选择TensorFlow的解释器,如下图
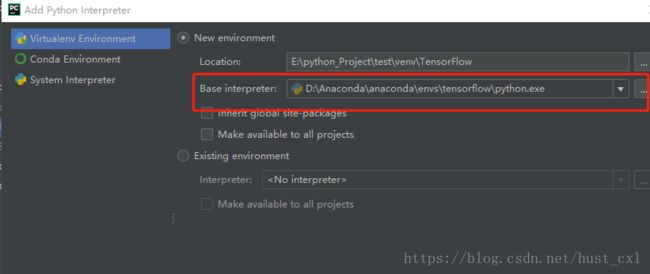
再在IDE中输入上面的测试代码,运行
以上部分参考文档:Windows下用Anaconda安装TensorFlow,并在pycharm中使用
二、MNIST数据集处理
1、可视化
mnist官方文档对数据集有介绍:mnist数据集
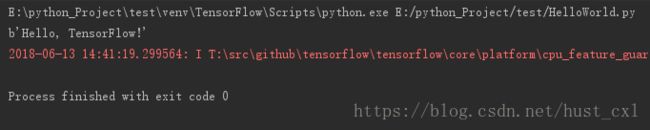
把它以字节流的存储方式转为图片模式,首先是一张图片的测试:
import numpy as np
import struct
import matplotlib.pyplot as plt

filename = 'train-images.idx3-ubyte'
binfile = open(filename, 'rb')
buf = binfile.read()

index = 0
magic, numImages, numRows, numColumns = struct.unpack_from('>IIII', buf, index)
index += struct.calcsize('>IIII')

im = struct.unpack_from('>784B', buf, index)
index += struct.calcsize('>784B')

im = np.array(im)
im = im.reshape(28, 28)

fig = plt.figure()
plotwindow = fig.add_subplot(111)
plt.imshow(im, cmap='gray')
plt.show()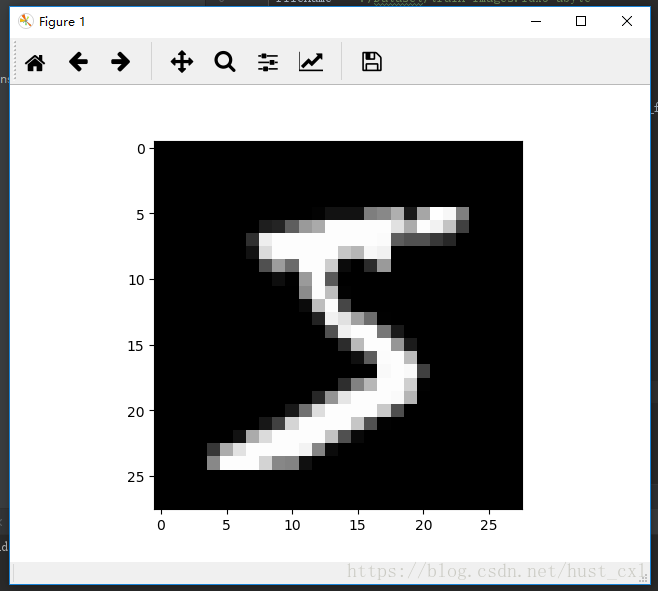
以上参考文档:python读取mnist
现在要读取多个图片并保存,加上一层循环,目前先读取30张
import numpy as np
import struct
import matplotlib.pyplot as plt
#以二进制方式读取文件
filename = './Dataset/train-images.idx3-ubyte'
binfile = open(filename, 'rb')
buf = binfile.read()
index = 0
magic, numImages, numRows, numColumns = struct.unpack_from('>IIII', buf, index)
index += struct.calcsize('>IIII')
#'>IIII'是说使用大端法读取4个unsinged int32
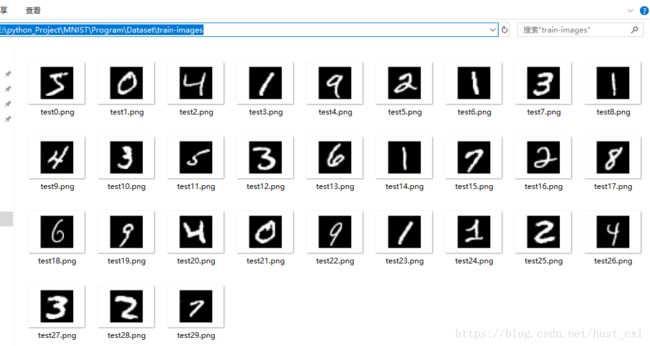
for i in range(30): # 读取前30张图片
im = struct.unpack_from('>784B', buf, index)
index += struct.calcsize('>784B')
im = np.array(im)
im = im.reshape(28, 28)
fig = plt.figure()
plotwindow = fig.add_subplot(111)
plt.axis('off')
plt.imshow(im, cmap='gray')
plt.savefig("./Dataset/train-images/test" + str(i) + ".png")
plt.close()
binfile.close()在对应的文件夹下可以看到图片,如下所示
另一种读取图片的方式
import gzip
import numpy
import matplotlib.pyplot as plt
filepath = r"E:\python_Project\MNIST\Program\Dataset\train-images-idx3-ubyte.gz"
def _read32(bytestream):
dt = numpy.dtype(numpy.uint32).newbyteorder('>')
return numpy.frombuffer(bytestream.read(4), dtype=dt)[0]
def imagine_arr(filepath):
with open(filepath, 'rb') as f:
with gzip.GzipFile(fileobj=f) as bytestream:
magic = _read32(bytestream)
if magic != 2051:
raise ValueError('Invalid magic number %d in MNIST image file: %s' % (magic, f.name))
_read32(bytestream) # 几张图片
rows = _read32(bytestream)
cols = _read32(bytestream)
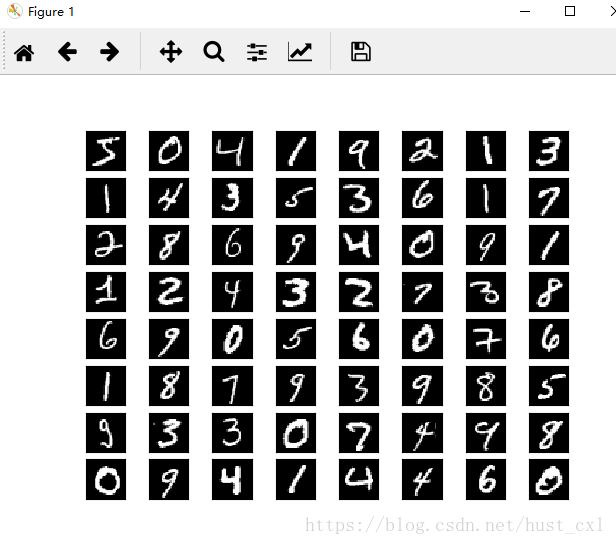
img_num = 64 #同时展示的图片数目
buf = bytestream.read(rows * cols * img_num)
data = numpy.frombuffer(buf, dtype=numpy.ubyte)
return data.reshape(img_num, rows, cols, 1)
im_data = imagine_arr(filepath)
fig, axes = plt.subplots(8, 8)
for l, ax in enumerate(axes.flat):
ax.imshow(im_data[l].reshape(28, 28), cmap='gray')
ax.set_xticks([])
ax.set_yticks([])
plt.show()
plt.close()选择了64张图片,以8*8的方式展示,运行结果如下
以上参考文档:python处理二进制
2、官方文档里读取数据集
文档中的下载、解压并读取数据集的代码可以在链接里找到:
input_data.py
粘贴出来如下
from __future__ import absolute_import
from __future__ import division
from __future__ import print_function
import gzip
import os
import tensorflow.python.platform
import numpy
from six.moves import urllib
from six.moves import xrange  # pylint: disable=redefined-builtin
import tensorflow as tf
SOURCE_URL = 'http://yann.lecun.com/exdb/mnist/'
def maybe_download(filename, work_directory):
  """Download the data from Yann's website, unless it's already here."""
  if not os.path.exists(work_directory):
    os.mkdir(work_directory)
  filepath = os.path.join(work_directory, filename)
  if not os.path.exists(filepath):
    filepath, _ = urllib.request.urlretrieve(SOURCE_URL + filename, filepath)
    statinfo = os.stat(filepath)
    print('Successfully downloaded', filename, statinfo.st_size, 'bytes.')
  return filepath
def _read32(bytestream):
  dt = numpy.dtype(numpy.uint32).newbyteorder('>')
  return numpy.frombuffer(bytestream.read(4), dtype=dt)[0]
def extract_images(filename):
  """Extract the images into a 4D uint8 numpy array [index, y, x, depth]."""
  print('Extracting', filename)
  with gzip.open(filename) as bytestream:
    magic = _read32(bytestream)
    if magic != 2051:
      raise ValueError(
          'Invalid magic number %d in MNIST image file: %s' %
          (magic, filename))
    num_images = _read32(bytestream)
    rows = _read32(bytestream)
    cols = _read32(bytestream)
    buf = bytestream.read(rows * cols * num_images)
    data = numpy.frombuffer(buf, dtype=numpy.uint8)
    data = data.reshape(num_images, rows, cols, 1)
    return data
def dense_to_one_hot(labels_dense, num_classes=10):
  """Convert class labels from scalars to one-hot vectors."""
  num_labels = labels_dense.shape[0]
  index_offset = numpy.arange(num_labels) * num_classes
  labels_one_hot = numpy.zeros((num_labels, num_classes))
  labels_one_hot.flat[index_offset + labels_dense.ravel()] = 1
  return labels_one_hot
def extract_labels(filename, one_hot=False):
  """Extract the labels into a 1D uint8 numpy array [index]."""
  print('Extracting', filename)
  with gzip.open(filename) as bytestream:
    magic = _read32(bytestream)
    if magic != 2049:
      raise ValueError(
          'Invalid magic number %d in MNIST label file: %s' %
          (magic, filename))
    num_items = _read32(bytestream)
    buf = bytestream.read(num_items)
    labels = numpy.frombuffer(buf, dtype=numpy.uint8)
    if one_hot:
      return dense_to_one_hot(labels)
    return labels
class DataSet(object):
  def __init__(self, images, labels, fake_data=False, one_hot=False,
               dtype=tf.float32):
    """Construct a DataSet.
    one_hot arg is used only if fake_data is true.  `dtype` can be either
    `uint8` to leave the input as `[0, 255]`, or `float32` to rescale into
    `[0, 1]`.
    """
    dtype = tf.as_dtype(dtype).base_dtype
    if dtype not in (tf.uint8, tf.float32):
      raise TypeError('Invalid image dtype %r, expected uint8 or float32' %
                      dtype)
    if fake_data:
      self._num_examples = 10000
      self.one_hot = one_hot
    else:
      assert images.shape[0] == labels.shape[0], (
          'images.shape: %s labels.shape: %s' % (images.shape,
                                                 labels.shape))
      self._num_examples = images.shape[0]
      # Convert shape from [num examples, rows, columns, depth]
      # to [num examples, rows*columns] (assuming depth == 1)
      assert images.shape[3] == 1
      images = images.reshape(images.shape[0],
                              images.shape[1] * images.shape[2])
      if dtype == tf.float32:
        # Convert from [0, 255] -> [0.0, 1.0].
        images = images.astype(numpy.float32)
        images = numpy.multiply(images, 1.0 / 255.0)
    self._images = images
    self._labels = labels
    self._epochs_completed = 0
    self._index_in_epoch = 0
  @property
  def images(self):
    return self._images
  @property
  def labels(self):
    return self._labels
  @property
  def num_examples(self):
    return self._num_examples
  @property
  def epochs_completed(self):
    return self._epochs_completed
  def next_batch(self, batch_size, fake_data=False):
    """Return the next `batch_size` examples from this data set."""
    if fake_data:
      fake_image = [1] * 784
      if self.one_hot:
        fake_label = [1] + [0] * 9
      else:
        fake_label = 0
      return [fake_image for _ in xrange(batch_size)], [
          fake_label for _ in xrange(batch_size)]
    start = self._index_in_epoch
    self._index_in_epoch += batch_size
    if self._index_in_epoch > self._num_examples:
      # Finished epoch
      self._epochs_completed += 1
      # Shuffle the data
      perm = numpy.arange(self._num_examples)
      numpy.random.shuffle(perm)
      self._images = self._images[perm]
      self._labels = self._labels[perm]
      # Start next epoch
      start = 0
      self._index_in_epoch = batch_size
      assert batch_size <= self._num_examples
    end = self._index_in_epoch
    return self._images[start:end], self._labels[start:end]
def read_data_sets(train_dir, fake_data=False, one_hot=False, dtype=tf.float32):
  class DataSets(object):
    pass
  data_sets = DataSets()
  if fake_data:
    def fake():
      return DataSet([], [], fake_data=True, one_hot=one_hot, dtype=dtype)
    data_sets.train = fake()
    data_sets.validation = fake()
    data_sets.test = fake()
    return data_sets
  TRAIN_IMAGES = 'train-images-idx3-ubyte.gz'
  TRAIN_LABELS = 'train-labels-idx1-ubyte.gz'
  TEST_IMAGES = 't10k-images-idx3-ubyte.gz'
  TEST_LABELS = 't10k-labels-idx1-ubyte.gz'
  VALIDATION_SIZE = 5000
  local_file = maybe_download(TRAIN_IMAGES, train_dir)
  train_images = extract_images(local_file)
  local_file = maybe_download(TRAIN_LABELS, train_dir)
  train_labels = extract_labels(local_file, one_hot=one_hot)
  local_file = maybe_download(TEST_IMAGES, train_dir)
  test_images = extract_images(local_file)
  local_file = maybe_download(TEST_LABELS, train_dir)
  test_labels = extract_labels(local_file, one_hot=one_hot)
  validation_images = train_images[:VALIDATION_SIZE]
  validation_labels = train_labels[:VALIDATION_SIZE]
  train_images = train_images[VALIDATION_SIZE:]
  train_labels = train_labels[VALIDATION_SIZE:]
  data_sets.train = DataSet(train_images, train_labels, dtype=dtype)
  data_sets.validation = DataSet(validation_images, validation_labels,
                                 dtype=dtype)
  data_sets.test = DataSet(test_images, test_labels, dtype=dtype)
  return data_sets
根据文档mnist入门,在没有做任何优化时候的模型,实际就是文档里代码段的简单堆叠:
import input_data
import tensorflow as tf
mnist = input_data.read_data_sets("MNIST_data/", one_hot=True)   #读取数据
x = tf.placeholder("float", [None, 784])   #输入图像展成784维向量
W = tf.Variable(tf.zeros([784,10]))   #权值,784*10的张量
b = tf.Variable(tf.zeros([10]))       #偏差
y = tf.nn.softmax(tf.matmul(x,W) + b)    #输出概率
y_ = tf.placeholder("float", [None,10])   #正确值
cross_entropy = -tf.reduce_sum(y_*tf.log(y))  #交叉熵
train_step = tf.train.GradientDescentOptimizer(0.01).minimize(cross_entropy)  #梯度下降算法
init = tf.global_variables_initializer()   #初始化变量
sess = tf.Session()  #启动模型
sess.run(init)
for i in range(1000):   #模型循环训练1000次
  batch_xs, batch_ys = mnist.train.next_batch(100)
  sess.run(train_step, feed_dict={x: batch_xs, y_: batch_ys})

correct_prediction = tf.equal(tf.argmax(y,1), tf.argmax(y_,1))   #检测预测是否与真实标签匹配
accuracy = tf.reduce_mean(tf.cast(correct_prediction, "float"))   #取平均值
print(sess.run(accuracy, feed_dict={x: mnist.test.images, y_: mnist.test.labels}))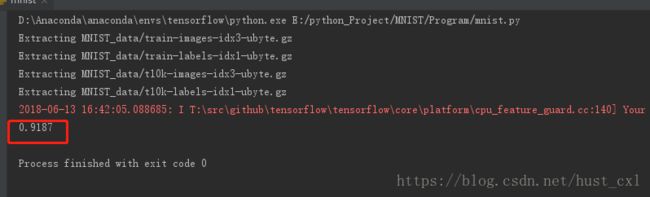
三、模型的优化
1、多层卷积网络
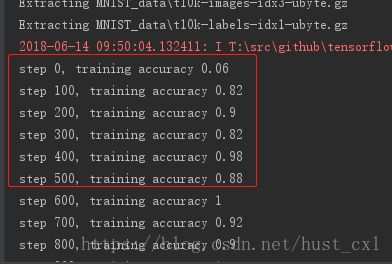
按照官网的文档,该模型构建了一个卷积网络,采用了两层卷积和池化,最后接入一个全连接层,使用ADAM优化器做梯度最速下降,代码如下
import input_data
import tensorflow as tf
mnist = input_data.read_data_sets('MNIST_data', one_hot=True)   #读取数据
sess = tf.InteractiveSession()
x = tf.placeholder("float", [None, 784])   #输入图像展成784维向量
y_ = tf.placeholder("float", [None,10])   #正确值
#权值和偏差的初始化
def weight_variable(shape):
  initial = tf.truncated_normal(shape, stddev=0.1)
  return tf.Variable(initial)
def bias_variable(shape):
  initial = tf.constant(0.1, shape=shape)
  return tf.Variable(initial)

#卷积步幅为1,padding为0
def conv2d(x, W):
  return tf.nn.conv2d(x, W, strides=[1, 1, 1, 1], padding='SAME')
#maxpooling大小为2*2
def max_pool_2x2(x):
  return tf.nn.max_pool(x, ksize=[1, 2, 2, 1], strides=[1, 2, 2, 1], padding='SAME')

#第一层卷积和池化
W_conv1 = weight_variable([5, 5, 1, 32])  #patch大小为5*5,,输入通道数1,输出通道数32,即32个输出特征
b_conv1 = bias_variable([32])   #每个输出特征对应一个偏置量

#将展成的784维向量reshape成4维,图片宽和高都是28,最后一维代表是灰度值图像
x_image = tf.reshape(x, [-1,28,28,1])
#把x_image和权值向量进行卷积,加上偏置项,然后应用ReLU激活函数,最后进行max pooling
h_conv1 = tf.nn.relu(conv2d(x_image, W_conv1) + b_conv1)
h_pool1 = max_pool_2x2(h_conv1)

#第二层卷积和池化
W_conv2 = weight_variable([5, 5, 32, 64])   #输入特征32,输出64
b_conv2 = bias_variable([64])

h_conv2 = tf.nn.relu(conv2d(h_pool1, W_conv2) + b_conv2)
h_pool2 = max_pool_2x2(h_conv2)

#全连接层,经过两次2*2的maxpooling,图片已经变成7*7,输出特征64
#加入一个有1024个神经元的全连接层,用于处理整个图片
W_fc1 = weight_variable([7 * 7 * 64, 1024])
b_fc1 = bias_variable([1024])

h_pool2_flat = tf.reshape(h_pool2, [-1, 7*7*64])
h_fc1 = tf.nn.relu(tf.matmul(h_pool2_flat, W_fc1) + b_fc1)

#加入dropout减少过拟合
keep_prob = tf.placeholder("float")
h_fc1_drop = tf.nn.dropout(h_fc1, keep_prob)

#输出层
W_fc2 = weight_variable([1024, 10])
b_fc2 = bias_variable([10])
y_conv=tf.nn.softmax(tf.matmul(h_fc1_drop, W_fc2) + b_fc2)

cross_entropy = -tf.reduce_sum(y_*tf.log(y_conv))    #交叉熵
train_step = tf.train.AdamOptimizer(1e-4).minimize(cross_entropy)   #ADAM优化器来做梯度最速下降
correct_prediction = tf.equal(tf.argmax(y_conv,1), tf.argmax(y_,1))
accuracy = tf.reduce_mean(tf.cast(correct_prediction, "float"))
sess.run(tf.global_variables_initializer())
for i in range(20000):
  batch = mnist.train.next_batch(50)
  if i%100 == 0:
    train_accuracy = accuracy.eval(feed_dict={x:batch[0], y_: batch[1], keep_prob: 1.0})
    print("step %d, training accuracy %g"%(i, train_accuracy))
  train_step.run(feed_dict={x: batch[0], y_: batch[1], keep_prob: 0.5})

print("test accuracy %g"%accuracy.eval(feed_dict={x: mnist.test.images, y_: mnist.test.labels, keep_prob: 1.0}))
刚开始运行精度比较低,从迭代500次以后精度大概就保持在90%以上,我的机器20000次迭代跑完大约耗时半个小时,最后的平均准确率是99.2% ,能看到比之前的简单的模型有明显的优化,如下图

2、获取运行信息
这里是对TensorFlow官方文档的运作方式介绍部分做了实验,有两个python文件,mnist.py和fully_connected_feed.py,前者定义了推理(inference)、损失(loss)和训练(training)三个函数,推理部分由两个隐层和一个线性回归层组成,最后的返回结果是一个逻辑张量,loss函数则是对inference的输出逻辑张量和标签进行对比,training包括使用梯度下降对模型参数进行优化,具体代码为:
from __future__ import absolute_import
from __future__ import division
from __future__ import print_function
import math
import tensorflow as tf
NUM_CLASSES = 10
IMAGE_SIZE = 28
IMAGE_PIXELS = IMAGE_SIZE * IMAGE_SIZE
def inference(images, hidden1_units, hidden2_units):
  # 第一个隐层
  with tf.name_scope('hidden1'):
    #tf.truncated_normal初始化权重变量,第一个维度代表该层中权重变量所连接(connect from)的单元数量
    #第二个维度代表该层中权重变量所连接到的(connect to)单元数量
    #对于名叫hidden1的第一层,相应的维度则是[IMAGE_PIXELS, hidden1_units]
    weights = tf.Variable(tf.truncated_normal([IMAGE_PIXELS, hidden1_units], stddev=1.0 / math.sqrt(float(IMAGE_PIXELS))), name='weights')
    biases = tf.Variable(tf.zeros([hidden1_units]), name='biases')
    hidden1 = tf.nn.relu(tf.matmul(images, weights) + biases)
  # 第二个隐层
  with tf.name_scope('hidden2'):
    weights = tf.Variable(tf.truncated_normal([hidden1_units, hidden2_units], stddev=1.0 / math.sqrt(float(hidden1_units))), name='weights')
    biases = tf.Variable(tf.zeros([hidden2_units]), name='biases')
    hidden2 = tf.nn.relu(tf.matmul(hidden1, weights) + biases)
  # 线性回归层
  with tf.name_scope('softmax_linear'):
    weights = tf.Variable(tf.truncated_normal([hidden2_units, NUM_CLASSES], stddev=1.0 / math.sqrt(float(hidden2_units))), name='weights')
    biases = tf.Variable(tf.zeros([NUM_CLASSES]), name='biases')
    logits = tf.matmul(hidden2, weights) + biases
  return logits

def loss(logits, labels):
  labels = tf.to_int64(labels)
  return tf.losses.sparse_softmax_cross_entropy(labels=labels, logits=logits)

def training(loss, learning_rate):
  tf.summary.scalar('loss', loss)
  optimizer = tf.train.GradientDescentOptimizer(learning_rate)
  #global_step保存全局训练步骤(global training step)的数值
  global_step = tf.Variable(0, name='global_step', trainable=False)
  #minimize更新系统中的三角权重(triangle weights)、增加全局步骤的操作
  train_op = optimizer.minimize(loss, global_step=global_step)
  return train_op

def evaluation(logits, labels):
  correct = tf.nn.in_top_k(logits, labels, 1)
return tf.reduce_sum(tf.cast(correct, tf.int32))以上两个文件的代码都可以在GitHub上找到:TensorFlow:MNIST
贴出来加过注释的代码方便自己理解:
from __future__ import absolute_import
from __future__ import division
from __future__ import print_function
import argparse
import os
import sys
import time
from six.moves import xrange
import tensorflow as tf
from tensorflow.examples.tutorials.mnist import input_data
from tensorflow.examples.tutorials.mnist import mnist
# Basic model parameters as external flags.
FLAGS = None
#图像和标签占位符
def placeholder_inputs(batch_size):
images_placeholder = tf.placeholder(tf.float32, shape=(batch_size, mnist.IMAGE_PIXELS))
labels_placeholder = tf.placeholder(tf.int32, shape=(batch_size))
return images_placeholder, labels_placeholder
#fill_feed_dict函数会查询给定的Dataset,索要下一批次batch_size的图像和标签
def fill_feed_dict(data_set, images_pl, labels_pl):
images_feed, labels_feed = data_set.next_batch(FLAGS.batch_size, FLAGS.fake_data)
#以占位符为哈希键,创建一个Python字典对象,键值则是其代表的反馈Tensor
feed_dict = {
images_pl: images_feed,
labels_pl: labels_feed,
}
return feed_dict
def do_eval(sess, eval_correct, images_placeholder, labels_placeholder, data_set):
true_count = 0
steps_per_epoch = data_set.num_examples // FLAGS.batch_size
num_examples = steps_per_epoch * FLAGS.batch_size
for step in xrange(steps_per_epoch):
feed_dict = fill_feed_dict(data_set, images_placeholder, labels_placeholder)
true_count += sess.run(eval_correct, feed_dict=feed_dict)
precision = float(true_count) / num_examples
print('Num examples: %d Num correct: %d Precision @ 1: %0.04f' % (num_examples, true_count, precision))
def run_training():
data_sets = input_data.read_data_sets(FLAGS.input_data_dir, FLAGS.fake_data)
with tf.Graph().as_default():
images_placeholder, labels_placeholder = placeholder_inputs(FLAGS.batch_size)
logits = mnist.inference(images_placeholder, FLAGS.hidden1, FLAGS.hidden2) #调用mnist.py中的inference方法
loss = mnist.loss(logits, labels_placeholder)
train_op = mnist.training(loss, FLAGS.learning_rate)
eval_correct = mnist.evaluation(logits, labels_placeholder)
summary = tf.summary.merge_all()
init = tf.global_variables_initializer()
saver = tf.train.Saver()
sess = tf.Session()
summary_writer = tf.summary.FileWriter(FLAGS.log_dir, sess.graph)
sess.run(init)
for step in xrange(FLAGS.max_steps):
#执行每一步时,代码会生成一个反馈字典(feed dictionary)
#其中包含对应步骤中训练所要使用的例子,这些例子的哈希键就是其所代表的占位符操作。
start_time = time.time()
feed_dict = fill_feed_dict(data_sets.train, images_placeholder, labels_placeholder)
_, loss_value = sess.run([train_op, loss], feed_dict=feed_dict)
duration = time.time() - start_time
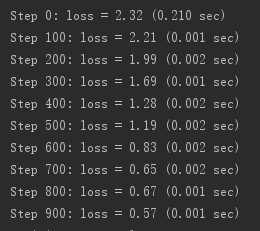
#训练循环会每隔100个训练步骤,就打印一行简单的状态文本,告知当前的训练状态
if step % 100 == 0:
print('Step %d: loss = %.2f (%.3f sec)' % (step, loss_value, duration))
summary_str = sess.run(summary, feed_dict=feed_dict)
summary_writer.add_summary(summary_str, step)
summary_writer.flush()
if (step + 1) % 1000 == 0 or (step + 1) == FLAGS.max_steps:
checkpoint_file = os.path.join(FLAGS.log_dir, 'model.ckpt')
saver.save(sess, checkpoint_file, global_step=step)
#每隔一千个训练步骤,代码会尝试使用训练数据集与测试数据集,对模型进行评估
#do_eval函数会被调用三次,分别使用训练数据集、验证数据集合测试数据集
print('Training Data Eval:')
do_eval(sess, eval_correct, images_placeholder, labels_placeholder, data_sets.train)
print('Validation Data Eval:')
do_eval(sess, eval_correct, images_placeholder, labels_placeholder, data_sets.validation)
print('Test Data Eval:')
do_eval(sess, eval_correct, images_placeholder, labels_placeholder, data_sets.test)
def main(_):
if tf.gfile.Exists(FLAGS.log_dir):
tf.gfile.DeleteRecursively(FLAGS.log_dir)
tf.gfile.MakeDirs(FLAGS.log_dir)
run_training()
if __name__ == '__main__':
parser = argparse.ArgumentParser()
parser.add_argument('--learning_rate', type=float, default=0.01, help='Initial learning rate.')
parser.add_argument('--max_steps', type=int, default=2000, help='Number of steps to run trainer.')
parser.add_argument('--hidden1', type=int, default=128, help='Number of units in hidden layer 1.')
parser.add_argument('--hidden2', type=int, default=32, help='Number of units in hidden layer 2.')
parser.add_argument('--batch_size', type=int, default=100, help='Batch size. Must divide evenly into the dataset sizes.')
parser.add_argument('--input_data_dir', type=str, default=os.path.join(os.getenv('TEST_TMPDIR', './tmp'), 'tensorflow/mnist/input_data'), help='Directory to put the input data.')
parser.add_argument('--log_dir', type=str, default=os.path.join(os.getenv('TEST_TMPDIR', './tmp'), 'tensorflow/mnist/logs/fully_connected_feed'), help='Directory to put the log data.')
parser.add_argument('--fake_data', default=False, help='If true, uses fake data for unit testing.', action='store_true')
FLAGS, unparsed = parser.parse_known_args()
tf.app.run(main=main, argv=[sys.argv[0]] + unparsed)运行的结果如下:

关于mnist的入门文档似乎就到这里,再后面就偏向于理论了,再慢慢深入学习吧