IOS TableView组件三:自定义Cell
文章目录
- 纯代码创建自定义cell
- AppDelegate.m中设置window和根视图
- 定义 FoodModel类
- MainViewController 读取数据到mode类中
- FoodCell
- MainViewController.m 中完成foodCell的加载
- setValuesForKeysWithDictionary方法讲解
- xib创建自定义的cell
- 给cell设置宽度和高度:
- 调整层级关系
- 将之前写过的updateCellWithMode函数粘贴过来
- MainViewController中使用
- 工厂方法完成cell的创建
- 1
- 创建plist文件
- 向cell中添加子视图
- [NSBundle mainBundle]loadNibNamed
- Demo
纯代码的方式和xib拖拽;
纯代码:便于后期维护,灵活度也更高一些,复用性强。
xib:很大程度上减少代码量,但是后期维护成本更高,灵活度更差一些。
但是实际开发中,往往会碰到一些复杂的cell,或者复杂的其他视图,此时纯代码的创建就会降低开发的效益,而xib可以节约开发成本,让前期可以进入快速的迭代当中。要根据具体的情况选择合适的创建方式。
纯代码创建自定义cell
AppDelegate.m中设置window和根视图
AppDelegate.m中设置window和根视图
//AppDelegate.m

#import "AppDelegate.h"
#import "MainViewController.h"

@interface AppDelegate ()

@end

@implementation AppDelegate


- (BOOL)application:(UIApplication *)application didFinishLaunchingWithOptions:(NSDictionary *)launchOptions {
    [self setWindow:[[UIWindow alloc]initWithFrame:[UIScreen mainScreen].bounds]];
    [self.window makeKeyAndVisible];
    UINavigationController *navController=[[UINavigationController alloc]initWithRootViewController:[[MainViewController alloc]init]];
    [self.window setRootViewController:navController];
    return YES;
}
MainViewController.m中设置视图的属性:题目颜色,添加tableview
//MainViewController.m

#import "MainViewController.h"

@interface MainViewController ()
@property (nonatomic,strong)UITableView *tableView;
@end

@implementation MainViewController

- (void)viewDidLoad {
    [super viewDidLoad];
    [self setTitle:@"自定义Cell"];
    [self.view setBackgroundColor:[UIColor whiteColor]];
    //属性tableView的set函数
    [self setTableView:[[UITableView alloc]initWithFrame:self.view.bounds style:UITableViewStylePlain]];
    [self.tableView setDataSource:self];
    [self.tableView setDelegate:self];
    [self.view addSubview:self.tableView];
    // Do any additional setup after loading the view.
}
#pragma mark -Table view delegate -
#pragma mark -Table view data Source -
-(NSInteger)tableView:(UITableView *)tableView numberOfRowsInSection:(NSInteger)section{
    return 0;
}
-(UITableViewCell *)tableView:(UITableView*)tableView cellForRowAtIndexPath:(NSIndexPath *)indexPath{
    return nil;
}
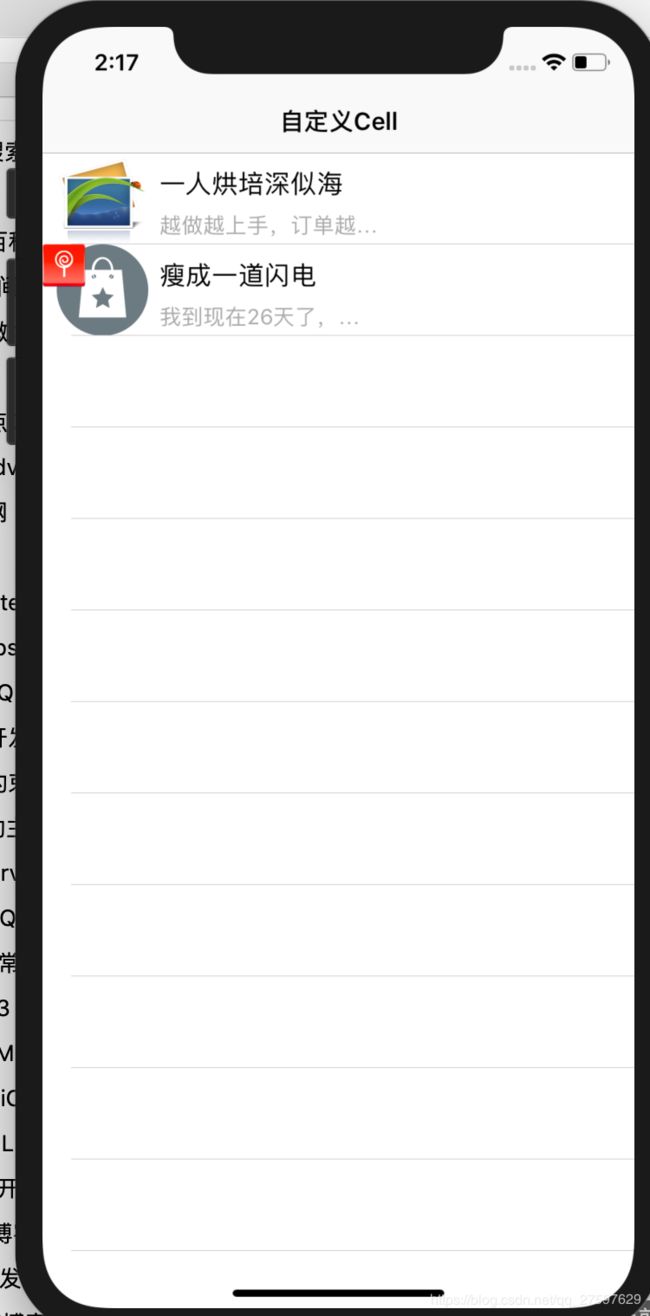
打开后会发现一个空白的tableview已经被创建出来。
创建自定义cell必须要有数据的支撑,本次的数据来源都来自一个plist文件。
创建plist文件

定义 FoodModel类
定义一个继承自NSObject的model类,其属性和plist中的key一一对应
//  FoodModel.h
#import
NS_ASSUME_NONNULL_BEGIN
@interface FoodModel : NSObject

@property(nonatomic,copy) NSString *title;
@property(nonatomic,copy) NSString *note;
@property(nonatomic,copy) NSString *icon;
@property(nonatomic,copy) NSString *promo;

+(instancetype)modeWithDict:(NSDictionary*)dict;
@end
在FoodModel.m文件中重写
-(void)setValue:(id)value forUndefinedKey:(NSString )key方法,防止赋值的时候结果不匹配导致的崩溃。工厂方法完成mode类的创建和属性赋值,
+(instancetype)modeWithDict:(NSDictionary)dict;
//FoodModel.h
#import "FoodModel.h"
@implementation FoodModel
- (void)setValue:(id)value forUndefinedKey:(NSString *)key{
}
+ (instancetype)modeWithDict:(NSDictionary *)dict{
    FoodModel *mode=[[FoodModel alloc]init];
    [mode setValuesForKeysWithDictionary:dict];
    return mode;
}
@end
MainViewController 读取数据到mode类中
在MainViewController.m中通过重写属性的get方法来完成一个懒加载。
如果没有这个变量,就从文件中读取数据。
数据是array类型,循环读取定义类,并将类添加到NSMutableArray中
-(NSArray *)foodArray{
    if(!_foodArray){
        NSString *path=[[NSBundle mainBundle] pathForResource:@"quanquan.plist" ofType:nil];
        NSArray *dataArray=[NSArray arrayWithContentsOfFile:path];
        NSMutableArray *tempArray=[NSMutableArray array];
        for(NSDictionary *dataDict in dataArray){
            FoodModel *model=[FoodModel modelWithDict:dataDict];
            [tempArray addObject:model];
        }
        _foodArray=[tempArray copy];
    }
    return _foodArray;
}
要想使用get方法,用self.foodArray方式或[self foodArray],不能用_foodArray方式.promoImageView视图的显示与否,是根据是否有这个key来判断的。
FoodCell
FoodCell中添加子视图相关的属性,和cell对象的更新函数- (void)updateCellWithMode:(FoodModel*)model;
//  FoodCellTableViewCell.h
#import
#import "FoodModel.h"
NS_ASSUME_NONNULL_BEGIN

@interface FoodCellTableViewCell : UITableViewCell
@property(nonatomic,strong)UIImageView *promoImageView;
@property(nonatomic,strong)UIImageView *iconImageView;
@property(nonatomic,strong)UILabel *titleLabel;
@property(nonatomic,strong)UILabel *noteLabel;
- (void)updateCellWithMode:(FoodModel*)model;
@end
NS_ASSUME_NONNULL_END
//  FoodCellTableViewCell.m
#import "FoodCellTableViewCell.h"

@implementation FoodCellTableViewCell

/*- (void)awakeFromNib {
    [super awakeFromNib];
    // Initialization code
}删掉这个方法,重写init方法*/
-(instancetype)init{
    self=[super init];
    if(self){
        [self setIconImageView:[[UIImageView alloc]initWithFrame:CGRectMake(10, 0, 64, 64)]];
        [self.contentView addSubview:self.iconImageView];

        [self setPromoImageView:[[UIImageView alloc]initWithFrame:CGRectMake(0, 0, 30, 30)]];
        [self.contentView addSubview:self.promoImageView];

        [self setTitleLabel:[[UILabel alloc]initWithFrame:CGRectMake(75, 10, 220, 21)]];
        [self.titleLabel setFont:[UIFont systemFontOfSize:18]];
        [self.contentView addSubview:self.titleLabel];

        [self setNoteLabel:[[UILabel alloc]initWithFrame:CGRectMake(75, 40, 250, 21)]];
        [self.noteLabel setFont:[UIFont systemFontOfSize:15]];
        [self.noteLabel setTextColor:[UIColor lightGrayColor]];
        [self.contentView addSubview:self.contentView];
    }
    return self;
}
-(void)updateCellWithMode:(FoodModel *)model{
    if(model.promo.length==0){
        [self.promoImageView setHidden:YES];
    }else{
        [self.promoImageView setHidden:NO];
        [self.promoImageView setImage:[UIImage imageNamed:model.promo]];
    }
    [self.iconImageView setImage:[UIImage imageNamed:model.icon]];
    [self.titleLabel setText:model.title];
    [self.noteLabel setText:model.note];
}
- (void)setSelected:(BOOL)selected animated:(BOOL)animated {
    [super setSelected:selected animated:animated];

    // Configure the view for the selected state
}
@end
MainViewController.m 中完成foodCell的加载
#pragma mark -Table view delegate -
#pragma mark -Table view data Source -
- (CGFloat)tableView:(UITableView *)tableView heightForRowAtIndexPath:(NSIndexPath *)indexPath{
    return 64;
}
-(NSInteger)tableView:(UITableView *)tableView numberOfRowsInSection:(NSInteger)section{
    NSLog(@"ddd%zd",[self foodArray].count);
    return [self foodArray].count;
}
-(UITableViewCell *)tableView:(UITableView*)tableView cellForRowAtIndexPath:(NSIndexPath *)indexPath{
    FoodCell *cell= [[FoodCell alloc]init];
   [cell updateCellWithMode:self.foodArray[indexPath.row]];
     //UITableViewCell *cell1= [[UITableViewCell alloc]init];
    return cell ;
}
setValuesForKeysWithDictionary方法讲解
1.为什么用
之前给model赋值的时候,一个一个往上写,写的贼tm烦,所以一直想找一个简单方便的方法。。。来张图感受下

2.怎么用
用这个之前我是知道有这么一个方法能快捷的赋值的,但是为什么没用呢?因为它搞不好就崩。使用方法很简单:
    Model *item = [[Model alloc]init];
    [item setValuesForKeysWithDictionary:dic];
其中字典的key值需要和model的属性一一对应,完全相同。
需要注意的是崩也是有原因的,基本上是因为字典中的key值在model中没有发现对应得属性。但是反过来,model中有多余的属性时,不会崩溃。
其次需要注意的是,当字典中的key值有oc关键字时,model对应属性不能写成关键字,如id等,那么应该怎么做呢。
答:实现下面的方法:
-(void)setValue:(id)value forUndefinedKey:(NSString *)key;
-(void)setValue:(id)value forUndefinedKey:(NSString *)key{
    if ([key isEqualToString:@"id"]) {
        self.wbid = value;
        //wbid是替代的id属性
    }
}
xib创建自定义的cell
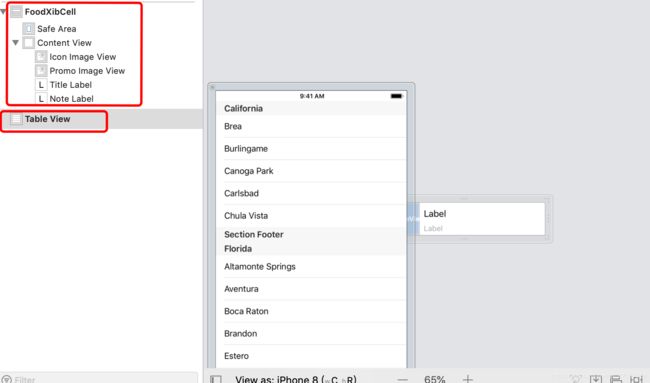
创建继承自UITableViewCell的类,勾选上Also create XIB file。
给cell设置宽度和高度:
调整层级关系


往下或者后创建的在面上。
拖动控件到@interface下生成相应的属性。

当加载xib文件的时候,会自动调用awakeFromNib方法。
将之前写过的updateCellWithMode函数粘贴过来
包括声明和实现。
MainViewController中使用
只需要更改cell类就行
-(UITableViewCell *)tableView:(UITableView*)tableView cellForRowAtIndexPath:(NSIndexPath *)indexPath{
   //FoodCell *cell= [[FoodCell alloc]init];
    FoodXibCell *cell=[FoodXibCell cell];
   [cell updateCellWithMode:self.foodArray[indexPath.row]];

    return cell ;
}
工厂方法完成cell的创建
1
每个类文件,按需要说明属性,类中方法围绕属性定义,用个带参的方法,给属性赋值。
类文件按使用继承自哪个夫类,
mode:NSObject
cell:UITableViewCell
创建plist文件
如何创建plist文件写到plist的章节:
https://blog.csdn.net/wanglei0918/article/details/80454177
向cell中添加子视图
一般我们向cell中添加子视图,有两种方式
1、[cell addSubview:]
2、[cell.contentView addSubview:]
区别在于进行cell编辑时,比如cell内容向左移或者右移时,第一种方式子视图不会移动,第二可以,所以这种情况一般使用第二种方式。
还有在设置backgroundColor时,使用cell设置时左移或者右移颜色是不会变的,
而用cell.contentCell设置时,移动后的空白会显示cell的默认颜色,这种情况视实际情况选择。
其实这两种方式在大多数情况是一样,不用纠结。
[NSBundle mainBundle]loadNibNamed
返回时一个数组,如下就有两个元素,所以要加lastobject。

Demo
demo

