Springboot 在Mybatis中使用HashMap进行增删查改
前言:使用HashMap,我们可以不写resultMap,不写实体类。
OK,我们直接进入实战案例,准备一个springboot+mybatis的项目(如果没搞懂springboot+mybatis的,可以参考我这篇https://blog.csdn.net/qq_35387940/article/details/88048830)。
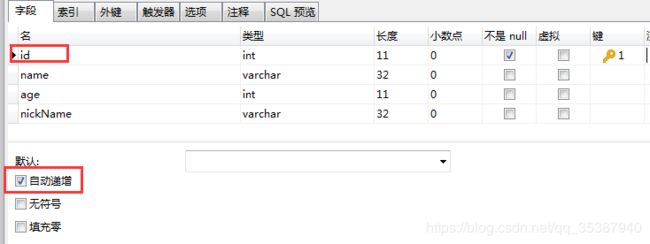
先准备一张表,
然后新建一个interface,FriendMapper.java:
package com.example.demo.mapper;

import org.apache.ibatis.annotations.Mapper;

import java.util.List;
import java.util.Map;

/**
 * @Author : JCccc
 * @CreateTime : 2019/9/27
 * @Description :
 **/

@Mapper
public interface FriendMapper {

    int add(Map map);

    void deleteById(Map map);

    Map queryById(Map map);

    int update(Map map);


}
然后是service,FriendService.java:
package com.example.demo.service;

import java.util.List;
import java.util.Map;

/**
 * @Author : JCccc
 * @CreateTime : 2019/9/27
 * @Description :
 **/
public interface FriendService {


    int add(Map map);

    void deleteById(Map map);

    Map queryById(Map map);

    int update(Map map);
}
接着是FriendServiceImpl.java:
package com.example.demo.service.impl;

import com.example.demo.mapper.FriendMapper;
import com.example.demo.service.FriendService;
import org.springframework.beans.factory.annotation.Autowired;
import org.springframework.stereotype.Service;

import java.util.List;
import java.util.Map;

/**
 * @Author : JCccc
 * @CreateTime : 2019/9/27
 * @Description :
 **/
@Service
public class FriendServiceImpl implements FriendService {
   @Autowired
    FriendMapper friendMapper;
    @Override
    public int add(Map map) {
        return friendMapper.add(map);
    }

    @Override
    public void deleteById(Map map) {
        friendMapper.deleteById(map);
    }

    @Override
    public Map queryById(Map map) {
        return  friendMapper.queryById(map);
    }

    @Override
    public int update(Map map) {
        return friendMapper.update(map);
    }
}
然后是xml,FriendMapper.xml:
insert into
friend(id,name,age,nickName)
values (#{id},#{name},#{age},#{nickName})
update friend
set name=#{name},age=#{age},nickName=#{nickName}
where id=#{id}
delete
from friend
where id=#{id}
最后是写接口进行测试,
添加接口:
 @GetMapping("/add")
    public String addFriend(){
     Map map=new HashMap();
     map.put("name","JCccc");
     map.put("age",12);
     map.put("nickName","Migrant worker");
     int result = friendServiceImpl.add(map);
     Object id = map.get("id");
     System.out.println("id:  "+id);
     return "影响行数为:"+result+"\n返回主键是:"+id;
 }
调用接口:
数据库:
![]()
剩下的查询,修改,删除接口,测试:
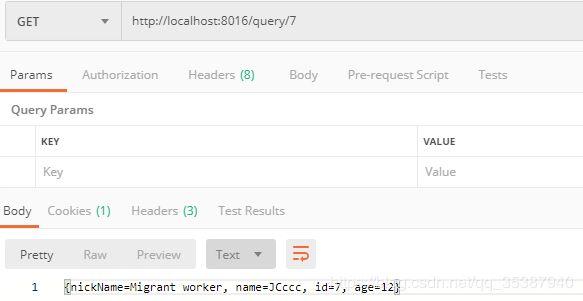
查询接口:
    @GetMapping("/query/{id}")
    public String queryFriend(@PathVariable("id") Integer id){
        Map map=new HashMap();
        map.put("id",id);
        map = friendServiceImpl.queryById(map);
        return map.toString();
    }
调用接口:
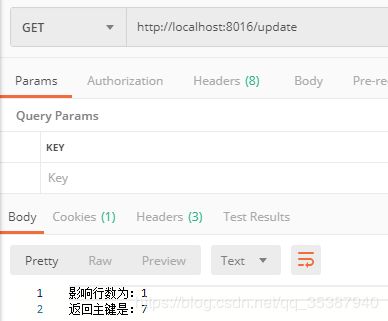
    @GetMapping("/update")
    public String updateFriend(){
        Map map=new HashMap();
        map.put("id",7);
        map.put("name","update");
        map.put("age",12);
        map.put("nickName","update");
        int result = friendServiceImpl.update(map);
        Object id = map.get("id");
        return "影响行数为:"+result+"\n返回主键是:"+id;
    }
调用接口:
数据库:
![]()
删除接口:
    @GetMapping("/delete/{id}")
    public void deleteFriend(@PathVariable("id") Integer id){
        Map map=new HashMap();
        map.put("id",id);
        friendServiceImpl.deleteById(map);

    }
调用:
好了,到此。
这个HashMap的使用是需要选择场景的,有些场景使用起来非常舒服方便,有些场景并不然。
学以致用,致用是需要找到合适的场景用才算致用。


