使用Weka进行数据可视化
先贴上Weka的下载地址和数据来源UCI:
Weka:https://www.cs.waikato.ac.nz/ml/weka/
UCI:https://archive.ics.uci.edu/ml/index.php
注:本文选取其中Bank Marketing的数据作为示例。
一、将excel(csv)文件转化成arff格式文件
打开文件的一般步骤:Weka 3.8.4 -> Explorer -> Open File(文件类型选择为.csv文件)。
出现如下错误:
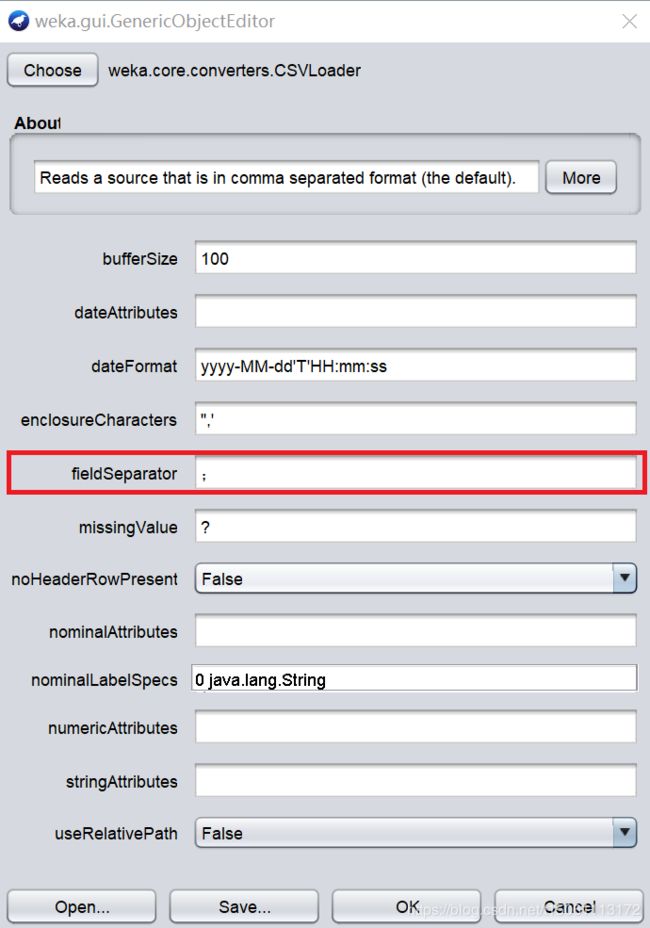
如图所示,出现读取错误,由于csv文件以","号作为分隔符,因此如文本中本身含","或空格,可能会出现格式读取错误。这里是由于下载的excel使用";"作为分隔符,因此 -> Use Converter, 并将fieldSeparator修改为";"(这里的引号仅作为引用,实际如下图所示)。
-> OK-> Save(右上角)-> 保存(默认存储在文件打开文件路径下)
二、数据可视化
1.直方图
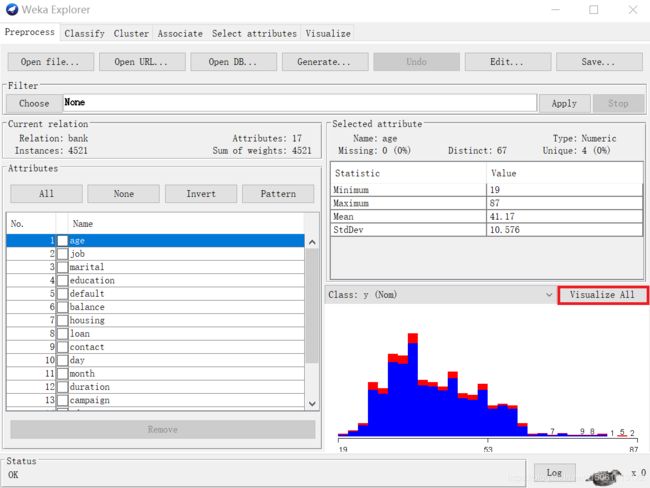
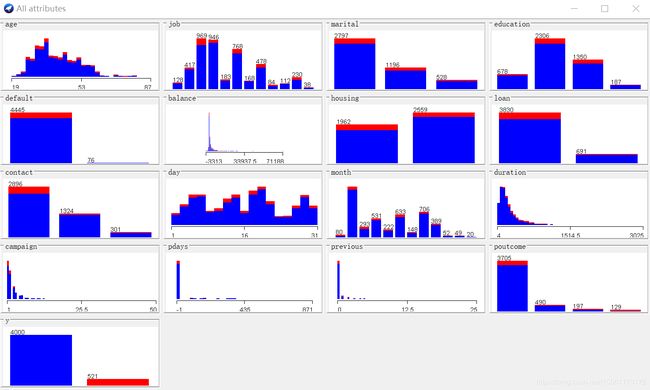
-> Visualize All,可以看到每个属性的划分(蓝色表示no,红色表示yes),如下图所示:
2.散点图
2.1Weka绘制
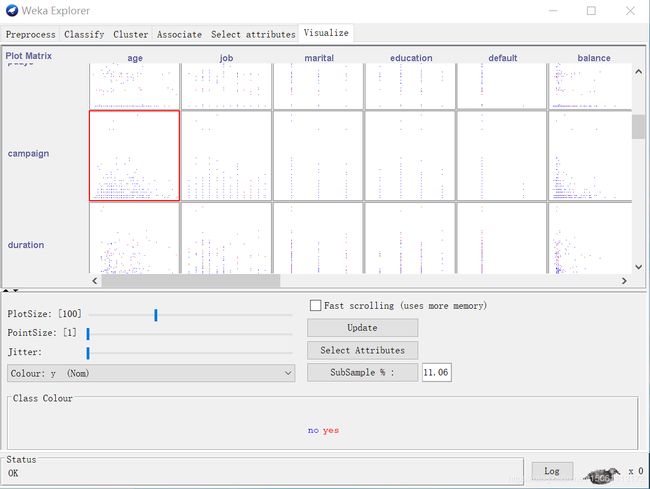
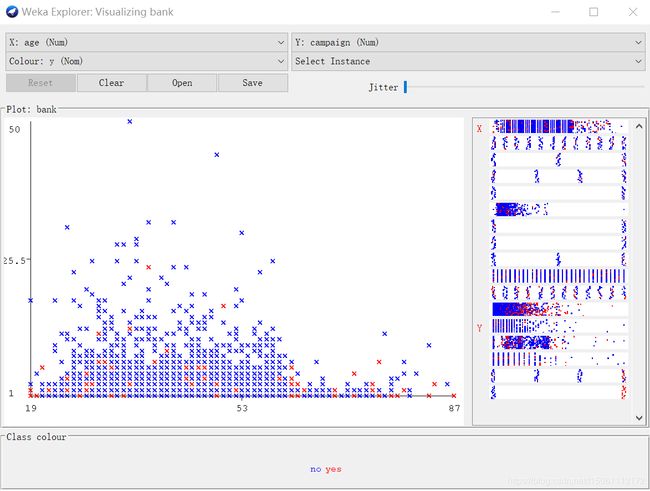
由于使用的Bank Market数据共有十七个属性,因此下图中所示为17×17的矩阵,可以更改任意两个属性作为散点图的横纵坐标。以age和campaign为例(点击红色图框):
调整Jitter可以改变添加到坐标中的随机噪声,作用是将数据散布开以让一些被遮掩住的点显示出来。
2.2Python绘制
由于下载的excel数据每行均保存在同一个单元格中,因此需要对字符串进行分割,代码如下:
import numpy as np
import re
import matplotlib.pyplot as plt

f = open("Bank.txt","r")
row = f.readlines()
scatter_plot_no = []
scatter_plot_yes = []
scatter_plot = []
#Read out the age and balance attributes in the data and use them for drawing,
#and distribute them in the arrays of yes and no respectively.
for i in range(len(row)):	#skip the directory line, means start from the 2nd line
	if i == 0:
		continue
	else:
		string_numbers = re.findall(r"\-?\d+",row[i])
		#Here observe that the development of yes or no is in the stable position counting from
		#the end of each line. Match yes or or by string splitting may be a wiser way.
		if str(row[i][len(row[i])-5]) == "o":
			scatter_plot_no_temp = []
			for j in range(len(string_numbers)):
				scatter_plot_no_temp.append(float(string_numbers[j]))
			scatter_plot_no_temp.append("no")
			scatter_plot_no.append(scatter_plot_no_temp)
			scatter_plot.append(scatter_plot_no_temp)
		else:
			scatter_plot_yes_temp = []
			for k in range(len(string_numbers)):
				scatter_plot_yes_temp.append(float(string_numbers[k]))
			scatter_plot_yes_temp.append("yes")
			scatter_plot_yes.append(scatter_plot_yes_temp)
			scatter_plot.append(scatter_plot_yes_temp)
#scatter_plot
fig = plt.figure()
ax = fig.add_subplot(111)
for i in range(len(scatter_plot_no)):
	ax.scatter(scatter_plot_no[i][0],scatter_plot_no[i][4],color='',marker = 'o',edgecolors = 'b',s=1)
for i in range(len(scatter_plot_yes)):
	ax.scatter(scatter_plot_yes[i][0],scatter_plot_yes[i][4],color='',marker = 'o',edgecolors = 'r',s=1)

plt.xlabel("age")
plt.ylabel("campaign")
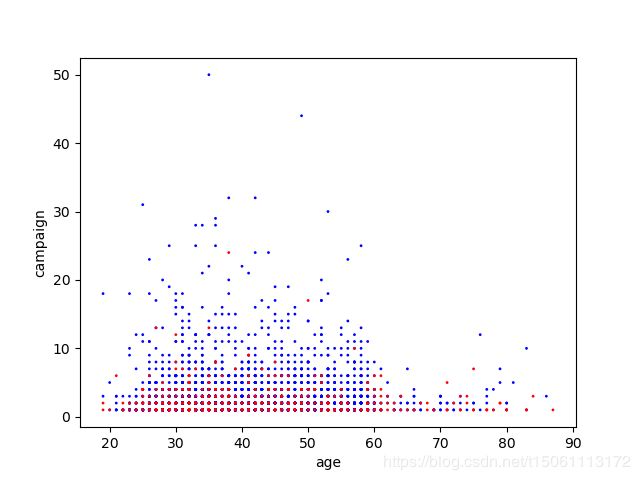
plt.show()由于excel第一行为属性行,因此从第二行数据行开始读取。if str(row[i][len(row[i])-5]) == "o":yes和no得最后一个字母在每行所处的倒数次序是固定的,方法有点投机,按照";"分割更加合理一些。效果图如下所示(仅是简图,感兴趣的可以画得更精美一些):
3.箱形图
笔者采取的方法是将数据按行列依次写入到excel中(也可以直接用Python进行绘制),仅是在上述散点图代码基础上添加写入部分。代码如下:
import numpy as np
import re
import matplotlib.pyplot as plt

f = open("Bank.txt","r")
row = f.readlines()
scatter_plot_no = []
scatter_plot_yes = []
scatter_plot = []
#Read out the age and balance attributes in the data and use them for drawing,
#and distribute them in the arrays of yes and no respectively.
for i in range(len(row)):	#skip the directory line, means start from the 2nd line
	if i == 0:
		continue
	else:
		string_numbers = re.findall(r"\-?\d+",row[i])
		#Here observe that the development of yes or no is in the stable position counting from
		#the end of each line. Match yes or or by string splitting may be a wiser way.
		if str(row[i][len(row[i])-5]) == "o":
			scatter_plot_no_temp = []
			for j in range(len(string_numbers)):
				scatter_plot_no_temp.append(float(string_numbers[j]))
			scatter_plot_no_temp.append("no")
			scatter_plot_no.append(scatter_plot_no_temp)
			scatter_plot.append(scatter_plot_no_temp)
		else:
			scatter_plot_yes_temp = []
			for k in range(len(string_numbers)):
				scatter_plot_yes_temp.append(float(string_numbers[k]))
			scatter_plot_yes_temp.append("yes")
			scatter_plot_yes.append(scatter_plot_yes_temp)
			scatter_plot.append(scatter_plot_yes_temp)

#write into the excel
import xlwt
file = xlwt.Workbook()
table = file.add_sheet('Scatter_Plot')
for i in range(len(scatter_plot)):
	for j in range(len(scatter_plot[i])):
		table.write(i,j,scatter_plot[i][j])
file.save('Scatter_Plot.xls')直接打开上述代码生成的表格会发现无法找到箱形图绘制功能,这是版本原因造成的。如果直接将上述代码最后一行file.save('Scatter_Plot.xls')改为file.save('Scatter_Plot.xlsx')的话,会出现如下警告:
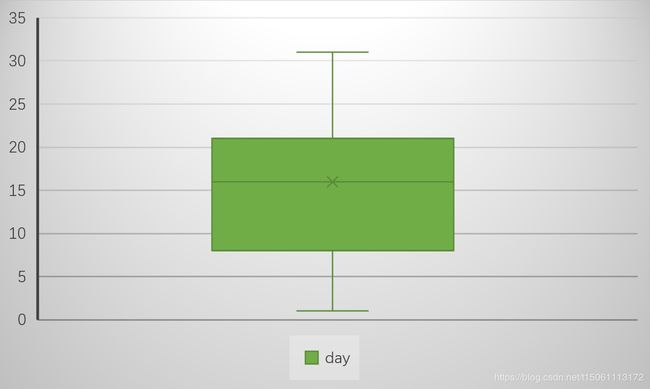
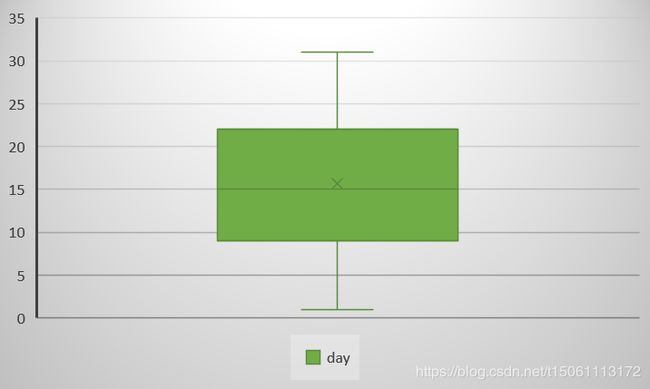
解决方法是:将文件保存为97-2003工作表(.xls),也就是file.save('Scatter_Plot.xls'),打开生成的表格后,再将其另存为excel工作簿(.xlsx)就可以了。生成箱形图的步骤如下: -> 打开前面生成的excel文件 -> 选中某一列属性的全部数据 -> 插入直方图 -> 选择箱形图。结果为no和yes对应的day属性的箱形图如下所示:
三、决策树(Weka)
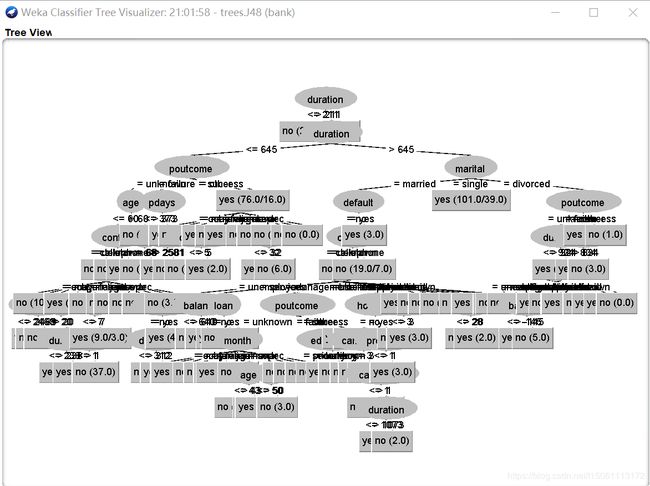
-> 打开之前生成的.arff文件 -> 点击面板中的Clissify -> Choose -> Trees -> J48 -> Start。右边会输出结果,包括树的结构,正确率等。也可以右击左下角面板的Result List -> Visualize Tree,这样可以更直观地理解决策树的结构。
由于树的结构较复杂,因此显示比较高糊,可以对树进行操作选择单一节点进行查看。

