SpringBoot自学好几天 中途开始写笔记 SpringBoot与缓存 JRS-107 SpringBoot缓存抽象 整合Redis 20190225
一、JSR107 他是接口 面向接口编程
Java Caching定义了5个核心接口,分别是CachingProvider, CacheManager, Cache, Entry和Expiry。
- CachingProvider定义了创建、配置、获取、管理和控制多个CacheManager。一个应用可以在运行期访问多个CachingProvider。
- CacheManager定义了创建、配置、获取、管理和控制多个唯一命名的Cache,这些Cache存在于CacheManager的上下文中。一个CacheManager仅被一个CachingProvider所拥有。
- Cache是一个类似Map的数据结构并临时存储以Key为索引的值。一个Cache仅被一个CacheManager所拥有。
- Entry是一个存储在Cache中的key-value对实体。
- Expiry每一个存储在Cache中的条目有一个定义的有效期。一旦超过这个时间,条目变为过期的状态。一旦过期,条目将不可访问、更新和删除。缓存有效期可以通过ExpiryPolicy设置。
- 使用流程图

使用JSR107 需要导入
<dependency>
    <groupId>javax.cachegroupId>
    <artifactId>cache-apiartifactId>
    <version>1.0.0version>
dependency>
二、Spring缓存抽象
Spring从3.1开始定义了org.springframework.cache.Cache和org.springframework.cache.CacheManager接口来统一不同的缓存技术;并支持使用JCache(JSR-107)注解简化我们开发;
- Cache接口为缓存的组件规范定义,包含缓存的各种操作集合;
- Cache接口下Spring提供了各种xxxCache的实现;如RedisCache,EhCacheCache , ConcurrentMapCache等;
- 每次调用需要缓存功能的方法时,Spring会检查检查指定参数的指定的目标方法是否已经被调用过;如果有就直接从缓存中获取方法调用后的结果,如果没有就调用方法并缓存结果后返回给用户。下次调用直接从缓存中获取。
- 使用Spring缓存抽象时我们需要关注以下两点;
1)、 确定方法需要被缓存以及他们的缓存策略
2)、从缓存中读取之前缓存存储的数据
| 概念 | 说明 |
|---|---|
| Cache | 缓存接口,定义缓存操作。实现有:RedisCache、EhCacheCache、ConcurrentMapCache等 |
| CacheManager | 缓存管理器,管理各种缓存(Cache)组件 |
| @Cacheable | 主要针对方法配置,能够根据方法的请求参数对其结果进行缓存 |
| @CacheEvict | 清空缓存 |
| @EnableCaching | 开启基于注解的缓存 |
| keyGenerator | 缓存数据时key生成策略 可以自定义生成类 也可以简单拼接字符串 |
| serialize | 缓存数据时value序列化策略 |
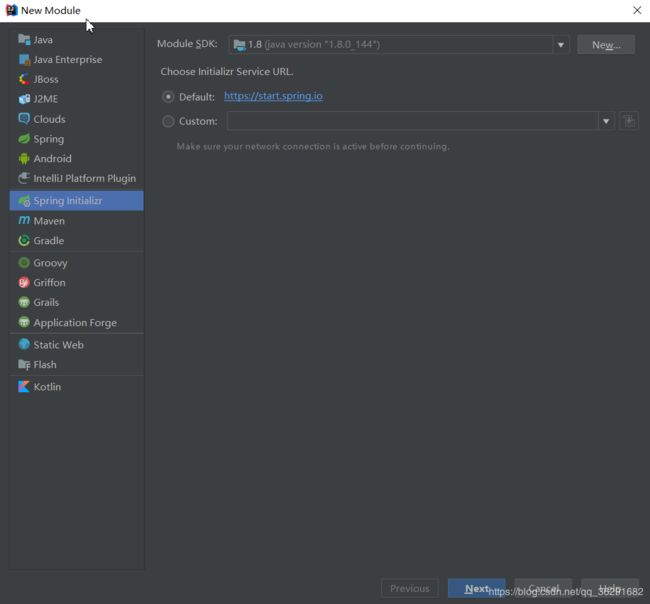
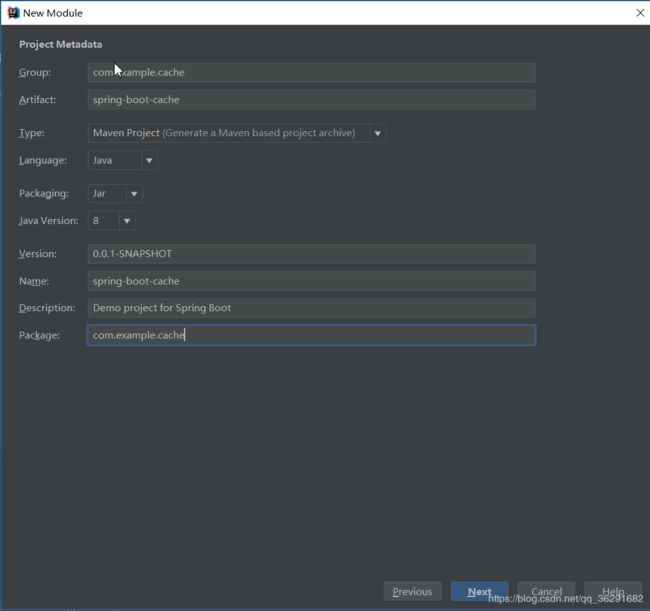
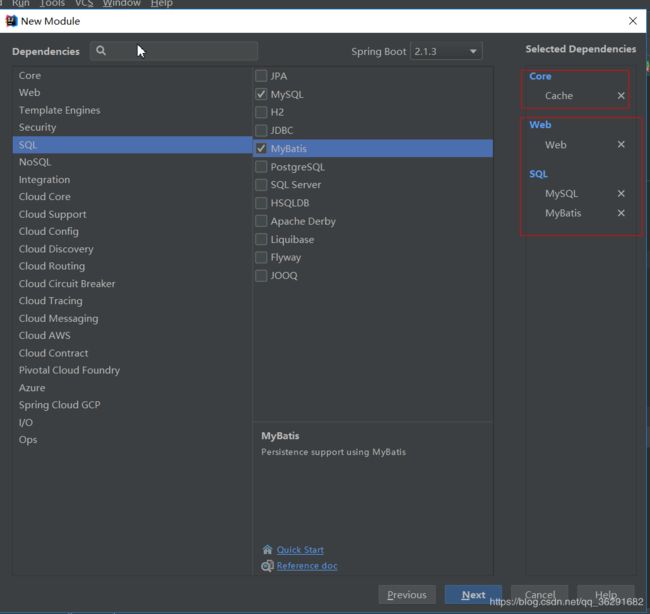
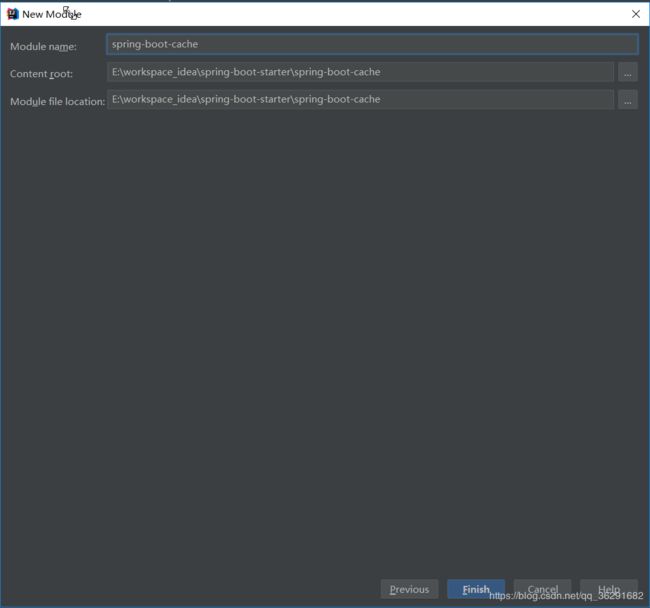
三、创建工程 测试使用缓存前准备
- 创建数据库

- 创建数据库表
/*
Navicat MySQL Data Transfer

Source Server         : 本地
Source Server Version : 50528
Source Host           : 127.0.0.1:3306
Source Database       : springboot_cache

Target Server Type    : MYSQL
Target Server Version : 50528
File Encoding         : 65001

Date: 2018-04-27 14:54:04
*/

SET FOREIGN_KEY_CHECKS=0;

-- ----------------------------
-- Table structure for department
-- ----------------------------
DROP TABLE IF EXISTS `department`;
CREATE TABLE `department` (
  `id` int(11) NOT NULL AUTO_INCREMENT,
  `departmentName` varchar(255) DEFAULT NULL,
  PRIMARY KEY (`id`)
) ENGINE=InnoDB DEFAULT CHARSET=utf8;

-- ----------------------------
-- Table structure for employee
-- ----------------------------
DROP TABLE IF EXISTS `employee`;
CREATE TABLE `employee` (
  `id` int(11) NOT NULL AUTO_INCREMENT,
  `lastName` varchar(255) DEFAULT NULL,
  `email` varchar(255) DEFAULT NULL,
  `gender` int(2) DEFAULT NULL,
  `d_id` int(11) DEFAULT NULL,
  PRIMARY KEY (`id`)
) ENGINE=InnoDB DEFAULT CHARSET=utf8;
- 创建javaBean 封装数据库数据 用!
Department
package com.example.cache.bean;

/**
 * @author LM
 * @create 2019-02-25 20:51
 */
public class Department {

    private Integer id;
    private String departmentName;


    public Department() {
        super();
        // TODO Auto-generated constructor stub
    }
    public Department(Integer id, String departmentName) {
        super();
        this.id = id;
        this.departmentName = departmentName;
    }
    public Integer getId() {
        return id;
    }
    public void setId(Integer id) {
        this.id = id;
    }
    public String getDepartmentName() {
        return departmentName;
    }
    public void setDepartmentName(String departmentName) {
        this.departmentName = departmentName;
    }
    @Override
    public String toString() {
        return "Department [id=" + id + ", departmentName=" + departmentName + "]";
    }

}
Employee
package com.example.cache.bean;

/**
 * @author LM
 * @create 2019-02-25 20:51
 */
public class Employee {

    private Integer id;
    private String lastName;
    private String email;
    private Integer gender; //性别 1男  0女
    private Integer dId;


    public Employee() {
        super();
    }


    public Employee(Integer id, String lastName, String email, Integer gender, Integer dId) {
        super();
        this.id = id;
        this.lastName = lastName;
        this.email = email;
        this.gender = gender;
        this.dId = dId;
    }

    public Integer getId() {
        return id;
    }
    public void setId(Integer id) {
        this.id = id;
    }
    public String getLastName() {
        return lastName;
    }
    public void setLastName(String lastName) {
        this.lastName = lastName;
    }
    public String getEmail() {
        return email;
    }
    public void setEmail(String email) {
        this.email = email;
    }
    public Integer getGender() {
        return gender;
    }
    public void setGender(Integer gender) {
        this.gender = gender;
    }
    public Integer getdId() {
        return dId;
    }
    public void setdId(Integer dId) {
        this.dId = dId;
    }
    @Override
    public String toString() {
        return "Employee [id=" + id + ", lastName=" + lastName + ", email=" + email + ", gender=" + gender + ", dId="
                + dId + "]";
    }


}
- 整合Mybatis 操作数据库 - 配置数据源application.properties
spring.datasource.url=jdbc:mysql://localhost:3306/spring-cache?useUnicode=true&useJDBCCompliantTimezoneShift=true&useLegacyDatetimeCode=false&serverTimezone=UTC
spring.datasource.username=root
spring.datasource.password=123456
spring.datasource.driver-class-name=com.mysql.cj.jdbc.Driver
- 整合Mybatis 操作数据库 - 使用注解版Mybatis
- @MapperScan指定需要扫描的mapper的包
@MapperScan("com.example.cache.mapper")
@SpringBootApplication
public class SpringBootCacheApplication {
    public static void main(String[] args) {
        SpringApplication.run(SpringBootCacheApplication.class, args);
    }
}
2)创建接口
package com.example.cache.mapper;

import com.example.cache.bean.Employee;
import org.apache.ibatis.annotations.*;

/**
 * @author LM
 * @create 2019-02-25 20:58
 */
@Mapper
public interface EmployeeMapper {
    @Select("SELECT * FROM employee WHERE id = #{id}")
    public Employee getEmpById(Integer id);

    @Update("UPDATE employee SET lastName=#{lastName},email=#{email},gender=#{gender},d_id=#{dId} WHERE id=#{id}")
    public void updateEmp(Employee employee);

    @Delete("DELETE FROM employee WHERE id=#{id}")
    public void deleteEmpById(Integer id);

    @Insert("INSERT INTO employee(lastName,email,gender,d_id) VALUES(#{lastName},#{email},#{gender},#{dId})")
    public void insertEmployee(Employee employee);

    @Select("SELECT * FROM employee WHERE lastName = #{lastName}")
    Employee getEmpByLastName(String lastName);
}
package com.example.cache.mapper;

import com.example.cache.bean.Department;
import org.apache.ibatis.annotations.Mapper;
import org.apache.ibatis.annotations.Select;

/**
 * @author LM
 * @create 2019-02-25 20:58
 */
@Mapper
public interface DepartmentMapper {
    @Select("SELECT * FROM department WHERE id = #{id}")
    Department getDeptById(Integer id);

}
3)测试Mapper
package com.example.cache;

import com.example.cache.bean.Employee;
import com.example.cache.mapper.EmployeeMapper;
import org.junit.Test;
import org.junit.runner.RunWith;
import org.springframework.beans.factory.annotation.Autowired;
import org.springframework.boot.test.context.SpringBootTest;
import org.springframework.test.context.junit4.SpringRunner;

@RunWith(SpringRunner.class)
@SpringBootTest
public class SpringBootCacheApplicationTests {

    @Autowired
    EmployeeMapper employeeMapper;
    @Test
    public void contextLoads() {
      Employee el =  employeeMapper.getEmpById(1);
      System.out.println(el);
    }

}
测试结果:dId为null 没有开启驼峰配置
可以在配置文件加上:mybatis.configuration.map-underscore-to-camel-case=true

- service
package com.example.cache.service;

import com.example.cache.bean.Employee;
import com.example.cache.mapper.EmployeeMapper;
import org.springframework.beans.factory.annotation.Autowired;
import org.springframework.stereotype.Service;

/**
 * @author LM
 * @create 2019-02-25 21:09
 */
@Service
public class EmployeeService {

    @Autowired
    EmployeeMapper employeeMapper;

    public Employee getEmp(Integer id){
        System.out.println("查询:"+id);
        Employee e = employeeMapper.getEmpById(id);
        return e;
    }
}
- controller
package com.example.cache.controller;

import com.example.cache.bean.Employee;
import com.example.cache.service.EmployeeService;
import org.springframework.beans.factory.annotation.Autowired;
import org.springframework.web.bind.annotation.GetMapping;
import org.springframework.web.bind.annotation.PathVariable;
import org.springframework.web.bind.annotation.RestController;

/**
 * @author LM
 * @create 2019-02-25 21:12
 */
@RestController //返回数据
public class EmployeeController  {

    @Autowired
    EmployeeService employeeService;

    @GetMapping("/emp/{id}")
    public Employee getEmp(@PathVariable("id") Integer id){
        Employee e = employeeService.getEmp(id);
        return e;
    }
}
- 测试controller

三、@Cacheable 缓存初体验
- 开启基于注解的缓存
@MapperScan("com.example.cache.mapper")
@SpringBootApplication
@EnableCaching //开启基于注解的缓存
public class SpringBootCacheApplication {
    public static void main(String[] args) {
        SpringApplication.run(SpringBootCacheApplication.class, args);
    }
}
- 标注缓存注解
@Cacheable @CacheEvict @CachePut
Cacheable属性:
(1) CacheManager 管理多个Cache组件,对缓存的真正的CRUD 操作在Cache组件中,每一个缓存组件有自己唯一的一个名字;
cacheNames/value : 指定缓存名字
(2)key :缓存数据时使用的key 默认是使用方法参数的值
key:可以使用SpEl表达式
key可以取的值很多:

(3)keyGenerator:key的生成器 可以自己制定key的生成器名字 位置 描述 示例 methodName root object 当前被调用的方法名 #root.methodName method root object 当前被调用的方法 #root.method.name target root object 当前被调用的目标对象 #root.target targetClass root object 当前被调用的目标对象类 #root.targetClass args root object 当前被调用方法的参数列表 #root.args[0] caches root object 当前方法调用使用的缓存列表(比如@Cacheable(value={“cache1”,“cache2”}) #root.caches[0].name argument evaluation context 方法参数的名字,可以直接 #参数名,也可以#p0 或 #a0 0代表参数的索引 result evaluation context 只适用于unless 表达式,cache put表达式(计算key),或cache evict 表达式(如果beforeInvocation是false)。对于支持的包装器,例如 Optional,#result指的是实际的对象,而不是包装器 #result
key与keyGenerator二选一
(4)cacheManager 指定缓存管理器 (可能多个缓存管理器中有相同名字的缓存)或者指定缓存解析器:cacheResolver 缓存解析器和缓存管理器 也是二选一
(5)condition 指定符合条件的情况下 才缓存
例子:condition = “#id>0”
(6)unless: 否定缓存 当unless指定的条件为true 方法的返回值就不会被缓存 它还可以获取到结果进行判断
(7)sycn 是否使用异步模式
package com.example.cache.service;

        import com.example.cache.bean.Employee;
        import com.example.cache.mapper.EmployeeMapper;
        import org.springframework.beans.factory.annotation.Autowired;
        import org.springframework.cache.annotation.Cacheable;
        import org.springframework.stereotype.Service;

/**
 * @author LM
 * @create 2019-02-25 21:09
 */
@Service
public class EmployeeService {

    @Autowired
    EmployeeMapper employeeMapper;

    /**
     * 将方法的运行结果缓存;以后再要相同的数据,直接从缓存中获取,不再调用方法
     * @param id
     * @return
     */
    @Cacheable(cacheNames = "emp")
    public Employee getEmp(Integer id){
        System.out.println("查询:"+id);
        Employee e = employeeMapper.getEmpById(id);
        return e;
    }
}
四、@Cacheable 运行流程
@Configuration
@ConditionalOnClass({CacheManager.class})
@ConditionalOnBean({CacheAspectSupport.class})
@ConditionalOnMissingBean(
    value = {CacheManager.class},
    name = {"cacheResolver"}
)
@EnableConfigurationProperties({CacheProperties.class})
@AutoConfigureAfter({CouchbaseAutoConfiguration.class, HazelcastAutoConfiguration.class, HibernateJpaAutoConfiguration.class, RedisAutoConfiguration.class})
@Import({CacheAutoConfiguration.CacheConfigurationImportSelector.class})
public class CacheAutoConfiguration {
CacheAutoConfiguration.CacheConfigurationImportSelector.class:
 static class CacheConfigurationImportSelector implements ImportSelector {
        CacheConfigurationImportSelector() {
        }

        public String[] selectImports(AnnotationMetadata importingClassMetadata) {
            CacheType[] types = CacheType.values();
            String[] imports = new String[types.length];

            for(int i = 0; i < types.length; ++i) {
                imports[i] = CacheConfigurations.getConfigurationClass(types[i]);
            }

            return imports;
        }
    }
未完待续…