spring boot菜鸟教程-----springboot项目部署
Spring Boot是由Pivotal团队提供的全新框架,其设计目的是用来简化新Spring应用的初始搭建以及开发过程。该框架使用了特定的方式来进行配置,从而使开发人员不再需要定义样板化的配置。通过这种方式,Spring Boot致力于在蓬勃发展的快速应用开发领域(rapid application development)成为领导者。
Spring Boot特点
1. 创建独立的Spring应用程序
2. 嵌入的Tomcat,无需部署WAR文件
3. 简化Maven配置
4. 自动配置Spring
5. 提供生产就绪型功能,如指标,健康检查和外部配置
6. 绝对没有代码生成和对XML没有要求配置。
创建springboot项目
工具:intellj idea 2016 , maven 3.04 ,jdk1.8
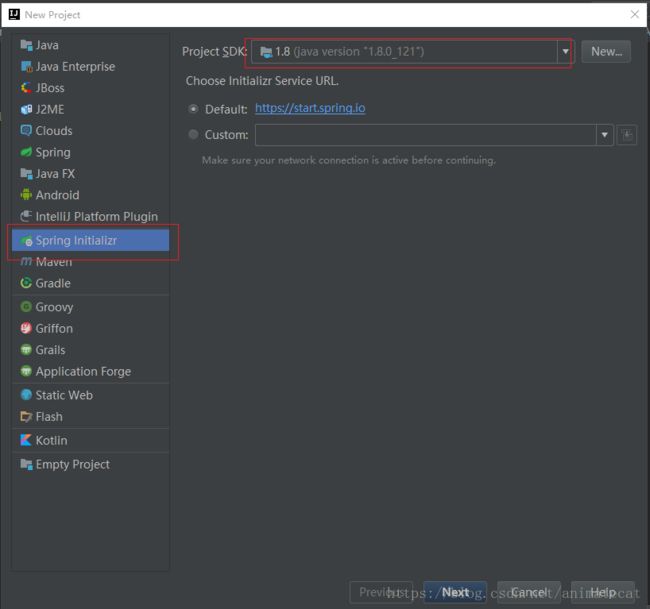
1. 在idea中创建一个新工程。file->new->project
2. 选择Spring Initializr,右侧SDK选择自己安装的JDK->next。
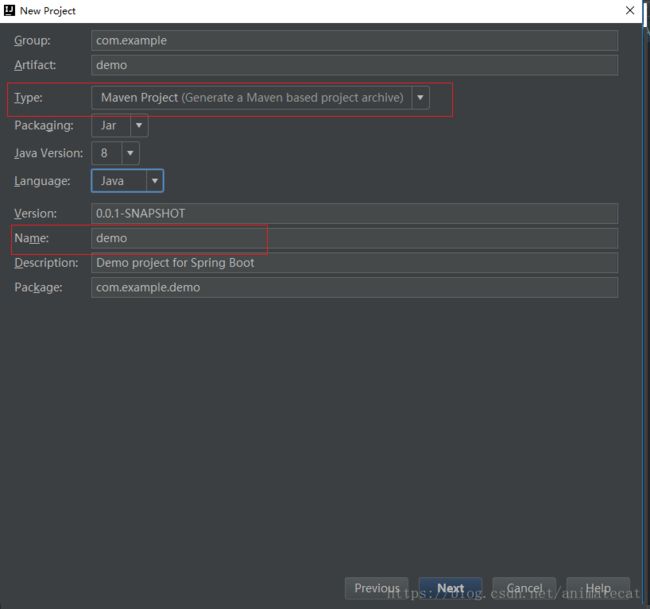
3. name可自行修改,type选择maven project->next
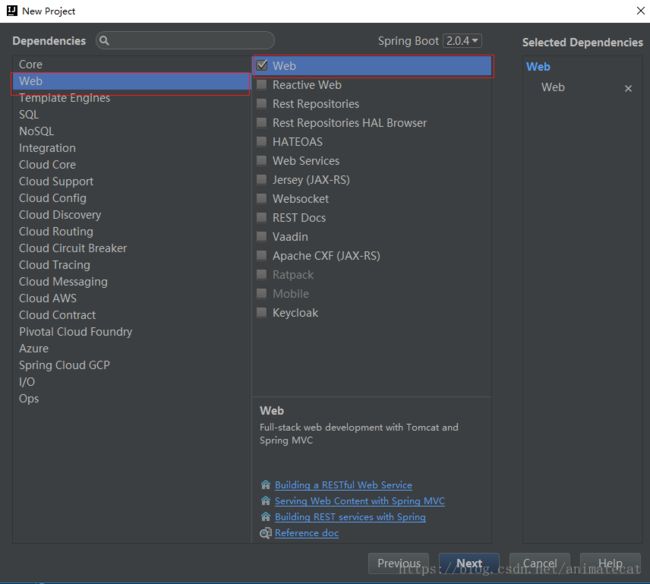
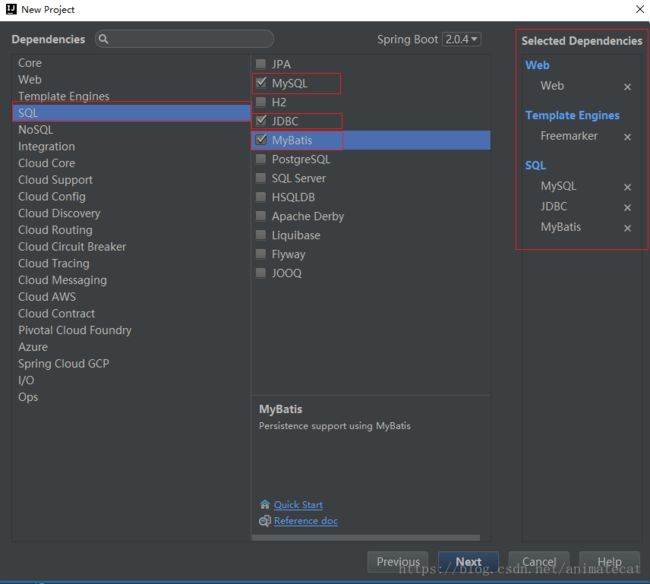
4. 选择Web菜单下的web选项
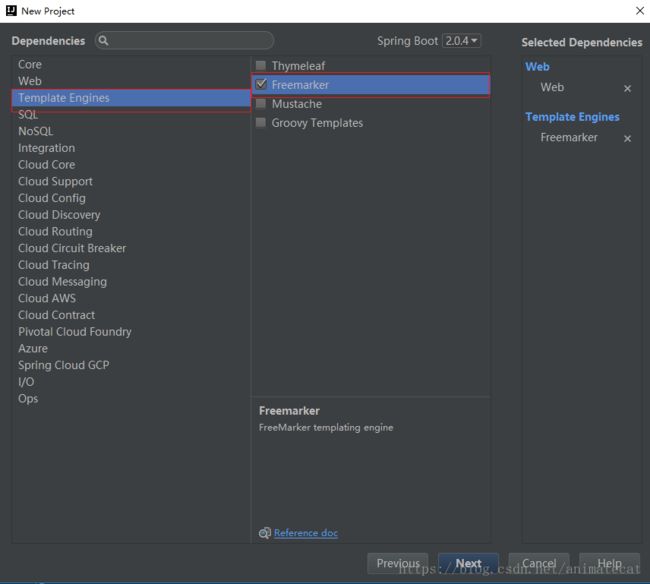
选择Template Engines菜单下的Freemarker选项
选择SQL菜单下的MySql,JDBC,MyBatis选项
在最右侧是已经选择好的各个依赖->next。
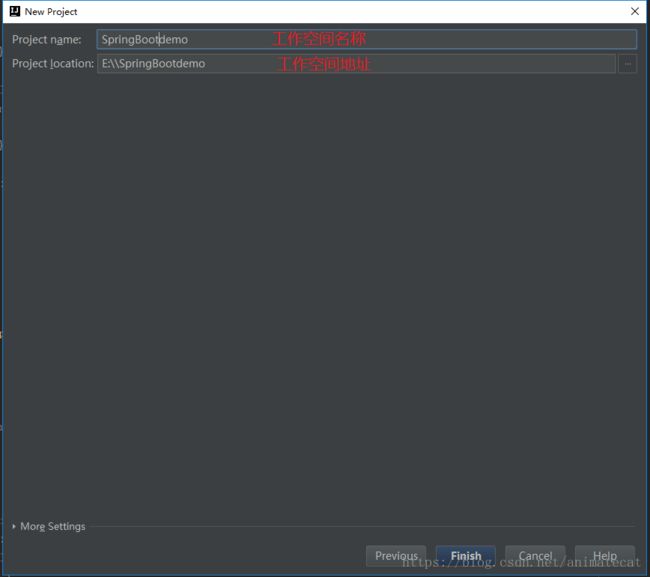
5. 修改工程名称和地址->finish
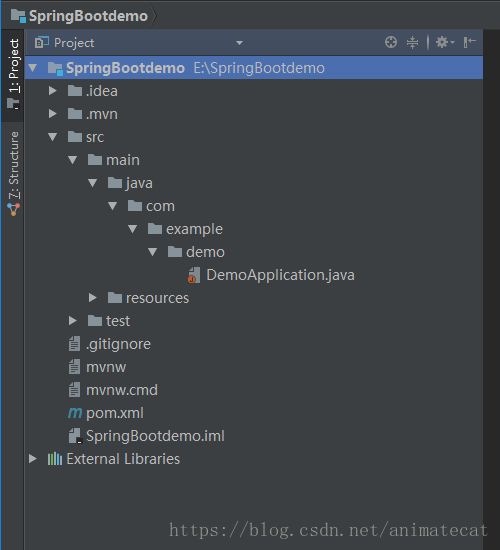
6. 创建成功目录如下:
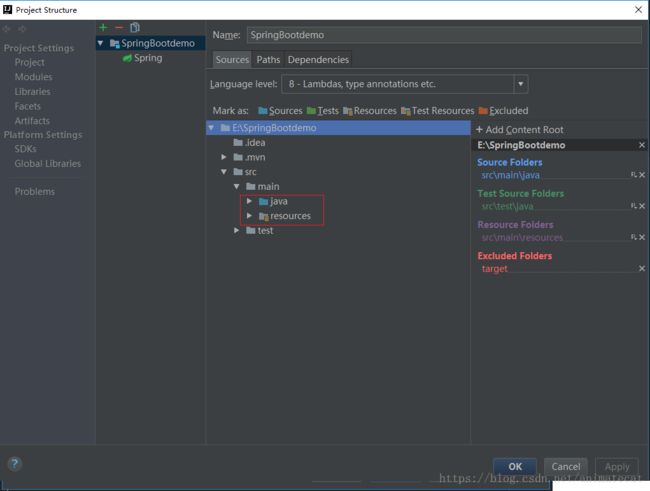
7.打开Project Structure->Modules->Sources,将Java Mark as Sources,将resources Mark as resources 。
8.配置数据库。
打开application.properties 加入以下代码,具体情况根据自己连接的数据库进行更改。
spring.datasource.url = jdbc:mysql://localhost:3306/test?characterEncoding=utf8&useSSL=true
spring.datasource.driverClassName = com.mysql.jdbc.Driver
spring.datasource.username = root
spring.datasource.password = 123456
9. 在demo下创建controller
package com.example.demo;

import org.springframework.stereotype.Controller;
import org.springframework.web.bind.annotation.RequestMapping;
import org.springframework.web.bind.annotation.ResponseBody;

/**
 * Created by w on 2018/8/30.
 */
@Controller
public class DemoController {
    @RequestMapping(name = "hello")
    @ResponseBody
    public String test(){
        return "hello ,spring boot!!";
    }

}
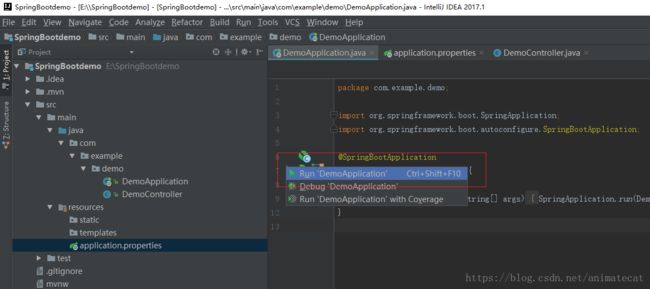
10. 回到DemoApplication.java,点击左侧绿色启动按钮,选择Run 'DemoApplication';
11.项目启动
12. 此时发现项目报错,原因是我的8080端口被其他项目占用。
sprinboot修改默认端口号的方式:
二选一即可。
(1)在application.properties 加server.port=8004 //8004为修改后的端口号
(2)在DemoApplication.java中添加如下方法
@SpringBootApplication
public class Application extends SpringBootServletInitializer implements EmbeddedServletContainerCustomizer{

    public static void main(String[] args) {
        SpringApplication.run(Application.class, args);
    }

    @Override
    public void customize(ConfigurableEmbeddedServletContainer container) {
        container.setPort(8004);
    }
}
13.重新启动项目,如下图,启动成功
14.在浏览器地址中输入:http://localhost:8004/hello
我们看到了想要的结果,就是controller 中返回的数据。
