【springCloud2 Finchley版本】完整SpringCloud2框架,可直接拿来使用,附带详细教程及开源代码,持续更新
目录
- 一、项目简介
- 1.1 项目目标
- 1.2 项目环境要求
- 1.3 项目工程结构 -持续更新
- 1.4 完整代码下载地址
- 二、扬帆起航
- 2.1 创建cloud工程作为Maven父级工程
- 2.2 cloud父级工程pom依赖
- 2.3 创建Maven的module项目示例
- 三、别离码头-注册中心-eureka
- 3.1 pom文件
- 3.2 配置文件-高可用
- 3.3 启动类
- 3.4 修改Host文件
- 3.5 打包测试
- 三、藏宝图-准备测试项目
- 3.1 藏宝图-提供者
- 3.1.1 pom文件
- 3.1.2 配置文件
- 3.1.3 启动类
- 3.1.4 创建Controller
- 3.1.5 测试
- 3.2 藏宝图-消费者
- 3.2.1 使用RestTemplate进行调用
- 3.2.2 测试RestTemplate调用
- 3.2.3 使用Feign方式进行调用
- 3.2.4 测试Feign调用
- 四、误入礁石群-服务降级熔断-hystrix
- 4.1 POM文件
- 4.2 启动类
- 4.3 添加熔断回调
- 4.4 测试熔断
- 五、浅滩灯塔-配置中心-config-git方式
- 5.1 POM文件
- 5.2 配置文件
- 5.3 创建配置文件
- 5.4 启动类
- 5.5 测试及config的url访问规则
- 5.6 结合服务调用config配置中心
- 六、漂流瓶-消息总线-rabbitmq-整合config全局自动刷新
- 6.1 config整合rabbitmq
- 6.2 服务调用整合RabbitMQ
- 6.3 测试使用rabbitmq刷新配置中心
- 6.4 使用Webhooks插件实现自动刷新
- 七、遗落群岛,宝藏秘境-网关之gateway-全套实用案例
- 7.1 gateway之基础使用
- 7.1.1 POM
- 7.1.2 配置文件
- 7.1.3 routes规则说明
- 7.1.3 服务调用及测试
- 7.2 gateway路由之熔断路由
- 7.2.1 POM
- 7.2.2 创建熔断回调
- 7.2.3 配置文件
- 7.3 gateway之路由重试
- 7.3.1 POM
- 7.3.2 配置文件
- 7.4 gateway之限速路由-基于令牌桶算法实现限流-bucket4j
- 7.4.1 POM
- 7.4.2 创建filter
- 7.4.3 启动类中定义拦截规则
- 7.4.5 测试
- 7.5 gateway之限速路由-基于lua加redis桶限流
- 7.5.1 POM
- 7.5.2 配置文件
- 7.5.3 创建相关的java类
- 7.5.4 配置文件定义规则
- 7.6 gateway之限速路由-基于系统cpu进行限速
- 7.6.1 创建filter
- 7.6.2 启动类中定义限速规则
- 7.7 gateway之自定义拦截器之工厂模式(可做全局)
- 7.7.1 创建工厂类
- 7.7.2 配置文件定义规则
- 7.7.3 启动类添加工厂
- 八、指南针-链路追踪-zipkin
- 8.1 POM
- 8.2 配置文件
- 8.3启动类
- 8.4 链路追踪UI查看
- 8.5 整合服务项目调用
- 8.5.1 POM
- 8.5.2 配置文件
- 8.5.3 测试
- 8.6 整合gateway
- 8.6.1 POM
- 8.6.2 配置文件
- 8.6.3 测试
- 九、整合Spring Security Oauth2
- 有钱的捧个钱场,没钱的点个收藏
一、项目简介
1.1 项目目标
1、分布式基础架构支持
2、可自由扩展服务
3、封装并开源统一管理核心代码
4、尽可能全的分享更多学习内容
5、预计使用VUE作为前端框架
spirngCloud一代入门版本学习请点击这里
1.2 项目环境要求
JDK 1.8
MAVEN 3.0+
TOMCAT 8.5+
RabbitMQ 3.7.14 详细安装教程请点击这里
Redis 3.2.1
git
IDE: IDEA
SpringBoot 2.0.5
SpringCloud Finchley.SR2
工程结构为Maven结构
1.3 项目工程结构 -持续更新
- cloud – maven父级工程
- eureka(必须) – SpringCloud 注册中心
- config(必须) – SpringCloud 配置中心
- gateway(必须) – SpringCloud 网关
- zipkin-server(辅助) – SpringCloud 链路追踪
- producer7001(测试) – 测试工程,作用:服务提供者
- producer7002(测试) – 测试工程,作用:服务提供者
- consumer6001(测试) – 测试工程,作用:服务消费者
- consumer6002(测试) – 测试工程,作用:服务消费者

1.4 完整代码下载地址
github完整代码下载地址请点击这里
您也可以留言或者私信我索要联系方式,直接给发过去(开源免费)
二、扬帆起航
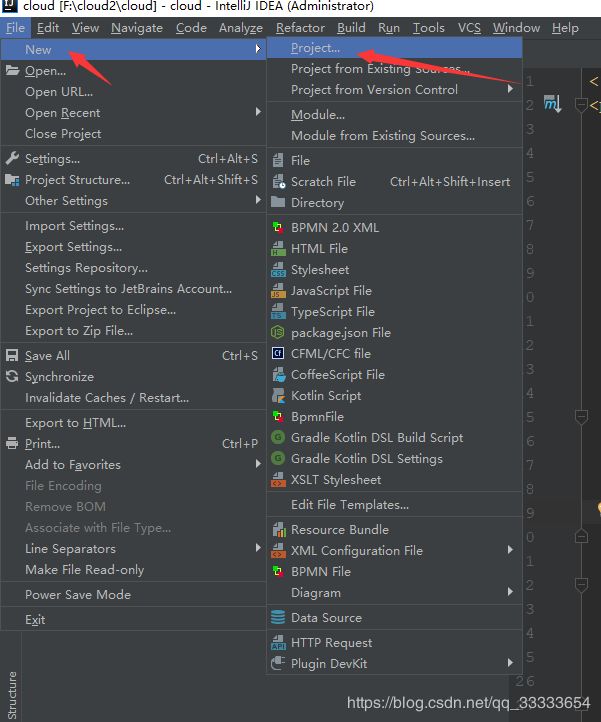
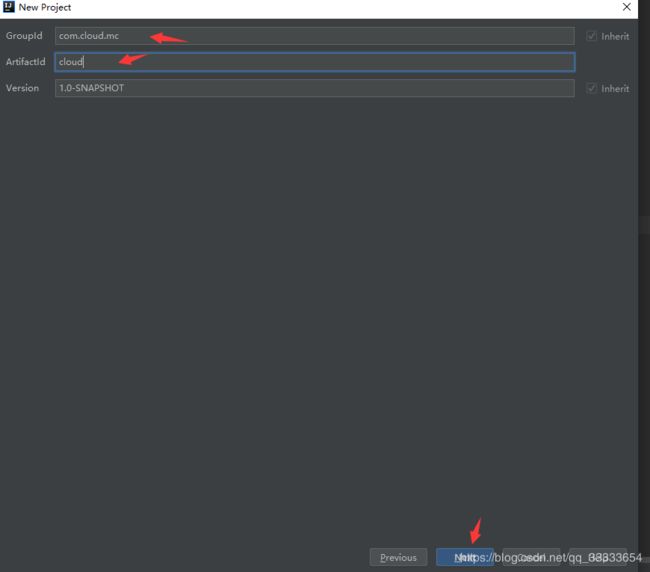
2.1 创建cloud工程作为Maven父级工程


2.2 cloud父级工程pom依赖
<?xml version="1.0" encoding="UTF-8"?>
<project xmlns="http://maven.apache.org/POM/4.0.0"
         xmlns:xsi="http://www.w3.org/2001/XMLSchema-instance"
         xsi:schemaLocation="http://maven.apache.org/POM/4.0.0 http://maven.apache.org/xsd/maven-4.0.0.xsd">
    <modelVersion>4.0.0</modelVersion>

    <groupId>com.cloud.mc</groupId>
    <artifactId>cloud</artifactId>
    <version>1.0-SNAPSHOT</version>
    <packaging>pom</packaging>

    <name>cloud</name>
    <description>Demo project for Spring Boot</description>

    <properties>
        <project.build.sourceEncoding>UTF-8</project.build.sourceEncoding>
        <project.reporting.outputEncoding>UTF-8</project.reporting.outputEncoding>
        <java.version>1.8</java.version>
        <spring-cloud.version>Finchley.SR2</spring-cloud.version>
    </properties>

    <parent>
        <groupId>org.springframework.boot</groupId>
        <artifactId>spring-boot-starter-parent</artifactId>
        <version>2.0.5.RELEASE</version>
        <relativePath/>
    </parent>

    <modules>
        <module>eureka</module>
        <module>gateway</module>
        <module>config</module>
        <module>zipkin-server</module>
        <module>producer7001</module>
        <module>producer7002</module>
        <module>consumer6001</module>
        <module>consumer6002</module>
    </modules>

    <dependencies>
        <dependency>
            <groupId>org.springframework.boot</groupId>
            <artifactId>spring-boot-starter-test</artifactId>
            <scope>test</scope>
        </dependency>

    </dependencies>

    <dependencyManagement>
        <dependencies>
            <dependency>
                <groupId>org.springframework.cloud</groupId>
                <artifactId>spring-cloud-dependencies</artifactId>
                <version>${spring-cloud.version}</version>
                <type>pom</type>
                <scope>import</scope>
            </dependency>
        </dependencies>
    </dependencyManagement>

    <build>
        <plugins>
            <plugin>
                <groupId>org.springframework.boot</groupId>
                <artifactId>spring-boot-maven-plugin</artifactId>
            </plugin>
        </plugins>
    </build>

</project>
2.3 创建Maven的module项目示例
右键cloud项目选择new,如图:


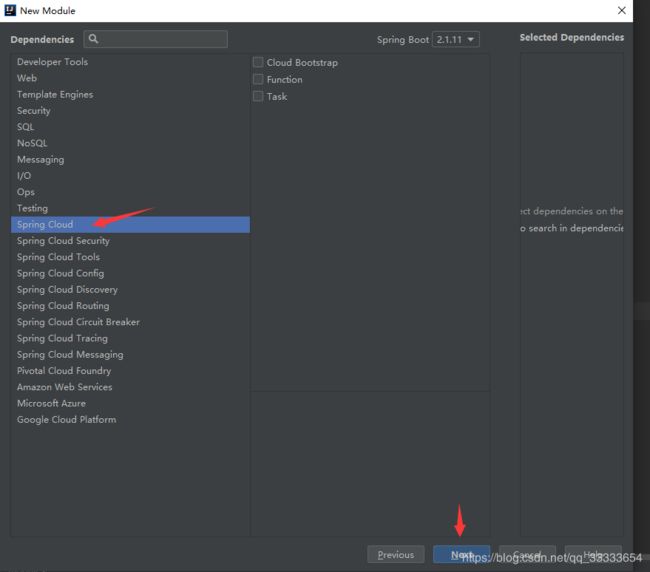
点击Finish。新创建的Model中打开pom文件
修改parent标签体内容:
<parent>
        <groupId>com.cloud.mc</groupId>
        <artifactId>cloud</artifactId>
        <version>1.0-SNAPSHOT</version>
    </parent>
module项目创建完成,只需要添加对应的依赖即可使用。
将module添加到父级项目中,打开cloud的pom文件,在modules标签体内添加
你的项目名称
即可。
三、别离码头-注册中心-eureka
依照目录 2.3 创建module项目,项目名为eureka。
pom文件依赖,直接复制即可使用:
3.1 pom文件
<?xml version="1.0" encoding="UTF-8"?>
<project xmlns="http://maven.apache.org/POM/4.0.0" xmlns:xsi="http://www.w3.org/2001/XMLSchema-instance"
         xsi:schemaLocation="http://maven.apache.org/POM/4.0.0 https://maven.apache.org/xsd/maven-4.0.0.xsd">
    <modelVersion>4.0.0</modelVersion>
    <parent>
        <groupId>com.cloud.mc</groupId>
        <artifactId>cloud</artifactId>
        <version>1.0-SNAPSHOT</version>
    </parent>
    <groupId>com.example</groupId>
    <artifactId>eureka</artifactId>
    <version>0.0.1-SNAPSHOT</version>
    <name>eureka</name>
    <description>Demo project for Spring Boot</description>

    <properties>
        <java.version>1.8</java.version>
    </properties>

    <dependencies>
        <dependency>
            <groupId>org.springframework.cloud</groupId>
            <artifactId>spring-cloud-starter-netflix-eureka-server</artifactId>
        </dependency>
        <dependency>
            <groupId>org.springframework.boot</groupId>
            <artifactId>spring-boot-starter</artifactId>
        </dependency>

        <dependency>
            <groupId>org.springframework.boot</groupId>
            <artifactId>spring-boot-starter-test</artifactId>
            <scope>test</scope>
            <exclusions>
                <exclusion>
                    <groupId>org.junit.vintage</groupId>
                    <artifactId>junit-vintage-engine</artifactId>
                </exclusion>
            </exclusions>
        </dependency>
    </dependencies>

    <build>
        <plugins>
            <plugin>
                <groupId>org.springframework.boot</groupId>
                <artifactId>spring-boot-maven-plugin</artifactId>
            </plugin>
        </plugins>
    </build>

</project>
3.2 配置文件-高可用
修改application.yml文件为:
---
spring:
  application:
    name: spring-cloud-eureka
  profiles: peer1
server:
  port: 8000
eureka:
  instance:
    hostname: peer1
  client:
    serviceUrl:
      defaultZone: http://peer2:8001/eureka/,http://peer3:8002/eureka/
    register-with-eureka: false
    fetch-registry: false
---
spring:
  application:
    name: spring-cloud-eureka
  profiles: peer2
server:
  port: 8001
eureka:
  instance:
    hostname: peer2
  client:
    serviceUrl:
      defaultZone: http://peer1:8000/eureka/,http://peer3:8002/eureka/
    register-with-eureka: false
    fetch-registry: false
---
spring:
  application:
    name: spring-cloud-eureka
  profiles: peer3
server:
  port: 8002
eureka:
  instance:
    hostname: peer3
  client:
    serviceUrl:
      defaultZone: http://peer1:8000/eureka/,http://peer2:8001/eureka/
    register-with-eureka: false
    fetch-registry: false
3.3 启动类
启动类添加核心注解 @EnableEurekaServer
3.4 修改Host文件
自行百度找到系统host文件,添加如下内容:
127.0.0.1 peer1
127.0.0.1 peer2
127.0.0.1 peer3
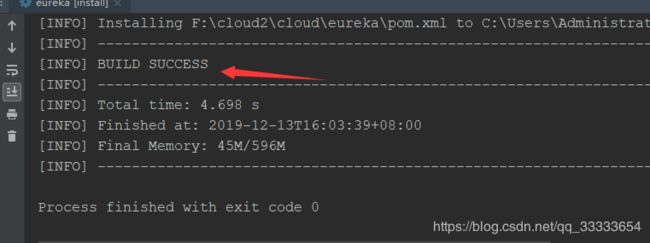
3.5 打包测试
使用maven打包工具打包,如图:
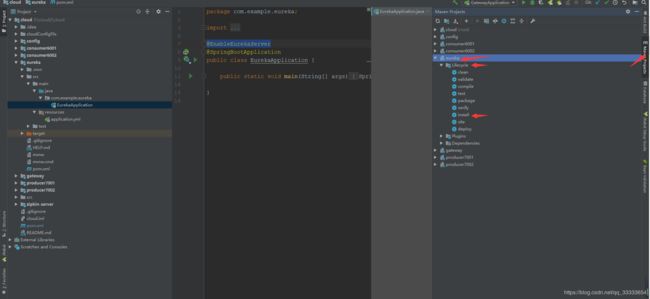
双击 install,控制台会打印日志,等到打印 BUILD SUCCESS 即可。如图:
项目中会出现一个target文件夹,jar包就在里面,如图:

为了方便测试,将jar包复制到F盘根目录。打开CMD命令进入F盘,输入
java -jar eureka-0.0.1-SNAPSHOT.jar --spring.profiles.active=peer1
再次打开CMD进入F盘输入
java -jar eureka-0.0.1-SNAPSHOT.jar --spring.profiles.active=peer2
再次打开CMD进入F盘输入
java -jar eureka-0.0.1-SNAPSHOT.jar --spring.profiles.active=peer3
浏览器分别访问
http://localhost:8000/
http://localhost:8001/
http://localhost:8002/
如图:

注意:中间红色字体是eureka的自我保护机制,不用担心,有兴趣的朋友可以自行查找资料了解原由。我这没有管它,不影响使用。
三、藏宝图-准备测试项目
3.1 藏宝图-提供者
参考2.3创建Module项目,项目名称为 producer7001 作为后续的一个测试工程,身份为内容提供者。
参考2.3创建Module项目,项目名称为 producer7002 作为后续的一个测试工程,身份为内容提供者。
这里我弄了两个项目,实际开发中可能会更多,二者差别不大,主要是端口分别为7001、7002 。
3.1.1 pom文件
首先修改提供者的pom文件,两个工程相同:
<?xml version="1.0" encoding="UTF-8"?>
<project xmlns="http://maven.apache.org/POM/4.0.0" xmlns:xsi="http://www.w3.org/2001/XMLSchema-instance"
         xsi:schemaLocation="http://maven.apache.org/POM/4.0.0 https://maven.apache.org/xsd/maven-4.0.0.xsd">
    <modelVersion>4.0.0</modelVersion>
    <parent>
        <groupId>com.cloud.mc</groupId>
        <artifactId>cloud</artifactId>
        <version>1.0-SNAPSHOT</version>
    </parent>
    <groupId>com.example</groupId>
    <artifactId>producer7001</artifactId>
    <version>0.0.1-SNAPSHOT</version>
    <name>producer7001</name>
    <description>Demo project for Spring Boot</description>

    <properties>
        <java.version>1.8</java.version>
    </properties>

    <dependencies>
        <dependency>
            <groupId>org.springframework.cloud</groupId>
            <artifactId>spring-cloud-starter-netflix-eureka-client</artifactId>
        </dependency>
        <dependency>
            <groupId>org.springframework.boot</groupId>
            <artifactId>spring-boot-starter-web</artifactId>
        </dependency>

        <dependency>
            <groupId>org.springframework.boot</groupId>
            <artifactId>spring-boot-starter</artifactId>
        </dependency>

        <dependency>
            <groupId>org.springframework.boot</groupId>
            <artifactId>spring-boot-starter-test</artifactId>
            <scope>test</scope>
        </dependency>
    </dependencies>

    <build>
        <plugins>
            <plugin>
                <groupId>org.springframework.boot</groupId>
                <artifactId>spring-boot-maven-plugin</artifactId>
            </plugin>
        </plugins>
    </build>

</project>
3.1.2 配置文件
修改两个提供者的配置文件(仅端口号不同),以7001为例:
server:
  port: 7001
spring:
  application:
    name: cloud-producer
eureka:
  client:
    service-url:
      defaultZone: http://peer1:8000/eureka/,http://peer2:8001/eureka/,http://peer3:8002/eureka/
7002项目仅需要修改port即可。
3.1.3 启动类
两个工程的启动类均添加@EnableEurekaClient注解
3.1.4 创建Controller
两个工程中,在启动类所在的目录中添加web文件夹,文件夹中创建MessageController类。
7001项目代码如下:
package com.example.producer7001.web;

import org.springframework.beans.factory.annotation.Value;
import org.springframework.web.bind.annotation.GetMapping;
import org.springframework.web.bind.annotation.RequestMapping;
import org.springframework.web.bind.annotation.RequestParam;
import org.springframework.web.bind.annotation.RestController;

/**
 * @ProjectName: cloud
 * @Package: web
 * @ClassName: MessageController
 * @Author: MC
 * @Description: ${description}
 * @Date: 2019/12/9 0009 10:35
 * @Version: 1.0
 */
@RestController
public class MessageController {

    @Value("${server.port}")
    String port;

    @GetMapping("/get")
    public String getMsg(@RequestParam("name")String name){
        return "you name is "+name+" and get port is "+port;
    }

    @RequestMapping("/foo")
    public String foo(String foo) {
        return "hello "+foo+"!7001";
    }
}
7002代码如下:
package com.example.producer7002.web;

import org.springframework.beans.factory.annotation.Value;
import org.springframework.web.bind.annotation.GetMapping;
import org.springframework.web.bind.annotation.RequestMapping;
import org.springframework.web.bind.annotation.RequestParam;
import org.springframework.web.bind.annotation.RestController;

/**
 * @ProjectName: cloud
 * @Package: web
 * @ClassName: MessageController
 * @Author: MC
 * @Description: ${description}
 * @Date: 2019/12/9 0009 10:35
 * @Version: 1.0
 */
@RestController
public class MessageController {

    @Value("${server.port}")
    String port;

    @GetMapping("/get")
    public String getMsg(@RequestParam("name")String name){
        return "you name is "+name+" and get port is "+port;
    }

    @RequestMapping("/foo")
    public String foo(String foo) {
        return "hello "+foo+"!7002";
    }
}
3.1.5 测试
浏览器访问
http://localhost:7001/get?name=test
http://localhost:7002/get?name=test
查看返回内容是否与代码中一致
3.2 藏宝图-消费者
参考2.3创建Module项目,项目名称为 consumer6001 作为后续的一个测试工程,身份为内容消费者。
application的name为:cloud-consumer
参考2.3创建Module项目,项目名称为 consumer6002 作为后续的一个测试工程,身份为内容消费者。
application的name为:cloud-consumer-feign
这里我弄了两个项目,实际开发中可能会更多,二者差别不大,主要是端口分别为6001、6002 。
pom依赖与producer项目的一致,这里就不粘贴了。
配置文件与producer项目的一致,只需要修改port即可。同样不粘贴了
3.2.1 使用RestTemplate进行调用
启动类添加如下代码:
 @Bean
    public RestTemplate restTemplate(){
        return new RestTemplate();
    }
在启动类所在目录创建web文件夹并创建MessageController类。
代码如下:
@RestController
public class MessageController {
    @Autowired
    RestTemplate restTemplate;


    @GetMapping("/show")
    public String showMessage(@RequestParam String name){
        return restTemplate.getForObject("http://cloud-producer/get?name="+name, String.class);
    }


}
3.2.2 测试RestTemplate调用
检查注册中心是否已全部启动
启动7001项目,启动7002项目
查看注册中心是否已注册
启动6001项目,查看注册中心是否已注册
浏览器访问
http://localhost:6001/show?name=test
然后再次访问,观察数据变化
3.2.3 使用Feign方式进行调用
6002项目添加依赖:
 <dependency>
            <groupId>org.springframework.cloud</groupId>
            <artifactId>spring-cloud-starter-openfeign</artifactId>
        </dependency>
启动类添加:
@EnableFeignClients
启动类所在目录创建service文件夹,并创建类:SchedualService,内容为:
package com.example.consumer6002.service;

import org.springframework.cloud.openfeign.FeignClient;
import org.springframework.web.bind.annotation.RequestMapping;
import org.springframework.web.bind.annotation.RequestMethod;
import org.springframework.web.bind.annotation.RequestParam;

/**
 * @ProjectName: cloud
 * @Package: com.example.consumer6002.service
 * @ClassName: SchedualService
 * @Author: MC
 * @Description: ${description}
 * @Date: 2019/12/9 0009 11:50
 * @Version: 1.0
 */
@FeignClient(value = "cloud-producer")
public interface SchedualService {
    @RequestMapping(value = "/get",method = RequestMethod.GET)
    String hello(@RequestParam(value = "name") String name);

}
FeignClient注解指向了注册中心服务的ID
RequestMapping注解指向了要调用的接口
然后在启动类所在的目录创建web文件夹,并创建MessageController类,内容如下:
package com.example.consumer6002.web;

import com.example.consumer6002.service.SchedualService;
import org.springframework.beans.factory.annotation.Autowired;
import org.springframework.web.bind.annotation.GetMapping;
import org.springframework.web.bind.annotation.RequestParam;
import org.springframework.web.bind.annotation.RestController;

/**
 * @ProjectName: cloud
 * @Package: com.example.consumer6002.web
 * @ClassName: MessageController
 * @Author: MC
 * @Description: ${description}
 * @Date: 2019/12/9 0009 11:52
 * @Version: 1.0
 */
@RestController
public class MessageController {
    @Autowired
    private SchedualService schedualService;

    @GetMapping(value = "/hello")
    public String hello(@RequestParam String name) {
        return schedualService.hello( name );
    }
}
3.2.4 测试Feign调用
检查注册中心是否已全部启动
启动7001项目,启动7002项目
查看注册中心是否已注册
启动6002项目,查看注册中心是否已注册
浏览器访问
http://localhost:6002/hello?name=test
然后再次访问,观察数据变化
四、误入礁石群-服务降级熔断-hystrix
以6001项目为例
4.1 POM文件
pom文件添加依赖:
<dependency>
            <groupId>org.springframework.cloud</groupId>
            <artifactId>spring-cloud-starter-netflix-ribbon</artifactId>
        </dependency>
        <dependency>
            <groupId>org.springframework.cloud</groupId>
            <artifactId>spring-cloud-starter-netflix-hystrix</artifactId>
        </dependency>
4.2 启动类
restTemplate方法添加注解:@LoadBalanced //使用负载均衡机制
启动类添加注解:@EnableHystrix
代码如下:
package com.example.consumer6001;

import org.springframework.boot.SpringApplication;
import org.springframework.boot.autoconfigure.SpringBootApplication;
import org.springframework.cloud.client.discovery.EnableDiscoveryClient;
import org.springframework.cloud.client.loadbalancer.LoadBalanced;
import org.springframework.cloud.netflix.eureka.EnableEurekaClient;
import org.springframework.cloud.netflix.hystrix.EnableHystrix;
import org.springframework.context.annotation.Bean;
import org.springframework.web.client.RestTemplate;

//从Spring Cloud Edgware开始,@EnableDiscoveryClient 或@EnableEurekaClient 可省略。只需加上相关依赖,并进行相应配置,即可将微服务注册到服务发现组件上。
/*@EnableEurekaClient
@EnableDiscoveryClient*/
@EnableHystrix
@SpringBootApplication
public class Consumer6001Application {

    public static void main(String[] args) {
        SpringApplication.run(Consumer6001Application.class, args);
    }
    @LoadBalanced //使用负载均衡机制
    @Bean
    public RestTemplate restTemplate(){
        return new RestTemplate();
    }
}
4.3 添加熔断回调
HelloService类修改:
package com.example.consumer6001.service;

import com.netflix.hystrix.contrib.javanica.annotation.HystrixCommand;
import org.springframework.beans.factory.annotation.Autowired;
import org.springframework.stereotype.Service;
import org.springframework.web.client.RestTemplate;

/**
 * @ProjectName: cloud
 * @Package: com.example.consumer6001.service
 * @ClassName: HelloService
 * @Author: MC
 * @Description: ${description}
 * @Date: 2019/12/9 0009 13:10
 * @Version: 1.0
 */
@Service
public class HelloService {
    @Autowired
    RestTemplate restTemplate;

    @HystrixCommand(fallbackMethod = "error")
    public String hello(String name) {
        return restTemplate.getForObject("http://producer/get?name="+name, String.class);
    }

    public String error(String name) {
        return "hi,"+name+",sorry,error!";
    }

}
4.4 测试熔断
启动注册中心
启动7001、7002项目
启动6001项目
浏览器访问 http://localhost:6001/show?name=test
然后我们手动将7001与7002项目停掉
浏览器再次访问http://localhost:6001/show?name=test
观察数据变化
五、浅滩灯塔-配置中心-config-git方式
参考2.3创建Module项目,项目名称为 config 作为SpringCloud的注册中心项目。
5.1 POM文件
<?xml version="1.0" encoding="UTF-8"?>
<project xmlns="http://maven.apache.org/POM/4.0.0" xmlns:xsi="http://www.w3.org/2001/XMLSchema-instance"
         xsi:schemaLocation="http://maven.apache.org/POM/4.0.0 https://maven.apache.org/xsd/maven-4.0.0.xsd">
    <modelVersion>4.0.0</modelVersion>
    <parent>
        <groupId>com.cloud.mc</groupId>
        <artifactId>cloud</artifactId>
        <version>1.0-SNAPSHOT</version>
    </parent>
    <groupId>com.example</groupId>
    <artifactId>config</artifactId>
    <version>0.0.1-SNAPSHOT</version>
    <name>config</name>
    <description>Demo project for Spring Boot</description>

    <dependencies>
        <dependency>
            <groupId>org.springframework.cloud</groupId>
            <artifactId>spring-cloud-starter-netflix-eureka-client</artifactId>
        </dependency>

        <dependency>
            <groupId>org.springframework.cloud</groupId>
            <artifactId>spring-cloud-starter</artifactId>
        </dependency>
        <dependency>
            <groupId>org.springframework.cloud</groupId>
            <artifactId>spring-cloud-config-server</artifactId>
        </dependency>
        <dependency>
            <groupId>org.springframework.boot</groupId>
            <artifactId>spring-boot-starter-test</artifactId>
            <scope>test</scope>
        </dependency>
    </dependencies>

    <build>
        <plugins>
            <plugin>
                <groupId>org.springframework.boot</groupId>
                <artifactId>spring-boot-maven-plugin</artifactId>
            </plugin>
        </plugins>
    </build>

</project>
5.2 配置文件
server:
  port: 8700
spring:
  application:
    name: cloud-config-eureka
  cloud:
    config:
      server:
        git:
          uri: https://github.com/MaoCaiAWen/cloud_F
          search-paths: cloudConfigFils/
          username: xxx
          password: xxx
      label: master

eureka:
  client:
    service-url:
      defaultZone: http://peer1:8000/eureka/,http://peer2:8001/eureka/,http://peer3:8002/eureka/
说明:
uri 是github所在的工程地址
search-paths 是指项目要搜索的文件夹,文件夹必须在工程地址目录下
5.3 创建配置文件
在自己的git仓库地址下创建文件夹,名称为cloudConfigFils
并在文件夹下创建三个配置文件:
springcloud-config-dev.properties
springcloud-config-pro.properties
springcloud-config-test.properties
自行在配置文件中添加内容,格式为: xxx=yyy 比如我的是 name=dev,name=pro,name=test
5.4 启动类
启动类添加
@EnableEurekaClient
@EnableConfigServer
注解
5.5 测试及config的url访问规则
启动注册中心
启动config项目
浏览器访问
http://localhost:8700/springcloud-config-dev.properties/
访问规则:

访问规则网上有很多详细的说明,这里就不多说废话了。
5.6 结合服务调用config配置中心
本次以6001项目为例,进行微服务调用示例。
首先6001项目的pom文件添加依赖:
 <dependency>
            <groupId>org.springframework.cloud</groupId>
            <artifactId>spring-cloud-starter-config</artifactId>
        </dependency>
然后配置文件添加:
注意是在spring节点下添加
spring:
  application:
    name: cloud-consumer
  cloud:
    config:
      # 仓库地址
      uri: http://127.0.0.1:8700
      # 对应 {label} 部分,即 Git 的分支
      label: master
      # 对应 {application} 部分
      name: springcloud-config
      # 对应 {profile} 部分
      profile: dev
最后修改MessageController类,添加属性:
@Value("${name}")
    private String name;
添加方法:
@GetMapping(value = "/configDev")
    public String configDev() {
        return "config dev = "+name;
    }
测试
启动注册中心
启动配置中心
启动6001项目
浏览器访问
http://localhost:6001/configDev
OK config的基础使用OK,接下来就是更深入的操作,在这之前,我们先思考几个问题:
为什么要使用git方式?
如果配置文件更新了怎办?
配置文件更新了项目是否能够自动刷新?
六、漂流瓶-消息总线-rabbitmq-整合config全局自动刷新
整合rabbitmq目的有二
一、实现配置中心全局自动刷新
二、实现springCloud服务之间的消息传递(广播模式)
感兴趣的可以深入了解下rabbitmq的原理,我这里就不多说了,当前菜单只实现第一个目的。
电脑上没有安装mq的请移驾RabbitMQ详细安装教程
6.1 config整合rabbitmq
config项目的pom文件添加依赖:
 <dependency>
            <groupId>org.springframework.cloud</groupId>
            <artifactId>spring-cloud-starter-bus-amqp</artifactId>
        </dependency>
        <dependency>
            <groupId>org.springframework.boot</groupId>
            <artifactId>spring-boot-starter-actuator</artifactId>
        </dependency>
config的配置文件调整为:
server:
  port: 8700
spring:
  application:
    name: cloud-config-eureka
  cloud:
    config:
      server:
        git:
          uri: https://github.com/MaoCaiAWen/cloud_F
          search-paths: cloudConfigFils/
          username: xxx
          password: xxx
      label: master
  rabbitmq:
    host: localhost
    port: 5672
    username: admin
    password: 123456
management:
  endpoints:
    web:
      exposure:
        include: "*"
eureka:
  client:
    service-url:
      defaultZone: http://peer1:8000/eureka/,http://peer2:8001/eureka/,http://peer3:8002/eureka/
6.2 服务调用整合RabbitMQ
由于上面测试config调用使用的是6001项目,这里继续使用该项目进行示例代码。
6001项目的pom文件添加:
<dependency>
            <groupId>org.springframework.cloud</groupId>
            <artifactId>spring-cloud-starter-bus-amqp</artifactId>
        </dependency>
        <dependency>
            <groupId>org.springframework.boot</groupId>
            <artifactId>spring-boot-starter-actuator</artifactId>
        </dependency>
6001项目创建bootstrap.yml配置文件,如果不知道的话,可以搜索下这个文件是干嘛的。
bootstrap.yml内容:
eureka:
  client:
    service-url:
      defaultZone: http://peer1:8000/eureka/,http://peer2:8001/eureka/,http://peer3:8002/eureka/
spring:
  application:
    name: cloud-consumer
  cloud:
    config:
      # 仓库地址
      uri: http://127.0.0.1:8700
      # 对应 {label} 部分,即 Git 的分支
      label: master
      # 对应 {application} 部分
      name: springcloud-config
      # 对应 {profile} 部分
      profile: dev
management:
  endpoints:
    web:
      exposure:
        include: bus-refresh
application.yml文件内容:
server:
  port: 6001
spring:
  rabbitmq:
    host: localhost
    port: 5672
    username: admin
    password: 123456
6001项目的MessageController类上添加@RefreshScope注解,支持属性自定刷新。
6.3 测试使用rabbitmq刷新配置中心
启动注册中心
启动配置中心
启动6001项目
浏览器访问http://localhost:6001/configDev
返回的是 dev
然后我们手动修改git仓库中dev配置文件中的内容为ccc
然后使用POSTMAN接口调试工具发送POST请求(如果没有postman可以使用下面的方法):
localhost:8700/actuator/bus-refresh
如果没有postman,可以使用cmd命令:
curl -X POST http://localhost:8700/actuator/bus-refresh
浏览器访问http://localhost:6001/configDev
查看数据编号
6.4 使用Webhooks插件实现自动刷新
Webhooks插件是git的插件,可以做很多事件处理,比如我们提交了git代码后,可以触发Webhooks的某个事件做某件事。
这里我们设置的是使用Webhooks发送post请求:你的ip:8700/actuator/bus-refresh
有一点需要注意的是,webhooks发送请求的IP及端口必须支持外网,否则是发送不了。
打开git仓库,我的是github,很方便,直接提供的就有:


OK,修改下配置文件,提交下代码测试一下吧。
这里声明下,我没有做config高可用,如果感兴趣的可以自己尝试下,很简单。创建多个配置中心即可,每一个配置中心对应一套系统服务。
七、遗落群岛,宝藏秘境-网关之gateway-全套实用案例
参考2.3创建Module项目,项目名称为 gateway作为SpringCloud的网关项目。
如果想知道为什么不用zuul作为网关,请点击这里
7.1 gateway之基础使用
7.1.1 POM
pom文件添加依赖:
 <dependency>
            <groupId>org.springframework.cloud</groupId>
            <artifactId>spring-cloud-starter-netflix-eureka-client</artifactId>
        </dependency>

        <dependency>
            <groupId>org.springframework.boot</groupId>
            <artifactId>spring-boot-starter</artifactId>
        </dependency>

        <dependency>
            <groupId>org.springframework.cloud</groupId>
            <artifactId>spring-cloud-starter-gateway</artifactId>
            <version>2.1.2.RELEASE</version>
        </dependency>
7.1.2 配置文件
server:
  port: 8888
spring:
  application:
    name: cloud-gateway-eureka
      cloud:
   gateway:
     discovery:
       locator:
         enabled: true #支持使用eureka的serviceId进行匹配,注意使用中划线而不是下划线
         lowerCaseServiceId: true #注意开启小写的话均必须使用小写
       routes:
       	- id: nameRoot
          uri: lb://cloud-producer
          predicates:
          - Path=/name/**
          filters:
          - StripPrefix=2  #求请求进行截取操作,截取前:http://localhost:8888/name/hello/foo,截取后:http://localhost:8888/foo
         - id: prefixpath_route
          uri: lb://cloud-producer
          predicates:
          - Path=/name/**
          filters:
          - PrefixPath=/foo #是在 URL 路径前面添加一部分的前缀
7.1.3 routes规则说明
说明:
routes:指定网关规则集
id:定义某一条规则的ID 不可重复
uri:有多种格式,建议自行百度学习。 我这里使用的 lb://cloud-producer 意思是从注册中心的serviceId中找匹配的服务。特别注意,只有设置lowerCaseServiceId为ture才可以使用小写,否则cloud-producer要全部大写。
filters:拦截器,该拦截器有很多规则可以对请求的URL添加前缀、后缀、截取等等,还可以对请求添加parameter参数或者header参数等等,由于太多这里就不罗列了。另外该拦截器支持自定义,后面会具体说。filters下还有其他的属性,比如name、args等等。
predicates:该参数是可以指定某一个请求连接进行处理,也可以设置某一种类的请求进行处理,例如:
predicates:
- Path=/test/**
- Method=GET
意思就是test开通的GET请求进行处理。
ordered:这个是指定级别,数值越低级别越高,执行顺序越靠前。我这里没有指定目前用不到。实际业务开发中会用到的。
除了使用yml配置文件进行规则配置,还可以使用java代码,我这里先粘贴一个例子,后面会用到,使用java代码需要在启动类中添加如下部分代码:
@Autowired
private RateLimitByCpuGatewayFilter rateLimitByCpuGatewayFilter;//系统负载分流拦截器限流

 /**
     * @Method 根据系统CPU动态限流
     * @Author MC

     * @Return
     * @Date 2019/12/10 0010 18:00
     */
    @Bean
    public RouteLocator customerCPURouteLocator(RouteLocatorBuilder builder) {
        // @formatter:off
        return builder.routes()
                .route(r -> r.path("/customerCPU/**")
                        .filters(f -> f.stripPrefix(2)
                                .filter(rateLimitByCpuGatewayFilter))
                        .uri("lb://cloud-consumer")
                        .order(0)
                        .id("customer_CPU_service")
                )
                .build();
        // @formatter:on
    }
注意:filter中是我的自定义Filter,如下图:

下面会具体写到的,这里主要说规则。
7.1.3 服务调用及测试
在7001与7002项目也就是cloud-producer项目中的MessageController中添加方法:
7001的是
@RequestMapping("/foo")
    public String foo(String foo) {
        return "hello "+foo+"!7001";
    }
7002的是
@RequestMapping("/foo")
    public String foo(String foo) {
        return "hello "+foo+"!7002";
    }
接下来我们测试一下基础的使用
首先启动注册中心
启动7001与7002项目
启动网关
浏览器访问:
http://localhost:8888/name/hello/foo?foo=test
多次访问查看数据变化
我们这里是使用了规则访问,那么不使用规则呢?
答案是肯定可以的。
规则就是
http://localhost:8888/对应的注册中心服务的ID(小写)/该服务下的接口
即可访问,这个很简单,自己试试吧
7.2 gateway路由之熔断路由
7.2.1 POM
pom文件添加依赖
 <!-- 路由熔断 -->
        <dependency>
            <groupId>org.springframework.cloud</groupId>
            <artifactId>spring-cloud-starter-netflix-hystrix</artifactId>
        </dependency>
7.2.2 创建熔断回调
在启动类所在目录创建web文件夹,文件夹下创建HystrixController,内容如下:
package com.example.gateway.web;

import org.springframework.web.bind.annotation.GetMapping;
import org.springframework.web.bind.annotation.RestController;

/**
 * @ProjectName: cloud
 * @Package: com.example.gateway.web
 * @ClassName: HystrixController
 * @Author: MC
 * @Description: ${description}
 * @Date: 2019/12/10 0010 11:02
 * @Version: 1.0
 */
@RestController
public class HystrixController {
    @GetMapping("/fallback")
    public String fallback() {
        return "Hello World! from gateway";
    }
}
7.2.3 配置文件
yml文件的routes节点下添加:
 - id: hystrix_route #熔断路由
   uri: lb://cloud-producer
    predicates:
    - Path=/consumingserviceendpoint/**
    filters:
    - name: Hystrix
      args:
        name: fallbackcmd
        fallbackUri: forward:/fallback #当调用 Hystrix 的 fallback 被调用时,请求将转发到/fallback 这个 URI。
注意几点:
Path指定了请求路径为consumingserviceendpoint的请求进行熔断处理
filters.name填写的是Hystrix是指交给了Hystrix拦截器进行处理
filters.args.name 指定了回调名称
filters.args.fallbackUri指定了回调具体方法,注意这里格式必须是 forward:/接口方法名
这里我就不测试了。这个自行测试把,测试方法就是:
启动注册中心、7001、7002、网关
然后手动关闭7001与7002看看返回的是什么
请求consumingserviceendpoint接口
7.3 gateway之路由重试
7.3.1 POM
添加依赖:
<!-- 路由重试 -->
        <dependency>
            <groupId>org.springframework.retry</groupId>
            <artifactId>spring-retry</artifactId>
        </dependency>
7.3.2 配置文件
yml文件的routes节点下添加:
- id: service_producer #路由重试
  uri: lb://cloud-producer
   predicates:
   - Path=/**
   filters:
   - name: Retry
     args:
       retries: 5 #重试次数,默认值是 3 次
       statuses: BAD_GATEWAY #HTTP 的状态返回码,取值请参考:org.springframework.http.HttpStatus
这里我就不测试了,可以自行写一个接口,加上一个休眠尝试一下,观察控制台打印日志
7.4 gateway之限速路由-基于令牌桶算法实现限流-bucket4j
7.4.1 POM
  <!-- bucket4j基于令牌桶算法实现限流 -->
        <dependency>
            <groupId>com.github.vladimir-bukhtoyarov</groupId>
            <artifactId>bucket4j-core</artifactId>
            <version>4.0.0</version>
        </dependency>
7.4.2 创建filter
在启动类所在的目录创建filter文件夹,文件夹下创建RateLimitByIpGatewayFilter类,具体代码如下:
package com.example.gateway.filter;

import io.github.bucket4j.Bandwidth;
import io.github.bucket4j.Bucket;
import io.github.bucket4j.Bucket4j;
import io.github.bucket4j.Refill;
import org.apache.commons.logging.Log;
import org.apache.commons.logging.LogFactory;
import org.springframework.cloud.gateway.filter.GatewayFilter;
import org.springframework.cloud.gateway.filter.GatewayFilterChain;
import org.springframework.core.Ordered;
import org.springframework.http.HttpStatus;
import org.springframework.web.server.ServerWebExchange;
import reactor.core.publisher.Mono;

import java.time.Duration;
import java.util.Map;
import java.util.concurrent.ConcurrentHashMap;

/**
 * @ProjectName: 令牌桶算法拦截器
 * 在这个实现中,我们使用了 IP 来进行限制,当达到最大流量就返回 429 错误。
 * 这里我们简单使用一个 Map 来存储 bucket,所以也决定了它只能单点使用,如果是分布式的话,
 * 可以采用 Hazelcast 或 Redis 等解决方案。
 * @Package: com.example.gateway.filter
 * @ClassName: RateLimitByIpGatewayFilter
 * @Author: MC
 * @Description: ${description}
 * @Date: 2019/12/10 0010 15:53
 * @Version: 1.0
 */
public class RateLimitByIpGatewayFilter implements GatewayFilter, Ordered {
    private static final Log log = LogFactory.getLog(GatewayFilter.class);
        int capacity;//桶的最大容量,即能装载 Token 的最大数量
        int refillTokens;//每次 Token 补充量
        Duration refillDuration;//补充 Token 的时间间隔

        private static final Map<String, Bucket> CACHE = new ConcurrentHashMap<>();

    public RateLimitByIpGatewayFilter(int capacity, int refillTokens, Duration refillDuration) {
        this.capacity = capacity;
        this.refillTokens = refillTokens;
        this.refillDuration = refillDuration;
    }

    private Bucket createNewBucket() {
            Refill refill = Refill.of(refillTokens,refillDuration);
            Bandwidth limit = Bandwidth.classic(capacity,refill);
            return Bucket4j.builder().addLimit(limit).build();
        }


        @Override
        public Mono<Void> filter(ServerWebExchange exchange,GatewayFilterChain chain) {
            // if (!enableRateLimit){
            //     return chain.filter(exchange);
            // }
            String ip = exchange.getRequest().getRemoteAddress().getAddress().getHostAddress();
            Bucket bucket = CACHE.computeIfAbsent(ip,k -> createNewBucket());

            log.debug("IP: " + ip + ",TokenBucket Available Tokens: " + bucket.getAvailableTokens());
            if (bucket.tryConsume(1)) {
                return chain.filter(exchange);
            } else {
                exchange.getResponse().setStatusCode(HttpStatus.TOO_MANY_REQUESTS);
                return exchange.getResponse().setComplete();
            }
        }

    @Override
        public int getOrder() {
            return -1000;
        }
}
7.4.3 启动类中定义拦截规则
启动类中添加如下代码:
/**
     * @Method 使用令牌桶算法进行限流
     * @Author MC
        核心查看RateLimitByIpGatewayFilter类
     * @Return
     * @Date 2019/12/10 0010 16:17
     */
    @Bean
    public RouteLocator customRouteLocator(RouteLocatorBuilder builder) {
        return builder.routes()
                .route(r -> r.path("/customer/**")
                        .filters(f -> f.stripPrefix(2)
                                .filter(new RateLimitByIpGatewayFilter(10,1,Duration.ofSeconds(1))))
                        .uri("lb://cloud-consumer")
                        .order(0)
                        .id("throttle_customer_service")
                )
                .build();
    }
7.4.5 测试
6001项目创建CustomController类,代码如下:
@RestController
public class CustomController {

    @GetMapping(value = "/test")
    public String hello(@RequestParam String name) {
        System.out.println(" this is 6001 custom name is "+ name);
        return "this is 6001 custom name is "+ name;
    }
}
启动注册中心
启动6001项目
启动网关
浏览器多次访问
http://localhost:8888/customer/customer/test?name=maocai
观察gateway项目中的控制台输出,token的数量逐渐减少,然后一会又满了
7.5 gateway之限速路由-基于lua加redis桶限流
7.5.1 POM
  <!-- 限流算法 实现基于lua加redis桶实现 -->
        <dependency>
            <groupId>org.springframework.boot</groupId>
            <artifactId>spring-boot-starter-data-redis-reactive</artifactId>
            <version>2.0.4.RELEASE</version>
        </dependency>
7.5.2 配置文件
yml文件的spring节点下添加redis配置:
redis:
  host: localhost
  password:
  port: 6379
yml文件的routes节点下添加:
	- id: requestratelimiter_route #依赖于redis的限速路由
	 uri: lb://cloud-producer
	  filters:
	  - name: RequestRateLimiter #名称必须是 RequestRateLimiter
	  args:
	    redis-rate-limiter.replenishRate: 10 #允许用户每秒处理多少个请求
	    redis-rate-limiter.burstCapacity: 20 #令牌桶的容量,允许在一秒钟内完成的最大请求数
	    key-resolver: "#{@remoteAddrKeyResolver}" #用于限流的键的解析器的 Bean 对象名字(有些绕,看代码吧)。它使用 SpEL 表达式根据#{@beanName} 从 Spring 容器中获取 Bean 对象。默认情况下,使用 PrincipalNameKeyResolver,以请求认证的 java.security.Principal 作为限流键。
	  #            key-resolver: "#{@userKeyResolver}"
	  predicates:
	  - Path=/test/**
	  - Method=GET
注意这里的fiter.name是RequestRateLimiter,之所以这么写的原因是因为网上有人说源码中是默认filter会报错。具体原因参考该博客
7.5.3 创建相关的java类
启动类所在目录创建keyResolver文件夹,文件夹中创建RemoteAddrKeyResolver类,具体代码如下:
package com.example.gateway.keyResolver;

import org.springframework.cloud.gateway.filter.ratelimit.KeyResolver;
import org.springframework.web.server.ServerWebExchange;
import reactor.core.publisher.Mono;

/**
 * @ProjectName: 自定义Key键解析器,用于路由限流操作
 * @Package: com.example.gateway.keyResolver
 * @ClassName: RemoteAddrKeyResolver
 * @Author: MC
 * @Description: ${description}
 * @Date: 2019/12/10 0010 16:24
 * @Version: 1.0
 */
public class RemoteAddrKeyResolver implements KeyResolver {
    public static final String BEAN_NAME = "remoteAddrKeyResolver";
    @Override
    public Mono<String> resolve(ServerWebExchange exchange) {
        return Mono.just(exchange.getRequest().getRemoteAddress().getAddress().getHostAddress());
    }
}
接着,启动类下创建config文件夹,文件夹中创建RequestRateLimiterConfig类,具体代码如下:
package com.example.gateway.config;

import com.example.gateway.keyResolver.RemoteAddrKeyResolver;
import org.springframework.cloud.gateway.filter.ratelimit.KeyResolver;
import org.springframework.context.annotation.Bean;
import org.springframework.context.annotation.Configuration;
import reactor.core.publisher.Mono;

/**
 * @ProjectName: 设置限流的策略
 * @Package: com.example.gateway.config
 * @ClassName: RequestRateLimiterConfig
 * @Author: MC
 * @Description: ${description}
 * @Date: 2019/12/10 0010 10:42
 * @Version: 1.0
 */

@Configuration
public class RequestRateLimiterConfig {

    @Bean
    KeyResolver userKeyResolver() {
        //根据请求参数中的 user 字段来限流
        return exchange -> Mono.just(exchange.getRequest().getQueryParams().getFirst("user"));
    }

    @Bean
    public KeyResolver ipKeyResolver() {
        //根据请求 IP 地址来限流
        return exchange -> Mono.just(exchange.getRequest().getRemoteAddress().getHostName());
    }

    @Bean(name = RemoteAddrKeyResolver.BEAN_NAME)
    public RemoteAddrKeyResolver remoteAddrKeyResolver() {
        return new RemoteAddrKeyResolver();
    }
}
7.5.4 配置文件定义规则
yml文件的routes节点下添加:
- id: requestratelimiter_route #依赖于redis的限速路由
  uri: lb://cloud-producer
  filters:
  - name: RequestRateLimiter #名称必须是 RequestRateLimiter
  args:
    redis-rate-limiter.replenishRate: 10 #允许用户每秒处理多少个请求
    redis-rate-limiter.burstCapacity: 20 #令牌桶的容量,允许在一秒钟内完成的最大请求数
    key-resolver: "#{@remoteAddrKeyResolver}" #用于限流的键的解析器的 Bean 对象名字(有些绕,看代码吧)。它使用 SpEL 表达式根据#{@beanName} 从 Spring 容器中获取 Bean 对象。默认情况下,使用 PrincipalNameKeyResolver,以请求认证的 java.security.Principal 作为限流键。
  #            key-resolver: "#{@userKeyResolver}"
  predicates:
  - Path=/test/**
  - Method=GET
测试方式跟上面的一样,我这里就不过多展示了。
7.6 gateway之限速路由-基于系统cpu进行限速
7.6.1 创建filter
在启动类中filter文件夹下创建RateLimitByCpuGatewayFilter类,具体代码如下:
package com.example.gateway.filter;

import lombok.extern.apachecommons.CommonsLog;
import org.apache.commons.logging.Log;
import org.apache.commons.logging.LogFactory;
import org.springframework.beans.factory.annotation.Autowired;
import org.springframework.boot.actuate.metrics.MetricsEndpoint;
import org.springframework.cloud.gateway.filter.GatewayFilter;
import org.springframework.cloud.gateway.filter.GatewayFilterChain;
import org.springframework.core.Ordered;
import org.springframework.http.HttpStatus;
import org.springframework.stereotype.Component;
import org.springframework.web.server.ServerWebExchange;
import reactor.core.publisher.Mono;

import java.util.Objects;

/**
 * @ProjectName: 基于系统的负载进行动态限流的拦截器
 * @Package: com.example.gateway.filter
 * @ClassName: RateLimitByCpuGatewayFilter
 * @Author: MC
 * @Description: ${description}
 * @Date: 2019/12/10 0010 17:55
 * @Version: 1.0
 */
@CommonsLog
@Component
public class RateLimitByCpuGatewayFilter implements GatewayFilter, Ordered {

    @Autowired
    private MetricsEndpoint metricsEndpoint;

    private static final String METRIC_NAME = "system.cpu.usage";
    private static final double MAX_USAGE = 0.50D;

    @Override
    public Mono<Void> filter(ServerWebExchange exchange, GatewayFilterChain chain) {
        // if (!enableRateLimit){
        //     return chain.filter(exchange);
        // }
        Double systemCpuUsage = metricsEndpoint.metric(METRIC_NAME, null)
                .getMeasurements()
                .stream()
                .filter(Objects::nonNull)
                .findFirst()
                .map(MetricsEndpoint.Sample::getValue)
                .filter(Double::isFinite)
                .orElse(0.0D);

        boolean ok = systemCpuUsage < MAX_USAGE;
        log.debug("system.cpu.usage: " + systemCpuUsage + " ok: " + ok);

        if (!ok) {
            exchange.getResponse().setStatusCode(HttpStatus.TOO_MANY_REQUESTS);
            return exchange.getResponse().setComplete();
        } else {
            return chain.filter(exchange);
        }
    }

    @Override
    public int getOrder() {
        return 0;
    }
}
7.6.2 启动类中定义限速规则
启动类中添加代码:
 /**
     * @Method 根据系统CPU动态限流
     * @Author MC

     * @Return
     * @Date 2019/12/10 0010 18:00
     */
    @Bean
    public RouteLocator customerCPURouteLocator(RouteLocatorBuilder builder) {
        // @formatter:off
        return builder.routes()
                .route(r -> r.path("/customerCPU/**")
                        .filters(f -> f.stripPrefix(2)
                                .filter(rateLimitByCpuGatewayFilter))
                        .uri("lb://cloud-consumer")
                        .order(0)
                        .id("customer_CPU_service")
                )
                .build();
        // @formatter:on
    }
由于CPU使用不好操作,这里就不测试了。
7.7 gateway之自定义拦截器之工厂模式(可做全局)
7.7.1 创建工厂类
在启动类目录中的filter中创建ExampleGatewayFilterFactory类,具体代码如下:
package com.example.gateway.filter;

import org.apache.commons.logging.Log;
import org.apache.commons.logging.LogFactory;
import org.springframework.cloud.gateway.filter.GatewayFilter;
import org.springframework.cloud.gateway.filter.GatewayFilterChain;
import org.springframework.cloud.gateway.filter.factory.AbstractGatewayFilterFactory;
import org.springframework.core.Ordered;
import org.springframework.web.server.ServerWebExchange;
import reactor.core.publisher.Mono;

import java.util.Arrays;
import java.util.List;

/**
 * @ProjectName: 工厂拦截器,可做全局
 * @Package: com.example.gateway.filter
 * @ClassName: ExampleGatewayFilterFactory
 * @Author: MC
 * @Description: ${description}
 * @Date: 2019/12/10 0010 13:07
 * @Version: 1.0
 */
public class ExampleGatewayFilterFactory extends AbstractGatewayFilterFactory<ExampleGatewayFilterFactory.Config> {

    private static final Log log = LogFactory.getLog(GatewayFilter.class);

    /**
     * 定义可以再yaml中声明的属性变量
     */
    private static final String TYPE = "type";
    private static final String OP = "op";

    /**
     * constructor
     */
    public ExampleGatewayFilterFactory(){
        // 这里需要将自定义的config传过去,否则会报告ClassCastException
        super(Config.class);
    }


    @Override
    public List<String> shortcutFieldOrder() {
        return Arrays.asList(TYPE, OP);
    }

    @Override
    public GatewayFilter apply(Config config) {
        /*return ((exchange, chain) -> {
            boolean root = "root".equals(config.getOp());
            if (root){
                log.info("GatewayFilter root");
            }
            else {
                log.info("GatewayFilter customer");
            }
            // 在then方法里的,相当于aop中的后置通知
            return chain.filter(exchange).then(Mono.fromRunnable(()->{
                // do something
            }));
        });*/
        return new InnerFilter(config);
    }
    /**
     * 创建一个内部类,来实现2个接口,指定顺序
     */
    private class InnerFilter implements GatewayFilter, Ordered {

        private Config config;

        InnerFilter(Config config) {
            this.config = config;
        }

        @Override
        public Mono<Void> filter(ServerWebExchange exchange, GatewayFilterChain chain) {
            System.out.println("  pre 自定义过滤器工厂 AAAA  " + this.getClass().getSimpleName());
            boolean root = "root".equals(config.getOp());
            if (root) {
                System.out.println("  is root ");
            } else {
                System.out.println("  is no root ");
            }
            // 在then方法里的,相当于aop中的后置通知
            return chain.filter(exchange).then(Mono.fromRunnable(() -> {
                System.out.println("  post 自定义过滤器工厂 AAAA " + this.getClass().getSimpleName());
            }));
        }

        @Override
        public int getOrder() {
            return Ordered.LOWEST_PRECEDENCE;
        }
    }

    /**
     * 自定义的config类,用来设置传入的参数
     */
    public static class Config {

        /**
         * 过滤类型
         */
        private String type;

        /**
         * 操作
         */
        private String op;

        public String getType() {
            return type;
        }

        public void setType(String type) {
            this.type = type;
        }

        public String getOp() {
            return op;
        }

        public void setOp(String op) {
            this.op = op;
        }
    }
}
7.7.2 配置文件定义规则
yml的routes节点下添加:
- id: example_routes #自定义路由拦截器
  uri: lb://cloud-consumer
   predicates:
   - Path=/test/**
   filters:
   - name: Example  #浏览器访问http://localhost:8888/test?name=MC 测试,查看控制台输出
     args:
       op: root
       type: he
7.7.3 启动类添加工厂
启动类添加如下代码:
/**
     * @Method 工厂拦截器限流
     * @Author MC

     * @Return
     * @Date 2019/12/10 0010 17:59
     */
    @Bean
    public ExampleGatewayFilterFactory exampleGatewayFilterFactory(){
        return new ExampleGatewayFilterFactory();
    }
启动注册中心、7001、7002、6001项目,浏览器访问http://localhost:8888/test?name=MC 测试,查看控制台输出
八、指南针-链路追踪-zipkin
参考2.3创建Module项目,项目名称为 zipkin作为SpringCloud的链路追踪项目。
8.1 POM
<?xml version="1.0" encoding="UTF-8"?>
<project xmlns="http://maven.apache.org/POM/4.0.0" xmlns:xsi="http://www.w3.org/2001/XMLSchema-instance"
         xsi:schemaLocation="http://maven.apache.org/POM/4.0.0 https://maven.apache.org/xsd/maven-4.0.0.xsd">
    <modelVersion>4.0.0</modelVersion>
    <parent>
        <groupId>com.cloud.mc</groupId>
        <artifactId>cloud</artifactId>
        <version>1.0-SNAPSHOT</version>
    </parent>
    <groupId>com.example</groupId>
    <artifactId>zipkin-server</artifactId>
    <version>0.0.1-SNAPSHOT</version>
    <name>zipkin-server</name>
    <description>Demo project for Spring Boot</description>

    <properties>
        <java.version>1.8</java.version>
        <zipkin-server.version>2.11.4</zipkin-server.version>
    </properties>

    <dependencies>
        <dependency>
            <groupId>org.springframework.boot</groupId>
            <artifactId>spring-boot-starter</artifactId>
        </dependency>

        <dependency>
            <groupId>org.springframework.boot</groupId>
            <artifactId>spring-boot-starter-test</artifactId>
            <scope>test</scope>
        </dependency>

        <dependency>
            <groupId>org.springframework.cloud</groupId>
            <artifactId>spring-cloud-starter-netflix-eureka-client</artifactId>
        </dependency>

        <!-- 链路追踪的依赖服务 采用http上传的模式,也可采用RabbitMq kafka来传输-->
        <dependency>
            <groupId>io.zipkin.java</groupId>
            <artifactId>zipkin-server</artifactId>
            <version>${zipkin-server.version}</version>
            <exclusions>
                <exclusion>
                    <groupId>org.springframework.boot</groupId>
                    <artifactId>spring-boot-starter-log4j2</artifactId>
                </exclusion>
            </exclusions>
        </dependency>

        <!-- zipkinServer的ui依赖界面-->
        <dependency>
            <groupId>io.zipkin.java</groupId>
            <artifactId>zipkin-autoconfigure-ui</artifactId>
            <version>${zipkin-server.version}</version>
        </dependency>

        <dependency>
            <groupId>org.springframework.boot</groupId>
            <artifactId>spring-boot-autoconfigure</artifactId>
        </dependency>


    </dependencies>

    <build>
        <plugins>
            <plugin>
                <groupId>org.springframework.boot</groupId>
                <artifactId>spring-boot-maven-plugin</artifactId>
            </plugin>
        </plugins>
    </build>

</project>
8.2 配置文件
server:
  port: 9411
spring:
  application:
    name: zipkin-server
eureka:
  client:
    service-url:
      defaultZone: http://peer1:8000/eureka/,http://peer2:8001/eureka/,http://peer3:8002/eureka/
  #zipkin的ui界面配置
management:
  metrics:
    web:
      server:
        auto-time-requests: false
8.3启动类
package com.example.zipkinserver;

import org.springframework.boot.SpringApplication;
import org.springframework.boot.autoconfigure.SpringBootApplication;
import org.springframework.cloud.netflix.eureka.EnableEurekaClient;
import zipkin2.server.internal.EnableZipkinServer;

@SpringBootApplication
@EnableEurekaClient
@EnableZipkinServer
public class ZipkinServerApplication {

    public static void main(String[] args) {
        SpringApplication.run(ZipkinServerApplication.class, args);
    }

}
8.4 链路追踪UI查看
启动注册中心,启动zipkin项目
浏览器访问:http://localhost:9411/zipkin/
如图:
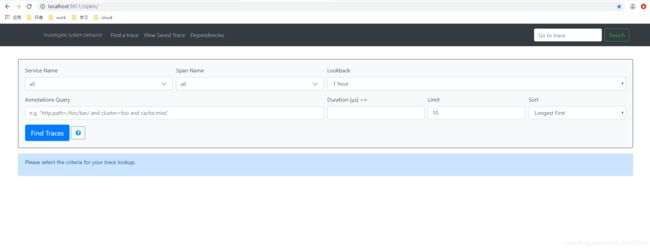
表示追踪项目创建成功。
8.5 整合服务项目调用
8.5.1 POM
首先7001、7002、6002 项目添加POM依赖
  <!-- 被zipkin服务追踪的启动依赖-->
        <dependency>
            <groupId>org.springframework.cloud</groupId>
            <artifactId>spring-cloud-starter-zipkin</artifactId>
        </dependency>
8.5.2 配置文件
其次修改7001、7002、6002 项目的配置文件
均在spring节点下添加:
sleuth:
  sampler:
    probability: 1.0
zipkin:
  base-url: http://localhost:9411
8.5.3 测试
启动注册中心、6002、7001、7002项目、zipkin-server项目
浏览器访问 http://localhost:6002/hello?name=maocai
然后再到http://localhost:9411/zipkin/中点击Find Traces查看结果,可以看到请求的记录列表
8.6 整合gateway
8.6.1 POM
<!-- 被zipkin服务追踪的启动依赖-->
        <dependency>
            <groupId>org.springframework.cloud</groupId>
            <artifactId>spring-cloud-starter-zipkin</artifactId>
            <version>2.1.0.RELEASE</version>
        </dependency>
8.6.2 配置文件
spring节点下添加:
 sleuth:
    sampler:
      probability: 1.0
  zipkin:
    base-url: http://localhost:9411
routes节点下添加拦截规则方便测试:
 - id: feign_hystrix_route
   uri: lb://cloud-consumer-feign
    predicates:
    - Path=/feign/**
    filters:
    - StripPrefix=1 #注意需要截取一位
8.6.3 测试
启动7001、7002、6002、gateway、zipkin-server项目
浏览器访问http://localhost:8888/feign/hello?name=maocai
然后到http://localhost:9411/zipkin/
点击Find Traces查看请求列表
可以点击dependecies查看调用视图

九、整合Spring Security Oauth2
整合oauth2我单独写了一个博客,是基于本项目的,也可以单独剥离出来作为手脚架使用,详情请点击这里
有钱的捧个钱场,没钱的点个收藏
开源分享不易,求各位大哥大姐赏点饭钱。

