SpringBoot自学好几天 中途开始写笔记 SpringBoot数据访问 整合MyBatis(二) 20190221
一、对数据库操作
注意注意:上一步自动创建数据表 这一步 需要把sql文件删除 或者把配置文件改成 initialization-mode: never
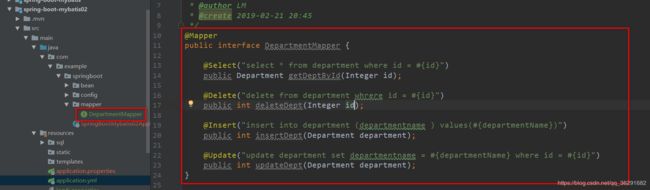
- 新建mapper 注解 @Mapper
package com.example.springboot.mapper;

import com.example.springboot.bean.Department;
import org.apache.ibatis.annotations.*;

/**
 * @author LM
 * @create 2019-02-21 20:45
 */
@Mapper
public interface DepartmentMapper {

    @Select("select * from department where id = #{id}")
    public Department getDeptById(Integer id);

    @Delete("delete from department whrere id = #{id}")
    public int deleteDept(Integer id);

    @Insert("insert into department (departmentname ) values(#{departmentName})")
    public int insertDept(Department department);

    @Update("update department set departmentname = #{departmentName} where id = #{id}")
    public int updateDept(Department department);
}
- 新建controller测试
package com.example.springboot.controller;

import com.example.springboot.bean.Department;
import com.example.springboot.mapper.DepartmentMapper;
import org.apache.ibatis.annotations.Options;
import org.springframework.beans.factory.annotation.Autowired;
import org.springframework.web.bind.annotation.GetMapping;
import org.springframework.web.bind.annotation.PathVariable;
import org.springframework.web.bind.annotation.RestController;

/**
 * @author LM
 * @create 2019-02-21 20:57
 *
 * 简化一下:这里就不写service层了 为了方便测试  开发不能这样
 */
@RestController
public class DeptController {

    @Autowired
    DepartmentMapper departmentMapper;

    @GetMapping("/dept/{id}")
    public Department getDepartment(@PathVariable("id") Integer id){
        return departmentMapper.getDeptById(id);
    }
    //option指定了 自增属性会封装到department中
    @Options(useGeneratedKeys = true,keyProperty = "id")
    @GetMapping("/dept")
    public Department insertDept(Department department){
          departmentMapper.insertDept(department);
          return department;
    }
}
- 访问页面
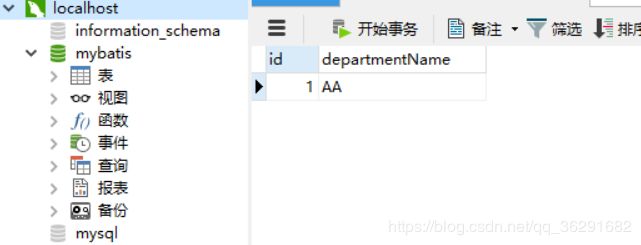
新增:
http://127.0.0.1:8080/dept/?departmentName=AA

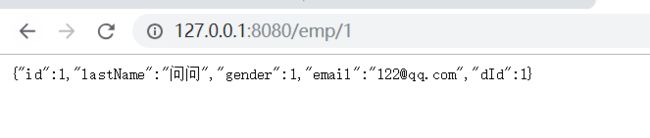
查询:
http://127.0.0.1:8080/dept/1

查看数据库数据:
- 考虑问题 修改mybatis相关规则 添加ConfigurationCustomizer
package com.example.springboot.config;

import org.mybatis.spring.boot.autoconfigure.ConfigurationCustomizer;
import org.springframework.context.annotation.Bean;


/**
 * @author LM
 * @create 2019-02-21 21:18
 */
@org.springframework.context.annotation.Configuration
public class MyBatisConfig {

    @Bean
    public ConfigurationCustomizer  configurationCustomizer(){
        return new ConfigurationCustomizer() {
            @Override
            public void customize(org.apache.ibatis.session.Configuration configuration) {
                //开启驼峰命名法
                configuration.setMapUnderscoreToCamelCase(true);
            }
        };
    }
}
- 每个mapper写一个 @Mapper注解 比较麻烦 可以统一配置
方法: 在SpringBootMybatis02Application上加注解
@MapperScan(value = "com.example.springboot.mapper")
@SpringBootApplication
public class SpringBootMybatis02Application {

    public static void main(String[] args) {
        SpringApplication.run(SpringBootMybatis02Application.class, args);
    }

}
@Mapper已经不需要了

二、 配置文件的方式 SQL
- 创建新Mapper
/**
 * @author LM
 * @create 2019-02-21 21:26
 * @Mapper 或者 用 @MapperScan方式 将接口扫描到容器中 之前已经配置了@MapperScan所以这里不用配置了
 */

public interface EmployeeMapper {
    public  Employee getEmpById(Integer id);
    public void insertEmp(Employee employee);
}
- 创建sql映射文件
官网有配置文件的参考 点击进入
namespace绑定接口!!
mybatis-config.xml
<configuration>

configuration>
EmployeeMapper.xml
<mapper namespace="com.example.springboot.mapper.EmployeeMapper">


    <select id="getEmpById" resultType="com.example.springboot.bean.Employee">
      select * from employee where id =#{id}
    select>


    <insert id="insertEmp" >
        insert into employee (lastName,email,gender,d_id) values (#{lastName},#{email},#{gender},#{dId})
    insert>

mapper>
- 项目配置文件配置
application.yml
mybatis:
  config-location: classpath:mybatis/mybatis-config.xml #指定全局配置文件
  mapper-locations: classpath:mybatis/mapper/*.xml #指定sql编写文件
- 测试
package com.example.springboot.controller;

import com.example.springboot.bean.Employee;
import com.example.springboot.mapper.EmployeeMapper;
import org.springframework.beans.factory.annotation.Autowired;
import org.springframework.web.bind.annotation.GetMapping;
import org.springframework.web.bind.annotation.PathVariable;
import org.springframework.web.bind.annotation.RestController;

/**
 * @author LM
 * @create 2019-02-21 21:50
 */
@RestController
public class EmployeeController {

    @Autowired
    EmployeeMapper employeeMapper;

    @GetMapping("/emp/{id}")
    public Employee getEmp(@PathVariable("id") Integer id){
        return employeeMapper.getEmpById(id);
    }

}

问题:dId字段是空的 因为我们没有开启驼峰命名法
http://www.mybatis.org/mybatis-3/configuration.html#settings
mybatis-config.xml
<configuration>
        <settings>
            <setting name="mapUnderscoreToCamelCase" value="true"/>
        settings>
configuration>
再次访问: