又是一个漫漫长夜。
公司的编辑器坏了,用的是百度编辑器,上传图片的网址被框架给拦截了,我们本地怎么测试都没问题,放到服务器就这样了。和老李找了半天,疯了,没原因的。
笔者以前用过jsp+ckeditor,觉得里面上传功能挺好用,于是想出这个法子,把网站的编辑器换掉。
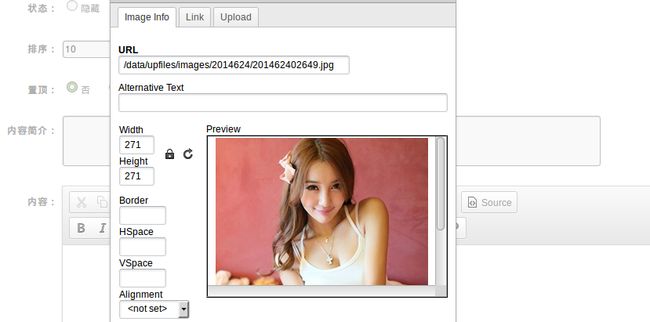
用的是最新的版本的,4点几的。很有wordpress的感觉,不知道是不是一家的。先预览一下:
代码:
package action; import java.io.File; import java.io.FileInputStream; import java.io.FileOutputStream; import java.io.InputStream; import java.io.OutputStream; import java.io.PrintWriter; import javax.servlet.http.HttpServletResponse; import org.apache.struts2.ServletActionContext; import util.DateUtil; import com.opensymphony.xwork2.ActionSupport; public class UploadFile extends ActionSupport{ private File upload; private String uploadContentType; private String uploadFileName; public File getUpload() { return upload; } public void setUpload(File upload) { this.upload = upload; } public String getUploadContentType() { return uploadContentType; } public void setUploadContentType(String uploadContentType) { this.uploadContentType = uploadContentType; } public String getUploadFileName() { return uploadFileName; } public void setUploadFileName(String uploadFileName) { this.uploadFileName = uploadFileName; } public String execute() throws Exception { HttpServletResponse response = ServletActionContext.getResponse(); response.setCharacterEncoding("GBK"); PrintWriter out = response.getWriter(); // CKEditor提交的很重要的一个参数 String callback = ServletActionContext.getRequest().getParameter("CKEditorFuncNum"); String expandedName = ""; //文件扩展名 if (uploadContentType.equals("image/pjpeg") || uploadContentType.equals("image/jpeg")) { //IE6上传jpg图片的headimageContentType是image/pjpeg,而IE9以及火狐上传的jpg图片是image/jpeg expandedName = ".jpg"; }else if(uploadContentType.equals("image/png") || uploadContentType.equals("image/x-png")){ //IE6上传的png图片的headimageContentType是"image/x-png" expandedName = ".png"; }else if(uploadContentType.equals("image/gif")){ expandedName = ".gif"; }else if(uploadContentType.equals("image/bmp")){ expandedName = ".bmp"; }else{ out.println(""); return null; } if(upload.length() > 600*1024){ out.println(""); return null; } InputStream is = new FileInputStream(upload); String uploadPath = ServletActionContext.getServletContext().getRealPath("img/upload/"+DateUtil.getDirDate()); System.out.println("uploadpath:"+uploadPath); File dirfile=new File(uploadPath); if(!dirfile.exists()){ dirfile.mkdirs(); } String fileName = DateUtil.getDate(); //采用时间+UUID的方式随即命名 fileName += expandedName; System.out.println("filename:"+fileName); File toFile = new File(uploadPath, fileName); OutputStream os = new FileOutputStream(toFile); byte[] buffer = new byte[1024]; int length = 0; while ((length = is.read(buffer)) > 0) { os.write(buffer, 0, length); } is.close(); os.close(); // 返回“图像”选项卡并显示图片 out.println(""); return null; } }
里面用到一个时间的工具类,用于按照时间创建目录和文件名字。文件名字精确到秒,以免发生名称重复。
其中:
out.println("window.parent.CKEDITOR.tools.callFunction(" + callback + ",'" + "img/upload/"+ DateUtil.getDirDate() +"/"+ fileName + "','')");
这一句是上传图片后,返回给编辑器的一个图片路径地址。
时间工具类:
package com.util;

import java.util.Calendar;

public class DateUtil {
    public static String getDate(){
        Calendar calendar=Calendar.getInstance();
        int y=calendar.get(Calendar.YEAR);
        int m=calendar.get(Calendar.MONTH);
        int d=calendar.get(Calendar.DATE);
        int h=calendar.get(Calendar.HOUR);
        int mi=calendar.get(Calendar.MINUTE);
        int s=calendar.get(Calendar.SECOND);
        StringBuffer sb=new StringBuffer("");
        sb.append(y);
        sb.append(m+1);
        sb.append(d);
        sb.append(h);
        sb.append(mi);
        sb.append(s);
        String date=sb.toString();
        return date;
    }

    public static String getDirDate(){
        Calendar calendar=Calendar.getInstance();
        int y=calendar.get(Calendar.YEAR);
        int m=calendar.get(Calendar.MONTH);
        int d=calendar.get(Calendar.DATE);
        StringBuffer sb=new StringBuffer("");
        sb.append(y);
        sb.append(m+1);
        sb.append(d);
        String date=sb.toString();
        return date;
    }

}
其中很有意思的是,上面获取的月份,比当前月份要少一个月,不知道这个是怎么理解(有人说老外是从0开始计算月份的,呵呵),于是加1代表当前月份。
然后在struts.xml中,配置一个action即可,不需要result,返回为null的。
 <action name="uploadfile" class="indexAction" method="uploadfile">
        action>
哦,既然有action,当然要有请求他的。这个请求是点击上传时候发生的,在config.js配置:
    //个人的配置
    config.filebrowserUploadUrl="/uploadfile.html";
在结束前插入这一句。我这里后面是html,是因为url重写的。默认情况就是上面的action name。
然后就是在各个页面引入编辑器框架。
<textarea rows="70" cols="80" name="content">textarea>
还要引入以下这个js:
最后是在页面头部引入框架的js:
顺序貌似说反了,大概就是这样。这个真心比百度编辑器好用,整合也简单方便。
