2019独角兽企业重金招聘Python工程师标准>>> 
20181228 ubuntu 18.04 安装 LNMP
开始时是要学习 Docker 中 安装 nginx、php、mysql的
开始的时候虚拟机上 ubuntu 18.04 an zhao按照官网已经安装过了 LAMP
然后就总是出现这样那样的错误!浪费无数脑细胞之后,决定从头开始!
安装完 ubuntu 18.04 之后,不要安装 LAMP ,而是按照 LNMP 的次序一步一步的来过!
1、安装 nginx
sudo apt install nginx

确认:查看端口
netstat -anp |grep 80
或者
sudo lsof -i:80
	COMMAND  PID     USER   FD   TYPE DEVICE SIZE/OFF NODE NAME
	nginx   1750     root    6u  IPv4  22825      0t0  TCP *:http (LISTEN)
	nginx   1750     root    7u  IPv6  22826      0t0  TCP *:http (LISTEN)
	nginx   1752 www-data    6u  IPv4  22825      0t0  TCP *:http (LISTEN)
	nginx   1752 www-data    7u  IPv6  22826      0t0  TCP *:http (LISTEN)

确认:cha查看 nginx 服务
sudo systemctl status nginx
2 、安装 php
sudo apt install php php-fpm
sudo apt-get install php7.2 php7.2-fpm
确认:查看版本
php -v
	PHP 7.2.10-0ubuntu0.18.04.1 (cli) (built: Sep 13 2018 13:45:02) ( NTS )
	Copyright (c) 1997-2018 The PHP Group
	Zend Engine v3.2.0, Copyright (c) 1998-2018 Zend Technologies
		with Zend OPcache v7.2.10-0ubuntu0.18.04.1, Copyright (c) 1999-2018, by Zend Technologies

确认:查看进程
ps -ef |grep php
	root     10848     1  0 12:41 ?        00:00:00 php-fpm: master process (/etc/php/7.2/fpm/php-fpm.conf)
	www-data 10862 10848  0 12:41 ?        00:00:00 php-fpm: pool www
	www-data 10863 10848  0 12:41 ?        00:00:00 php-fpm: pool www
	dhbm     10983  1232  0 12:48 pts/0    00:00:00 grep --color=auto php
3 、修改站点配置,测试 php 文件解析
1)、新建一个 php 文件
	cd /var/www/html
	sudo vim info.php
加入以下 3 行

2)、修改站点配置
cd /etc/nginx/sites-available/
	** a. 去掉 location ~ \.php$ { 这行的注释,同时去掉配对的 } 这行的注释
	** b. 去掉 fastcgi_pass unix:/var/run/php/php7.2-fpm.sock; 这行的注释
	** c. 同时,修改成对应的 php-fpm 版本号的文件名(我安装的是 php7.2)
3)、测试 nginx,重启 nginx 服务
nginx -t
		nginx: [alert] could not open error log file: open() "/var/log/nginx/error.log" failed (13: Permission denied)
	...

需要 sudo

sudo nginx -t
	nginx: [emerg] "fastcgi_pass" directive is not allowed here in /etc/nginx/sites-enabled/default:62
	nginx: configuration file /etc/nginx/nginx.conf test failed
按照错误提示的行号(我的错误在 62 行),检查以上 a,b,c 处修改正确否!

4)、纪录一下修改的结果
    location ~ \.php$ {
    include snippets/fastcgi-php.conf;
    #
    #       # With php-fpm (or other unix sockets):
    fastcgi_pass unix:/var/run/php/php7.2-fpm.sock;
    #       # With php-cgi (or other tcp sockets):
    # fastcgi_pass 127.0.0.1:9000;
    }

5)、正确测试结果
	sudo nginx -t
		nginx: the configuration file /etc/nginx/nginx.conf syntax is ok
		nginx: configuration file /etc/nginx/nginx.conf test is successful
6)、正确之后再重启 nginx 服务
	sudo systemctl restart nginx

	** 不确认的话,可以查看 nginx 服务状态!
		sudo systemctl status nginx
	**中途总是折腾不对时,多次 reboot ,实践证明:必须 nginx 测试正确后,重启服务才会正常!
7)、测试结果
	本地测试:
		curl 127.0.0.1
		curl 127.0.0.1/info.php
	浏览器测试:
		http://192.168.1.191/
		http://192.168.1.191/info.php
4、错误处理:nginx打开php文件总是显示下载,并开始下载我的 info.php 文件
这是之前学习时遇到的问题(另一个虚拟机)
原因同上!
5、错误处理:nginx打开php文件,显示 502 Bad Gateway
回头处理之前学习时遇到的问题(另一个虚拟机)
不出现下载了,但是,出来 502 Bad Gateway 错误
检查 /etc/nginx/sites-available/default 配置中 php部分
fastcgi_pass unix:/var/run/php/php7.2-fpm.sock;
cd /var/run/php/
ls
php7.2-fpm.pid
只有一个 pid 文件!没有发现存在这个文件 php7.2-fpm.sock ?
怎么安装的 php-fpm?
sudo vim /etc/nginx/sites-available/default
先改用 php-cgi 方式
fastcgi_pass 127.0.0.1:9000;
重启 php7.2-fpm 服务
sudo systemctl restart php7.2-fpm.service
重启 nginx
sudo systemctl restart nginx
再次测试
http://192.168.1.192/info.php
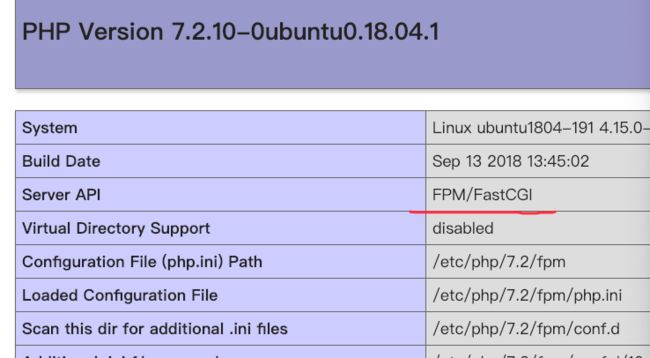
可以看到正确信息了
PHP Version 7.2.10-0ubuntu0.18.04.1
..
*** php-cgi 方式 和 php-fpm 方式差别在哪里来着?需要再次学习去!
***经过回忆:
之前的虚拟机上的 php 是直接按照ubuntu 18.04 官网介绍一次整体安装了 LAMP
之后是自己从头 LNMP 一个一个手工安装的!
6、安装 mysql
sudo apt install mysql-server

确认
	sudo netstat -tap | grep mysql
	tcp        0      0 localhost.localdo:mysql 0.0.0.0:*               LISTEN      2808/mysqld
7、设置 mysql 初始密码
sudo mysql_secure_installation
返回结果如下:
	Securing the MySQL server deployment.

	Connecting to MySQL using a blank password.

	VALIDATE PASSWORD PLUGIN can be used to test passwords
	and improve security. It checks the strength of password
	and allows the users to set only those passwords which are
	secure enough. Would you like to setup VALIDATE PASSWORD plugin?

	Press y|Y for Yes, any other key for No: y

	There are three levels of password validation policy:

	LOW    Length >= 8
	MEDIUM Length >= 8, numeric, mixed case, and special characters
	STRONG Length >= 8, numeric, mixed case, special characters and dictionary                  file

Please enter 0 = LOW, 1 = MEDIUM and 2 = STRONG: 0

** 学习用,简单设置 12345678
	后续一路 y
8、安装 phpmyadmin
** 我是按照ubuntu 18.04 官网操作的,但是,她主要针对得失 apache2
** 这次没有安装 apache2,所以,中途注意不要让它自动配置
** 拿不准的话,直接去下载 phpmyadmin 然后,按照 nginx 网站去配置

sudo apt install phpmyadmin
** 注意:Web 自动选择: apache ,lightd 一个都不选!

摘录一部分安装提示如下
...
	should most likely be provided in /usr/share/doc/phpmyadmin.
	...
	Creating config file /etc/phpmyadmin/config-db.php with new version
	...

收到以上提示信息影响,第一次我给配置到了 phpmyadmin 文档,也纪录一下
cd /usr/share/doc/phpmyadmin
ls
	changelog.Debian.gz  copyright  html            README            TODO.Debian
	CONTRIBUTING.md      examples   NEWS.Debian.gz  README.Debian.gz
9、新建一个网站 phpmyadmin
1)、为了统一,将 phpmyadmin ln 到 /var/www
	这是第一次错误的操作,ln 到 phpmyadmin 文档 了
	sudo ln -s /usr/share/doc/phpmyadmin/html /var/www/phpmyadmin

	正确的 ln 路径
	sudo ln -s /usr/share/phpmyadmin /var/www/phpmyadmin

2)、直接 cp default 过来修改
	cd /etc/nginx/sites-available/
	sudo cp default phpmyadmin

3)sudo vim /etc/nginx/site-available/phpmyadmin
	修改这个 phpmyadmin 以下 2 处
	listen 999;
	 root /var/www/phpmyadmin;

4)、连接到 sites-enabled
	sudo ln -s /etc/nginx/sites-available/phpmyadmin /etc/nginx/sites-enabled/phpmyadmin

5)测试、重启 nginx 服务
	sudo nginx -t
	必须测试正确!
	sudo systemctl restart nginx
10、 测试结果
本地先测试
curl 127.0.0.1:999
	出现403 错误
		403 Forbidden
	据说是首页没有加上 index.php

curl 127.0.0.1:999/index.php
	ok!说明 403确实是因为:首页没有加上 index.php

浏览器测试
http://192.168.1.191:999
出错误了:
403 Forbidden

加上 php文件路径
http://192.168.1.191:999/index.php

原因同上!

修改之后再来!
vim /etc/nginx/sites-availablephpmyadmin
	# Add index.php to the list if you are using PHP
	index index.php index.html index.htm index.nginx-debian.html;