Android实现与Apache Tomcat服务器数据交互(MySql数据库)
需求:Android客户端连接服务器端MySQL数据库中的内容
环境部署
服务器:apache-tomcat-8.5.9
语言版本:Java 1.8.0_101
编译环境:Eclipse
android Studio
调用jar包:httpclient-4.2.5,httpcore-4.2.4 //HttpClient父类
mysql-connector-java-5.1.40-bin //用于连接mysql数据库
思路:涉及到服务器端mysql数据库安装、web应用部分开发和Android客户端开发三个部分
步骤:
1、mysql数据库安装
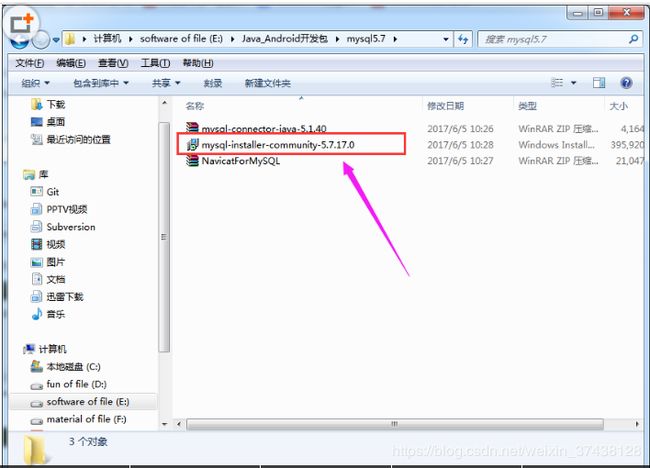
a、先安装mysql-installer-community-5.7.17.0,其中在Setup Type上选择“Server only”,然后记住数据库端口号和账号(例如:root)密码(例如:123456),如下图:

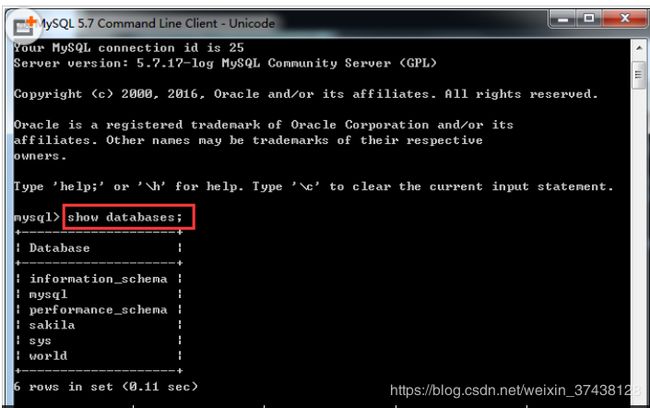
b、安装成功验证。命令行窗口输入密码,然后输入显示所有数据库命令:show databases; 一定要有分号,并按回车。

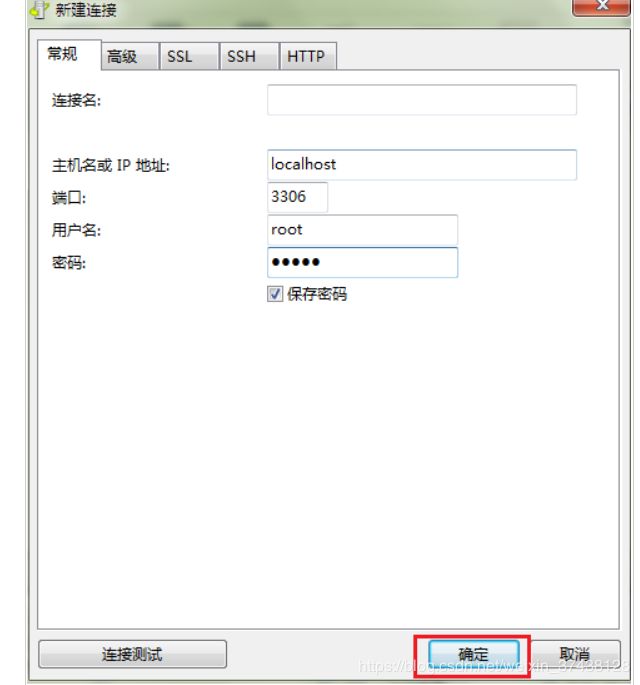
c、NavicatforMySQL下载及使用。注册,然后连接数据库,输入密码后,能够看到已存在的数据库,可以在其中进行相关数据库和数据表的创建操作。

2、web应用部分开发
a、新建servlet,并且配置好web.xml中的相应信息(在WebContent下的WEB-INF文件夹下加入web.xml文件来连接servlet与jsp前端),此外还需在libs中添加mysql-connector-java-5.1.37-bin.jar文件,代码如下:
package com.Servlet;
import java.io.IOException;
import javax.servlet.ServletException;
import javax.servlet.annotation.WebServlet;
import javax.servlet.http.HttpServlet;
import javax.servlet.http.HttpServletRequest;
import javax.servlet.http.HttpServletResponse;
import java.io.PrintWriter;
import java.sql.Connection;
import java.sql.ResultSet;
import java.sql.Statement;
import com.DBTool.DBUtil;
@WebServlet("/Servlet")
public class Login extends HttpServlet {
private static final long serialVersionUID = L;
/**
* @see HttpServlet#HttpServlet()
*/
public Login() {
super();
// TODO Auto-generated constructor stub
}
/**
* @see HttpServlet#doGet(HttpServletRequest request, HttpServletResponse response)
*/
protected void doGet(HttpServletRequest request, HttpServletResponse response) throws ServletException, IOException {
// TODO Auto-generated method stub
response.getWriter().append("Served at: ").append(request.getContextPath());
}
/**
* @see HttpServlet#doPost(HttpServletRequest request, HttpServletResponse response)
*/
protected void doPost(HttpServletRequest request, HttpServletResponse response) throws ServletException, IOException {
String ID = request.getParameter("ID");
String PW= request.getParameter("PW");
boolean type=false;
response.setContentType("text/html; charset=UTF-8");
PrintWriter out = response.getWriter();
try
{
Connection con=DBUtil.getConnection();
Statement stmt=con.createStatement();
//mysql数据库中的数据表,表名叫:demotable ,需要自己预先在数据库中进行创建,包含相应的字段和记录。
String sql="select * from mysql.demotable where uid="+ID+" and pwd="+PW;
ResultSet rs=stmt.executeQuery(sql);
while(rs.next())
{
type=true;
}
}
catch(Exception ex)
{
ex.printStackTrace();
}
finally
{
DBUtil.Close();
out.print(type);
out.flush();
out.close();
}
}
}
web.xml内容如下:
xml version="1.0" encoding="UTF-8"?>
<web-app id="WebApp_ID" version="2.4" xmlns="http://java.sun.com/xml/ns/j2ee" xmlns:xsi="http://www.w3.org/2001/XMLSchema-instance" xsi:schemaLocation="http://java.sun.com/xml/ns/j2ee http://java.sun.com/xml/ns/j2ee/web-app_2_4.xsd">
<display-name>webdisplay-name>
<servlet>
<display-name>Logindisplay-name>
<servlet-name>Loginservlet-name>
<servlet-class>com.Servlet.Loginservlet-class>
servlet>
<servlet-mapping>
<servlet-name>Loginservlet-name>
<url-pattern>/Loginurl-pattern>
servlet-mapping>
<welcome-file-list>
<welcome-file>index.htmlwelcome-file>
<welcome-file>index.jspwelcome-file>
welcome-file-list>
web-app>
b、前端界面设计(TestPage.jsp)如下:
<%@ page language="java" contentType="text/html; charset=UTF-8" pageEncoding="UTF-8"%>
"-//W3C//DTD HTML 4.01 Transitional//EN" "http://www.w3.org/TR/html4/loose.dtd">
"Content-Type" content="text/html; charset=UTF-8">
用户名 "text" name="ID">密码 "password" name="PW">"2" align="center">"submit" value="登陆"/>
c、在java Resources下的src文件夹中新建com.DBTool包,用作数据池来连接数据库,在包中建立DBUtil类实现功能,代码如下:
package com.DBTool;
import java.sql.*;
public class DBUtil {
//其中mysql是数据库名称,在mysql57版本的数据库中已经预先新建完成;3306是mysql数据库的端口号。
private static String url="jdbc:mysql://localhost:3306/mysql";
//com.mysql.jdbc.Driver是mysql-connector-java-5.1.40中的驱动包路径
private static String driverClass="com.mysql.jdbc.Driver";
//mysql的账号和密码是在安装mysql中进行设置的,这里拿来用即可。
private static String username="root";
private static String password="123456";
private static Connection conn;
//装载驱动
static{
try{
Class.forName(driverClass);
}
catch(ClassNotFoundException e){
e.printStackTrace();
}
}
//获取数据库连接
public static Connection getConnection(){
try{
conn=DriverManager.getConnection(url,username,password);
}
catch(SQLException e){
e.printStackTrace();
}
return conn;
}
//建立数据库连接
public static void main(String[] args){
Connection conn=DBUtil.getConnection();
if(conn!=null){
System.out.println("数据库连接成功");
}
else{
System.out.println("数据库连接失败");
}
}
//关闭数据库连接
public static void Close(){
if(conn!=null){
try{
conn.close();
}
catch(SQLException e){
e.printStackTrace();
}
}
}
}
d、运行服务器,测试是否成功搭建。