zookeeper+hadoop+hbase伪分布式安装最全教程
zookeeper+hadoop+hbase伪分布式安装最全教程
zookeeper+hadoop+hbase伪分布式安装最全教程
这里先介绍以下安装环境以及配置:
1.ubuntu18
2.jdk1.8
3.zookeeper3.4.12
4.hadoop2.8.5
5.hbase2.2.2
1.jdk的安装
jdk的安装就不需要多讲了,简单过一下:
1.下载jdk1.8压缩包
2.解压至自己的期望的安装目录
3.配置环境变量
vim /etc/profile
如果不会用vim的话,就首先按insert键,然后用方向键将光标移到指定的地方,复制粘贴即可,之后按esc键,输入:wq!退出。
切忌这个路径是自己jdk安装的路径
#java
export JAVA_HOME=/home/user802/bigdata/jdk1.8.0_201
export  PATH=${JAVA_HOME}/bin:$PATH
之后调用下面这句话让环境变量立即生效,也可以重启电脑
source /etc/profile
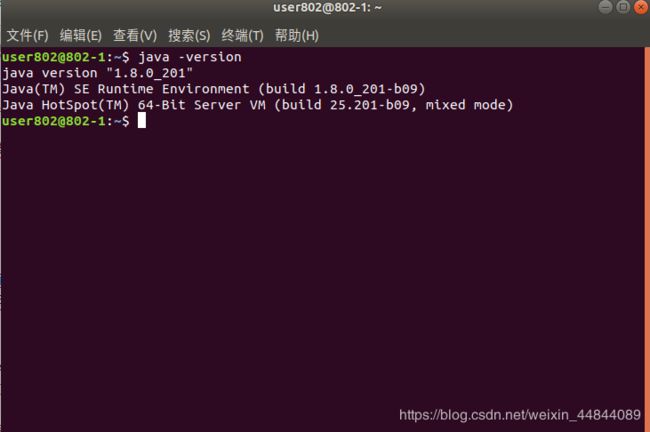
查看java版本
2.zookeeper的安装
1.下载相应版本的压缩包
2.解压在期望安装目录下
3.修改配置文件
在zookeeper包下的conf目录下找到zoo_sample.cfg文件。
拷贝一份重命名为zoo.cfg文件。
打开文件,将以下内容全部放进去,当然前提是以前的全部删掉。
# The number of milliseconds of each tick
tickTime=2000
# The number of ticks that the initial
# synchronization phase can take
initLimit=10
# The number of ticks that can pass between
# sending a request and getting an acknowledgement
syncLimit=5
# the directory where the snapshot is stored.
# do not use /tmp for storage, /tmp here is just
# example sakes.
dataDir=/home/user802/bigdata/zookeeper-3.4.12/data
dataLogDir=/home/user802/bigdata/zookeeper-3.4.12/logs
# the port at which the clients will connect
clientPort=2181
# the maximum number of client connections.
# increase this if you need to handle more clients
#maxClientCnxns=60
#
# Be sure to read the maintenance section of the
# administrator guide before turning on autopurge.
#
# http://zookeeper.apache.org/doc/current/zookeeperAdmin.html#sc_maintenance
#
# The number of snapshots to retain in dataDir
#autopurge.snapRetainCount=3
# Purge task interval in hours
# Set to "0" to disable auto purge feature
#autopurge.purgeInterval=1
其实里面的重点就是添加了三个东西:
所以我们前提要在zookeeper下建好这两个文件夹,这两个文件夹就是zookeeper的数据和日志的存放地址
 dataDir=/home/user802/bigdata/zookeeper-3.4.12/data
 dataLogDir=/home/user802/bigdata/zookeeper-3.4.12/logs
 clientPort=2181
4.配置环境变量
vim /etc/profile
加入下面内容,记得路径是自己的安装路径
#zookeeper
export ZOOKEEPER_HOME=/home/user802/bigdata/zookeeper-3.4.12
export PATH=$ZOOKEEPER_HOME/bin:$PATH
5.运行zookeeper
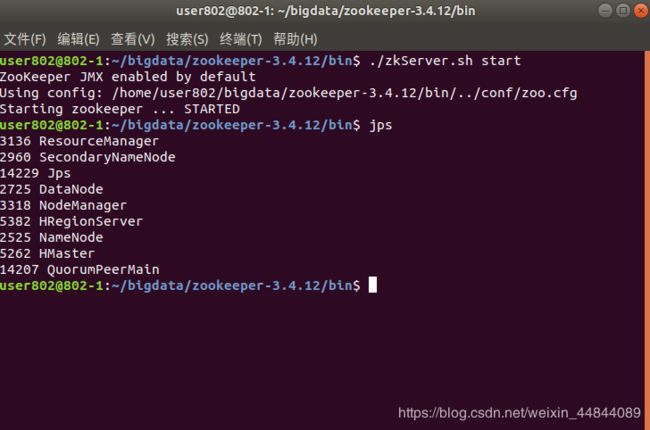
在zookeeper下的bin目录下打开终端:
./zkServer.sh start
然后用jps命令查看是否启动了,可以看到QuorumPeerMain这个已经启动了,那就意味着运行成功,这里还有其他的节点,不用管,这是我已经运行的hadoop和hbase节点
3.hadoop安装
1.设置ssh免密登陆
好像用这个一路回车就可以了,如果不行的话,上网查设置ssh免密登陆就可以,很简单的东西
ssh-keygen -t rsa -P ""
2.下载压缩包和解压到期望路径
3.配置环境变量
vim /etc/profile
添加下面两行
#hadoop
export HAOOP_HOME=/home/user802/bigdata/hadoop
export PATH=${HAOOP_HOME}/bin:$PATH
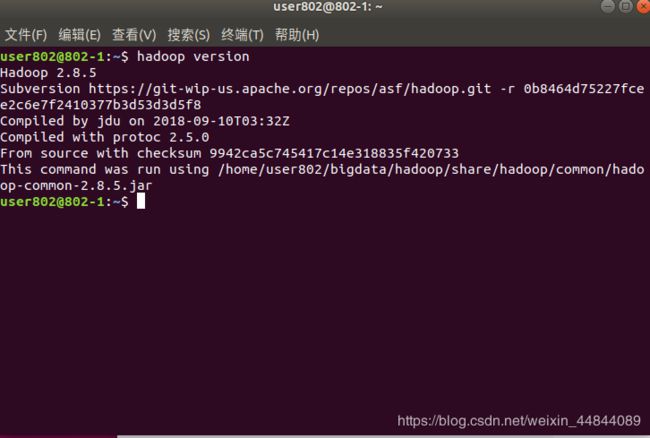
4.查看hadoop版本
一般来说这时候就差配置文件的修改了,是可以查看版本的,这里有点记不清楚了,其实这一步不看也可以
hadoop version
5.修改配置文件
这一步真的是重重之中,很容易就会出错,而且不同的博主给的配置文件不一样,但是大体都一样,我这里配置的是伪分布式,所以大家如果版本和我一样,那么就可以直接完全复制,但是里面的路径要自己改哦
我们要修改的配置文件有5个,都在hadoop/etc/hadoop下:
1.hadoop-env.sh
将我们自己安装的jdk路径配进去,这里是添加这一行就行
export JAVA_HOME=/home/user802/bigdata/jdk1.8.0_201
2.core-site.xml
将这一段换进去 里面应该只有
但是路径也要自己创建相应的路径噢
      hadoop.tmp.dir
      /home/user802/bigdata/hadoop/hdfs/data
    A base for other temporary directories.


     fs.default.name
     hdfs://localhost:9000
fs.default.name 保存了NameNode的位置,HDFS和MapReduce组件都需要用到它,这就是它出现在core-site.xml 文件中而不是 hdfs-site.xml文件中的原因
3.hdfs-site.xml
这里有写博主会提前改主机名,将localhost换成ip,或者其他的名字,我这里就没有换,直接用localhost
        dfs.namenode.name.dir
        /home/user802/bigdata/hadoop/hdfs/name


        dfs.datanode.data.dir
        /home/user802/bigdata/hadoop/hdfs/data1


        dfs.namenode.secondary.http-address
        localhost:9001


        dfs.webhdfs.enabled
        true


    dfs.replication
    1
4.yarn-site.xml
        yarn.nodemanager.aux-services
        mapreduce_shuffle
5.mapred-site.xml 也可能是mapred-site.xml.template
    mapred.job.tracker
    localhost:9001
到这里配置文件就配置完了 下面就是启动了
6.启动hadoop
在hadoop的sbin目录下打开终端:
输入:
./start-dfs.sh
./start-yarn.sh
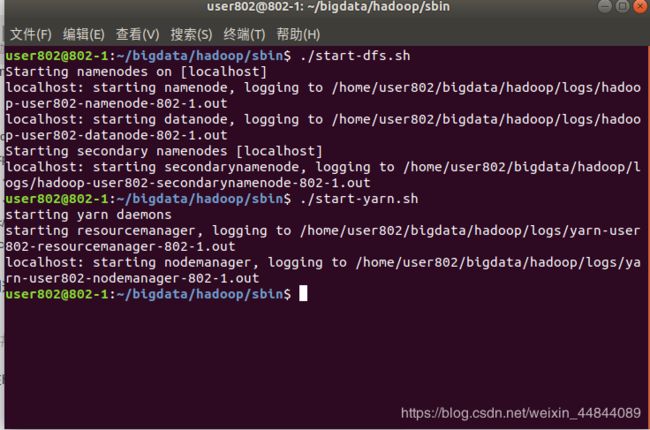
用jps命令查看节点是否启动:
 可以看到上面的五个节点都是我们刚刚启动的!
到这里我们的hadoop就已经完成了!
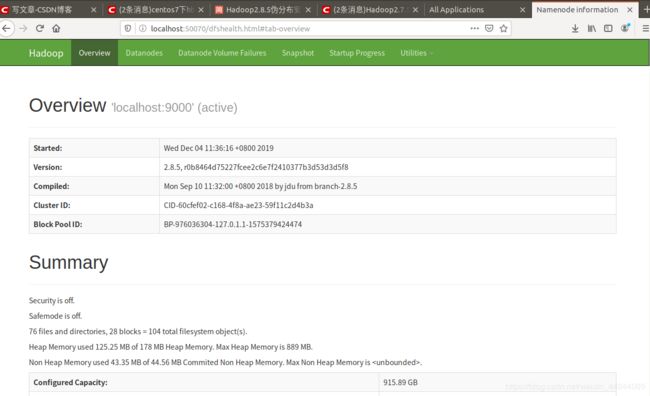
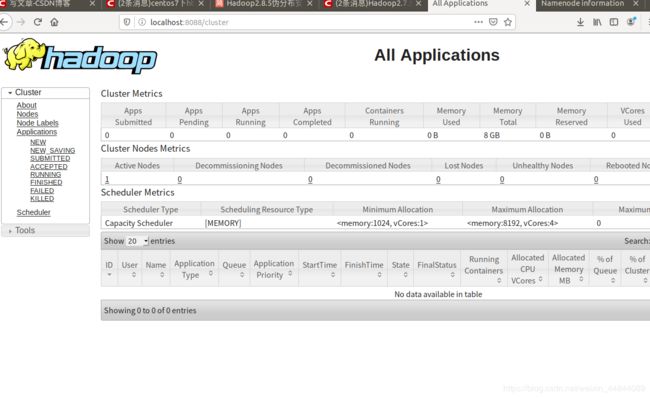
然后我们可以在下面两个网页监控:
http://localhost:50070
http://localhost:8088
4.hbase安装
1.下载安装包压缩指定目录
2.配置环境变量
vim /etc/profile
#hbase
export HBASE_HOME=/home/user802/bigdata/hbase
export PATH=$HBASE_HOME/bin:$PAT
3.修改配置文件
都在hbase/conf目录下
1.hbase-env.sh
添加路径变量
这里第二行的作用是不使用hbase自带的zookeeper
export JAVA_HOME="/home/user802/bigdata/jdk1.8.0_201"
export HBASE_MANAGES_ZK=false
2.hbase-site.xml
这里面可以说是最全的配置了记住里面有文件路径的话就改为自己的路径就行
        hbase.rootdir
        hdfs://localhost:9000/hbase


        hbase.cluster.distributed
        true


        hbase.master
        localhost:60000


        hbase.tmp.dir
        /home/user802/bigdata/hbase/tmp


        hbase.zookeeper.quorum
        localhost


        hbase.zoopkeeper.property.dataDir
        /home/user802/bigdata/zookeeper-3.4.12/data


        hbase.zookeeper.property.clientPort
        2181


        hbase.regionserver.info.port
        16030


    	hbase.master.info.port
    	16010


        hbase.unsafe.stream.capability.enforce
        false


        zookeeper.znode.parent
        /hbase-unsecure
3.regionservers
这里面打开一看应该是localhost 就用这个就行
4.可能会遇见的问题
1.当我们查看hbase版本的时候,可能会出现这样的错误
错误: 找不到或无法加载主类 org.apache.hadoop.hbase.util.GetJavaProperty
这里给大家推荐一个博主的博客:
https://blog.csdn.net/pycrossover/article/details/102627807
这里面可以完美解决
2.还有就是slf4j的包冲突 如果我们设置了不用自带的zookeeper,那应该没这样的问题,如果还有的话,可以做以下两部:
1)将hbase中zookeeper中的jar包换成zookeeper目录下的jar包
2)将hbase中的log4,slf4j的包全部删除掉
 3.我之前遇见一种情况就是建表的时候新诗错误:
ERROR: KeeperErrorCode = NoNode for /hbase/master
这个其实就是我们的配置文件有问题,上面那个博客中有讲到
5.启动hbase
在bin目录下打开终端:
./start-hbase.sh
用jps查看
HMaster,HRegionServer这两个端口都运行了
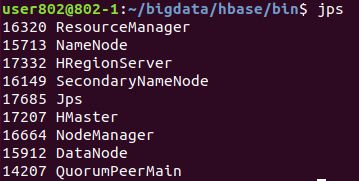
这样基本就完美了
给大家推荐hbase基本命令使用的博客:
https://www.cnblogs.com/kw28188151/p/8679331.html
