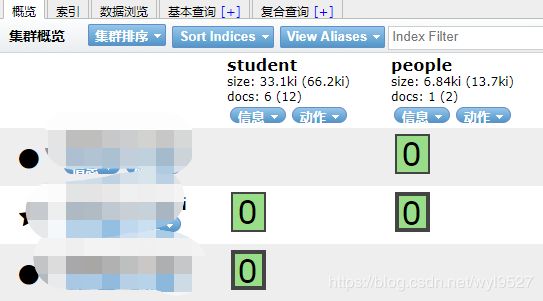
elasticsearch的数据迁移
[root@wyl01 opt]# curl -XPUT 'http://192.168.52.128:9200/_snapshot/my_backup' -H 'Content-Type: application/json' -d '{
>   "type": "fs",
>   "settings": {"compress" : "true",
>     "location": "/usr/local/esbackup"
>   }
> }'
{
    "error":{
        "root_cause":[
            {
                "type":"repository_verification_exception",
                "reason":"[my_backup] [[cKxbRsb1QyKZdOEy0EpXVQ, 'RemoteTransportException[[wyl01][192.168.52.128:9300][internal:admin/repository/verify]]; nested: RepositoryVerificationException[[my_backup] a file written by master to the store [/usr/local/esbackup] cannot be accessed on the node [{wyl01}{cKxbRsb1QyKZdOEy0EpXVQ}{2qdc81O-SgGdQ6ks-EZPMA}{192.168.52.128}{192.168.52.128:9300}{dim}{ml.machine_memory=1023934464, xpack.installed=true, ml.max_open_jobs=20}]. This might indicate that the store [/usr/local/esbackup] is not shared between this node and the master node or that permissions on the store don't allow reading files written by the master node];'], [uPPig2SwTdyDEuoqYkPj3Q, 'RemoteTransportException[[wyl02][192.168.52.129:9300][internal:admin/repository/verify]]; nested: RepositoryVerificationException[[my_backup] a file written by master to the store [/usr/local/esbackup] cannot be accessed on the node [{wyl02}{uPPig2SwTdyDEuoqYkPj3Q}{2dUU28QZReCCCLXeq-DNhg}{192.168.52.129}{192.168.52.129:9300}{dim}{ml.machine_memory=1023934464, xpack.installed=true, ml.max_open_jobs=20}]. This might indicate that the store [/usr/local/esbackup] is not shared between this node and the master node or that permissions on the store don't allow reading files written by the master node];']]"
            }
        ],
        "type":"repository_verification_exception",
        "reason":"[my_backup] [[cKxbRsb1QyKZdOEy0EpXVQ, 'RemoteTransportException[[wyl01][192.168.52.128:9300][internal:admin/repository/verify]]; nested: RepositoryVerificationException[[my_backup] a file written by master to the store [/usr/local/esbackup] cannot be accessed on the node [{wyl01}{cKxbRsb1QyKZdOEy0EpXVQ}{2qdc81O-SgGdQ6ks-EZPMA}{192.168.52.128}{192.168.52.128:9300}{dim}{ml.machine_memory=1023934464, xpack.installed=true, ml.max_open_jobs=20}]. This might indicate that the store [/usr/local/esbackup] is not shared between this node and the master node or that permissions on the store don't allow reading files written by the master node];'], [uPPig2SwTdyDEuoqYkPj3Q, 'RemoteTransportException[[wyl02][192.168.52.129:9300][internal:admin/repository/verify]]; nested: RepositoryVerificationException[[my_backup] a file written by master to the store [/usr/local/esbackup] cannot be accessed on the node [{wyl02}{uPPig2SwTdyDEuoqYkPj3Q}{2dUU28QZReCCCLXeq-DNhg}{192.168.52.129}{192.168.52.129:9300}{dim}{ml.machine_memory=1023934464, xpack.installed=true, ml.max_open_jobs=20}]. This might indicate that the store [/usr/local/esbackup] is not shared between this node and the master node or that permissions on the store don't allow reading files written by the master node];']]"
    },
    "status":500
}
安装 NFS 服务器所需的软件包
[root@wyl01 opt]# yum install -y nfs-utils
编辑exports文件,添加从机器
[root@wyl01 opt]# vim /etc/exports
/usr/local/esbackup 192.168.52.129(rw,sync,fsid=0)  192.168.52.130(rw,sync,fsid=0)
注意:
129,130两台机器可以挂载NFS服务器上的/data目录到自己的文件系统中
rw表示可读写;sync表示同步写
启动nfs服务
systemctl enable rpcbind.service
systemctl enable nfs-server.service


systemctl start rpcbind.service
systemctl start nfs-server.service
确认NFS服务器启动成功
[root@wyl01 elasticsearch-7.3.0]# rpcinfo -p|grep nfs
    100003    3   tcp   2049  nfs
    100003    4   tcp   2049  nfs
    100227    3   tcp   2049  nfs_acl
    100003    3   udp   2049  nfs
    100003    4   udp   2049  nfs
    100227    3   udp   2049  nfs_acl
检查 NFS 服务器是否挂载我们想共享的目录 /usr/local/esbackup
[root@wyl01 usr]# exportfs
/usr/local/esbackup
		192.168.52.129
/usr/local/esbackup
		192.168.52.130
在从机上安装NFS 客户端
首先是安裝nfs,同上,然后启动rpcbind服务
#rpcbind做开机启动
systemctl enable rpcbind.service

#启动rpcbind服务
systemctl start rpcbind.service
注意:客户端不需要启动nfs服务
在从机上使用 mount 挂载服务器端的目录/usr/local/esbackup到客户端的/usr/local/esbackup目录下
[root@wyl02 opt]# mkdir -p /usr/local/esbackup
[root@wyl02 opt]# mount -t nfs 192.168.52.128:/usr/local/esbackup /usr/local/esbackup

[root@wyl03 opt]# mkdir -p /usr/local/esbackup
[root@wyl03 opt]# mount -t nfs 192.168.52.128:/usr/local/esbackup /usr/local/esbackup
开始创建仓库
[root@wyl01 elasticsearch-7.3.0]# curl -XPUT 'http://192.168.52.128:9200/_snapshot/my_backup' -H 'Content-Type: application/json' -d '{
>   "type": "fs",
>   "settings": {"compress" : "true",
>     "location": "/usr/local/esbackup"
>   }
> }'
{"acknowledged":true}
查看仓库。
其实如果返回下面的值,表示建立成功
[root@wyl01 elasticsearch-7.3.0]# curl -XGET 'http://192.168.52.128:9200/_snapshot?pretty'
{
  "my_backup" : {
    "type" : "fs",
    "settings" : {
      "compress" : "true",
      "location" : "/usr/local/esbackup"
    }
  }
}
{"acknowledged":true}
备份索引
[root@wyl01 opt]# curl -XPUT 'http://192.168.52.128:9200/_snapshot/my_backup/snapshot_1'
{"accepted":true}
我们查看一下备份数据吧,查看的命令如下
[root@wyl01 elasticsearch-7.3.0]# curl -XGET 'http://192.168.52.128:9200/_snapshot/my_backup/snapshot_1'
{
    "snapshots":[
        {
            "snapshot":"snapshot_1",
            "uuid":"7yRvCNeVRNWEm-Gm4cIBEQ",
            "version_id":7030099,
            "version":"7.3.0",
            "indices":[
                "people",
                "student"
            ],
            "include_global_state":true,
            "state":"SUCCESS",
            "start_time":"2019-09-02T07:22:36.931Z",
            "start_time_in_millis":1567408956931,
            "end_time":"2019-09-02T07:22:37.458Z",
            "end_time_in_millis":1567408957458,
            "duration_in_millis":527,
            "failures":[

            ],
            "shards":{
                "total":2,
                "failed":0,
                "successful":2
            }
        }
    ]
}
迁入地集群也需要配置elasticsearch.yml文件,增加path.repo的配置。
目标ES集群中创建repository
[root@lhf01 elasticsearch-7.3.0]# curl -XGET 'http://192.168.12.11:9200/_snapshot?pretty'
{
  "my_backup" : {
    "type" : "fs",
    "settings" : {
      "compress" : "true",
      "location" : "/usr/local/esbackup"
    }
  }
}
{"acknowledged":true}
将源es的快照文件拷贝到目标es的esbackup目录下,然后就可以从中读出信息
[root@lhf01 elasticsearch-7.3.0]# curl -XGET 192.168.12.11:9200/_snapshot/my_backup/_all
{
    "snapshots":[
        {
            "snapshot":"snapshot_1",
            "uuid":"7yRvCNeVRNWEm-Gm4cIBEQ",
            "version_id":7030099,
            "version":"7.3.0",
            "indices":[
                # 可以看到2个索引
                "people",
                "student"
            ],
            "include_global_state":true,
            "state":"SUCCESS",
            "start_time":"2019-09-02T07:22:36.931Z",
            "start_time_in_millis":1567408956931,
            "end_time":"2019-09-02T07:22:37.458Z",
            "end_time_in_millis":1567408957458,
            "duration_in_millis":527,
            "failures":[

            ],
            "shards":{
                "total":2,
                "failed":0,
                "successful":2
            }
        }
    ]
}
备份数据迁移
[root@lhf01 elasticsearch-7.3.0]# curl -XPOST 'http://192.168.12.11.13:9200/_snapshot/my_backup/snapshot_1/_restore'
{"accepted":true}

