Android 滑动标题导航栏
我的视频课程:《FFmpeg打造Android万能音频播放器》
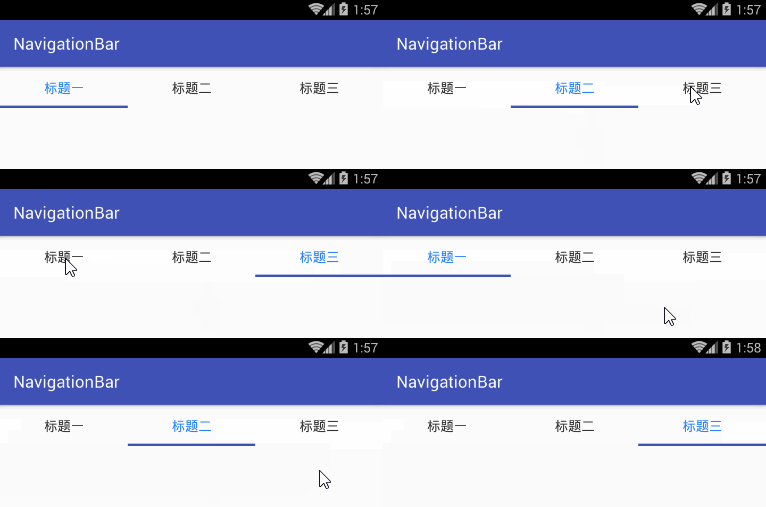
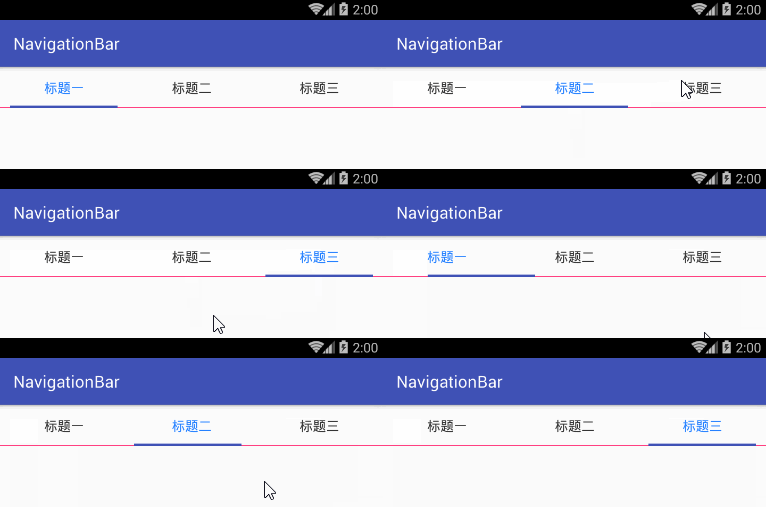
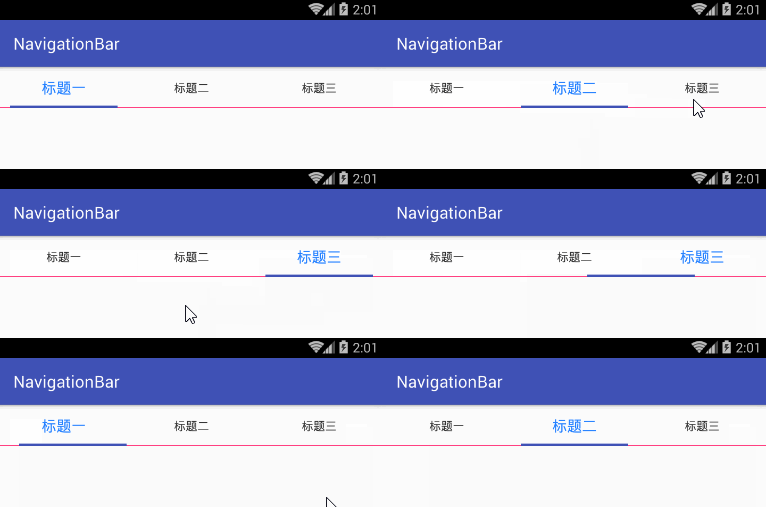
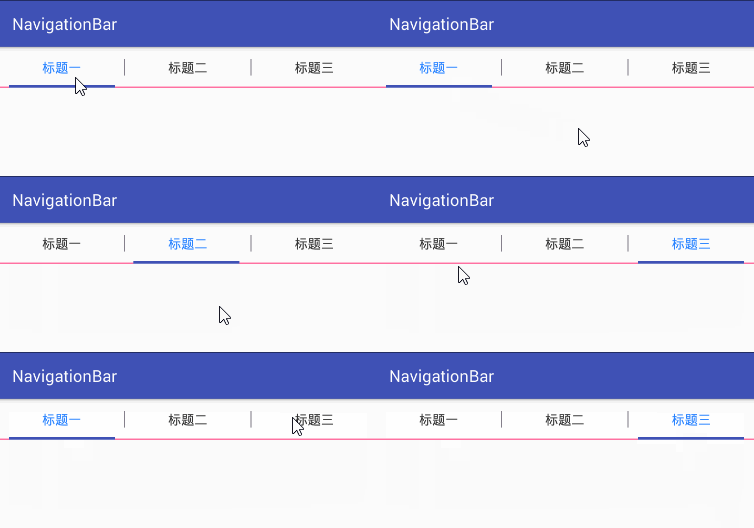
现在Android应用开发中因为功能比较多所以都喜欢用viewpager+fragment的方式加入更多的页面,而每每使用这种模式,标题栏导航也是必不可少的,因此又会重复写很多导航菜单的代码,程序猿都是很懒的,都想写少量的代码就把功能实现了,更何况这都是写重复的代码,不辞辛劳的程序猿就成了CV战士了哈哈。我也是很懒的,不想每次都重复写那些没用的代码,所以就把标题导航栏这块功能封装成了一个自定义的控件,使用起来就三两句代码搞定,是不是听着很爽 反正我是觉得爽了。废话不多说,先上示例图片,所谓有图有真相:
综合类型:
1、第一种类型(只有滑动导航条):
2、第二种类型(滑动导航条有背景色)
3、第三种类型(滑动导航条有边距)
4、第四种类型(选中标题栏文字变大)
5、第五中类型(标题栏直接具有分隔条)
以上这些效果的实现代码只有下面几句(核心语句,去除初始化和布局代码):
navitationLayout.setViewPager(this, titles, viewPager, R.color.color_333333, R.color.color_2581ff, 16, 16, 0, 12, true, R.color.color_333333, 1f, 15f, 15f);
        navitationLayout.setBgLine(this, 1, R.color.colorAccent);
navitationLayout.setNavLine(this, 3, R.color.colorPrimary, 0);通过我们的需求不难发现,第一要生成标题栏的每个标题(TextView),然而标题又是横向排列的,所以自然就想到了我们的线性布局(LinearLayout),通过代码动态添加标题栏到LinearLayout中;最基本的就实现了,然后再看需求,我们还需要再底部添加导航条,因为导航条在底部,然后还具有背景色,所以我们用相对布局(RelativeLayout)来布局是比较好的,这样基本框架就可以了(父布局是相对布局,里面添加包含标题栏的线性布局,再在底部添加导航条背景布局,再在导航条背景上面添加导航条)。剩下的就是颜色,长款等细节问题的处理了。
3、功能逻辑代码
(1):标题栏
private void setTitles(Context context, String[] titles, final boolean smoothScroll)
    {
        this.textViews = new TextView[titles.length];
        LinearLayout.LayoutParams params = new LinearLayout.LayoutParams(0,LayoutParams.MATCH_PARENT);
        params.weight = 1;
        params.gravity = Gravity.CENTER;
        // 循环,根据标题栏动态生成TextView来显示标题,每个标题栏的宽度比例为1:1,其中的内容居中。
        for(int i = 0; i < titles.length; i++)
        {
            final int index = i;
            TextView textView = new TextView(context);
            textView.setText(titles[i]);
            textView.setGravity(Gravity.CENTER);
            textViews[i] = textView;
            textViews[i].setOnClickListener(new OnClickListener() {
                @Override
                public void onClick(View v) {
                    viewPager.setCurrentItem(index, smoothScroll);
                    if(onTitleClickListener != null)
                    {
                        onTitleClickListener.onTitleClick(v);
                    }
                }
            });
            titleLayout.addView(textView, params);
        }
}(2):设置导航条背景
/**
     * 设置导航背景色
     * @param context
     * @param height
     * @param color
     */
    public void setBgLine(Context context, int height, int color)
    {
        height = dip2px(context,height);
        LayoutParams layoutParams = new LayoutParams(LayoutParams.MATCH_PARENT, height);
        bgLine = new View(context);
        bgLine.setLayoutParams(layoutParams);
        bgLine.setBackgroundColor(context.getResources().getColor(color));

        LayoutParams lp = new LayoutParams(LayoutParams.MATCH_PARENT, height);
        lp.addRule(RelativeLayout.ALIGN_PARENT_BOTTOM, RelativeLayout.TRUE);
        addView(bgLine, lp);
    }
也是用代码为导航条添加背景view。
(3):添加导航条
/**
     * 设置导航条颜色
     * @param context
     * @param height
     * @param color
     * @param currentPosition
     */
    public void setNavLine(Activity context, int height, int color, int currentPosition)
    {
        if(textViews != null)
        {
            navWidth = getScreenWidth(context) / textViews.length;
        }
        height = dip2px(context,height);
        System.out.println("width:" + navWidth);

        LayoutParams layoutParams = new LayoutParams(LayoutParams.MATCH_PARENT, height);
        navLine = new View(context);
        navLine.setLayoutParams(layoutParams);
        navLine.setBackgroundColor(context.getResources().getColor(color));

        LayoutParams lp = new LayoutParams(navWidth, height);
        lp.addRule(RelativeLayout.ALIGN_PARENT_BOTTOM, RelativeLayout.TRUE);
        addView(navLine, lp);
        moveBar(navLine, navWidth, widOffset, currentPosition);
}(4):移动导航条功能
private void moveBar(View bar, int width, float percent, int position) {
        RelativeLayout.LayoutParams lp = (RelativeLayout.LayoutParams) bar.getLayoutParams();
        int marginleft = (position) * width + (int) (width * percent);
        lp.width = width - widOffset * 2;
        lp.setMargins(marginleft + widOffset, 0, widOffset, 0);
        bar.requestLayout();
}(5)调用方法的设置
/**
     *
     * @param context 上下文
     * @param titles 标题栏
     * @param viewPager
     * @param unselectedcolor 未选中字体颜色
     * @param setectedcolor 选中字体颜色
     * @param txtUnselectedSize 未选中字体大小
     * @param txtSelectedSize 选中字体大小
     * @param currentPosition 当前viewpager的位置
     * @param widOffset 导航条的边距
     * @param smoothScroll 滑动类型
     */
    public void setViewPager(final Context context, String[] titles, ViewPager viewPager, final int unselectedcolor, final int setectedcolor, int txtUnselectedSize, final int txtSelectedSize, final int currentPosition, int widOffset, boolean smoothScroll)
    {
        this.viewPager = viewPager;
        this.txtUnselectedColor = unselectedcolor;
        this.txtSelectedColor = setectedcolor;
        this.txtUnselectedSize = txtUnselectedSize;
        this.txtSelectedSize = txtSelectedSize;
        this.widOffset = dip2px(context, widOffset);

        viewPager.setCurrentItem(currentPosition);
        setTitles(context, titles, smoothScroll);
        setUnselectedTxtColor(context, unselectedcolor, txtUnselectedSize);
        setSelectedTxtColor(context, setectedcolor, txtSelectedSize, currentPosition);
        viewPager.setOnPageChangeListener(new ViewPager.OnPageChangeListener() {
            @Override
            public void onPageScrolled(int position, float positionOffset, int positionOffsetPixels) {
                moveBar(navLine, navWidth, positionOffset, position);
                if(onNaPageChangeListener != null)
                {
                    onNaPageChangeListener.onPageScrolled(position, positionOffset, positionOffsetPixels);
                }
            }

            @Override
            public void onPageSelected(int position) {
                setSelectedTxtColor(context, setectedcolor, txtSelectedSize, position);
                if(onNaPageChangeListener != null)
                {
                    onNaPageChangeListener.onPageSelected(position);
                }
            }

            @Override
            public void onPageScrollStateChanged(int state) {
                if(onNaPageChangeListener != null)
                {
                    onNaPageChangeListener.onPageScrollStateChanged(state);
                }
            }
        });
}核心代码就是这样的了,其他两种类型类似,这里就不多说了,可以看源码哦。
完整项目源码下载地址:
1、CSDN:NavigationBar
2、Github:NavigationBar
欢迎各位使用和start


