greendao是如何实现查询操作的,多线程是否安全?
想要了解GreenDao如何进行数据库CRUD操作,那么可以看源码。
查询:
先看最简单最容记得查询方法queryBuilder().list()。
/** Executes the query and returns the result as a list containing all entities loaded into memory. */
    public List list() {
        checkThread();
        Cursor cursor = dao.getDatabase().rawQuery(sql, parameters);
        return daoAccess.loadAllAndCloseCursor(cursor);
    }
通过sql语句进行查询,然后返回一个游标。根据这个游标进行处理。查看下方法实现
/** Reads all available rows from the given cursor and returns a list of entities. */
    protected List loadAllFromCursor(Cursor cursor) {
        int count = cursor.getCount();
        if (count == 0) {
            return new ArrayList();
        }
        List list = new ArrayList(count);
        CursorWindow window = null;
        boolean useFastCursor = false;
        if (cursor instanceof CrossProcessCursor) {
            window = ((CrossProcessCursor) cursor).getWindow();
            if (window != null) { // E.g. Robolectric has no Window at this point
                if (window.getNumRows() == count) {
                    cursor = new FastCursor(window);
                    useFastCursor = true;
                } else {
                    DaoLog.d("Window vs. result size: " + window.getNumRows() + "/" + count);
                }
            }
        }

        if (cursor.moveToFirst()) {
            if (identityScope != null) {
                identityScope.lock();
                identityScope.reserveRoom(count);
            }

            try {
                if (!useFastCursor && window != null && identityScope != null) {
                    loadAllUnlockOnWindowBounds(cursor, window, list);
                } else {
                    do {
                        list.add(loadCurrent(cursor, 0, false));
                    } while (cursor.moveToNext());
                }
            } finally {
                if (identityScope != null) {
                    identityScope.unlock();
                }
            }
        }
        return list;
    }
看到这里,发现和我们自己写SQLite原生查询的时候处理游标差不多。
它首先判断cursor是否为空,接着新建List,再从游标中读取数据存进list中然后返回,整体理解起来不难。那么它转化成我们需要的对象是在loadCurrent()这个方法中。
final protected T loadCurrent(Cursor cursor, int offset, boolean lock)
所以总体思路是这样:
我们调用实体类Dao的queryBuilder().list()方法,接着它使用SQL语句进行数据库查询,返回一个cursor,再对cursor进行解析,解析cursor的方法是
final protected T loadCurrent(Cursor cursor, int offset, boolean lock),存进List中返回给我们。
再看看queryBuilder().listLazy()
该方法返回一个LazyList
看下他实现的的方法。构造方法
 LazyList(InternalQueryDaoAccess daoAccess, Cursor cursor, boolean cacheEntities) {
        this.cursor = cursor;
        this.daoAccess = daoAccess;
        size = cursor.getCount();
        if (cacheEntities) {
            entities = new ArrayList(size);
            for (int i = 0; i < size; i++) {
                entities.add(null);
            }
        } else {
            entities = null;
        }
        if (size == 0) {
            cursor.close();
        }

        lock = new ReentrantLock();
    }
@Override
    public E get(int location) {
        if (entities != null) {
            E entity = entities.get(location);
            if (entity == null) {
                lock.lock();
                try {
                    entity = entities.get(location);
                    if (entity == null) {
                        entity = loadEntity(location);
                        entities.set(location, entity);
                        // Ignore FindBugs: increment of volatile is fine here because we use a lock
                        loadedCount++;
                        if (loadedCount == size) {
                            cursor.close();
                        }
                    }
                } finally {
                    lock.unlock();
                }
            }
            return entity;
        } else {
            lock.lock();
            try {
                return loadEntity(location);
            } finally {
                lock.unlock();
            }
        }
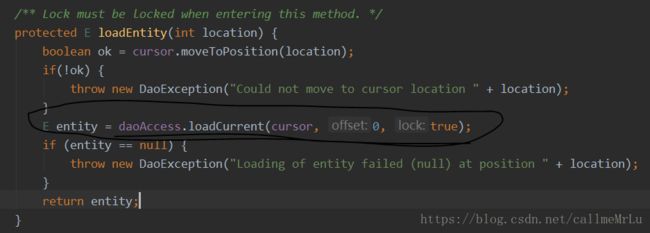
}可以看到LazyList中的get方法是线程安全的,里面使用了双重检验。提高了多线程的安全性和效率。里面使用了loadEntity()方法来解析游标数据,查看源码
可以发现最终也调用了loadCurrent()方法来解析cursor并封装成一个实体类返回给get方法。最后封装成一个LazyList返回给用户。
总体思路是这样:
用户调用queryBuilder().LazyList()方法,该方法使用SQL语句进行数据库查询并返回一个游标,接着游标层层传递,在LazyList的get方法中进行数据解析,解析cursor的方法是loadEntity(location),但是该方法调用了loadCurrent方法,所以最终解析cursor数据的方法是loadCurrent,然后封装成实体类返回,装载进LazyList返回给用户,完成查询。
再看看迭代查询,queryBuilder().listIterator()
该方法返回一个迭代器,在迭代器中获取数据使用到next()方法,判断是否还有数据则使用hasNext()方法,接下来看看源码
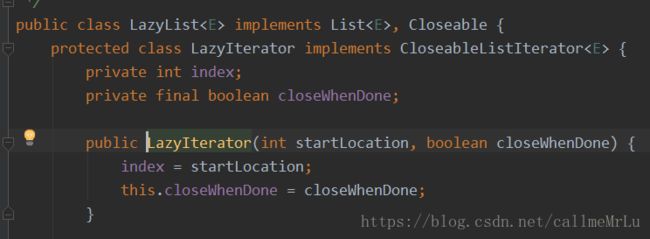
层层进入源码,最终 发现进入的是LazyList
看看next()方法,非常容易理解,里面通过一个get()方法来进行数据的获取
@Override
        public E next() {
            if (index >= size) {
                throw new NoSuchElementException();
            }
            E entity = get(index);
            index++;
            if (index == size && closeWhenDone) {
                close();
            }
            return entity;
        }
点进去发现和我们的Lislazy方法一毛一样!! 也是最终通过loadCurrent()方法解析游标数据进行实体类封装返回给用户。
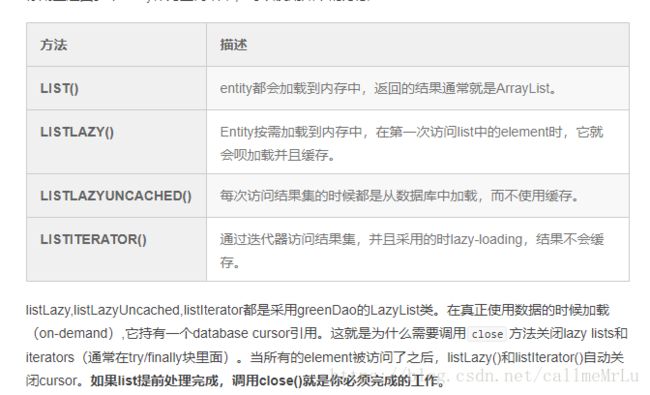
其实除了list方法,其余的三个查询方法都用到了LazyList类,最终调用的步骤也是一致。不过和list的区别就是惰性加载(按需加载),而且需要开发者手动关闭连接。
总体思路:
用户调用该方法,然后它new 一个迭代器,通过LazyList类的get方法加载数据封装实体存进迭代器返回给用户。


