CentOS7安装FastDFS以及整合Nginx
官网下载进行编译安装(官网下载地址):
https://sourceforge.net/projects/fastdfs/files/
https://github.com/happyfish100/libfastcommon
https://sourceforge.net/projects/libfastcommon/files/(不可用)
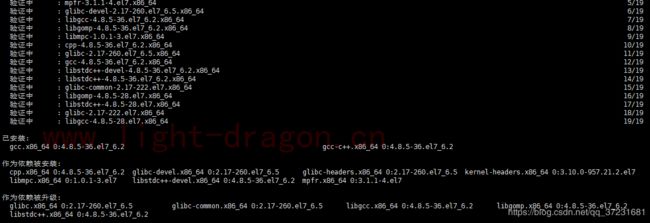
编译需要gcc环境,若没有使用如下命令进行安装:
yum install -y gcc gcc-c++
如上图表示安装成功
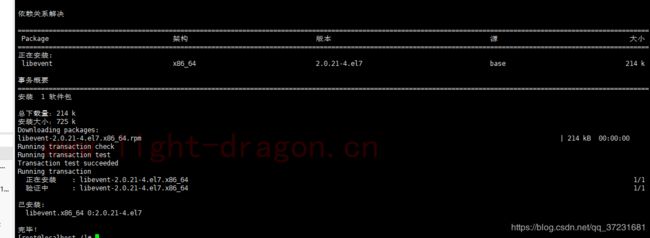
安装libevent(运行时需要)
yum -y install libevent
安装libfastcommon
将下载好的libfastcommon包上传到服务器并解压
unzip libfastcommon-master.zip
进入libfastcommon-master目录编译安装
./make.sh #编译
./make.sh install #安装
如图所示表示安装成功
解压FastDFS包
tar -zxvf FastDFS_v5.08.tar.gz
进入FastDFS进行编译安装
./make.sh #编译
./make.sh install #安装
安装成功将安装目录下的conf下的文件拷贝到/etc/fdfs/下
cp ./conf/* /etc/fdfs/
配置启动tracker
切换到/etc/fdfs/目录下
修改tracker.conf :
vi tracker.conf
修改以下内容:
base_path=/home/tracker http.server_port=80 #配置http端口
使用如下命令启动/关闭/重启tracker
/usr/bin/fdfs_trackerd /etc/fdfs/tracker.conf start / stop / restart
配置启动storage
修改storage.conf:
vi storage.conf
修改以下内容:
base_path=/home/storage
store_path0=/home/storage
tracker_server=192.168.73.128:22122 ##改成自己的虚拟机IP地址
http.server_port=8088
#创建storage.conf中的base_path、store_path0路径
mkdir -p /fastdfs/storage
使用如下命令启动/关闭/重启storage
/usr/bin/fdfs_storaged /etc/fdfs/storage.conf start / stop / restart
配置client测试上传:
修改client.conf;
vi client.conf
修改以下内容:
base_path=/home/tracker
tracker_server=192.168.73.128:22122
测试上传
/usr/bin/fdfs_upload_file /etc/fdfs/client.conf /temp/FastDFS_v5.08.tar.gz
如上图所示,文件已经上传成功!!!
安装nginx(建议此处不要用yum方式安装nginx,因为需要添加模块,没有./configure)
pcre及nginx下载地址:
https://ftp.pcre.org/pub/pcre/ #pcr
http://nginx.org/en/download.html #nginx
pcre安装
解压pcre:
tar -zxvf pcre-8.39.tar.gz
进入解压后的文件夹中
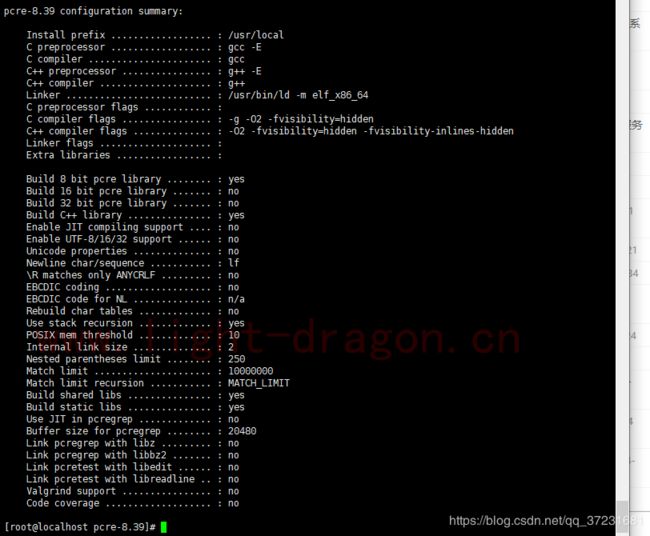
./configure
编译安装并检查是否安装成功:
make && make install
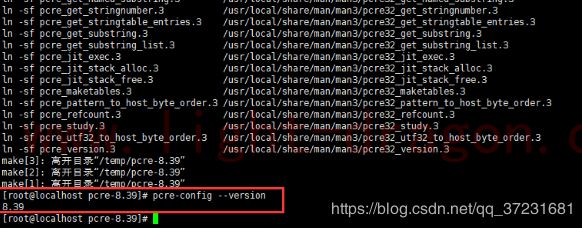
检查pcre版本:
pcre-config --version
nginx安装
解压nginx:
tar -zxf nginx-1.17.0.tar.gz
进入nginx目录执行如下命令(此命令为配置安装目录):
./configure --prefix=/usr/local/nginx
创建此目录:
mkdir -p /usr/local/nginx
使用如下命令进行编译安装:
make && make install
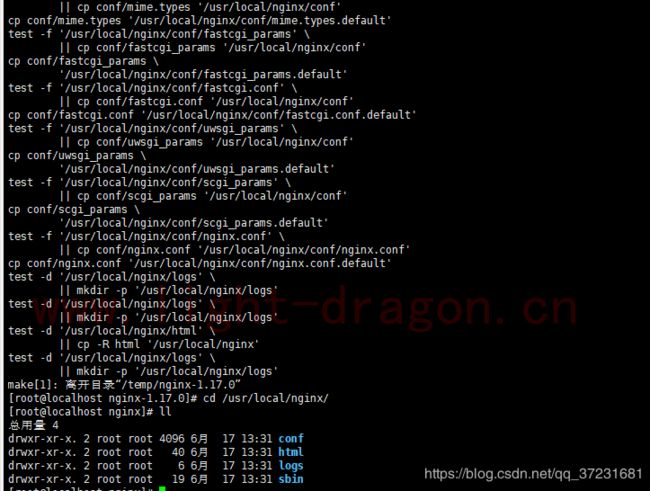
安装成功后生成这些文件
注:这里可能会出现如下错误:
此错误为缺少依赖包,使用如下命令进行安装:
yum install pcre-devel
yum install zlib zlib-devel
yum install openssl openssl-devel
安装完成后再次执行make && make install
进入sbin目录中
cd sbin
运行nginx,查看nginx进程
./nginx
ps -ef | grep nginx
如上图所示,nginx已经启动成功了。
使用浏览器输入你服务器的的ip地址,看到下图表示没有问题。
若访问失败可能是服务器端口为开启,这里先将防火墙关闭:
systemctl start firewalld.service
或使用以下命令开放80端口:
firewall-cmd --add-port=80/tcp --permanent
重新载入
firewall-cmd --reload
查看端口是否开放:
firewall-cmd --query-port=80/tcp
FastDFS 与 Nginx整合
fastdfs-nginx-module:
创建一个文件夹用来存放module:
mkdir -p /usr/local/fast
解压:
tar -zxf ./fastdfs-nginx-module_v1.16.tar.gz -C /usr/local/fast/
修改module配置文件:
vi /usr/local/fast/fastdfs-nginx-module/src/config
如图所示,将/usr/local 修改为/usr
将之前的nginx结束进程并删除
rm -rf nginx
重新进入到之前解压的nginx安装包中:
cd /temp/nginx-1.17.0
配置module:
./configure --add-module=/usr/local/fast/fastdfs-nginx-module/src/
编译安装:
make && make install
修改fastdfs-nginx-module中的配置
复制module配置文件到fdfs目录
cp /usr/local/fast/fastdfs-nginx-module/src/mod_fastdfs.conf /etc/fdfs/
修改配置文件:
vi mod_fastdfs.conf
具体内容如下:
connect_timeout=10
tracker_server=192.168.73.128:22122
url_have_group_name = true
store_path0=/home/storage
创建一个软连接,在/fastdfs/storage文件存储目录下创建软连接,将其链接到实际存放数据的目录:
ln -s /home/storage/data/ /home/storage/data/M00
编辑nginx.conf
进入/usr/local/nginx/conf目录下:
cd /usr/local/nginx/conf
vim nginx.conf
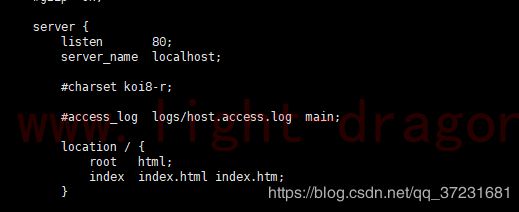
修改前:
修改后:server_name为你服务器IP,root为配置的storage路径
配置完成后nginx的执行命令为:
关闭nginx命令:/usr/local/nginx/sbin/nginx -s stop
启动nginx命令:/usr/local/nginx/sbin/nginx
重启nginx命令:/usr/local/nginx/sbin/nginx -s reload
查看版本命令:/usr/local/nginx/sbin/nginx -v
如果遇到使用命令/usr/local/nginx/sbin/nginx -s reload,出现报错:nginx: [error] invalid PID number "" in "/usr/local/nginx/logs/nginx.pid"
解决命令如下:
第一种:
/usr/local/nginx/sbin/nginx -c /usr/local/nginx/conf/nginx.conf
第二种:
vi /etc/profile
在最后一行加上PATH=$PATH:/usr/local/nginx/sbin ,保存退出
如下图:
最后测试
检查fdfs及nginx是否启动,若未启动使用文档中命令进行启动
浏览器输入一下地址即可下载之前上传的文件:
http://192.168.73.128/group1/M00/00/00/wKhJgF0HBcqAS32GAAVCLEPUQWI.tar.gz
FastDFS配置开机启动
cd /etc/init.d/
chkconfig --add fdfs_trackerd
chkconfig fdfs_trackerd on
chkconfig --add fdfs_storaged
chkconfig fdfs_storaged on
Nginx配置开机启动
编写nginx.service文件:
vi /lib/systemd/system/nginx.service
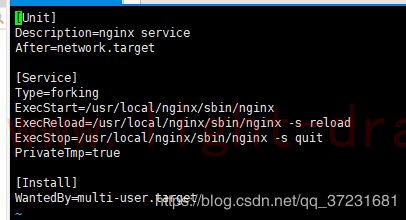
内容如下:
[Unit]
Description=nginx service #描述服务
After=network.target #描述服务类别
[Service]
Type=forking #是后台运行的形式
ExecStart=/usr/local/nginx/sbin/nginx #为服务的具体运行命令
ExecReload=/usr/local/nginx/sbin/nginx -s reload #为重启命令
ExecStop=/usr/local/nginx/sbin/nginx -s quit 停止命令
PrivateTmp=true #表示给服务分配独立的临时空间
[Install] #服务安装的相关设置,可设置为多用户
WantedBy=multi-user.target
设置开机启动:
systemctl enable nginx.service
相关命令:
systemctl enable nginx.service 开机启动nginx服务
systemctl disable nginx.service 禁止开机启动nginx服务
systemctl is-enable nginx.service 查询是否开机启动nginx服务
systemctl start nginx.service 启动nginx服务
systemctl stop nginx.service 停止nginx服务
systemctl reload nginx.service 重新加载nginx服务
systemctl status nginx.service 查看nginx服务状态
服务文件说明:
[Unit]:服务的说明
Description:描述服务
After:描述服务类别
[Service]服务运行参数的设置
Type=forking是后台运行的形式
ExecStart为服务的具体运行命令
ExecReload为重启命令
ExecStop为停止命令
PrivateTmp=True表示给服务分配独立的临时空间
注意:[Service]的启动、重启、停止命令全部要求使用绝对路径
[Install]服务安装的相关设置,可设置为多用户

