matplotlib入门(二)----窗口与子图
窗口与子图
在第一篇入门里,我们直接使用plot()函数进行绘图,但它其实仍然是在子图上进行绘制的,即plt代表的当前子图(当前若没有子图plt会自行创建一个子图)。
在绘图结构中,figure创建窗口,subplot创建子图,所有的绘画都只能在子图上进行,绘图的基本步骤即先创建一个窗口,再创建子图,接下来介绍如何创建窗口和子图。
示例1:
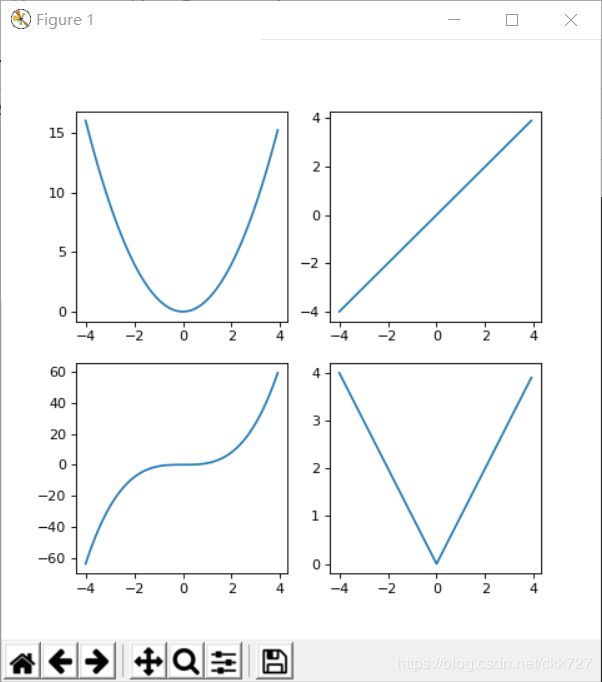
先创建窗口,再创建子图
import matplotlib.pyplot as plt
import numpy as np
#生成数据集
x = np.arange(-4,4,0.1)
y1 = x**2
y2 = x
y3 = x**3
y4 = abs(x)

#创建窗口fig,设置数量sum=1,大小figsize=(6,6),设置分辨率dpi=80
fig = plt.figure(num = 1,figsize=(6,6),dpi=80)
#在fig窗口内创建第一个子图ax1,并设置位置。(2,2,1)意即把窗口区域分为两行两列,ax1位于第一个分区
ax1 = fig.add_subplot(2,2,1)
plt.plot(x,y1) #在当前子图绘画
ax2 = fig.add_subplot(2,2,2)
plt.plot(x,y2)
ax3 = fig.add_subplot(2,2,3)
plt.plot(x,y3)
ax4 = fig.add_subplot(2,2,4)
plt.plot(x,y4)
plt.show() #将绘制的四个图形全部展示
示例2:
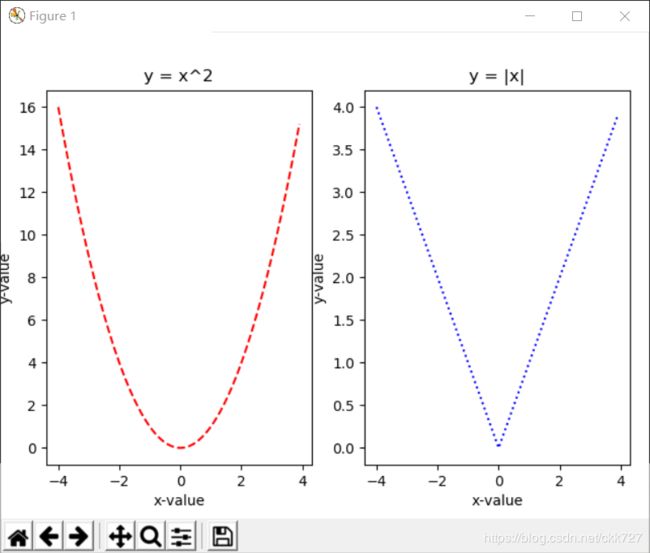
不创建窗口,在默认窗口中创建子图
import matplotlib.pyplot as plt
import numpy as np
x = np.arange(-4,4,0.1)
y1 = x**2
y2 = abs(x)

ax1 = plt.subplot(1,2,1) #第一个子图,一行两列一区
ax1.set_title("y = x^2")
ax1.set_xlabel("x-value")
ax1.set_ylabel("y-value")
plt.plot(x,y1,'r--') #简写形式,r-- 意即color=red,linestyle='--'

ax2 = plt.subplot(122) #第二个子图,一行两列二区
ax2.set_title("y = |x|")
ax2.set_xlabel("x-value")
ax2.set_ylabel("y-value")
plt.plot(x,y2,'b:')

fig = plt.gcf() #获取当前窗口
fig.subplots_adjust(left=0.07) #设置窗口左内边距
fig.subplots_adjust(right=0.97) #设置窗口右内边距

plt.show()
示例3:
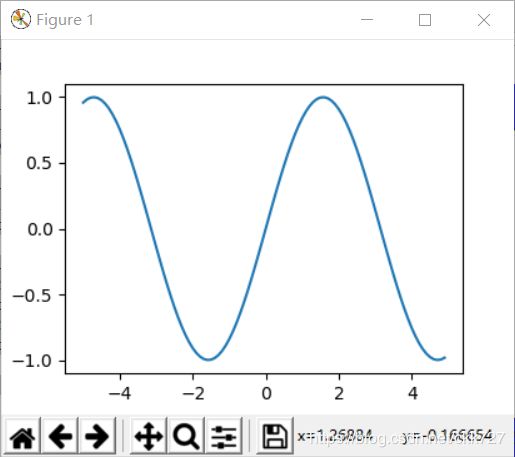
创建多个窗口
import matplotlib.pyplot as plt
import numpy as np

x = np.arange(-5,5,0.1)
y1 = np.sin(x)
y2 = np.cos(x)

fig1 = plt.figure(figsize=(3,3),facecolor="white") #创建第一个窗口
ax1 = fig1.add_subplot(1,1,1)
plt.plot(x,y1)

fig2 = plt.figure(figsize=(6,3),facecolor="blue") #创建第二个窗口
ax2 = fig2.add_subplot(1,2,1)
plt.plot(x,y1)
ax3 = fig2.add_subplot(122)
plt.plot(x,y2)

plt.show()
方法回顾:
在上面三个例子中,我们大量用到了figure、plt、subplot等参数的方法或者属性,现再回顾一下(一些没在示例中出现的为补充内容):
plt.figure(num,figsize,facecolor,dpi,...) #创建一个窗口

plt.gcf() #获取当前窗口

plt.subplot() #创建一个子图

fig.add_aubplot() #在fig窗口内创建一个子图

fig.subplots_adjust() #设置边距

ax1.figure #获取ax1子图所在的窗口

ax1.set_title() #为子图ax1设置title

ax1.set_xlabel()/ax1.set_ylabel() #设置x轴或y轴的标签

ax1.set_xlim()/ax1.set_ylim() #设置x轴或y轴的范围

ax1.set_xticks() #设置x轴刻度


