openfileresa(安装+iscsi+nfs)
这个镜像可以在网上下载。
openfileresa是NAS操作系统,就是专门做NAS的。同类型的还有OpenMediaVault等等。
安装openfileresa操作系统:
这个和centos很像。不能说像用的就是linux2.6的内核。
内存CPU1G就差不多了。
装系统的硬盘也不用太大,30G就差不多了。
直接挂载镜像,直接开机。
英文键盘。

分区只分这几个就好了,boot分区512M /根分区10G swap分区1G就差不多了。
时区,就选亚洲上海,关闭UTC
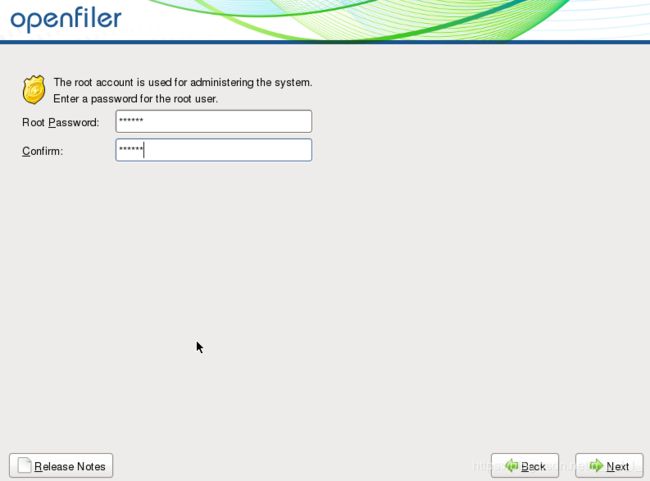
然后就开始安装了。
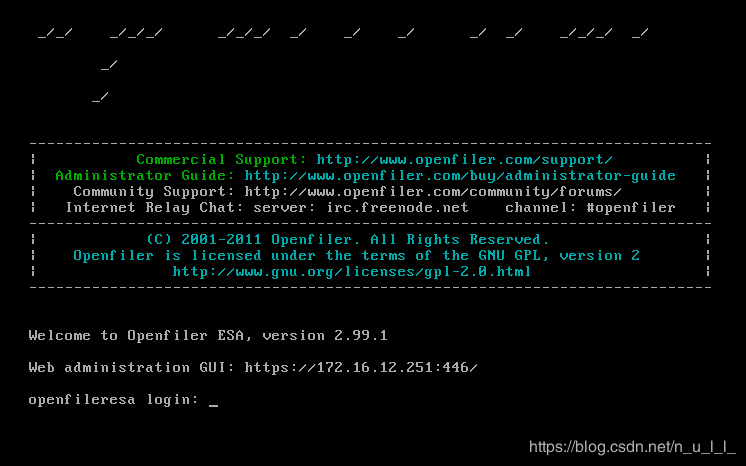
安装之后就直接重启就好了。reboot。
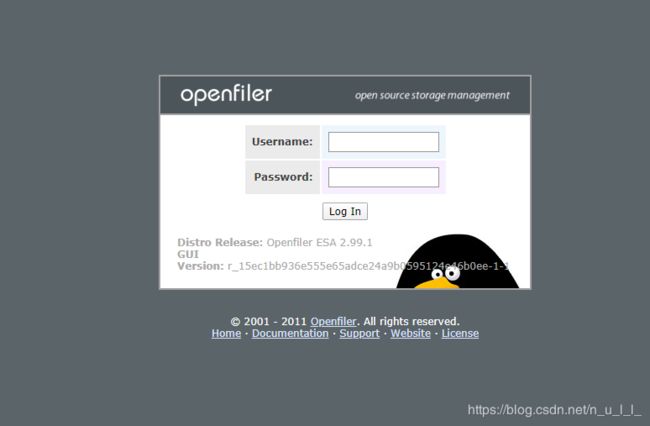
正常的页面就是这样了。
用户名:openfiler
密码:password
就能看到管理界面了。
ISCSI:
这个是要做存储的,所以做存储的因硬盘可以大一些,额外再添加一块硬盘吧。
然后重启系统,重新进入管理后台,
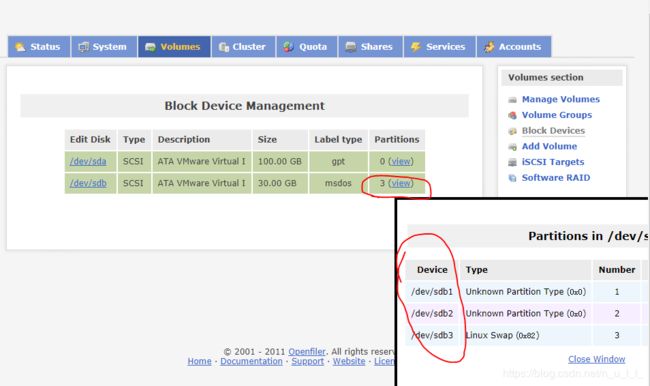
点击volumes然后点击block,就能看到新的硬盘的。两块,一块30G是装系统的,一块100G准备做存储的。
可以点下view看下分区情况,3个分区的是一开始系统盘。
直接点击/dev/sda,进到硬盘里进行操作。
可以看到这是块空的硬盘。直接都做成PV就可以了。点击create。

然后就能看到有一个PV,在点击右边的Add Volumes,添加vg。
写上名字,直接add就可以添加了。
然后VG就添加了。
点击这里可以查看VG状态。
再点击右侧的add volumes
翻到最下边添加LV

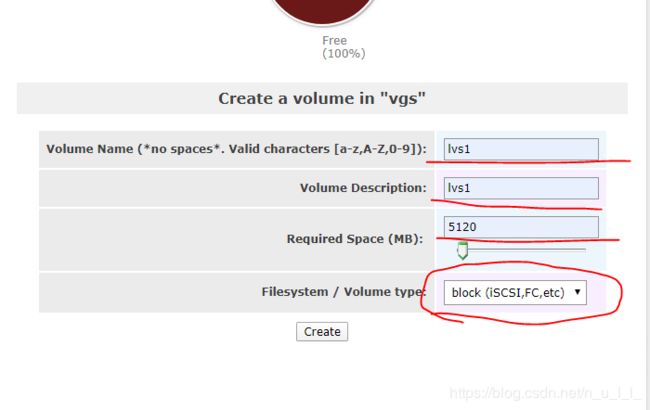
LV的名字,下边是LV的访问路径,然后是大小单位是M,5120M就是5G,最下边是文件系统的类型,就选择block就可以了,这个格式可以做iscsi。
看到这个LV就添加成功了。
点击ISCSI Target添加存储的共享。
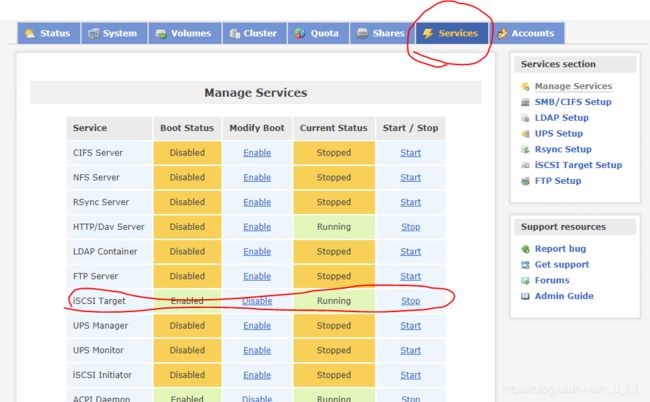
但是这时发现并不能修改和操作,这时因为服务没有启动,点击上方的services ,把ISCSI这个服务启动。
再回来点击就可以修改了。
修改成自己想要的然后点击Add就添加了。
然后点击第二个。LUN Mapping,添加映射关系。

对应着在配置文件中写的那个标签。直接点击map,就建立了映射。
然后创建访问控制列表:
会发现没有列表不能创建。点击那个 Local Networks ,添加一个ACL列表就好了。

要分享的网段,名字,子网掩码等等,然后update。就添加上了,然后再点回ISCSI哪里,发现有了个列表。
把原来的Deny拒绝,改成Allow允许通过,保存。
然后点击status,ISCSI Target,能看到1个共享出去的了。
安装个包:
[root@localhost ~]# yum install -y iscsi-initiator-utils
发现存储:
[root@localhost ~]# iscsiadm -m discovery -t st -p 172.16.12.251

172.16.12.251:3260,1 iqn.2019-12.com.up.openfileresa:lvs1
导入存储:
[root@localhost ~]# lsblk
NAME            MAJ:MIN RM  SIZE RO TYPE MOUNTPOINT
sda               8:0    0  200G  0 disk
├─sda1            8:1    0    4G  0 part /boot
└─sda2            8:2    0   74G  0 part
  ├─centos-root 253:0    0   20G  0 lvm  /
  ├─centos-swap 253:1    0    4G  0 lvm  [SWAP]
  └─centos-tmp  253:2    0   50G  0 lvm  /tmp
sdb               8:16   0  100G  0 disk
sr0              11:0    1 1024M  0 rom

先查看状态2个硬盘 sda和sdb

导入
[root@localhost ~]# iscsiadm -m node -T iqn.2019-12.com.up.openfileresa:lvs1 -p 172.16.12.251 -l

Logging in to [iface: default, target: iqn.2019-12.com.up.openfileresa:lvs1, portal: 172.16.12.251,3260] (multiple)
Login to [iface: default, target: iqn.2019-12.com.up.openfileresa:lvs1, portal: 172.16.12.251,3260] successful.

[root@localhost ~]# lsblk
NAME            MAJ:MIN RM  SIZE RO TYPE MOUNTPOINT
sda               8:0    0  200G  0 disk
├─sda1            8:1    0    4G  0 part /boot
└─sda2            8:2    0   74G  0 part
  ├─centos-root 253:0    0   20G  0 lvm  /
  ├─centos-swap 253:1    0    4G  0 lvm  [SWAP]
  └─centos-tmp  253:2    0   50G  0 lvm  /tmp
sdb               8:16   0  100G  0 disk
sdc               8:32   0    5G  0 disk
sr0              11:0    1 1024M  0 rom

再查有1个sdc了
这个分区可以正常使用,PV VG LV 还是存储 ,挂载等等都可以。
添加第二个共享。
和第一个一样,都是要那一个LV做,所以再分出一个LV。
然后点击ISCSI Target,添加。都和第一个一样。
注意再添加映射的时候。

这个映射是给LVS2 那个共享映射的,要选新的那个LV。因为就的那个LV已经被第一个映射用掉了。而且这个也只能是1对1 的,一个LV只能对应1个共享。
这里选/dev/vgs/lvs2那个LV的映射 点击map
然后还是networks ACL。allwo
再看状态:

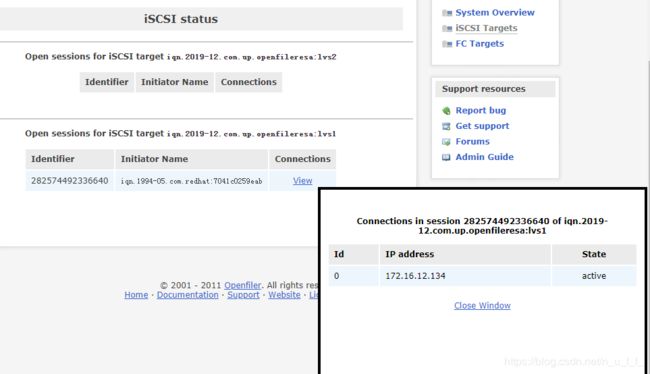
已经有2个了,并且第一个那个因为应被一个节点导入了,所以在里面有一条记录。
点开可以看到客户端节点的信息
[root@localhost ~]# iscsiadm -m discovery -t st -p 172.16.12.251
172.16.12.251:3260,1 iqn.2019-12.com.up.openfileresa:lvs2
172.16.12.251:3260,1 iqn.2019-12.com.up.openfileresa:lvs1
再次发现已经有2个了。
[root@localhost ~]# iscsiadm -m node -T iqn.2019-12.com.up.openfileresa:lvs2 -p 172.16.12.251 -l

[root@localhost ~]# lsblk
NAME                  MAJ:MIN RM  SIZE RO TYPE MOUNTPOINT
sda                     8:0    0  200G  0 disk
├─sda1                  8:1    0    4G  0 part /boot
└─sda2                  8:2    0   74G  0 part
  ├─centos-root       253:0    0   20G  0 lvm  /
  ├─centos-swap       253:1    0    4G  0 lvm  [SWAP]
  └─centos-tmp        253:2    0   50G  0 lvm  /tmp
sdb                     8:16   0  100G  0 disk
sdc                     8:32   0    5G  0 disk
└─vgs1node1-lvs1node1 253:3    0    4G  0 lvm
sdd                     8:48   0    6G  0 disk
再次导入查看,又多了块硬盘。
[root@localhost ~]# pvcreate /dev/sdd
  Physical volume "/dev/sdd" successfully created.
可以使用
注:如果上边的映射关系没有弄对的话,是不能用的,操做这个分区会卡死。
到这里ISCSI的存储的共享就基本完成了。
NFS :
openfileresa也可以做NFS的共享,同样是在图形化界面进行操作。
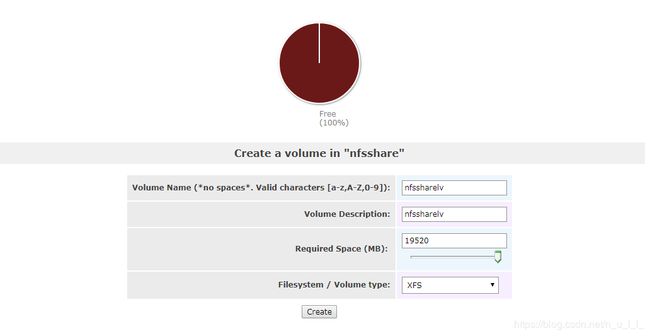
新准备块硬盘,同样是PV VG LV等等的。

在这里新建一个文件夹nfs1

然后点进新建的nfs1里 make share
然后就可以看到这个页面了。
对分享的一些设置,这里指定的是访问列表,我就直接选public 了,公开。
然后要添加共享到哪个网段,在system那里添加,我就添加了一个nfssharenet这个名字自定义的

比如有samba、NFS、http、ftp、rsync等等。我都关了只开启nfs。

nfs的这些选项都可以自己决定的。然后update修改保存就好了。
这个nfs 的共享就设置完成了。
另外开台机器,然后使用这个nfs。
挂载正常。
使用正常。
到这里nfs的设置就完成了。!!!!!
另外LV的扩容和删除也都很简单,就是制作VG、LV时选下就好了。
除了 ISCSI NFS之外还有很多的文件类服务,比如ftp,samba、rsync同步、CIFS,还有软件RAID支持0、1、5、10等等的,也还比较简单,不过像软RAID这种就没什么用了,因为有硬RAID性能更强。
另外openfiler是可以汉化的只要把汉化包放到/opt/openfiler/var/www/下进行替换这三个目录就好了phpsysinfo/ includes/ htdocs/就可以了。
这些另外有时间再补充吧。


