kaggle -- House Prices实例:分数+思路+代码:sklearn + xgboost
本人小白,请不要嘲笑;
如有错误,请不吝赐教。
kaggle – House Prices:分数、思路、代码
源地址:
题目:训练集是多套房的多项房屋信息指标和房价;测试集是多套房的多项房屋信息指标,要得到房价。
成绩:0.12405 (RMSLE),878名/2722。
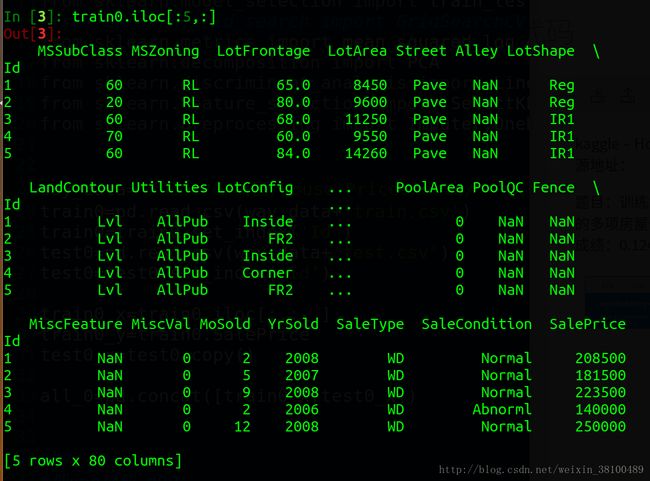
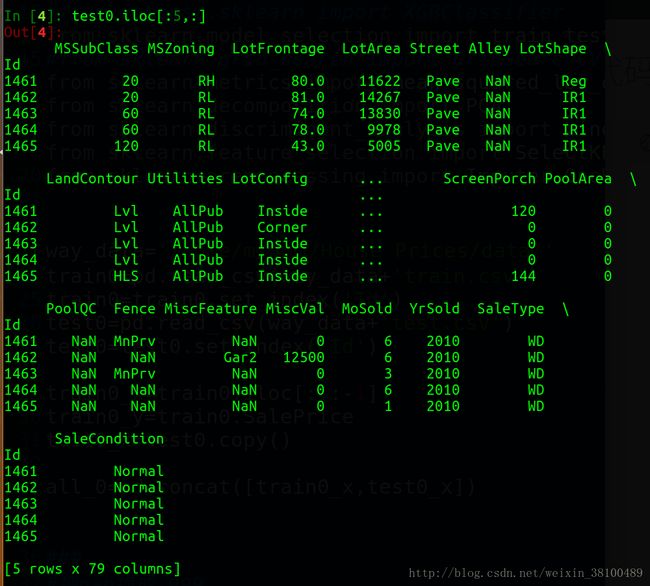
- 特征有79维,SalePrice为Label。
- 训练集中多列有大量缺失值。
- 特征兼具定性特征和定量特征。
处理步骤 :特征工程 + xgboost
- 合并训练集和测试集
- 用-999补缺
- 分定性和定量
3.1.定性数据:编码、哑编码
3.2.定量数据:数据变换(升维) - 定性和定量数据合并
- 判别分析(降维):最终在代码中后删去
—–特征工程结束—– - 分离训练集和测试集
- 将训练集分成 train_x, test_x, train_y, test_y_real
- 自定义xgboost损失函数
- xgboost进行机器学习
- 手工调参
思路说明
定性数据哑编码:
sklearn.preprocessing.LabelEncoder
sklearn.preprocessing.OneHotEncoder若只编码(LabelEncoder)而不哑编码(OneHotEncoder),定型数据将被视作定量数据处理。比如,“张王李赵”变成了“0123”,则“王”会介于“张李”之间,影响训练效果;哑编码后形成稀疏矩阵,张王李赵变成4个维度将相互不会形成上述的干扰。
(在sklearn中OneHotEncoder只能处理数字类输入,故需先做LabelEncoder)数据变换(升维):
sklearn.preprocessing.PolynomialFeatures
感性来说,可以近一步揭示数据不同维度之间的相互关系对label的影响。升维的幂数,即参数degree,选2最佳,选3时不增反降。经实测,升维后效果确实提升了。合并训练集和测试集
省得多次fit_transform再transform。特征选择、判别分析(降维)
sklearn.feature_selection.SelectKBest
sklearn.feature_selection.chi2
sklearn.decomposition.PCA
最初尝试SelectKBest、Percentile还有它俩的变种GenericUnivariateSelect,效果不增反降。本以为只要调好参就能提升效果,结果发现最佳参数是全体,即不降维。
推测原因是上述三种均是无监督的。故改为使用有监督的PCA或SelectKBest(chi2),结果同样是不增反降,调参至接近全体,几乎无效。
推测原因是后面使用的算法是xgboost,可以通过迭代对维度的权重不断做出调整,直至忽略部分无用维度(“鸡肋维度”),仅保留这些“鸡肋维度”的零星有效信息。而上述多种降维方法,不论有无监督,都要扔掉一些维度。所以可以这样认为:
如果用了“鸡肋维度”进入训练,则干扰主要维度,所以要用降维的方式删掉。但xgboost算法能做到,既不让“鸡肋维度”影响主要维度,又能在其中找出零星的有用信息。就是这些零星信息使不降维的效果优于降维的效果。故省略降维过程。用-999补缺
sklearn.preprocessing.Imputer(最后未使用)
最开始用的是,把定量数据用平均值补缺,即Imputer(strategy=’mean’);把定性数据用最高频值补缺,即Imputer(strategy=’most_frequent’)。效果都不如用一个绝不可能出现的东西补缺,给xgboost计算。
感性理解是,不论平均数还是最高频值补缺,其实都是对数据的污染,都是无可奈何必须补上nan才能各种estimator的妥协。(有nan就删这一行和这一列?只能选个最可能的值补上,让这一行和这一列上的其他数据在estimator里发挥作用,那一点干扰就干扰了吧。)而xgboost能够解决这个问题。内部原理,下次讨论。【!别忘了啊!】自定义xgboost损失函数
由于这个比赛中的score是用的Root Mean Squared Logarithm Error ( RMSLE ),但xgboost中只有RMSE。所以需要自己定义损失函数放入xgboost。
注1:RMSLE的优点是弥补了RMSE中离群的超大100000或超小数值0.000001对整体的不良影响。反正大家都取了对数。
 注2:sklearn中的“评分函数”scoreing以半开放形式自定义,如果使用sklearn的estimator会比xgboost的自定义略简单,比如:
 GridSearchCV(pipeline, param_grid=param_grid, scoring=make_scorer(mean_squared_log_error))
详细的自定义方法见我的另一篇文章【干货】 xgboost如何自定义eval_metric ( feval ) ?手工调参
首先说手工调参的可行性,之前想过手工调参如果忘了刻意放大搜索范围,就容易出现局部最优,而非全局最优。之前看过一个知乎帖子,说得很好,如果维度巨大
真的不喜欢用GridSearch调,此例中不用它的原因是因为一旦用GridSearch就得用sklearn的estimator。虽然xgboost有sklearn的格式,xgboost.XGBRegressor,可以配套GridSearch。但xgboost.XGBRegressor没有显式的迭代次数num_boost_round,所以不爽,用手工。
参数介绍网上很多都是直接翻译下面第一个链接,没劲。我以后会写文章详细讨论。【!别忘了啊!】
参数的简介见官网参数介绍
和官网类介绍
params = {
            'objective': 'reg:gamma',
            'eta': 0.1,
            'seed': 0,
            'missing': -999,
            #'num_class':num_class,
            'silent' : 1,
            'gamma' : 0.5,
            'subsample' : 0.5,
            'alpha' : 0.5,
            'max_depth':5,
            'min_child_weight':1,
            #'colsample_bytree':0.6,
            #'colsample_bylevel':1
            #'max_delta_step':0.8
            }
num_rounds=3000
clf=xgb.train(params,dtrain,num_rounds,watchlist, feval=evalerror)
几个特点(都用我的代码中的变量名了,注意和xgb.train的形参变量名的区别)(后面的是重点):
- 迭代次数num_rounds要听步长eta的,负相关。粗调时把eta定大,如0.1, 0.01;迭代次数定小,如300, 1000。细调时把eta调小,迭代次数调大。
- 算法objective不妨都试试。我用reg:gamma效果最好。
- 内部train和test的比例subsample定的0.5,即使太离谱了即使直接效果编号,那么最终效果应该不好,所以没试;调了上下0.1, 0.2,效果变差,就0.5了。
- 子树最小权重min_child_weight,就是说样本要是小于这个参数,就不设置子树了。我试了2,变差,就改回了默认的1。
最重要的三个:
- max_depth:树的层数。越小越保守。从默认值5往上下试。
- alpha:范数规则化中的L1范数。越大越保守。从大往小试。
- gamma:新建叶节点的最小的损失减少值。翻译成人类能听懂的话,就是只有在新建叶节点时损失函数值能下降这个参数这个多或者下降比它大,才能新建叶节点。越大越保守。从大往小试。
(此处未出现具体数字,下面代码中params和num_rounds的参数值我都刻意改动了,不是我真正提交的,我也不知道改动后的结果怎样。)
完整代码:(train经过train_test_split后,内部测试)
#!/usr/bin/python
# -*- coding: UTF-8 -*-
import pandas as pd
import numpy as np
import sklearn as sk
import math
#import time
#import gc
import xgboost as xgb
#from xgboost.sklearn import XGBClassifier
from sklearn.model_selection import train_test_split
#from sklearn.grid_search import GridSearchCV
from sklearn.metrics import mean_squared_log_error
from sklearn.decomposition import PCA
from sklearn.discriminant_analysis import LinearDiscriminantAnalysis
from sklearn.feature_selection import SelectKBest,chi2,SelectPercentile,GenericUnivariateSelect
from sklearn.preprocessing import Imputer,OneHotEncoder,PolynomialFeatures


way_data='/home/m/桌面/House Prices/data/'
train0=pd.read_csv(way_data+'train.csv')
train0=train0.set_index('Id')
test0=pd.read_csv(way_data+'test.csv')
test0=test0.set_index('Id')

train0_x=train0.iloc[:,:-1]
train0_y=train0.SalePrice
test0_x=test0.copy()

all_0=pd.concat([train0_x,test0_x])


###
#把nan换成-999
all_0.fillna(-999,inplace=True)
###

#分定性和定量
qualitative_0=pd.DataFrame()
quantitative_0=pd.DataFrame()
for k in all_0.columns:
    dtype_k=all_0[k].dtype
    if dtype_k=='object':   #定性
        qualitative_0[k]=all_0[k]
    else:
        quantitative_0[k]=all_0[k]

qualitative_1 = qualitative_0.copy()
quantitative_1 = quantitative_0.copy()

#定性编码
for k in qualitative_1.columns:
    le=sk.preprocessing.LabelEncoder()
    qualitative_1[k][qualitative_1[k].notnull()]=le.fit_transform(qualitative_1[k][qualitative_1[k].notnull()])
#定性补缺
#imputer=Imputer(strategy='most_frequent')
#qualitative_1 = pd.DataFrame(imputer.fit_transform(qualitative_1),index=qualitative_1.index)
#定性哑编码
encoder=OneHotEncoder(sparse=False,dtype=np.int)
qualitative_1 = pd.DataFrame(encoder.fit_transform(qualitative_1),index=qualitative_1.index)

#定量补缺
#imputer=Imputer(strategy='mean')
#quantitative_1 = pd.DataFrame(imputer.fit_transform(quantitative_1),index=quantitative_1.index)
#数据变换(升维)
pf=PolynomialFeatures(degree=2,interaction_only=True,include_bias=False)
quantitative_1 = pd.DataFrame(pf.fit_transform(quantitative_1),index=quantitative_1.index)

#定性和定量合并
all_1=pd.concat([qualitative_1,quantitative_1],axis=1)
all_1.columns=np.arange(all_1.shape[1])

#分成train和test
train1_x=all_1.loc[train0_x.index,:]
test1_x=all_1.loc[test0_x.index,:]
train1_y=train0_y.copy()
#train1_y=train0_y.apply(float)/800000
#train1_y=train0_y.apply(float)
'''
#判别分析(降维)
skb=SelectKBest(chi2,k=400)
all_2=skb.fit_transform(train1_x,train1_y)
'''
########################
train_x, test_x, train_y, test_y_real = sk.model_selection.train_test_split(train1_x,train1_y,test_size=0.3)
########################
'''
#判别分析(降维)
skb=SelectKBest(chi2,k=3000)        ###
train_x=skb.fit_transform(train_x,train_y)
test_x=skb.transform(test_x)
'''

dtrain=xgb.DMatrix(train_x,train_y)
dtest=xgb.DMatrix(test_x,test_y_real)   ###

watchlist=[(dtrain,'train'),(dtest,'test')]
#num_class=train_y.max()+1

def evalerror(preds, dtrain):
    labels = dtrain.get_label()
    # return a pair metric_name, result
    # since preds are margin(before logistic transformation, cutoff at 0)
    return 'error', math.sqrt(mean_squared_log_error(preds,labels))

#############

params = {
            'objective': 'reg:gamma',
            'eta': 0.1,
            'seed': 0,
            'missing': -999,
            #'num_class':num_class,
            'silent' : 1,
            'gamma' : 0.5,
            'subsample' : 0.5,
            'alpha' : 0.5,
            'max_depth':5,
            'min_child_weight':1,
            #'colsample_bytree':0.6,
            #'colsample_bylevel':1
            #'max_delta_step':0.8
            }
num_rounds=3000
clf=xgb.train(params,dtrain,num_rounds,watchlist, feval=evalerror)
提交版本:(懒得改变量名了,就直接把train_test_split的比例调成0了,囧。)
########################
train_x, test_x, train_y, test_y_real = sk.model_selection.train_test_split(train1_x,train1_y,test_size=0.0)
########################
dtrain=xgb.DMatrix(train_x,train_y)
#dtest=xgb.DMatrix(test_x)  ###

watchlist=[(dtrain,'train'),(dtrain,'test')]
#num_class=train_y.max()+1

def evalerror(preds, dtrain):
    labels = dtrain.get_label()
    # return a pair metric_name, result
    # since preds are margin(before logistic transformation, cutoff at 0)
    return 'error', math.sqrt(mean_squared_log_error(preds,labels))

params = {
            'objective': 'reg:gamma',
            'eta': 0.002,
            'seed': 0,
            'missing': -999,
            #'num_class':num_class,
            'silent' : 1,
            'gamma' : 0.02,
            'subsample' : 0.5,
            'alpha' : 0.045,
            'max_depth':4,
            'min_child_weight':1
            }
num_rounds=20000
clf=xgb.train(params,dtrain,num_rounds,watchlist, feval=evalerror)

# real rate test
dtest1_x_self=xgb.DMatrix(test1_x)
test1_y_pred=pd.Series(clf.predict(dtest1_x_self),index=test1_x.index)
result=pd.DataFrame(test1_y_pred,columns=['SalePrice'])
way_out='/home/m/桌面/House Prices/data/result/'
result.to_csv(way_out+'result.csv')
知乎:远行人


