Spring Boot+Vue项目 微博系统(5):Spring Security登录流程源码分析
系列目录
Spring Boot+Vue项目 微博系统
目录
- 系列目录
- 前言
- Spring Security简介
- 基于内存的用户认证
- 配置
- 测试
- 基于数据库的用户认证
- 原理分析
- 总结
- 题外话
前言
后端的权限框架也有多种选择,比如Shiro、Spring Security,这里选择Spring Security。框架的好处就是它本来就提供了一整套完整的机制,而且还都是基于接口编程,并提供了setter方法,所以对原生框架有任何不满意,或不满足具体需求的地方,只需要实现它的对应接口,自定义其实现,并把自己的实现set进框架中即可。这种编程方法也很值得学习。
感觉用户管理这个需求从刚学编程就是绕不过去的一关,虽然很常见,但它并不简单,甚至根据具体系统的需求,可能成为最核心最复杂的模块。关于Web程序的用户管理,又会涉及Cookie、Session、JWT、OAuth 2等一大堆相关的知识。由于Spring Security默认实现了传统的基于Cookie/Session的用户管理。我也折腾过很久的JWT方式,但是因为涉及token的过期、续签等一些问题,一直想不到比较简单、完善的解决方案。所以本着简单的原则就先基于Cookie/Session实现吧。以后有需要或者有兴趣再去改进。
Spring Security简介
Spring Security框架比较庞大、复杂,简单来说就是提供了一系列的过滤器(Filter)对传递来的HTTP请求进行处理,每层过滤器也都预设了一些常用的默认实现,比如用户登录认证、记住我功能等。可以说是提供了保姆式服务。用户只需要根据自己的需求,重写一些配置信息或者自定义实现一些接口即可对原生框架进行“偷梁换柱”。
基于内存的用户认证
配置
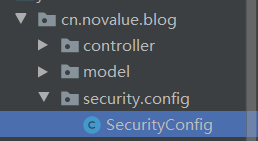
Spring Security提供了多种用户认证方式,先从简单的基于内存的认证来学习,新建security.config目录下的SecurityConfig类来配置Spring Security。
做如下配置:
package cn.novalue.blog.security.config;

import org.springframework.context.annotation.Configuration;
import org.springframework.security.config.annotation.authentication.builders.AuthenticationManagerBuilder;
import org.springframework.security.config.annotation.method.configuration.EnableGlobalMethodSecurity;
import org.springframework.security.config.annotation.web.builders.HttpSecurity;
import org.springframework.security.config.annotation.web.configuration.EnableWebSecurity;
import org.springframework.security.config.annotation.web.configuration.WebSecurityConfigurerAdapter;
import org.springframework.security.crypto.bcrypt.BCryptPasswordEncoder;

// 加上这个注解,让其能够自动注册到Spring容器中
@Configuration
@EnableWebSecurity
// 允许在方法上添加权限注解来拦截请求
@EnableGlobalMethodSecurity(prePostEnabled = true)
public class SecurityConfig extends WebSecurityConfigurerAdapter {
    @Override
    protected void configure(AuthenticationManagerBuilder auth) throws Exception {
        // Spring Security默认使用这种加密方式来对密码加密
        BCryptPasswordEncoder encoder = new BCryptPasswordEncoder();
        // 创建基于内存的用户认证控制
        auth.inMemoryAuthentication()
                .passwordEncoder(encoder)
                // 配置一个root用户
                .withUser("root")
                .password(encoder.encode("root"))
                // root用户有ADMIN角色
                .roles("ADMIN")
                .and()
                .withUser("normal")
                .password(encoder.encode("normal"))
                .roles("NORMAL");
    }

    @Override
    protected void configure(HttpSecurity http) throws Exception {
    	// 禁用csrf
        http.csrf().disable()
        		// 表单登录
                .formLogin()
                // 允许所有请求访问
                .permitAll()
                .and()
                // 其他所有请求都需要认证
                .authorizeRequests()
                .anyRequest()
                .authenticated();

    }
}
在权限控制这里有个RBAC(Role-Based Access Control)策略,即基于角色的访问控制,以下截取自百度百科的解释:
对系统操作的各种权限不是直接授予具体的用户,而是在用户集合与权限集合之间建立一个角色集合。每一种角色对应一组相应的权限。一旦用户被分配了适当的角色后,该用户就拥有此角色的所有操作权限。这样做的好处是,不必在每次创建用户时都进行分配权限的操作,只要分配用户相应的角色即可,而且角色的权限变更比用户的权限变更要少得多,这样将简化用户的权限管理,减少系统的开销。
这也算是一种解耦思想吧。因为这里用户权限并不是很重要,就暂时不过多涉及权限的问题了,只配置个用户和角色,体会一下思想就行。
这里选择继承自 WebSecurityConfigurerAdapter ,其实是应用了适配器设计模式,因为我们只需要重写部分配置,但是如果直接实现原生接口,那么就必须重写很多不需要重写的配置,因为如果一个类要实现一个接口是必须要实现接口的所有方法的。
同时去掉原来在主类@SpringBootApplication注解中添加的exclude:
package cn.novalue.blog;

import org.springframework.boot.SpringApplication;
import org.springframework.boot.autoconfigure.SpringBootApplication;

@SpringBootApplication
public class BlogApplication {

    public static void main(String[] args) {
        SpringApplication.run(BlogApplication.class, args);
    }

}
测试
在 TestController 中添加一个方法接受GET请求,并且需要验证用户角色,只有是“ADMIN”角色才能访问。
    @GetMapping("/user")
    @PreAuthorize("hasRole('ADMIN')")
    public String user() {
        return "hello user";
    }
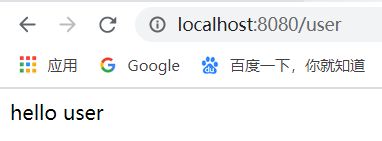
启动项目,访问localhost:8080/user,会被重定向到localhost:8080/login,使用root用户登录后,能正常显示结果,因为root用户有user()方法上标注的所需ADMIN角色。

重新使用normal用户登录,再次访问/user接口,返回403错误。因为normal用户没有ADMIN角色权限

基于数据库的用户认证
真实项目中肯定不会用内存来管理用户,用户信息肯定都是从数据库中加载的,下面我从源码分析,探究该如何配置,能使其从我们的数据库中加载用户信息。如果对源码头疼可以直接看后边的总结。
原理分析
首先从配置中的formLogin()入手,看看框架里是怎么做的。按住Ctrl+左键点击该方法,进入方法内部。(这里建议下载Spring Security的 .java 源文件来看,可读性要比反编译出来的 .class 文件好很多,并且有注释。这里我偷懒了,直接看 .class 了)

可以看到,是给配置中加了一个FormLoginConfigurer对象,继续点击进入这个类,查看其构造方法。
这里又加入了一个 UsernamePasswordAuthenticationFilter 过滤器,顾名思义,是做用户名密码认证的过滤器。此外还配置了对应的参数名字,即“username”和“password”,也就是说我们请求的时候,只要把请求参数与之对应,就可以被框架获取。
再次进入 UsernamePasswordAuthenticationFilter 类查看。
    public static final String SPRING_SECURITY_FORM_USERNAME_KEY = "username";
    public static final String SPRING_SECURITY_FORM_PASSWORD_KEY = "password";
    // 依然是参数名字,默认值,可设定
    private String usernameParameter = "username";
    private String passwordParameter = "password";
    private boolean postOnly = true;

    public UsernamePasswordAuthenticationFilter() {
    	// 该过滤器拦截“/login”路径的POST请求
        super(new AntPathRequestMatcher("/login", "POST"));
    }
	// 重点,该过滤器起主要作用的方法
    public Authentication attemptAuthentication(HttpServletRequest request, HttpServletResponse response) throws AuthenticationException {
    	// 如果不是所要拦截的POST方法,则抛出异常
        if (this.postOnly && !request.getMethod().equals("POST")) {
            throw new AuthenticationServiceException("Authentication method not supported: " + request.getMethod());
        } else {
        	// 从request中获取对应的用户名和密码参数
            String username = this.obtainUsername(request);
            String password = this.obtainPassword(request);
            // 设置默认值,防止后续操作出现NullPointerException异常
            if (username == null) {
                username = "";
            }

            if (password == null) {
                password = "";
            }

            username = username.trim();
            // 封装用户信息
            UsernamePasswordAuthenticationToken authRequest = new UsernamePasswordAuthenticationToken(username, password);
            this.setDetails(request, authRequest);
            // 调用AuthenticationManager的authenticate方法
            return this.getAuthenticationManager().authenticate(authRequest);
        }
    }

    @Nullable
    protected String obtainPassword(HttpServletRequest request) {
        return request.getParameter(this.passwordParameter);
    }

    @Nullable
    protected String obtainUsername(HttpServletRequest request) {
        return request.getParameter(this.usernameParameter);
    }
从源码中可以看出,这里只是对request的参数做了一些处理和封装,然后调用了 AuthenticationManager的authenticate(authRequest) 方法。继续点击进这个方法。
AuthenticationManager是一个接口,点击方法左侧绿色图标,查看该接口的实现类
这里有个位于 org.springframework.security.authentication 包下的 ProviderManager 类,就是它提供(provide)了不同的认证方式。查看这个类的 authenticate方法,这里我只保留了比较重要的代码。
    public Authentication authenticate(Authentication authentication) throws AuthenticationException {
        Class<? extends Authentication> toTest = authentication.getClass();
        Iterator var8 = this.getProviders().iterator();

        while(var8.hasNext()) {
            AuthenticationProvider provider = (AuthenticationProvider)var8.next();
            if (provider.supports(toTest)) {
                try {
                    result = provider.authenticate(authentication);
                }
            }
        }
    }
可以看到,该类肯定会有一个providers集合,提供了各种各样的provider,这里认证方法就是遍历这个集合,看哪个provider支持(supports)所需要的认证方式,就让它去认证。点击进入 provider.authenticate方法,发现。。。又是个接口
public interface AuthenticationProvider {
    Authentication authenticate(Authentication var1) throws AuthenticationException;

    boolean supports(Class<?> var1);
}
继续找它的实现类。
这里有一系列的provider,比如RememberMeAuthenticationProvider ,顾名思义就是处理记住我功能的。我们要找的是验证用户信息的,所以就是这个 AbstractUserDetailsAuthenticationProvider 类,继续进入查看,该类是个抽象类,查看其 authenticate 方法。
    public Authentication authenticate(Authentication authentication) throws AuthenticationException {
    	username = authentication.getPrincipal() == null ? "NONE_PROVIDED" : authentication.getName();
    	// 从之前的用户缓存中获取到用户信息
        UserDetails user = this.userCache.getUserFromCache(username);
        // 如果还没有用户信息
        if (user == null) {
            try {
            	// 调用retrieveUser方法去获取用户
                user = this.retrieveUser(username, (UsernamePasswordAuthenticationToken)authentication);
            }
        }
        // 回调函数,会做一些在认证成功后需要的操作
        return this.createSuccessAuthentication(principalToReturn, authentication, user);
    }

    protected abstract UserDetails retrieveUser(String var1, UsernamePasswordAuthenticationToken var2) throws AuthenticationException;
经过一顿分析,定位到加载用户的操作是在 retrieveUser 方法中,但是该类的该方法是抽象方法。。。点击查看有没有默认实现。
点击发现只有一个 DaoAuthenticationProvider 的实现类,“dao”,即DAO(Data Access Object) ,是数据访问对象是一个面向对象的数据库接口。所以这就是我们要的数据库Provider,查看其retrieveUser 方法。
    protected final UserDetails retrieveUser(String username, UsernamePasswordAuthenticationToken authentication) throws AuthenticationException {

        try {
            UserDetails loadedUser = this.getUserDetailsService().loadUserByUsername(username);
            if (loadedUser == null) {
                throw new InternalAuthenticationServiceException("UserDetailsService returned null, which is an interface contract violation");
            } else {
                return loadedUser;
            }
        }
    }
终于看出点眉目了,它通过 this.getUserDetailsService().loadUserByUsername(username); 来加载通过之前获取的用户名来加载用户。我们都知道**Service就是用来干业务逻辑的。点击查看该方法。
public interface UserDetailsService {
    UserDetails loadUserByUsername(String var1) throws UsernameNotFoundException;
}
这里有几种不同的Service,其中就有之前我们用的基于内存(InMemory)的service。所以现在看明白了:
总结
Spring Security的用户认证是基于UserDetailsService接口来加载用户了,默认实现了内存模式,缓存模式,jdbc模式等,之前我们在配置类中配置了inMemoryAuthentication(),所以就是基于内存的用户管理。所以我们要是想让Spring Security从我们自己的数据库中加载用户信息,只需要写一个类实现UserDetailsService接口,在其loadUserByUsername方法中,访问自己的数据库获取用户。然后把我们自己写的service配置上即可。
题外话
相信很多初学者都是谈源码色变,觉得源码很高深很难,自己是不可能看懂的。确实,我们看待源码相当于只是在二维层面上去摸索,跟着源码一步步走。没有从三维层面上去看源码的布局规划,确实很难看懂整个框架。但是如果我们只是按需查看的话,源码其实也并没有很难。就像上边,如果只是为了看如何让Spring Security从我们的数据库中加载用户。那么按着调用轨迹一步步往下走就行了,其它不相关的都不看。作为框架的使用者,我认为这样就可以了,当然如果能对框架有更全面的认识是更好了。
对于Java体系的技术而言,最好的一手学习资料就是官方文档和源码。网络上满天飞的文章都不知道转几手了,且不说能不能理解、能不能记住,甚至有些都被转变味了,压根就是错误的说法。如果只是日常遇到一点小问题,可以随便找个文章瞅一下。如果想要更系统的学习,我认为还是要回归到官方文档和源码上去。而且这些技术都是出自一些专家团队之手,并且经过实践验证的东西,我们从中可以学习到很多知识,比如上边的适配器模式、基于接口编程等等,这都会对我们产生潜移默化的帮助。
上一篇:
Spring Boot+Vue项目 微博系统(4):前后端通信测试
下一篇:
Spring Boot+Vue项目 微博系统(6):登录功能后端实现之新建用户表,测试访问数据库


