【流媒体】nginx + nginx-rtmp-model 服务器搭建 && 推拉流测试
推荐一个不错的AI教程: https://www.captainbed.net/blog-vincent/
No_1.what is 'nginx media server'?
nginx通过rtmp模块提供rtmp服务, ffmpeg推送一个rtmp流到nginx, 然后客户端通过访问nginx来收看实时视频流. HLS也是差不多的原理,只是最终客户端是通过HTTP协议来访问的,但是ffmpeg推送流仍然是rtmp的.
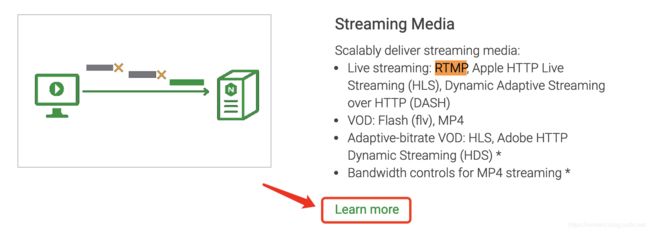
详细介绍,参考nginx官网中这块的详情:
https://www.nginx.com/products/nginx/streaming-media ,其中比如对点播(vod)的介绍:
The HLS/VOD module in NGINX Plus provides HTTP Live Streaming (HLS) support for H.264/AAC encoded content packaged in MP4 file containers (filename extensions .mp4, .m4v, and .m4a). With the HLS/VOD module, there’s no need to repackage existing MP4 content when introducing adaptive streaming to users – the content is “transformed” or “transmultiplexed” on the fly from the MP4 file container to HLS. The NGINX Plus module performs real-time segmentation, packetization, and multiplexing from the MP4 file container to HLS/MPEG-TS without recoding the content.

Before clients begin downloading media segments, they first request a manifest (filename extension .m3u8). The HLS/VOD module generates the playlist on the fly, so you do not need to manually describe the segment structure.

You can configure NGINX to serve HLS streams from a particular location, as in this example:
--------------------------------------------------------------------------------------------
location /hls/ {
    hls;  # Use the HLS handler to manage requests

    # Serve content from the following location
    alias /var/www/video;

    # HLS parameters
    hls_fragment            8s;
    hls_buffers         10 10m;
    hls_mp4_buffer_size     1m;
    hls_mp4_max_buffer_size 5m;
}
--------------------------------------------------------------------------------------------
HLS clients first request the .m3u8 manifest for a file in the location, then begin downloading the segments of video specified in the file. Again, NGINX Plus handles the task of segmenting MP4-packaged content on the fly for HLS streaming.

In addition, the HLS functionality can be used along with the NGINX secure link module to generate authorized, time-limited links based on unique client data such as a cookie or source IP address. This provides a strong degree of protection against misuse of the video service.
具体情况,针对自己的需要去选择,另外nginx-rtmp-model的wiki:
https://github.com/arut/nginx-rtmp-module/wiki/Directives
No_2.befor build the server
1.nginx常用的安装方式:yum、官网rpm、homebrew、源码编译等,注意如果后续要安装nginx-rtmp-model,只有编译型方式安装nginx,方可行得通。
2.rtmp对nginx版本的限制,以及特定版本需要安装的内容,在nginx-rtmp-model官方做了如下说明:“Several versions of nginx (1.3.14 - 1.5.0) require http_ssl_module to be added as well”。
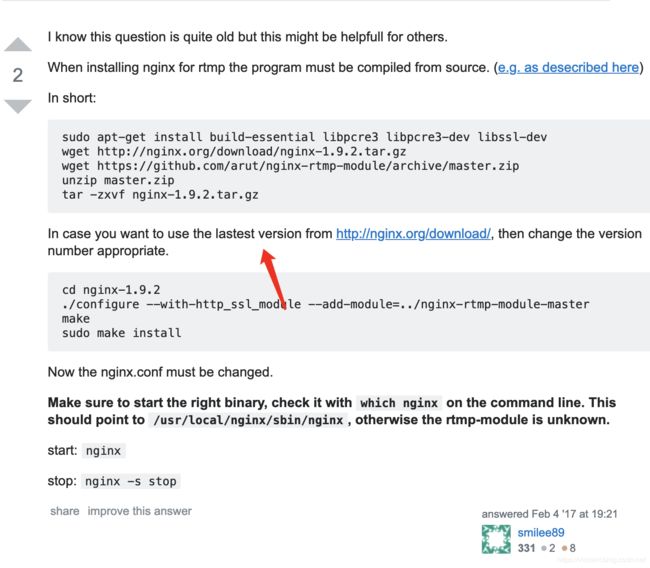
3.用最新版本的nginx来安装rtmp模块,也是有坑的,参考stackoverflow中出现过的问题:
最终推荐nginx版本为“1.8.1”。
N0_3.for install
1.environment
yum install gcc gcc-c++ automake pcre pcre-devel zlip zlib-devel openssl openssl-devel起初不明白这个命令的意思,之后在“Nginx 之一:编译安装nginx 1.8.1 及配置 https://www.cnblogs.com/zhang-shijie/p/5294162.html ”中,得到了解释:
   1.gcc为GNU Compiler Collection的缩写,可以编译C和C++源代码等,它是GNU开发的C和C++以及其他很多种语言 的编译器(最早的时候只能编译C,后来很快进化成一个编译多种语言的集合,如Fortran、Pascal、Objective-C、Java、Ada、 Go等。)

  2.gcc 在编译C++源代码的阶段,只能编译 C++ 源文件,而不能自动和 C++ 程序使用的库链接(编译过程分为编译、链接两个阶段,注意不要和可执行文件这个概念搞混,相对可执行文件来说有三个重要的概念:编译(compile)、链接(link)、加载(load)。源程序文件被编译成目标文件,多个目标文件连同库被链接成一个最终的可执行文件,可执行文件被加载到内存中运行)。因此,通常使用 g++ 命令来完成 C++ 程序的编译和连接,该程序会自动调用 gcc 实现编译。

  3.gcc-c++也能编译C源代码,只不过把会把它当成C++源代码,后缀为.c的,gcc把它当作是C程序,而g++当作是c++程序;后缀为.cpp的,两者都会认为是c++程序,注意,虽然c++是c的超集,但是两者对语法的要求是有区别的。

  4.automake是一个从Makefile.am文件自动生成Makefile.in的工具。为了生成Makefile.in,automake还需用到perl,由于automake创建的发布完全遵循GNU标准,所以在创建中不需要perl。libtool是一款方便生成各种程序库的工具。

  5.pcre pcre-devel:在Nginx编译需要 PCRE(Perl Compatible Regular Expression),因为Nginx 的Rewrite模块和HTTP 核心模块会使用到PCRE正则表达式语法。

  6.zlip zlib-devel:nginx启用压缩功能的时候,需要此模块的支持。

  7.openssl openssl-devel:开启SSL的时候需要此模块的支持。
2.prepare
1)nginx-rtmp-model 源代码,地址为https://github.com/arut/nginx-rtmp-module.git,如果linux环境安装了git可以直接clone,(我在测试环境搭建,由于需要升级yum,通过winSCP工具copy到linux,前提要打成.rar).
2) nginx 源码
wget http://nginx.org/download/nginx-1.8.1.tar.gz 3.install
1)定义安装路径、目录结构
因我的测试机在"/usr/local"下已装了nginx,我重新定义了安装路径:
注意,推流、拉流的路径,需开通读写权限。
2)解压nginx源码
tar -zxvf nginx-1.8.1.tar.gz 3)配置解压后的源码
cd nginx-1.8.1
./configure --prefix=/home/zhenhua.zhang/nginstall  --add-module=../nginx-rtmp-module  --with-http_ssl_module
指定安装路径,并添加三方模块。
4)配置nginx.conf
1.文档最后,添加如下rtmp配置:
rtmp {

    server {

        listen 1935;  #监听的端口

        chunk_size 4000;

        #1.多个如下配置,即为多个推流房间,此房间号为"hls"
        application hls {  #rtmp推流请求路径
            live on;
            hls on;
            hls_path /home/zhenhua.zhang/hlshome;
            hls_fragment 5s;
        }

        #2.直播后将流转为flv存储(初次配置可忽略)
        application record {
            live on;
            recorder rec1{
                record all;
                record_unique on;
                record_path /home/zhenhua.zhang/recordhome;
                record_suffix -%Y-%m-%d-%H_%M_%S.flv;
            }
        }

        #点播拉流地址(初次配置可忽略)
        application video {
            play /home/zhenhua.zhang/recordhome;
        }
    }
}
2.http{}内部,添加拉流内容:
server {
    listen       81;    #拉流请求的端口号
    server_name  localhost;

    location / {
        root   /home/zhenhua.zhang;   #根目录文件夹
        index  index.html index.htm;
    }

    error_page   500 502 503 504  /50x.html;
    location = /50x.html {
        root   html;
    }

    #监控页配置
    location /stat {
        rtmp_stat all;
        rtmp_stat_stylesheet stat.xsl;
    }
    location /stat.xsl {
        root html;
    }
}
具体配置信息的含义,在nginx-rtmp-model的github有详细的解释:(reference)
5)启动nginx
/home/zhenhua.zhang/nginstall/sbin/nginx -c /home/zhenhua.zhang/nginstall/conf/nginx.conf 搭建过程,到此结束。
4.valid
1)ffmpeg推流
ffmpeg -re -i /Users/zhangzhenhua/Desktop/testVideo.mp4 -vcodec copy -acodec copy -f flv rtmp://10.104.1.27:1935/hls在推流过程中,看到如下信息,并未报错:
且通过访问"serverip:81/stat",看到正在推流的信息,姑且说明,nginx-rtmp已经通了。
之后,再次推流,且通过vlc软件播放视频,network中的url配置为和推流时相同的地址即可,若播放成功,说明流媒体服务器搭建成功。此外,nginx安装路径下/logs/error.log可以查看下,推流以及播放过程中,是否出问题,若是,查下解决方案即可。
5.questions
1)nginx-rtmp在“./configure”时,报:No such file or directory
最处,我在测试环境已有的nginx上安装rtmp,因为此nginx非编译型安装,故重新选择安装1.8.1版本。
2).../nginx-rtmp-module/config: line 134: syntax error: unexpected end of file was configuredule
由于nginx-rtmp-model的源码是通过winscp拷贝到linux中,部分文件的编码格式改变了。安装时并不报错,启动nginx过程中,会弹出此错误。解决办法,rtmp源码先打包压缩,再传输,或直接在linux中clone.
3)nginx: [emerg] unknown directive "rtmp" in /home/zhenhua.zhang/nginx-installed/conf/nginx.conf:121
原因,同上。
6.addtion
对于已通过编译型方式安装了nginx的情况:
需要在源代码路径下,重新配置、编译 ./configure make, 之后将源码中的nginx拷贝到安装路径下/sbin/nginx即可。
-- 流媒体的路,才刚刚开始。
that's all.
2019年3月24日(周日)


