ubuntu20.04机器学习及日常使用环境搭建
ubuntu20.04机器学习及日常使用环境搭建
文章目录
- ubuntu20.04机器学习及日常使用环境搭建
- 分区
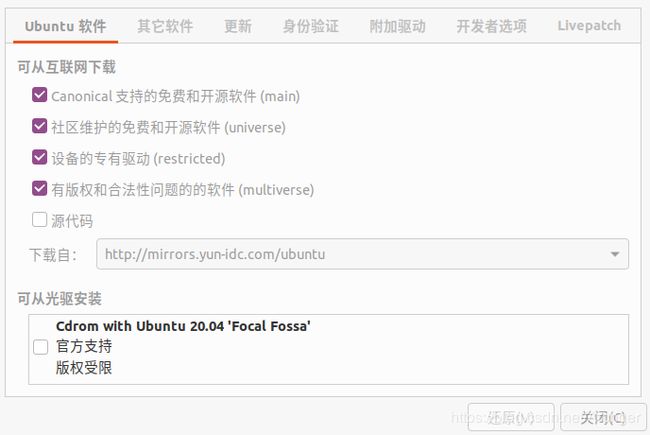
- 换源
- 设置网络环境
- 使用sudo执行命令走proxy代理不生效问题
- 安装google chrome浏览器
- 双系统下时间不对的问题
- 更换root密码
- 安装NVIDIA驱动
- 禁止ubuntu更新内核
- 终端美化
- 安装oh-my-zsh
- zsh-syntax-highlighting
- zsh-autosuggestions
- 安装cuda10.1
- gcc降级
- 安装cuda10.1
- 复制cuDNN内容到cuda相关文件夹内
- 安装sublime
- sublime汉化
- 安装cmake
- 安装openGL + glfw + glew + glad + assimp
- 安装常用软件
- 解决托盘不显示
- 安装cuda8
- 安装gcc5
- 安装cuda8
- Ubuntu下载工具uGet+aira2
- 安装搜狗输入法
- 添加ubuntukylin源
- 安装搜狗输入法
- 输入法设置
- 设置默认输入法
- 禁用IBus(可选)
- 安装文本比较器
分区
/usr 70G 逻辑分区 ext4
/swap 18G 交换空间 swap
/boot 1G 逻辑分区 ext4
/ 20G 逻辑分区 ext4
/efi 1G 逻辑分区 ext4
/tmp 5G 逻辑分区 ext4
/home left all 逻辑分区 ext4
换源
设置网络环境
参考 http://keyblog.cn/article-249.html
或 直接使用appimage
使用sudo执行命令走proxy代理不生效问题
问题描述:
在Linux系统中,在/etc/profile中设置了全局http_proxy代理或者在某个用户下设置了http_proxy代理。使用普通用户执行命令时代理是生效的,但是,在使用sudo执行命令的时候代理却不生效。
解决方法:
在/etc/sudoers中加入:
Defaults env_keep += “http_proxy https_proxy no_proxy”
安装google chrome浏览器
到 https://www.google.cn/chrome/ 下载
sudo dpkg -i google-chrome-stable_current_amd64.deb
双系统下时间不对的问题
timedatectl set-local-rtc 1 --adjust-system-clock
更换root密码
sudo passwd root
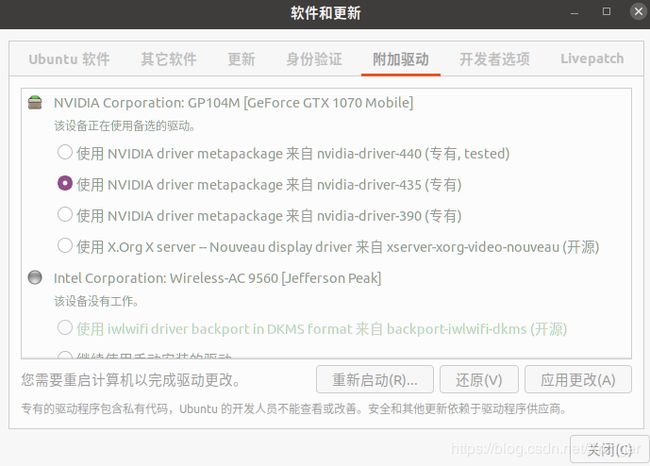
安装NVIDIA驱动
禁止ubuntu更新内核
查看已安装内核
dpkg --get-selections |grep linux-image
查看正在使用的内核
uname -a
删除旧内核
sudo apt-get remove linux-image-4.10.0-28-generic
sudo apt-get remove linux-image-extra-4.10.0-28-generic
或用这个命令移除
sudo dpkg --purge linux-image-4.4.0-21-generic
禁止更新内核,需时间来验证
sudo apt-mark hold linux-image-4.13.0-31-generic
sudo apt-mark hold linux-image-extra-4.13.0-31-generic
终端美化
https://kifarunix.com/install-and-setup-zsh-and-oh-my-zsh-on-ubuntu-20-04/
安装oh-my-zsh
sudo apt-get install zsh
sudo apt-get install git
sudo wget https://github.com/robbyrussell/oh-my-zsh/raw/master/tools/install.sh -O - | sh
chsh -s /bin/zsh\
如没有,注销重新登陆一下。(必须)
zsh-syntax-highlighting
作用 平常用的ls、cd 等命令输入正确会绿色高亮显示,输入错误会显示其他的颜色。
git clone https://github.com/zsh-users/zsh-syntax-highlighting.git ${ZSH_CUSTOM:-~/.oh-my-zsh/custom}/plugins/zsh-syntax-highlighting
在 ~/.zshrc 中配置
plugins=(其他的插件 zsh-syntax-highlighting)
使配置生效
source ~/.zshrc
zsh-autosuggestions
输入命令时,会给出建议的命令(灰色部分)按键盘 → 补全
git clone git://github.com/zsh-users/zsh-autosuggestions $ZSH_CUSTOM/plugins/zsh-autosuggestions
在 ~/.zshrc 中配置
plugins=(其他的插件 zsh-autosuggestions)
使配置生效
source ~/.zshrc
安装cuda10.1
输入nvidia-smi命令查看支持的cuda版本
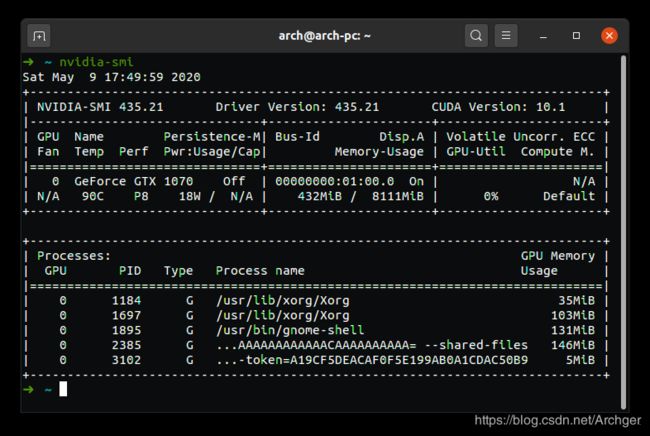
从https://developer.nvidia.com/cuda-toolkit-archive下载对应版本的cuda,选择18.04的版本即可
gcc降级
Ubuntu20.04自带的gcc版本为9.7.0,需要添加gcc7才可安装cuda10.1,输入命令按转gcc7
sudo apt-get install gcc-7 g+±7
查看gcc版本,可以看到目前系统中存在7和9两个版本
gcc -v # 用于查询当前版本
which gcc # 查询gcc所在位置(/usr/bin/gcc)
/usr/bin/gcc -v # 也可查询版本
ll /usr/bin/gcc* # 也可用于gcc查询版本
删除原始链接
sudo rm -rf /usr/bin/g++
sudo rm -rf /usr/bin/gcc
链接到新链接
sudo ln -s /usr/bin/gcc-7/usr/bin/gcc
sudo ln -s /usr/bin/g+±7/usr/bin/g++
安装cuda10.1
sudo sh cuda_10.1.105_418.39_linux_2.run
复制cuDNN内容到cuda相关文件夹内
sudo cp cuda/include/cudnn.h /usr/local/cuda/include
注意,解压后的文件夹名称为cuda ,将对应文件复制到 /usr/local中的cuda内
sudo cp cuda/lib64/libcudnn* /usr/local/cuda/lib64
sudo chmod a+r /usr/local/cuda/include/cudnn.h /usr/local/cuda/lib64/libcudnn*
安装sublime
wget -qO - https://download.sublimetext.com/sublimehq-pub.gpg | sudo apt-key add -
sudo apt-add-repository “deb https://download.sublimetext.com/ apt/stable/”
sudo apt install sublime-text
sublime汉化
1.https://github.com/Ihavee/st3-zh_CN/releases/latest 下载最新的 Source code (tar.gz)文件
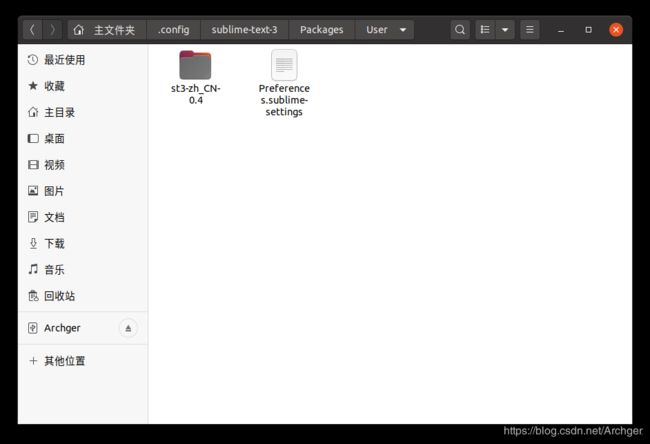
2.运行 Sublime Text 3,点击 Preferences – Browse Packages,会打开 Packages 目录
3.将 st3-zh_CN-0.3.tar.gz 移动到 Packages 下的 user 目录下之后提取
安装cmake
sudo apt install cmake
安装gui界面:
sudo apt-get install cmake-qt-gui
安装openGL + glfw + glew + glad + assimp
https://blog.csdn.net/l1216766050/article/details/102787618
https://blog.csdn.net/qq_42608626/article/details/99577448
安装常用软件
https://github.com/wszqkzqk/deepin-wine-ubuntu
解决托盘不显示
https://blog.csdn.net/xuelongqy/article/details/51340172?utm_source=blogxgwz6
https://github.com/GGleb/indicator-systemtray-unity
安装cuda8
安装gcc5
下载18.04的deb
https://packages.ubuntu.com/bionic/amd64/libmpx0/download
安装,本人下载整理的资源地址
按照依赖关系按顺序安装即可
安装cuda8
同上
Ubuntu下载工具uGet+aira2
sudo apt install uget aria2
在菜单栏中选择: 编辑–>设置,然后在弹出的对话框中选择:插件,然后插件匹配顺序中选择aira2
鼠标右键点击分类中的新建0
接着,选择弹出的菜单中的:属性,然后选择默认一般配置,修改最大连接数为16
设置uGet为Chrome的默认下载插件
Install uget-integrator
sudo add-apt-repository ppa:uget-team/ppa
sudo apt update
sudo apt install uget-integrator
安装Chrome插件:https://chrome.google.com/webstore/detail/uget-integration/efjgjleilhflffpbnkaofpmdnajdpepi?hl=zh-CN
添加uGet扩展后,谷歌浏览器右上角即可显示uGet图标。重启谷歌浏览器,只要点击下载链接,就会自动弹出uGet下载界面、自动添加下载任务。
安装搜狗输入法
参考:https://zhuanlan.zhihu.com/p/142206571
添加ubuntukylin源
根据官方教程添加ukui的官方源,为了安装及后续更新。此源中包含了麒麟版搜狗输入法。
curl -sL ‘https://keyserver.ubuntu.com/pks/lookup?&op=get&search=0x73BC8FBCF5DE40C6ADFCFFFA9C949F2093F565FF’ | sudo apt-key add
sudo apt-add-repository ‘deb http://archive.ubuntukylin.com/ukui focal main’
sudo apt upgrade
安装搜狗输入法
直接安装软件包,注意包名是sogouimebs而不是原来的sogoupinyin。这个版本在其他地方暂时是找不到的,因为是麒麟社区定制的版本。由于ubuntu和优麒麟一脉相承的关系,我们可以直接拿来用。
sudo apt install sogouimebs
输入法设置
根据自身需求针对输入法属性进行设置
sogouIme-configtool
设置默认输入法
进入设置,选择“区域与语言”,点击管理已安装的语言,把默认输入法设置为fcitx,重启电脑就可以使用搜狗输入法了。切换输入法按键Ctrl+Space。
禁用IBus(可选)
经过使用,我发现偶尔会遇到输入卡住的情况,ibus和fcitx发生冲突不是新鲜问题了,如果有相同的问题不妨卸载ibus试一试。
如果无法卸载ibus可以采用禁用ibus的方法。
sudo dpkg-divert --package im-config --rename /usr/bin/ibus-daemon
Adding ‘diversion of /usr/bin/ibus-daemon to /usr/bin/ibus-daemon.distrib by im-config’
附上启用ibus方法。
sudo dpkg-divert --package im-config --rename --remove /usr/bin/ibus-daemon
Removing 'diversion of /usr/bin/ibus-daemon to /usr/bin/ibus-daemon.distrib by im-c
安装文本比较器
sudo apt-get install kompare
未完待序…
