基于LNMP发布Discuz和WordPress!
利用3台服务器实战Linux+Nginx+PHP+MySQL主从,发布两个虚拟主机网站:Discuz和WordPress,数据库使用不同的库,实现通过两个域名dz.jf.com|wp.jf.com访问。 Node1:Linux+Nginx+PHP (FastCGI)Node2:MYSQL主库 Node3:MySQL从库
一.准备Discuz与WordPress软件包
1.Discuz_X3.1_SC_UTF8.zip
2.wordpress-4.9.7.tar.gz
二.准备一台装有Nginx+PHP的服务器
1.可以正常发布与访问即可
2.无,跟随配置一下跟随配置一下
三.安装Discuz
1.下载Discuz软件包
[root@localhost ~]# wget -c http://download.comsenz.com/DiscuzX/3.1/Discuz_X3.1_SC_UTF8.zip
2.安装服务
[root@localhost ~]# unzip Discuz_X3.1_SC_UTF8.zip -d /data/nginx/html   #解压至 /data/nginx/html 目录下
[root@localhost ~]# cd /data/nginx/html   #进入html目录
[root@localhost html]# mv upload/* /data/nginx/html   #移动 upload 目录下文件至 data/nginx/html 目录
[root@localhost html]# chmod 757 -R data/ uc_server/ config/ uc_client/   #为目录添加权限
3.修改Nginx配置文件
[root@localhost html]# cd /data/nginx/conf   #进入配置文件目录
[root@localhost conf]# vim nginx.conf   #修改nginx.conf
**Discuz server:**
server {
        listen       80;
        server_name  dz.jf.com;   #修改成需要的域名
        location / {
        root   /data/nginx/html;
        index  index.html index.php;
        }
		location ~ \.php$ {
        root           html;
        fastcgi_pass   127.0.0.1:9000;
        fastcgi_index  index.php;
		fastcgi_param  SCRIPT_FILENAME  /data/nginx/html$fastcgi_script_name;
        include        fastcgi_params;
		}
	}
4.重启Nginx服务
[root@localhost html]# /data/nginx/sbin/nginx -s reload
5.在MySQL创建Discuz数据库
MariaDB [(none)]> grant all on discuz.* to discuz@'192.168.1.113' identified by "gdl";   #创建MySQL连接用户
MariaDB [(none)]> create database discuz charset=utf8;   创建DIscuz数据库
MariaDB [(none)]> flush privileges;   #更新权限
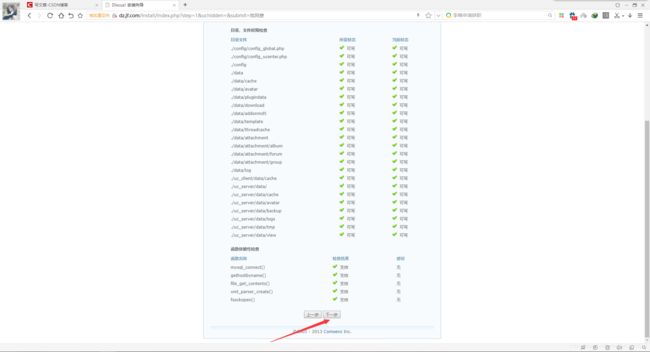
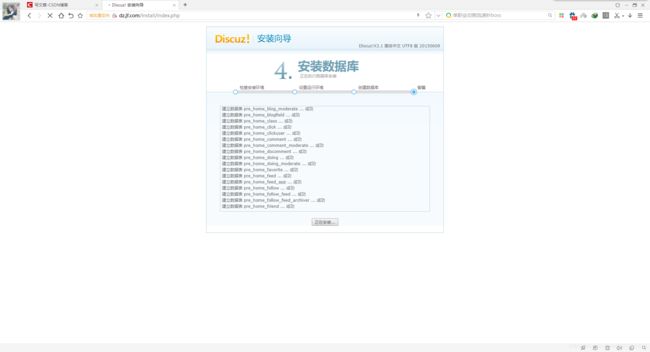
6.使用浏览器访问http://dz.jf.com,进行论坛安装


7.安装完毕,登录即可正常访问

三.安装WordPress
1.在/data/nginx目录下创建html_WP
[root@localhost nginx]# mkdir html_WP
2.下载WordPress软件包
[root@localhost nginx]# cd html_WP   #进入html_WP目录
[root@localhost ~]# wget -c https://wordpress.org/wordpress-4.9.7.tar.gz   #下载WordPress软件包
[root@localhost html_WP]# tar -xzf wordpress-4.9.7.tar.gz   #解压WordPress软件包
3.修改Nginx配置文件
[root@localhost html]# cd /data/nginx/conf   #进入配置文件目录
[root@localhost conf]# vim nginx.conf   #修改nginx.conf
**Discuz server:**
    server {
        listen       80;
        server_name  dz.jf.com;
        location / {
        root   /data/nginx/html;
        index  index.html index.php;
        }
	location ~ \.php$ {
        root           html;
        fastcgi_pass   127.0.0.1:9000;
        fastcgi_index  index.php;
		fastcgi_param  SCRIPT_FILENAME  /data/nginx/html$fastcgi_script_name;
        include        fastcgi_params;
		}
	}

**WordPress server:**
	server {
        listen       80;
        server_name  wp.jf.com;   #修改成需要的域名
        location / {
        root   /data/nginx/html_WP/wordpress;
        index  index.html index.php;
        }
	location ~ \.php$ {
        root           html;
        fastcgi_pass   127.0.0.1:9000;
        fastcgi_index  index.php;
		fastcgi_param  SCRIPT_FILENAME  /data/nginx/html_WP/wordpress$fastcgi_script_name;
        include        fastcgi_params;
		}
	}
4.重启Nginx服务
[root@localhost html]# /data/nginx/sbin/nginx -s reload
5.在MySQL创建WordPress数据库
MariaDB [(none)]> grant all on wordpress.* to wordpress@'192.168.1.113' identified by "gdl";   #创建MySQL连接用户
MariaDB [(none)]> create database wordpress;   创建WordPress数据库
MariaDB [(none)]> flush privileges;   #更新权限
6.使用浏览器访问http://wp.jf.com,进行博客安装


这一步提示缺少wp-config.php文件,进入目录创建wp-config.php
[root@localhost wordpress]# pwd   #当前位置
/data/nginx/html_WP/wordpress
[root@localhost wordpress]# touch wp-config.php   #创建 wp-config.php 空文件
[root@localhost wordpress]# vim wp-config.php   #修改 wp-config.php
`~lGI$2kdW)gk9-cF4q-zgX4qv_L~+J-Z*^?? K<5Lm%vg$fkOdZ;22=caRs%oK');
define('SECURE_AUTH_KEY',  'f>YG}MC-=LR%8]RBb58g/v?nW#+?#.Y7F@ctcdj^!wN9r*Lc0[fADdF+5oS25-ce');
define('LOGGED_IN_KEY',    's~`MBtq#RD<=:*i!V&HL()`1-&#:g[IO)kkBg8e[4aGy_3-q)!~6]zcF7H]zfz;|');
define('NONCE_KEY',        '$dfO <=?Hpm~$~%JS}(SWbbnw!.ong)k^g_ckm8=To?M)+MAF_lI5,F}p%RD');
define('AUTH_SALT',        'F@=!I#f7&V]Z:EY6wKq*cNA,%`itSDVnefSu*jRoaN-yYJL>mj|Yzh>%kb(lJP@++X8U(-WB;v9:U');
define('LOGGED_IN_SALT',   'V?Br9-EY@#z_vK^AE,y^iZqp|(5B_vR.7ci[?Ld%Z@6o=ihJ{M.){ FHC;V0c}~_');
define('NONCE_SALT',       'WSTpDT2|HoK CWaZ`
创建完成后继续进行:Run the installation

6.安装完毕登录完成,WordPress创建完成

四.当Discuz主数据库宕机时,可以使用以下方法解决
1.修改 /data/nginx/html/config/config_ucenter.php 文件
2.修改 /data/nginx/html/config/config_global.php 文件
// ----------------------------  CONFIG DB  ----------------------------- //
$_config['db']['1']['dbhost'] = '192.168.1.114';    #修改为从库192.168.1.115
$_config['db']['1']['dbuser'] = 'discuz';
$_config['db']['1']['dbpw'] = 'gdl';
$_config['db']['1']['dbcharset'] = 'utf8';
$_config['db']['1']['pconnect'] = '0';
$_config['db']['1']['dbname'] = 'discuz';
$_config['db']['1']['tablepre'] = 'pre_';
$_config['db']['slave'] = '';
$_config['db']['common']['slave_except_table'] = '';
3.修改 /data/nginx/html/uc_server/data/config.inc.php 文件
4.再次刷新页面就可以访问新数据库,但是主从复制失效。
五.当WordPress主数据库宕机时,可以使用以下方法解决
1.修改 /data/nginx/html_WP/wordpress/wp-config.php 文件
修改23行数据库ip
/** MySQL hostname */
define('DB_HOST', '192.168.1.114');    #修改为从库192.168.1.115
2.再次刷新页面就可以访问新数据库,但是主从复制失效。