LNMP+发布Zabbix监控
一、本次实验使用环境
1、192.168.1.105 Zabbix Server
Linux+Nginx+PHP+MariaDB+Zabbix Server
2、192.168.1.106 Zabbix Agent
Linux+Zabbix Agent
二、安装 LNMP 架构环境
1、先关闭CentOS系统防火墙
[root@localhost ~]# systemctl stop firewalld
2、安装 Nginx
①、安装PCRE库和基础库支持
[root@localhost ~]# yum install pcre-devel pcre gcc-c++ openssl openssl-devel zlib-devel -y
②、下载 Nginx 源码包
[root@localhost ~]# yum install wget -y
[root@localhost ~]# wget -c https://www.kuaidown.top/Linux/nginx-1.14.2.tar.gz
③、解压 Nginx 源码包,并创建服务用户
[root@localhost ~]# tar -xzf nginx-1.14.2.tar.gz
[root@localhost ~]# useradd -s /sbin/nologin nginx -M
④、进入 Nginx 源码包,进行预编译、编译与编译安装
[root@localhost ~]# cd nginx-1.14.2
[root@localhost nginx-1.14.2]# ./configure --prefix=/data/nginx --with-http_stub_status_module --with-http_ssl_module
[root@localhost nginx-1.14.2]# make && make install
⑤、检查 Nginx 配置文件是否正确,并启动服务
[root@localhost nginx-1.14.2]# /data/nginx/sbin/nginx -t
nginx: the configuration file /data/nginx/conf/nginx.conf syntax is ok
nginx: configuration file /data/nginx/conf/nginx.conf test is successful
[root@localhost nginx-1.14.2]# /data/nginx/sbin/nginx-
⑥、修改 Nginx 配置文件
[root@localhost nginx-1.14.2]# yum install vim -y
[root@localhost nginx-1.14.2]# vim /data/nginx/conf/nginx.conf
user  nginx;   #打开注释,修改用户
worker_processes  1;

#error_log  logs/error.log;
#error_log  logs/error.log  notice;
#error_log  logs/error.log  info;

#pid        logs/nginx.pid;


events {
    worker_connections  1024;
}


http {
    include       mime.types;
    default_type  application/octet-stream;

    #log_format  main  '$remote_addr - $remote_user [$time_local] "$request" '
    #                  '$status $body_bytes_sent "$http_referer" '
    #                  '"$http_user_agent" "$http_x_forwarded_for"';

    #access_log  logs/access.log  main;

    sendfile        on;
    #tcp_nopush     on;

    #keepalive_timeout  0;
    keepalive_timeout  65;

    #gzip  on;

    server {
        listen       80;
        server_name  localhost;

        #charset koi8-r;

        #access_log  logs/host.access.log  main;

        location / {
            root   /data/nginx/html;
            index  index.php index.html index.htm;
        }

        #error_page  404              /404.html;

        # redirect server error pages to the static page /50x.html
        #
        error_page   500 502 503 504  /50x.html;
        location = /50x.html {
            root   html;
        }

        # proxy the PHP scripts to Apache listening on 127.0.0.1:80
        #
        #location ~ \.php$ {
        #    proxy_pass   http://127.0.0.1;
        #}

        # pass the PHP scripts to FastCGI server listening on 127.0.0.1:9000
        #
        location ~ \.php$ {   #打开注释
            root           /data/nginx/html;   #打开注释
            fastcgi_pass   127.0.0.1:9000;   #打开注释
            fastcgi_index  index.php;   #打开注释
            fastcgi_param  SCRIPT_FILENAME   /data/nginx/html$fastcgi_script_name;   #打开注释
            include        fastcgi_params;   #打开注释
        }   #打开注释

        # deny access to .htaccess files, if Apache's document root
        # concurs with nginx's one
        #
        #location ~ /\.ht {
        #    deny  all;
        #}
    }


    # another virtual host using mix of IP-, name-, and port-based configuration
    #
    #server {
    #    listen       8000;
    #    listen       somename:8080;
    #    server_name  somename  alias  another.alias;

    #    location / {
    #        root   html;
    #        index  index.html index.htm;
    #    }
    #}


    # HTTPS server
    #
    #server {
    #    listen       443 ssl;
    #    server_name  localhost;

    #    ssl_certificate      cert.pem;
    #    ssl_certificate_key  cert.key;

    #    ssl_session_cache    shared:SSL:1m;
    #    ssl_session_timeout  5m;

    #    ssl_ciphers  HIGH:!aNULL:!MD5;
    #    ssl_prefer_server_ciphers  on;

    #    location / {
    #        root   html;
    #        index  index.html index.htm;
    #    }
    #}

}
3、安装 PHP 源码包
①、安装编译需要的依赖
[root@localhost ~]# yum install gd curl curl-devel libjpeg libjpeg-devel libpng libpng-devel freetype freetype-devel libxml2 libxml2-devel mysql-devel -y
②、下载 PHP 源码包
[root@localhost ~]# wget -c https://www.kuaidown.top/Linux/php-5.6.9.tar.gz
③、解压 PHP 源码包,并进行预编译、编译与编译安装
[root@localhost ~]# tar -xzf php-5.6.9.tar.gz
[root@localhost ~]# cd php-5.6.9
[root@localhost php-5.6.9]# ./configure --prefix=/data/php5 --enable-fpm --enable-debug --with-gd --with-jpeg-dir --with-png-dir --with-freetype-dir --enable-mbstring --with-curl --with-mysql --with-mysqli --disable-fileinfo --enable-bcmath --enable-sockets
[root@localhost php-5.6.9]# make && make install
④、编辑 PHP 文件权限与配置文件
[root@localhost php-5.6.9]# \cp php.ini-development /data/php5/lib/php.ini
[root@localhost php-5.6.9]# \cp /data/php5/etc/php-fpm.conf.default /data/php5/etc/php-fpm.conf
[root@localhost php-5.6.9]# \cp sapi/fpm/init.d.php-fpm /etc/init.d/php-fpm
[root@localhost php-5.6.9]# chmod 755 /etc/init.d/php-fpm
[root@localhost php-5.6.9]# chkconfig --add php-fpm
[root@localhost php-5.6.9]# chkconfig php-fpm on
⑤、修改 PHP 配置文件
[root@localhost php-5.6.9]# vim /data/php5/etc/php-fpm.conf
25 ;pid = run/php-fpm.pid   #原来
25 pid = run/php-fpm.pid   #修改为

149 user = nobody   #原来
149 group = nginx   #修改为

150 group = nobody   #原来
150 user = nginx   #修改为
4、YUM方式安装 MariaDB,并启动
[root@localhost ~]# yum install mariadb mariadb-devel mariadb-server -y
[root@localhost ~]# systemctl start mariadb
三、安装Zabbix Server端
1、下载 Zabbix 软件源码包
[root@localhost ~]# wget -c https://www.kuaidown.top/Linux/zabbix-4.2.5.tar.gz
2、安装编译所需组件,并创建服务用户
[root@localhost ~]# yum install curl curl-devel net-snmp libevent-devel net-snmp-devel perl-DBI mariadb-devel mysql-devel -y
[root@localhost ~]# groupadd  zabbix
[root@localhost ~]# useradd -g zabbix zabbix
[root@localhost ~]# usermod -s /sbin/nologin zabbix
3、创建 Zabbix 数据库连接用户
MariaDB [(none)]> create database zabbix charset=utf8;
Query OK, 1 row affected (0.00 sec)

MariaDB [(none)]> grant all on zabbix.* to zabbix@'192.168.1.105' identified by "gdl";
Query OK, 0 rows affected (0.00 sec)

MariaDB [(none)]> flush privileges;
Query OK, 0 rows affected (0.00 sec)
4、解压 Zabbix 软件包并将 Zabbix 基础SQL文件导入数据至 Zabbix 数据库
[root@localhost ~]# tar -xzf zabbix-4.2.5.tar.gz
[root@localhost ~]# cd zabbix-4.2.5
[root@localhost zabbix-4.2.5]# mysql -uzabbix -pgdl zabbix
[root@localhost zabbix-4.2.5]# mysql -uzabbix -pgdl zabbix
[root@localhost zabbix-4.2.5]# mysql -uzabbix -pgdl zabbix < database/mysql/data.sql
5、预编译、编译与编译安装 Zabbix_server
[root@localhost zabbix-4.2.5]# ./configure --prefix=/usr/local/zabbix/ --enable-server --enable-agent --with-mysql --enable-ipv6 --with-net-snmp --with-libcurl
[root@localhost zabbix-4.2.5]# make && make install
[root@localhost zabbix-4.2.5]# ln -s /usr/local/zabbix/sbin/zabbix_* /usr/local/sbin/
6、进入 Zabbix 备份配置文件
[root@localhost zabbix-4.2.5]# cd /usr/local/zabbix/etc
[root@localhost etc]# cp zabbix_server.conf zabbix_server.conf.bak
7、修改 Zabbix 配置文件
LogFile=/tmp/zabbix_server.log
DBHost=localhost   #需要取消注释
DBName=zabbix
DBUser=zabbix
DBPassword=gdl   #需要取消注释
8、拷贝 zabbix_server 启动脚本至 /etc/init.d/ 目录
[root@localhost ~]# cd /root/zabbix-4.2.5
[root@localhost zabbix-4.2.5]# cp misc/init.d/tru64/zabbix_server /etc/init.d/zabbix_server
[root@localhost zabbix-4.2.5]# chmod o+x /etc/init.d/zabbix_server
9、拷贝 Zabbix WEB 文件进 Nginx 发布目录
[root@localhost zabbix-4.2.5]# cp -a frontends/php/* /data/nginx/html/
10、重新启动Nginx、PHP服务
[root@localhost zabbix-4.2.5]# /data/nginx/sbin/nginx -s reload
[root@localhost zabbix-4.2.5]# systemctl restart php-fpm
11、访问网页进行安装 Zabbix
①、访问192.168.1.105/index.php
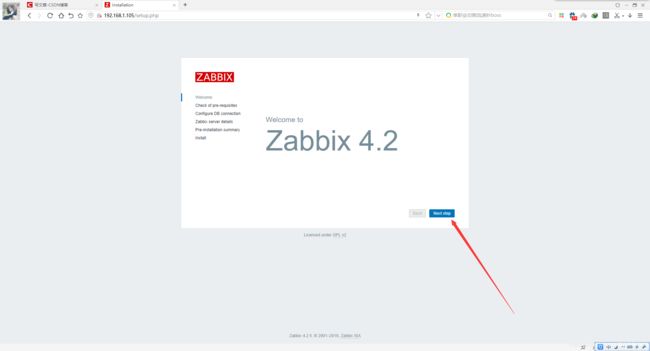

②、出现配置出错,进行修改
[root@localhost ~]# cd /data/php5/lib
[root@localhost lib]# vim php.ini
660 post_max_size = 16M
372 max_execution_time = 300
382 max_input_time = 300
927 date.timezone = Asia/shanghai
704 always_populate_raw_post_data = -1
③、重启 Nginx、PHP
[root@localhost lib]# systemctl restart php-fpm
[root@localhost lib]# /data/nginx/sbin/nginx -s reload
④、刷新页面继续进行安装
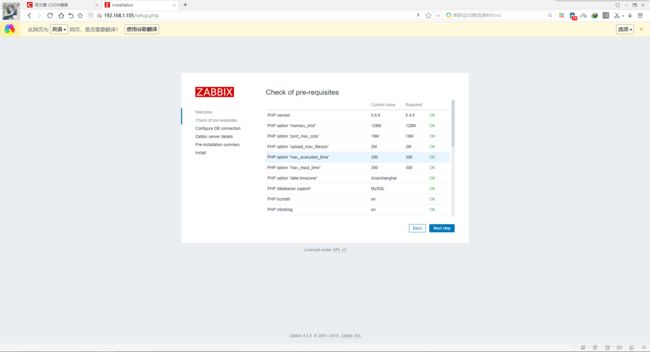
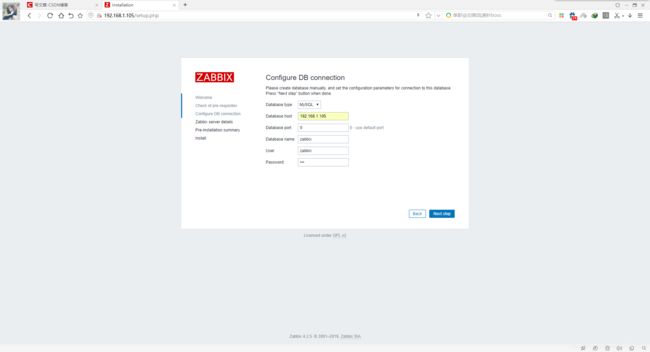
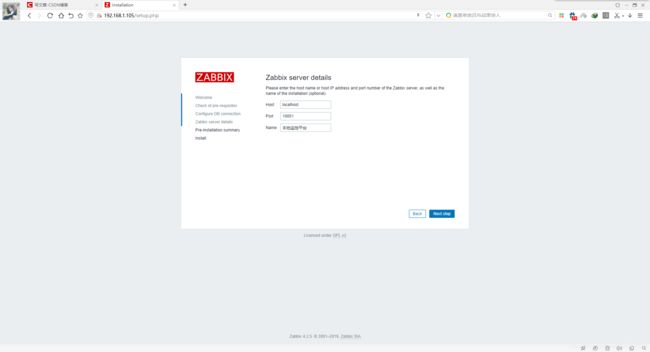


⑤、下载文件放入 /data/nginx/html/conf
将文件下载本机后,在上传服务器
[root@localhost conf]# yum install lrzsz -y
然后就可以上传服务器了
刷新页面
默认账号:admin
默认密码:zabbix
⑦、启动 Zabbix Server
[root@localhost conf]# cd /usr/local/zabbix/sbin/
[root@localhost sbin]# ./zabbix_server
四、安装Zabbix Agent端
1、安装编译所需组件,并创建服务用户
[root@localhost ~]# yum install gcc-c++ curl curl-devel net-snmp libevent-devel net-snmp-devel perl-DBI mariadb-devel mysql-devel -y
[root@localhost ~]# groupadd  zabbix
[root@localhost ~]# useradd -g zabbix zabbix
[root@localhost ~]# usermod -s /sbin/nologin zabbix
2、下载 Zabbix 软件源码包
[root@localhost ~]# wget -c https://www.kuaidown.top/Linux/zabbix-4.2.5.tar.gz
3、解压 Zabbix 源码包,进行预编译、编译与编译安装 Zabbix
[root@localhost ~]# tar -xzf zabbix-4.2.5.tar.gz
[root@localhost ~]# cd zabbix-4.2.5
[root@localhost zabbix-4.2.5]# ./configure --prefix=/usr/local/zabbix --enable-agent
[root@localhost zabbix-4.2.5]# make && make install
4、修改 Zabbix 客户端配置文件
[root@localhost zabbix-4.2.5]# cd /usr/local/zabbix/etc
[root@localhost etc]# cp zabbix_agentd.conf zabbix_agentd.conf.bak
[root@localhost etc]# vim zabbix_agentd.conf
94 Server=192.168.1.105
135 ServerActive=192.168.1.105
146 Hostname=192.168.1.106
5、拷贝 zabbix_agentd启动脚本至 /etc/init.d/ 目录,并启动
[root@localhost etc]# cd /root/zabbix-4.2.5
[root@localhost zabbix-4.2.5]# cp misc/init.d/tru64/zabbix_agentd /etc/init.d/zabbix_agentd
[root@localhost ~]# cd /usr/local/zabbix/sbin/
[root@localhost sbin]# ./zabbix_agentd
6、登录 Zabbix WEB 界面
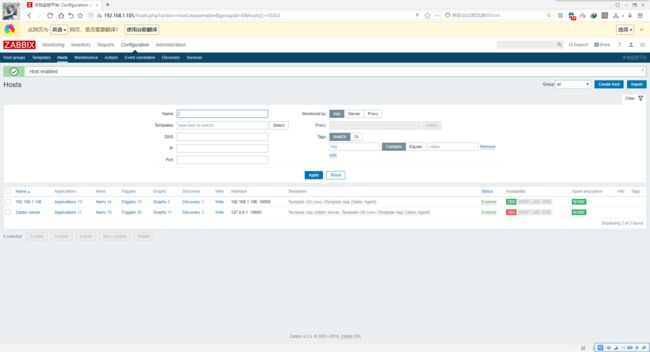
| Zabbix-WEB → configuration → hosts → Create host → Host name和Agent interfaces,同时选择添加templates模板 → 选择Add → 勾选Template OS Linux → 选择Add提交; |
|---|
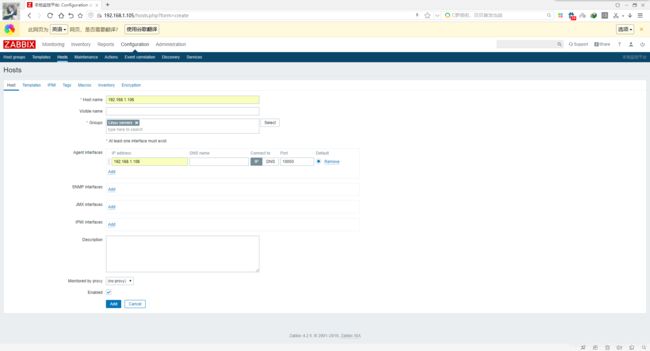

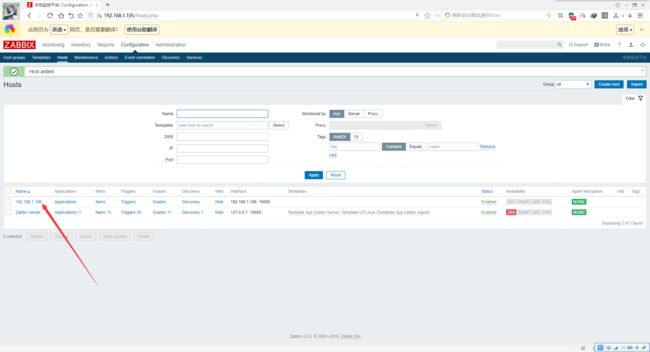
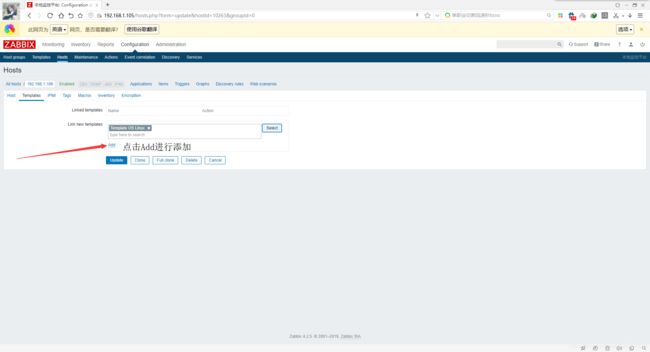
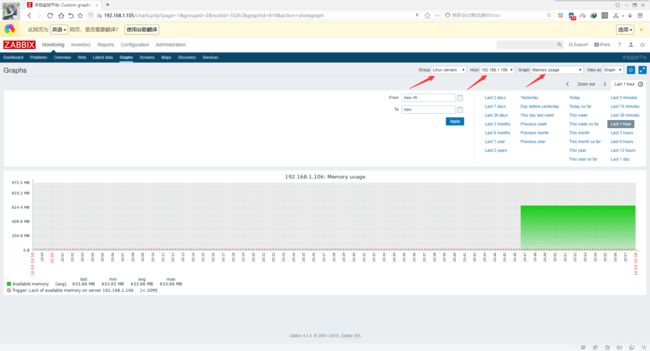
7、添加完模版,点击update,等待 Zabbix 连接

7、关闭防火墙,刷页面
[root@localhost sbin]# systemctl stop firewalld
五、中文字体乱码

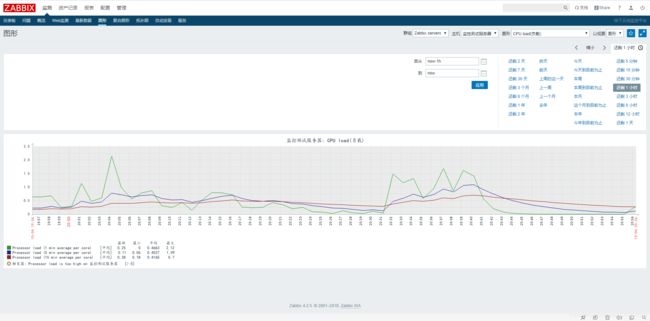
1、上图可以看到设置成默认中午,查看图表时出现“□□”,其实是字体原因
2、我们需要找到本机的中午字体文件上传至服务器

3.上传图片中选中的字体上传至服务器
#zabbix4.3的字体目录
[root@izuf6gc1hiv72w66vyzv5iz fonts]# pwd
/data/nginx/html/zabbix/assets/fonts
[root@izuf6gc1hiv72w66vyzv5iz fonts]# ls
DejaVuSans.ttf  simkai.ttf
4、修改网页配置文件
[root@izuf6gc1hiv72w66vyzv5iz include]# pwd
/data/nginx/html/zabbix/include
[root@izuf6gc1hiv72w66vyzv5iz include]# cp defines.inc.php defines.inc.php.bak
[root@izuf6gc1hiv72w66vyzv5iz include]# vim defines.inc.php
69 define('ZBX_GRAPH_FONT_NAME',           'DejaVuSans'); // font file name   #原来
69 define('ZBX_GRAPH_FONT_NAME',           'simkai'); // font file name       #修改为


