使用xmake构建STM32程序
主机环境:Windows 7 SP1
编译器版本:gcc-arm-none-eabi-7-2017-q4-major-win32
目标板:STM32F103C8T6单板
STM32库版本:STM32Cube_FW_F1_V1.6.0
XMAKE版本:2.1.9
之前一段时间一直在思索跨平台开发的问题,以前开发STM32用的是MDK开发环境,但该软件又只能在Windows平台使用,跨平台的集成开发环境有SW4STM32(支持windows、macos、linux),TureStudio(支持windows、linux),以及Embeded Studio(支持windows、macos、linux),最后的选择就是gcc了。其实SW4STM32和TureStudio也都是基于gcc的,两者基本类似,而Embeded Studio之前用过几次版本更新的也挺快的,就是现在要申请license才能编译,懒得弄了,刚好借此来学习一下gcc,网上大多数gcc历程都是gcc+eclipse+makefile的组合。之前申请了一块NXP的54608板卡,在SDK中有提到CMake,就去网上了解了一下,是一个挺好的工具,同时又知晓了另一个构建工具,即今天的主题-XMake,网址如下:http://xmake.io,有兴趣的可以去了解一下,xmake与cmake的区别是它不是生成工程文件为主,而是直接去编译,采用lua语言,支持三大平台,目前我也只是去官网学习了一下,还是处于一知半解的状态,因此用它来构建一下STM32来学习一下xmake和gcc,可谓是一举两得。
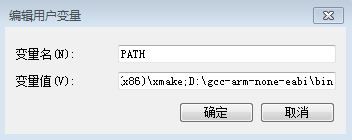
首先是安装xmake以及gcc工具链,并把它们添加到PATH中,如下:
接下来是编辑好我们的源码文件,由于只是学习,只需要很简单的功能即可,这里就以串口为例,进行简单的输出,拷贝UART_TwoBoards_ComPolling工程,命名为UART_Xmake,组织如下:

其中启动文件以及链接文件是从SW4STM32示例中拷贝出来的,主程序如下:
/**
  ******************************************************************************
  * @file    UART/UART_TwoBoards_ComPolling/Src/main.c
  * @author  MCD Application Team
  * @version V1.5.0
  * @date    14-April-2017
  * @brief   This sample code shows how to use UART HAL API to transmit
  *          and receive a data buffer with a communication process based on
  *          polling transfer.
  *          The communication is done using 2 Boards.
  ******************************************************************************
  * @attention
  *
  * © COPYRIGHT(c) 2016 STMicroelectronics
  *
  * Redistribution and use in source and binary forms, with or without modification,
  * are permitted provided that the following conditions are met:
  *   1. Redistributions of source code must retain the above copyright notice,
  *      this list of conditions and the following disclaimer.
  *   2. Redistributions in binary form must reproduce the above copyright notice,
  *      this list of conditions and the following disclaimer in the documentation
  *      and/or other materials provided with the distribution.
  *   3. Neither the name of STMicroelectronics nor the names of its contributors
  *      may be used to endorse or promote products derived from this software
  *      without specific prior written permission.
  *
  * THIS SOFTWARE IS PROVIDED BY THE COPYRIGHT HOLDERS AND CONTRIBUTORS "AS IS"
  * AND ANY EXPRESS OR IMPLIED WARRANTIES, INCLUDING, BUT NOT LIMITED TO, THE
  * IMPLIED WARRANTIES OF MERCHANTABILITY AND FITNESS FOR A PARTICULAR PURPOSE ARE
  * DISCLAIMED. IN NO EVENT SHALL THE COPYRIGHT HOLDER OR CONTRIBUTORS BE LIABLE
  * FOR ANY DIRECT, INDIRECT, INCIDENTAL, SPECIAL, EXEMPLARY, OR CONSEQUENTIAL
  * DAMAGES (INCLUDING, BUT NOT LIMITED TO, PROCUREMENT OF SUBSTITUTE GOODS OR
  * SERVICES; LOSS OF USE, DATA, OR PROFITS; OR BUSINESS INTERRUPTION) HOWEVER
  * CAUSED AND ON ANY THEORY OF LIABILITY, WHETHER IN CONTRACT, STRICT LIABILITY,
  * OR TORT (INCLUDING NEGLIGENCE OR OTHERWISE) ARISING IN ANY WAY OUT OF THE USE
  * OF THIS SOFTWARE, EVEN IF ADVISED OF THE POSSIBILITY OF SUCH DAMAGE.
  *
  ******************************************************************************
  */

/* Includes ------------------------------------------------------------------*/
#include "main.h"

/** @addtogroup STM32F1xx_HAL_Examples
  * @{
  */

/** @addtogroup UART_TwoBoards_ComPolling
  * @{
  */

/* Private typedef -----------------------------------------------------------*/
/* Private define ------------------------------------------------------------*/
//#define TRANSMITTER_BOARD

/* Private macro -------------------------------------------------------------*/
/* Private variables ---------------------------------------------------------*/
/* UART handler declaration */
UART_HandleTypeDef UartHandle;

/* Buffer used for transmission */
uint8_t aTxBuffer[] = " **** UART_Xmake sample ****";

/* Private function prototypes -----------------------------------------------*/
void SystemClock_Config(void);
static void Error_Handler(void);

/* Private functions ---------------------------------------------------------*/

/**
  * @brief  Main program
  * @param  None
  * @retval None
  */
int main(void)
{
  /* STM32F103xB HAL library initialization:
       - Configure the Flash prefetch
       - Systick timer is configured by default as source of time base, but user
         can eventually implement his proper time base source (a general purpose
         timer for example or other time source), keeping in mind that Time base
         duration should be kept 1ms since PPP_TIMEOUT_VALUEs are defined and
         handled in milliseconds basis.
       - Set NVIC Group Priority to 4
       - Low Level Initialization
     */
  HAL_Init();

  /* Configure the system clock to 64 MHz */
  SystemClock_Config();

  /*##-1- Configure the UART peripheral ######################################*/
  /* Put the USART peripheral in the Asynchronous mode (UART Mode) */
  /* UART configured as follows:
      - Word Length = 8 Bits
      - Stop Bit = One Stop bit
      - Parity = None
      - BaudRate = 9600 baud
      - Hardware flow control disabled (RTS and CTS signals) */
  UartHandle.Instance        = USARTx;

  UartHandle.Init.BaudRate     = 9600;
  UartHandle.Init.WordLength   = UART_WORDLENGTH_8B;
  UartHandle.Init.StopBits     = UART_STOPBITS_1;
  UartHandle.Init.Parity       = UART_PARITY_NONE;
  UartHandle.Init.HwFlowCtl    = UART_HWCONTROL_NONE;
  UartHandle.Init.Mode         = UART_MODE_TX_RX;
  if(HAL_UART_DeInit(&UartHandle) != HAL_OK)
  {
    Error_Handler();
  }
  if(HAL_UART_Init(&UartHandle) != HAL_OK)
  {
    Error_Handler();
  }

  /*##-2- Start the transmission process #####################################*/
  /* While the UART in reception process, user can transmit data through
     "aTxBuffer" buffer */
  if(HAL_UART_Transmit(&UartHandle, (uint8_t*)aTxBuffer, TXBUFFERSIZE, 5000)!= HAL_OK)
  {
    Error_Handler();
  }
  /* Infinite loop */
  while (1)
  {
  }
}

/**
  * @brief  System Clock Configuration
  *         The system Clock is configured as follow :
  *            System Clock source            = PLL (HSI)
  *            SYSCLK(Hz)                     = 64000000
  *            HCLK(Hz)                       = 64000000
  *            AHB Prescaler                  = 1
  *            APB1 Prescaler                 = 2
  *            APB2 Prescaler                 = 1
  *            PLLMUL                         = 16
  *            Flash Latency(WS)              = 2
  * @param  None
  * @retval None
  */
void SystemClock_Config(void)
{
  RCC_ClkInitTypeDef clkinitstruct = {0};
  RCC_OscInitTypeDef oscinitstruct = {0};

  /* Configure PLL ------------------------------------------------------*/
  /* PLL configuration: PLLCLK = (HSI / 2) * PLLMUL = (8 / 2) * 16 = 64 MHz */
  /* PREDIV1 configuration: PREDIV1CLK = PLLCLK / HSEPredivValue = 64 / 1 = 64 MHz */
  /* Enable HSI and activate PLL with HSi_DIV2 as source */
  oscinitstruct.OscillatorType  = RCC_OSCILLATORTYPE_HSI;
  oscinitstruct.HSEState        = RCC_HSE_OFF;
  oscinitstruct.LSEState        = RCC_LSE_OFF;
  oscinitstruct.HSIState        = RCC_HSI_ON;
  oscinitstruct.HSICalibrationValue = RCC_HSICALIBRATION_DEFAULT;
  oscinitstruct.HSEPredivValue    = RCC_HSE_PREDIV_DIV1;
  oscinitstruct.PLL.PLLState    = RCC_PLL_ON;
  oscinitstruct.PLL.PLLSource   = RCC_PLLSOURCE_HSI_DIV2;
  oscinitstruct.PLL.PLLMUL      = RCC_PLL_MUL16;
  if (HAL_RCC_OscConfig(&oscinitstruct)!= HAL_OK)
  {
    /* Initialization Error */
    while(1);
  }

  /* Select PLL as system clock source and configure the HCLK, PCLK1 and PCLK2
     clocks dividers */
  clkinitstruct.ClockType = (RCC_CLOCKTYPE_SYSCLK | RCC_CLOCKTYPE_HCLK | RCC_CLOCKTYPE_PCLK1 | RCC_CLOCKTYPE_PCLK2);
  clkinitstruct.SYSCLKSource = RCC_SYSCLKSOURCE_PLLCLK;
  clkinitstruct.AHBCLKDivider = RCC_SYSCLK_DIV1;
  clkinitstruct.APB2CLKDivider = RCC_HCLK_DIV1;
  clkinitstruct.APB1CLKDivider = RCC_HCLK_DIV2;
  if (HAL_RCC_ClockConfig(&clkinitstruct, FLASH_LATENCY_2)!= HAL_OK)
  {
    /* Initialization Error */
    while(1);
  }
}

/**
  * @brief  UART error callbacks
  * @param  UartHandle: UART handle
  * @note   This example shows a simple way to report transfer error, and you can
  *         add your own implementation.
  * @retval None
  */
void HAL_UART_ErrorCallback(UART_HandleTypeDef *UartHandle)
{
    Error_Handler();
}

/**
  * @brief  This function is executed in case of error occurrence.
  * @param  None
  * @retval None
  */
static void Error_Handler(void)
{
  while(1)
  {
    HAL_Delay(1000);
  }
}

#ifdef  USE_FULL_ASSERT

/**
  * @brief  Reports the name of the source file and the source line number
  *         where the assert_param error has occurred.
  * @param  file: pointer to the source file name
  * @param  line: assert_param error line source number
  * @retval None
  */
void assert_failed(uint8_t* file, uint32_t line)
{
  /* User can add his own implementation to report the file name and line number,
     ex: printf("Wrong parameters value: file %s on line %d\r\n", file, line) */

  /* Infinite loop */
  while (1)
  {
  }
}
#endif


/**
  * @}
  */

/**
  * @}
  */

/************************ (C) COPYRIGHT STMicroelectronics *****END OF FILE****/
xmake构建程序需要一个名为xmake.lua的文件,该文件可以自动生成,输入xmake后会提示你找不到xmake.lua文件,输入y来生成该文件,或是从xmake安装目录下拷贝一个示例的xmake.lua文件,两种方式都可以。我使用的第一种方式,有了xmake.lua文件后我们就可以在上面添加一下配置信息来构建我们的STM32程序,关于xmake.lua的信息可以去官网上查看手册来了解它.
此外,我们还需要对xmake做一些配置,xmake是支持多平台的构建,包括windows、linux、macos、cross、android等,这里我们需要配置为cross即跨平台,输入xmake f --menu会弹出配置对话框,如下:

进入第一项Basic Configuration,配置平台、体系架构、以及目标类型,如下:

这里我们需要配置前6项,前5项配置很容易,做一些选择即可,接下来配置第6项,如下:

设置工具链前缀以及目录,后面还需要配置编译器以及连接器,如下:


配置完后保存退出,会发现当前目录下多了一个.xmake文件夹

其中xmake.conf就包含了刚才我们的配置信息:

其他文件的信息,可以多去官网查看,.xmake文件夹下的文件是xmake自动生成的,直接修改配置文件是不行的。
接下来就是更改我们的xmake.lua文件,该文件主要是添加源文件,设置头文件搜索路径、添加宏定义、以及设置编译和链接选项,该文件内容如下:
-- the debug mode
if is_mode("debug") then

    -- enable the debug symbols
    set_symbols("debug")

    -- disable optimization
    set_optimize("none")
end

-- the release mode
if is_mode("release") then

    -- set the symbols visibility: hidden
    set_symbols("hidden")

    -- enable fastest optimization
    set_optimize("fastest")

    -- strip all symbols
    set_strip("all")
end
-- define target
target("UART_Xmake.elf")

    -- set kind
    set_kind("binary")

    -- add files
    add_files("startup_stm32f103xb.s")
    add_files("Src/*.c")
    add_files("../../../../../Drivers/BSP/STM32F1xx_Nucleo/stm32f1xx_nucleo.c")
    add_files("../../../../../Drivers/STM32F1xx_HAL_Driver/Src/stm32f1xx_hal.c")
    add_files("../../../../../Drivers/STM32F1xx_HAL_Driver/Src/stm32f1xx_hal_rcc.c")
    add_files("../../../../../Drivers/STM32F1xx_HAL_Driver/Src/stm32f1xx_hal_cortex.c")
    add_files("../../../../../Drivers/STM32F1xx_HAL_Driver/Src/stm32f1xx_hal_uart.c")
    add_files("../../../../../Drivers/STM32F1xx_HAL_Driver/Src/stm32f1xx_hal_dma.c")
    add_files("../../../../../Drivers/STM32F1xx_HAL_Driver/Src/stm32f1xx_hal_rcc_ex.c")
    add_files("../../../../../Drivers/STM32F1xx_HAL_Driver/Src/stm32f1xx_hal_gpio.c")
    add_files("../../../../../Drivers/STM32F1xx_HAL_Driver/Src/stm32f1xx_hal_gpio.c")

    --add include search directories
    add_includedirs("Inc")
    add_includedirs("../../../../../Drivers/CMSIS/Device/ST/STM32F1xx/Include")
    add_includedirs("../../../../../Drivers/CMSIS/Include")
    add_includedirs("../../../../../Drivers/STM32F1xx_HAL_Driver/Inc")
    add_includedirs("../../../../../Drivers/BSP/STM32F1xx_Nucleo")

    --add macro defination
    add_defines("USE_HAL_DRIVER","STM32F103xB","USE_STM32F1xx_NUCLEO")

    -- set warning all as error
    set_warnings("all", "error")

    -- set language: c99
    set_languages("c99")

    add_cxflags("-mcpu=cortex-m3 -mthumb -mfloat-abi=soft --specs=nano.specs  -ffunction-sections -fdata-sections")
    add_ldflags("-mcpu=cortex-m3 -mthumb -mfloat-abi=soft --specs=nosys.specs --specs=nano.specs -T\"STM32F103RBTx_FLASH.ld\" -Wl,--gc-sections")
    after_build(function(target)
        os.exec("arm-none-eabi-objcopy -O binary .\\build\\UART_Xmake.elf .\\build\\UART_Xmake.bin")
    end)
-- FAQ
--
-- You can enter the project directory firstly before building project.
--
--   $ cd projectdir
--
-- 1. How to build project?
--
--   $ xmake
--
-- 2. How to configure project?
--
--   $ xmake f -p [macosx|linux|iphoneos ..] -a [x86_64|i386|arm64 ..] -m [debug|release]
--
-- 3. Where is the build output directory?
--
--   The default output directory is `./build` and you can configure the output directory.
--
--   $ xmake f -o outputdir
--   $ xmake
--
-- 4. How to run and debug target after building project?
--
--   $ xmake run [targetname]
--   $ xmake run -d [targetname]
--
-- 5. How to install target to the system directory or other output directory?
--
--   $ xmake install
--   $ xmake install -o installdir
--
-- 6. Add some frequently-used compilation flags in xmake.lua
--
-- @code
--    -- add macro defination
--    add_defines("NDEBUG", "_GNU_SOURCE=1")
--
--    -- set warning all as error
--    set_warnings("all", "error")
--
--    -- set language: c99, c++11
--    set_languages("c99", "cxx11")
--
--    -- set optimization: none, faster, fastest, smallest
--    set_optimize("fastest")
--
--    -- add include search directories
--    add_includedirs("/usr/include", "/usr/local/include")
--
--    -- add link libraries and search directories
--    add_links("tbox", "z", "pthread")
--    add_linkdirs("/usr/local/lib", "/usr/lib")
--
--    -- add compilation and link flags
--    add_cxflags("-stdnolib", "-fno-strict-aliasing")
--    add_ldflags("-L/usr/local/lib", "-lpthread", {force = true})
--
-- @endcode
--
-- 7. If you want to known more usage about xmake, please see http://xmake.io/#/home
--

好了,使用xmake来构建STM32程序的示例就完成了。