讲一下SpringBoot 中使用比较多的Web开发。
全部章节传送门:
Spring Boot学习笔记(一):Spring Boot 入门基础
Spring Boot学习笔记(二):Spring Boot 运行原理
Spring Boot学习笔记(三):Spring Boot Web开发
Spring Boot学习笔记(四):Spring Boot 数据访问
Spring Boot学习笔记(五):Spring Boot 企业级开发
Spring Boot学习笔记(六):Spring Boot 应用监控
SpringBoot提供了spring-boot-starter-web为Web开发提供支持,其中包含嵌入的Tomcat以及SpringMVC的依赖。
Thymeleaf模板引擎
在SpringMVC中使用较多的是JSP,而在SpringBoot中,由于JSP在内嵌的Servlet容器上运行有一些问题,所以建议使用Thymeleaf模板引擎。
引入Thymeleaf
引入Thymeleaf需要在pom.xml文件中添加依赖。
    org.springframework.boot
    spring-boot-starter-thymeleaf
配置Thymeleaf
首先,SpringBoot通过org.springframework.boot.autoconfigure.thymeleaf包对Thymeleaf进行了自动配置。
包里面有3个类,其中ThymeleafAutoConfiguration类对继承所需要的Bean进行自动配置,包括templateResolver、
templateEgine和thymeleafViewResolver的配置。
ThymeleafProperties类包含Thymeleaf的自动配置,通过源码可以进行分析。
public class ThymeleafProperties {
    private static final Charset DEFAULT_ENCODING;
    public static final String DEFAULT_PREFIX = "classpath:/templates/";
    public static final String DEFAULT_SUFFIX = ".html";
    private boolean checkTemplate = true;
    private boolean checkTemplateLocation = true;
    private String prefix = "classpath:/templates/"; //默认前缀
    private String suffix = ".html"; //默认后缀
    private String mode = "HTML"; //默认模板模式
    private Charset encoding; //编码
    private boolean cache; //开启模板缓存
    ...
}
如过想要对配置进行修改,可以在application.properties中以spring.theymeleaf为开头进行配置。例如,模板缓存默认开启,在开发中我们想要关闭,则可以如下配置。
spring.thymeleaf.cache=false
编写模板文件
首先创建一个用来在模板页面中展示的实体类Person。
package com.wyk.exercise.bean;

public class Person {
    private String name;
    private Integer age;

    public Person() {}

    public Person(String name, Integer age) {
        this.name = name;
        this.age = age;
    }

    public String getName() {
        return name;
    }

    public void setName(String name) {
        this.name = name;
    }

    public Integer getAge() {
        return age;
    }

    public void setAge(Integer age) {
        this.age = age;
    }
}
在默认放置静态文件的目录src/main/resources/static下,添加Bootstrap和jQuery文件引用。在默认放置页面的目录src/main/resources/templates下,新建页面index.html。
访问model
列表
-
这里需要注意的一个知识点是Thymeleaf获取值得方法:[[${xx.name}]],可以直接获取xx里面的name值。
一开始使用的错误写法:th:onclick="'getName(\''+${person.name}+'\');'",
后来修改的正确写法:th:onclick="getName([[${person.name}]]);"。
添加控制器
在Applicaton类中添加控制器和相关数据。需要注意的是类上的控制器注解是@Controller而不是@RestController,因为@RestController会自动将返回结果转为字符串。
@Controller
@SpringBootApplication
public class ExerciseApplication {

    public static void main(String[] args) {
        //SpringApplication.run(ExerciseApplication.class, args);
        SpringApplication app = new SpringApplication(ExerciseApplication.class);
        app.setBannerMode(Banner.Mode.OFF);
        app.run(args);
    }

    @RequestMapping("/")
    public String index(Model model) {
        Person single = new Person("Lily", 11);

        List people = new ArrayList();
        Person p1 = new Person("Peter", 22);
        Person p2 = new Person("Ame", 12);
        Person p3 = new Person("Nacy", 21);
        people.add(p1);
        people.add(p2);
        people.add(p3);

        model.addAttribute("singlePerson", single);
        model.addAttribute("people", people);

        return "index";
    }
}
这时候运行程序,即可查看运行结果。
Web相关配置
SpringBoot自动配置
SpringBoot中Web相关配置在org.springframework.boot.autoconfigure.web.servlet包下的WebMvcAutoConfiguration类和WebMvcProperties类中。
自动配置的ViewResolver
SpringBoot当中自动配置的ViewResolver包括:
- ContentNegotiatingViewResolver: 它自己不处理View,而实代理给不同的ViewResolver来处理不同的View,拥有最高优先级。
- BeanNameViewResolver: 根据返回的字符串(视图名)来寻找相应的View渲染视图。
- InternalResourceViewResolver: 通过设置前缀、后缀和控制器中的方法来返回视图名的字符串,以得到实际页面。
自动配置的静态资源
在addResourceHandlers方法中定义了静态资源的自动配置,包括:
- 类路径文件:类路径下的/static、/public、/resources和/META-INF/resources文件夹下的静态文件直接映射为**,可以通过
http://localhost:8080/**来访问。 - webjar:webjar指将常用的脚本框架封装在jar包中的jar包。把webjar的/META-INF/resources/webjars/下的静态文件映射为/webjar/**,可以通过
http://localhost:8080/webjar/**来访问。
自动配置的Formatter和Converter
只要定义了Converter、GenericConverter和Formatter接口的实现类的Bean,这些Bean会自动注册。
自动配置的HttpMessageConverters
SpringBoot自动注册的HttpMessageConverter包含SpringMVC下默认的所有HttpMessageConverter。另外,当jackson或gson的jar包在类路径上的时候,它们相关的HttpMessageConverter也会自动注册。
如果要新增自定义的HttpMessageConverter,只需要定义一个HttpMessageConvertersd的bean,在此bean中注册自定义HttpMessageConverter即可。
自动配置的静态首页
把静态的index.html文件放到如下目录:
- classpath:/META-INF/resources/index.html
- classpath:/resources/index.html
- classpath:/static/index.html
- classpath:/public/idnex.html
当我们访问应用根目录的时候就会直接映射。
自定义Web配置
如果SpringBoot提供的SpringMVC默认配置不符合需求的时候,则可以通过一个配置类(注解有@Configuration)加上@EnableWebMvc注解来实现完全自己控制的MVC配置。
如果既想保留SpringBoot的配置,又想增加额外的自定义配置,则可以定义一个配置类(注解有@Configuration)并继承WebMvcConfigurerAdapter,无须使用@EnableWebMvc注解,按照SpringMVC添加配置的方法来添加其它配置。
注册Servlet、Filter、Listener
有2种方式,一种是将Servlet、Filter、Listener声明为Spring Bean从而达到效果,一种是作为参数注册到相应的ServletRegistrationBean、FilterRegistrationBean、ServletListernerRegistrationBean。
Servlet配置
SpringBoot的默认配置容器是Tomcat,但相关配置对Tomcat、Jetty和Undertow类似。
通过文件配置Tomcat
有关Tomcat的属性在org.springframework.boot.autoconfigure.web.ServerProperties配置类中,只需在application.properties中进行配置即可。其中通用的Servelt容器配置以server作为前缀,Tomcat特有的配置以sever.tomcat作为前缀。
配置Servlet容器:
server.port= #程序入口,默认8080
server.session-timeout= #用户会话session过期时间
server.context-path= #访问路径
配置Tomcat:
server.tomcat.url-encoding= #编码,默认为utf8
server.tomcat.compression= #是否开启压缩,默认关闭
通过代码配置Tomcat
如果需要通过代码的形式配置Servlet容器,注册一个实现EmbeddedServletContainerCustomizer接口的Bean,实现其customize方法。如果在@SpringBootApplication注解类中进行配置,则需将内部类声明为static。
@Component
public static class CustomServletContainer implements EmbeddedServletContainerCustomizer{
    @Override
    public void customize(ConfigurableEmbeddedServletContainer container) {
        container.setPort(8888);//1
        container.addErrorPages(new ErrorPage(HttpStatus.NOT_FOUND, "/404.html"));
        container.setSessionTimeout(10,TimeUnit.MINUTES);
    }
}
如果想直接配置Tomcat,则可以构建TomcatServletWebServerFactory的bean,在其中定义TomcatEmbeddedServletContainerFactory。
@Bean
public TomcatServletWebServerFactory servletContainer(){
    TomcatEmbeddedServletContainerFactory factory = new TomcatEmbeddedServletContainerFactory();
    factory.setUriEncoding(Charset.forName("UTF-8"));
    return factory;
}
替换Tomcat
SpringBoot默认使用Tomcat作为内嵌Servlet容器,如果想要更换,只需修改pom.xml中的依赖即可。
    org.springframework.boot
    spring-boot-starter-web


            org.springframework.boot
            spring-boot-starter-tomcat


    org.springframework.boot
    spring-boot-starter-jetty
SSL配置
SSL(Secure Sockets Layer 安全套接层),及其继任者传输层安全(Transport Layer Security,TLS)是为网络通信提供安全及数据完整性的一种安全协议。
在基于B/S的WEB应用中,是通过HTTPS来实现SSL的。HTTPS是以安全为目的的HTTP通道,简单讲就是HTTP的安全版,即在HTTP下加入SSL。
生成证书
使用SSL首先需要一个证书,在各大云服务商都可以申请到SSL官方证书。在JDK中可以自己生成 SSL证书,但是这个不被官方存档认可的。
在JAVA_HOME的bin目录下找到keytool.exe,在命令行中输入:
keytool -keystore D:\wyk.keystore -alias tomcat -genkeypair -keyalg RSA -keysize 2048 -ext SAN=ip:127.0.0.1
这里简单说以下生成证书的命令,因为一开始在Chrome浏览器下一直报ERR_SSL_VERSION_OR_CIPHER_MISMATCH的错误,花了不少精力解决。
-
-keystore D:\wyk.keystore是在D盘下生成证书文件,因为默认生成在C盘用户目录下,有可能会没有写权限导致生成失败。 -
-keyalg RSA是选择RSA算法,因为默认的DSA算法Chrome浏览器是不支持的。 -
-keysize 2048是选择2048bits,貌似有些版本的JAVA默认是1024bits,而它已经被官方禁止使用。 -
-ext SAN=ip:127.0.0.1是添加SAN扩展名,SAN中的值与用于连接的名称匹配,不知道有没有用,就加上了。

可以使用keytool -list -keystore D:\wyk.keystore -v查看证书的详细信息
SpringBoot配置SSL
将wyk.keystore文件放到项目的根目录src/main/resources下。在application.properties里面添加SSL相关配置:
server.port=8888
server.ssl.key-store=classpath:wyk.keystore
server.ssl.key-store-password=123456
server.ssl.key-store-type=JKS
server.ssl.key-alias=tomcat
注意其中server.ssl.key-store的位置要添加classpath,否则会报如下错误:
o.s.b.d.LoggingFailureAnalysisReporter : Application failed to start due to an exception
运行程序,访问https://localhost:8888/。
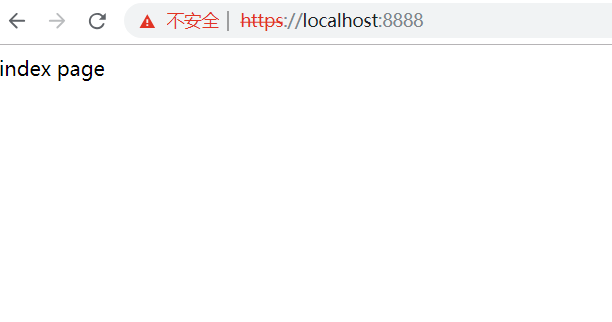
http转向https
在很多时候,我们在浏览器地址栏输入http,但是会自动跳转到https。要实现这个功能,需要配置TomcatServletWebServerFactory,并且添加Tomcat的connector来实现。
package com.wyk.exercise;

import org.apache.catalina.Context;
import org.apache.catalina.connector.Connector;
import org.apache.tomcat.util.descriptor.web.SecurityCollection;
import org.apache.tomcat.util.descriptor.web.SecurityConstraint;
import org.springframework.boot.Banner;
import org.springframework.boot.SpringApplication;
import org.springframework.boot.autoconfigure.SpringBootApplication;
import org.springframework.boot.web.embedded.tomcat.TomcatServletWebServerFactory;
import org.springframework.context.annotation.Bean;
import org.springframework.stereotype.Controller;

@Controller
@SpringBootApplication
public class ExerciseApplication {

    public static void main(String[] args) {
        //SpringApplication.run(ExerciseApplication.class, args);
        SpringApplication app = new SpringApplication(ExerciseApplication.class);
        app.setBannerMode(Banner.Mode.OFF);
        app.run(args);
    }

    @Bean
    public TomcatServletWebServerFactory servletContainer() {
        TomcatServletWebServerFactory tomcat = new TomcatServletWebServerFactory() {
            @Override
            protected void postProcessContext(Context context) {
                SecurityConstraint securityConstraint = new SecurityConstraint();
                securityConstraint.setUserConstraint("CONFIDENTIAL");
                SecurityCollection collection = new SecurityCollection();
                collection.addPattern("/*");
                securityConstraint.addCollection(collection);
                context.addConstraint(securityConstraint);
            }
        };
        tomcat.addAdditionalTomcatConnectors(httpConnector());
        return tomcat;
    }

    @Bean
    public Connector httpConnector() {
        Connector connector = new Connector("org.apache.coyote.http11.Http11NioProtocol");
        connector.setScheme("http");
        connector.setPort(8080);
        connector.setSecure(false);
        connector.setRedirectPort(8888);
        return connector;
    }

}
这时候当访问http://localhost:8080 的时候,会自动跳转到https://localhost:8888/。
Favicon配置
SpringBoot提供了一个默认的Favicon(网页图标),就是那片绿色的叶子。可以在application.properties中设置关闭Favicon。
spring.mvc.favicon.enabled=false
要想设置自己favicon,要将自己的favicon.ico(文件名不能变动)放到类路径根目录、类路径META-INF/resources/下、类路径resources/下、类路径static/下或类路径public/下。
WebSocket
WebSocket是一种网络通信协议,很多高级功能都需要它。
因为HTTP协议有一个缺陷:通信只能由客户端发起。最典型的场景就是聊天室,假如用HTTP协议的话,就只能去轮询获取服务端有没有消息了,而用WebSocket的话,服务端有新消息可以自动推送。使用较多的是WebSocket的子协议STOMP,它使用一个基于帧的格式来定义消息。
创建一个springboot项目并添加Thymeleaf和WebSocket依赖。
广播式WebSocket
广播式即服务端有消息时,会将消息发送给所有连接了当前endpoint的浏览器。
(1) 配置WebSocket
需要在配置类上使用@EnableWebSocketMessageBroker 注解开启WebSocket支持,并通过实现WebSocketMessageBrokerConfigurer接口来配置WebSocket。
package com.wyk.websocketdemo;

import org.springframework.context.annotation.Configuration;
import org.springframework.messaging.simp.config.MessageBrokerRegistry;
import org.springframework.web.socket.config.annotation.EnableWebSocketMessageBroker;
import org.springframework.web.socket.config.annotation.StompEndpointRegistry;
import org.springframework.web.socket.config.annotation.WebSocketMessageBrokerConfigurer;

@Configuration
@EnableWebSocketMessageBroker //在WebSocket上启用STOMP
public class WebSocketConfig implements WebSocketMessageBrokerConfigurer {

    @Override
    public void registerStompEndpoints(StompEndpointRegistry registry) {
        //websocket的端点,客户端需要注册这个端点进行链接
        registry.addEndpoint("/endpointWyk").withSockJS();
    }

    @Override
    public void configureMessageBroker(MessageBrokerRegistry registry) {
        registry.enableSimpleBroker("/topic");
    }
}
(2) 浏览器向服务器发送消息的接收类
package com.wyk.websocketdemo.domain;

public class WykMessage {
    private String name;

    public String getName() {
        return name;
    }
}
(3) 服务端向浏览器发送的消息类
package com.wyk.websocketdemo.domain;

public class WykResponse {
    private String responseMessage;

    public WykResponse(String responseMessage) {
        this.responseMessage = responseMessage;
    }

    public String getResponseMessage() {
        return responseMessage;
    }
}
(4) 添加控制器
package com.wyk.websocketdemo.web;

import com.wyk.websocketdemo.domain.WykMessage;
import com.wyk.websocketdemo.domain.WykResponse;
import org.springframework.beans.factory.annotation.Autowired;
import org.springframework.messaging.handler.annotation.MessageMapping;
import org.springframework.messaging.handler.annotation.SendTo;
import org.springframework.stereotype.Controller;

import java.security.Principal;

@Controller
public class WykController {

    @MessageMapping("/welcome")
    @SendTo("/topic/getResponse")
    public WykResponse say(WykMessage message) throws Exception {
        Thread.sleep(3000);
        return new WykResponse("Welcome, " + message.getName() + "!");
    }
}
(5) 添加演示页面
在src/main/resources/template下新建wyk.html。
Spring Boot + WebSocket + 广播式
(6) 配置ViewController
配置ViewController为wyk.html提供映射。
package com.wyk.websocketdemo.web;

import org.springframework.context.annotation.Configuration;
import org.springframework.web.servlet.config.annotation.ViewControllerRegistry;
import org.springframework.web.servlet.config.annotation.WebMvcConfigurer;

@Configuration
public class WebMvcConfig  implements WebMvcConfigurer {

    public void addViewControllers(ViewControllerRegistry registry) {
        registry.addViewController("/wyk").setViewName("/wyk");
        registry.addViewController("/login").setViewName("/login");
        registry.addViewController("/chat").setViewName("/chat");

    }
}
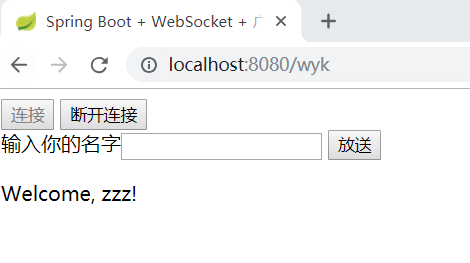
(7) 查看结果
打开多个浏览器,输入http://localhost:8080/wyk 进入页面,点击连接按钮,随便输入一个名字,点击发送按钮,发现所有的页面都受到了消息。在控制台可以查看相关日志。

点对点式 WebSocket
点对点式是聊天室场景常用的一种通讯方式,本部分在前面项目的基础上演示一个简单的聊天室程序。
(1) 引入Spring Security,在pom.xml中添加依赖。
    org.springframework.boot
    spring-boot-starter-security
(2) 对Spring Security进行简单配置。
package com.wyk.websocketdemo.web;

import org.springframework.context.annotation.Configuration;
import org.springframework.security.config.annotation.authentication.builders.AuthenticationManagerBuilder;
import org.springframework.security.config.annotation.web.builders.HttpSecurity;
import org.springframework.security.config.annotation.web.builders.WebSecurity;
import org.springframework.security.config.annotation.web.configuration.EnableWebSecurity;
import org.springframework.security.config.annotation.web.configuration.WebSecurityConfigurerAdapter;

@Configuration
@EnableWebSecurity
public class WebSecurityConfig extends WebSecurityConfigurerAdapter {
    @Override
    protected void configure(HttpSecurity http) throws Exception {
        http.authorizeRequests()
            //设置对/和/login不拦截
            .antMatchers("/","/login").permitAll()
            .anyRequest().authenticated()
            .and()
            //登录访问页面/login
            .formLogin()
            .loginPage("/login")
            //登陆成功转向/chat
            .defaultSuccessUrl("/chat")
            .permitAll()
            .and()
            .logout()
            .permitAll();
    }

    @Override
    protected void configure(AuthenticationManagerBuilder auth) throws Exception{
        //配置用户和角色
        auth.inMemoryAuthentication()
            .withUser("wyk").password("{noop}wyk").roles("USER")
            .and()
            .withUser("gjj").password("{noop}gjj").roles("USER");
    }

    @Override
    public void configure(WebSecurity web) throws Exception {
        //不拦截/resources/static/下的静态资源
        web.ignoring().antMatchers("/resources/static/**");
    }
}
需要注意的设置用户名密码的时候需要添加加密方式,放在花括号中。
(3) 配置WebSocket,增加endpoint和消息代理。
package com.wyk.websocketdemo;

import org.springframework.context.annotation.Configuration;
import org.springframework.messaging.simp.config.MessageBrokerRegistry;
import org.springframework.web.socket.config.annotation.EnableWebSocketMessageBroker;
import org.springframework.web.socket.config.annotation.StompEndpointRegistry;
import org.springframework.web.socket.config.annotation.WebSocketMessageBrokerConfigurer;

@Configuration
@EnableWebSocketMessageBroker //在WebSocket上启用STOMP
public class WebSocketConfig implements WebSocketMessageBrokerConfigurer {

    @Override
    public void registerStompEndpoints(StompEndpointRegistry registry) {
        //websocket的端点,客户端需要注册这个端点进行链接
        registry.addEndpoint("/endpointWyk").withSockJS();
        registry.addEndpoint("/endpointChat").withSockJS();
    }

    @Override
    public void configureMessageBroker(MessageBrokerRegistry registry) {
        registry.enableSimpleBroker("/queue", "/topic");
    }
}
(4) 在控制器WykController中添加配置
@Autowired
private SimpMessagingTemplate messagingTemplate; //向浏览器发送消息

@MessageMapping("/chat")
public void handleChat(Principal principal, String msg) { // Principal包含用户信息
    if(principal.getName().equals("wyk")) {
        messagingTemplate.convertAndSendToUser("gjj",
                "/queue/notifications", principal.getName() + "-send:" + msg);
    } else {
        messagingTemplate.convertAndSendToUser("wyk",
                "/queue/notifications", principal.getName() + "-send:" + msg);
    }
}
(5) 添加登录页面login.html。
登录页面
无效的帐号的密码
你已注销
(6) 添加聊天页面chat.html。
Home
聊天室
(7) 修改ViewController。
package com.wyk.websocketdemo.web;

import org.springframework.context.annotation.Configuration;
import org.springframework.web.servlet.config.annotation.ViewControllerRegistry;
import org.springframework.web.servlet.config.annotation.WebMvcConfigurer;

@Configuration
public class WebMvcConfig  implements WebMvcConfigurer {

    public void addViewControllers(ViewControllerRegistry registry) {
        registry.addViewController("/wyk").setViewName("/wyk");
        registry.addViewController("/login").setViewName("/login");
        registry.addViewController("/chat").setViewName("/chat");

    }
}
(8) 运行程序,在2个浏览器分别用2个用户登录,相互发送消息。

