springboot2.3.0源码解读
1.构建源码环境
下载源码https://github.com/spring-projects/spring-boot
然后添加在最外面的pom添加配置:

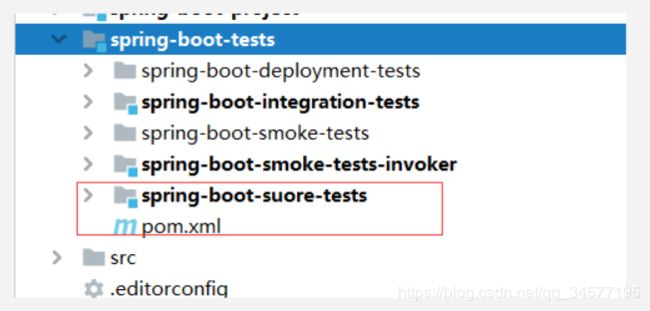
然后新建一个项目,在【spring-boot-tests】目录下面

然后修改【spring-boot-tests】的pom文件,添加自定义工程:

最后修改自己工程pom

这样子就可以看源码了!
2.查看SpringApplication源码
入口
@SpringBootApplication
public class SpringBootSuoreTestsApplication {

    public static void main(String[] args) {
        SpringApplication.run(SpringBootSuoreTestsApplication.class, args);
    }

}
包括注释和下面的main函数:
其中注释@SpringBootApplication 是springboot启动的关键! 其中关键的注释是@EnableAutoConfiguration 这是springboot自动的主要原因!
@Target(ElementType.TYPE)
@Retention(RetentionPolicy.RUNTIME)
@Documented
@Inherited
@SpringBootConfiguration
@EnableAutoConfiguration
@ComponentScan(excludeFilters = { @Filter(type = FilterType.CUSTOM, classes = TypeExcludeFilter.class),
      @Filter(type = FilterType.CUSTOM, classes = AutoConfigurationExcludeFilter.class) })
public @interface SpringBootApplication {
    ......
}
@EnableAutoConfiguration 注释解释:从classpath中搜寻所有的META-INF/spring.factories配置文件,并将其中 org.springframework.boot.autoconfigure.EnableutoConfiguration对应的配置项通过反射(Java Refletion)实例化为对应的标注了@Configuration的JavaConfig形式的IoC容器配置类,然后汇总为一个并加载到IoC容器。
初始化SpringApplication.run方法
public static void main(String[] args) {
    SpringApplication.run(SpringBootSuoreTestsApplication.class, args);
}
看底层代码
/**
 * Static helper that can be used to run a {@link SpringApplication} from the
 * specified sources using default settings and user supplied arguments.
 * @param primarySources the primary sources to load
 * @param args the application arguments (usually passed from a Java main method)
 * @return the running {@link ApplicationContext}
 */
public static ConfigurableApplicationContext run(Class<?>[] primarySources, String[] args) {
   return new SpringApplication(primarySources).run(args);
}
主要有两个部分,初始化SpringApplication,已经调用run方法:
首先先看SpringApplication的初始化,看源码
public SpringApplication(ResourceLoader resourceLoader, Class<?>... primarySources) {
   this.resourceLoader = resourceLoader;
   // 检验参数
   Assert.notNull(primarySources, "PrimarySources must not be null");
   this.primarySources = new LinkedHashSet<>(Arrays.asList(primarySources));
   // 推断应用类型是Standard还是Web
   this.webApplicationType = WebApplicationType.deduceFromClasspath();
   // 加载初始化器 从META-INF/spring.factories路径加载ApplicationContextInitializer
   setInitializers((Collection) getSpringFactoriesInstances(ApplicationContextInitializer.class));
   // 加载监听器  从META-INF/spring.factories路径加载ApplicationListener
   setListeners((Collection) getSpringFactoriesInstances(ApplicationListener.class));
   // 根据main方法找到应用启动类
   this.mainApplicationClass = deduceMainApplicationClass();
}
这里初始话关键方法是getSpringFactoriesInstances,这个方法可以从META-INF/spring.factories路径加载配置,其中关键点在SpringFactoriesLoader
SpringFactoriesLoader:这个对象在getSpringFactoriesInstances方法中被使用,主要功能就是从指定的配置文件META/spring.factories加载配置,spring.factories是一个典型的java properties文件,配置格式为Key-Value形式,只不过Key和Value都是Java类型的完整类名。
然后看SpringApplication的run方法
public ConfigurableApplicationContext run(String... args) {
   // 计时工具
   StopWatch stopWatch = new StopWatch();
   // 开始计时
   stopWatch.start();
   ConfigurableApplicationContext context = null;
   Collection<SpringBootExceptionReporter> exceptionReporters = new ArrayList<>();
   // 设置java.awt.headless系统属性为true 作用:对于一个Java服务器来说经常要处理一些图形元素,例如地图的创建或者图形和图表等。
   //                               这些API基本上总是需要运行一个X-server以便能使用AWT(Abstract Window Toolkit,抽象窗口工具集)。
   //                               然而运行一个不必要的X-server并不是一种好的管理方式.有时你甚至不能运行X-server,
   //                               因此最好的方案是运行headless服务器,来进行简单的图像处理.
   configureHeadlessProperty();
   // 初始化SpringApplicationRunListener
   // 原理与初始化一样 通过getSpringFactoriesInstances方法从META-INF/spring.factories路径加载SpringApplicationRunListener
   SpringApplicationRunListeners listeners = getRunListeners(args);
   // 发出开始执行的事件
   listeners.starting();
   try {
      ApplicationArguments applicationArguments = new DefaultApplicationArguments(args);
      // 根据SpringApplicationRunListeners以及参数来准备环境
      ConfigurableEnvironment environment = prepareEnvironment(listeners, applicationArguments);
      configureIgnoreBeanInfo(environment);
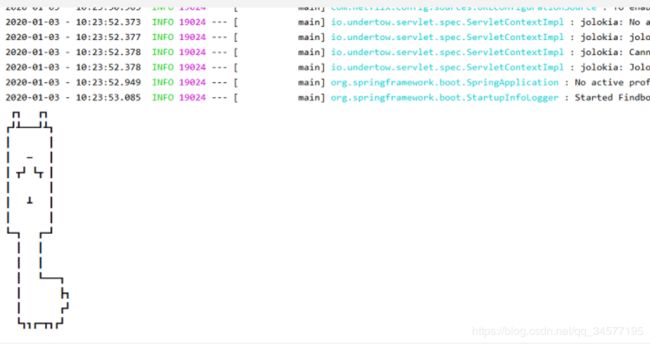
      // 准备Banner打印器 - 就是启动Spring Boot的时候打印在console上的ASCII艺术字体
      Banner printedBanner = printBanner(environment);
      // 创建Spring上下文
      context = createApplicationContext();
      // 准备异常报告器 从META-INF/spring.factories路径加载SpringBootExceptionReporter
      exceptionReporters = getSpringFactoriesInstances(SpringBootExceptionReporter.class,
            new Class[]{ConfigurableApplicationContext.class}, context);
      // 初始化spring上下文 *1
      prepareContext(context, environment, listeners, applicationArguments, printedBanner);
      // 刷新spring上下文   *2
      refreshContext(context);
      // spring上下文初始化完毕加载其他applicationRunner
      afterRefresh(context, applicationArguments);
      // 停止计时器
      stopWatch.stop();
      if (this.logStartupInfo) {
         new StartupInfoLogger(this.mainApplicationClass).logStarted(getApplicationLog(), stopWatch);
      }
      // 这里会触发所有 SpringApplicationRunListener 监听器的 started 事件方法。
      listeners.started(context);
      // 执行所有ApplicationRunner以及CommandLineRunner执行器     这两个都是Runners的实现类,但是参数不同ApplicationRunner
      //                                                         使用封装好的applicationArguments参数调用run方法,
      //                                                         CommandLineRunner使用的是String... 调用。
      callRunners(context, applicationArguments);
   } catch (Throwable ex) {
      handleRunFailure(context, ex, exceptionReporters, listeners);
      throw new IllegalStateException(ex);
   }

   try {
      // 触发所有 SpringApplicationRunListener 监听器的 running 事件方法。
      listeners.running(context);
   } catch (Throwable ex) {
      handleRunFailure(context, ex, exceptionReporters, null);
      throw new IllegalStateException(ex);
   }
   // 返回应用上下文
   return context;
}
*1 初始化spring上下文方法注释
private void prepareContext(ConfigurableApplicationContext context, ConfigurableEnvironment environment,
                     SpringApplicationRunListeners listeners, ApplicationArguments applicationArguments, Banner printedBanner) {
   // 设置环境 将环境和上下文关联起来
   context.setEnvironment(environment);
   // 配置上下文的 bean 生成器及资源加载器
   postProcessApplicationContext(context);
   // 为上下文应用所有初始化器
   applyInitializers(context);
   // 触发所有 SpringApplicationRunListener 监听器的 contextPrepared 事件方法
   listeners.contextPrepared(context);
   // 记录日志
   if (this.logStartupInfo) {
      logStartupInfo(context.getParent() == null);
      logStartupProfileInfo(context);
   }
   // 启动两个特殊的单例bean  springApplicationArguments和springBootBanner
   ConfigurableListableBeanFactory beanFactory = context.getBeanFactory();
   beanFactory.registerSingleton("springApplicationArguments", applicationArguments);
   if (printedBanner != null) {
      beanFactory.registerSingleton("springBootBanner", printedBanner);
   }
   if (beanFactory instanceof DefaultListableBeanFactory) {
      ((DefaultListableBeanFactory) beanFactory)
            .setAllowBeanDefinitionOverriding(this.allowBeanDefinitionOverriding);
   }
   if (this.lazyInitialization) {
      context.addBeanFactoryPostProcessor(new LazyInitializationBeanFactoryPostProcessor());
   }
   // Load the sources 加载所有资源 - 对于Application而言,这里的sources集合只包含了它一个class对象
   Set<Object> sources = getAllSources();
   Assert.notEmpty(sources, "Sources must not be empty");
   // 构造BeanDefinitionLoader并完成Bean定义的加载
   load(context, sources.toArray(new Object[0]));
   // 触发所有 SpringApplicationRunListener 监听器的 contextLoaded 事件方法
   listeners.contextLoaded(context);
}
*2 刷新spring上下文
private void refreshContext(ConfigurableApplicationContext context) {
   // 刷新-调用父类的refresh方法完成容器刷新的基础操作
   refresh(context);
   // 注册一个关闭容器时的钩子函数  具体实现方法在AbstractApplicationContext#registerShutdownHook中
   //                             如果没有自定义的就默认调用它的doClose方法,完成一些容器销毁时的清理工作。
   if (this.registerShutdownHook) {
      try {
         context.registerShutdownHook();
      } catch (AccessControlException ex) {
         // Not allowed in some environments.
      }
   }
}
这样springboot就启动完毕了。
总的来说就是从META-INF/spring.factories对应的对象,然后进行初始化和一系列监听器。
可扩展点:
1.使用初始化器来配置一下必要且通用的的配置文件
org.springframework.boot.autoconfigure.EnableAutoConfiguration=\
  org.xxx.common.xxxx (自定义的配置对象)
参考:https://blog.csdn.net/dm_vincent/article/details/76735888
https://blog.csdn.net/bskfnvjtlyzmv867/article/details/89434894
https://mp.weixin.qq.com/s?__biz=MzIzNzc2MDI2NQ==&mid=2247484294&idx=1&sn=c56e01c08f3614236993923eac40015a&chksm=e8c2f9e0dfb570f656536e1fb5f26584daa34143ed1234159543f64e36e0677804032588271e&scene=21#wechat_redirect
https://blog.csdn.net/qq_19674905/article/details/79367921
