高级UI-SVG
栅格图可以实现图片的清晰显示,但这也意味着如果要在各种设备上使用栅格图,那么在使用的时候就会产生为了适配各种尺寸的设备而增加大量不同规格的栅格图,这也直接导致了资源文件体积的增大,矢量图就不存在这个问题,这里就介绍一种矢量图–SVG
SVG的简介
SVG可缩放矢量图形(
Scalable Vector Graphics)是基于可扩展标记语言(XML),用于描述二维矢量图形的一种图形格式。SVG是W3C(World Wide Web ConSortium即国际互联网标准组织)在2000年8月制定的一种新的二维矢量图形格式,也是规范中的网络矢量图形标准。SVG严格遵从XML语法,并用文本格式的描述性语言来描述图像内容,因此是一种和图像分辨率无关的矢量图形格式
SVG优势
- 可被非常多的工具读取和修改(比如记事本)
- 与 JPEG 和 GIF 图像比起来,尺寸更小,且可压缩性更强。
- 是可伸缩的
- 图像可在任何的分辨率下被高质量地打印
- 可在图像质量不下降的情况下被放大
- 图像中的文本是可选的,同时也是可搜索的(很适合制作地图)
- 可以与 Java 技术一起运行
- 是开放的标准
- 文件是纯粹的 XML
以上内容引用自百度百科和W3C
Android中的矢量图为Vector Drawable,可以说Vector就是Android中的SVG实现(并不是支持全部的SVG语法,现已支持的完全足够用了),其最低支持2.1(23.2+),不过这种支持是将SVG转化为PNG,在5.0及以上就直接使用SVG
Vector Drawable
Android 5.0发布的时候,Google提供了Vector的支持,即:Vector Drawable类
Vector Drawable相对于普通的Drawable来说,有以下几个好处
- Vector图像可以自动进行适配,不需要通过分辨率来设置不同的图片
- Vector图像可以大幅减少图像的体积,同样一张图,用Vector来实现,可能只有PNG的几十分之一
- 使用简单,很多设计工具,都可以直接导出SVG图像,从而转换成Vector图像 功能强大
- 不用写很多代码就可以实现非常复杂的动画 成熟、稳定,前端已经非常广泛的进行使用了
Vector 语法简介
通过使用它的Path标签,几乎可以实现SVG中的其它所有标签,虽然可能会复杂一点,但这些东西都是可以通过工具来完成的,所以,不用担心写起来会很复杂
Path指令解析如下所示:
M = moveto(M X,Y):将画笔移动到指定的坐标位置,相当于android Path里的moveTo()
L = lineto(L X,Y):画直线到指定的坐标位置,相当于android Path里的lineTo()
H = horizontal lineto(H X):画水平线到指定的X坐标位置
V = vertical lineto(V Y):画垂直线到指定的Y坐标位置
C = curveto(C X1,Y1,X2,Y2,ENDX,ENDY):三次贝赛曲线
S = smooth curveto(S X2,Y2,ENDX,ENDY):同样三次贝塞尔曲线,更平滑
Q = quadratic Belzier curve(Q X,Y,ENDX,ENDY):二次贝赛曲线
T = smooth quadratic Belzier curveto(T ENDX,ENDY):映射 同样二次贝塞尔曲线,更平滑
A = elliptical Arc(A RX,RY,XROTATION,FLAG1,FLAG2,X,Y):弧线,相当于arcTo()
Z = closepath():关闭路径(会自动绘制连接起点和终点)
注意: M处理时,只是移动了画笔,没有画任何东西
- 关于这些语法,开发者不需要全部精通,而是能够看懂即可,这些path标签及数据生成都可以交给工具来实现(一般美工来帮你搞定!PS、Illustrator等等都支持导出SVG图片)
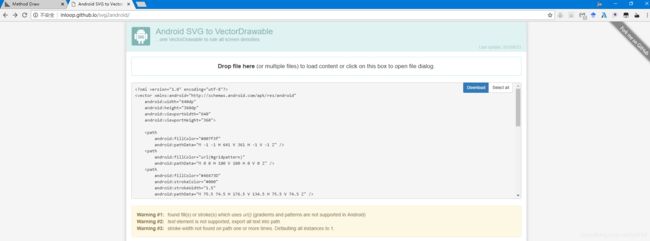
- 程序员:没必要去学习使用这些设计工具,开发者可以利用一些工具,自己转换一些比较基础的图像,如:http://inloop.github.io/svg2android/
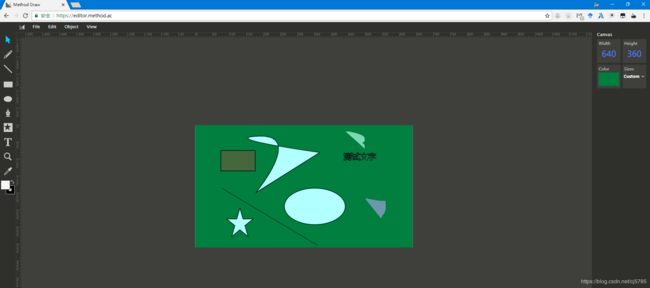
- 还可以使用SVG的编辑器来进行SVG图像的编写,例如:http://editor.method.ac/ (绝配!可以先用 http://editor.method.ac/ 生成SVG图片,然后用 http://inloop.github.io/svg2android/ 生成 VectorDrawable xml代码)
- 使用AndroidStudio插件完成SVG添加(
Vector Asset Studio)AS会自动生成兼容性图片(高版本会生成xxx.xml的SVG图片;低版本会自动生成xxx.png图片) - 有些网站可以找到SVG资源,SVG下载地址: http://www.shejidaren.com/8000-flat-icons.html ,http://www.flaticon.com/
静态Vector图像
生成图片
例如:我们用as生成的一个图片如下
<vector android:alpha="0.78" android:height="24dp"
	android:viewportHeight="24.0" android:viewportWidth="24.0"
	android:width="24dp" xmlns:android="http://schemas.android.com/apk/res/android">
	<path android:fillColor="#FF000000" android:pathData="M19.35,10.04C18.67,6.59 15.64,4 12,4 9.11,4 6.6,5.64 5.35,8.04 2.34,8.36 0,10.91 0,14c0,3.31 2.69,6 6,6h13c2.76,0 5,-2.24 5,-5 0,-2.64 -2.05,-4.78 -4.65,-4.96zM14,13v4h-4v-4H7l5,-5 5,5h-3z"/>
vector>
和 (一个矩形)
<vector xmlns:android="http://schemas.android.com/apk/res/android"
	android:width="200dp"
	android:height="200dp"
	android:viewportHeight="500"
	android:viewportWidth="500">
	<path
		android:name="square"
		android:fillColor="#000000"
		android:pathData="M100,100 L400,100 L400,400 L100,400 z"/>
vector>
解释头部的几个标签:
android:width \ android:height:定义图片的宽高
android:viewportHeight \ android:viewportWidth:定义图像被划分的比例大小,例如例子中的500,即把200dp大小的图像划分成500份,后面Path标签中的坐标,就全部使用的是这里划分后的坐标系统
这样做有一个非常好的作用,就是将图像大小与图像分离,后面可以随意修改图像大小,而不需要修改PathData中的坐标
使用图片,就当普通的图片使用就可以了。
<ImageView
	android:id="@+id/iv"
	android:layout_width="wrap_content"
	android:layout_height="wrap_content"
	app:src="@drawable/vector_image"/>
或者代码设置
ImageView iv = (ImageView) findViewById(R.id.iv);
iv.setImageResource(R.drawable.vector_image);
iv.setBackgroundResource(R.drawable.vector_image)
如果是Button,可以设置selector(写两个SVG的Drawable)
<selector xmlns:android="http://schemas.android.com/apk/res/android">
	<item android:drawable="@drawable/selector1" android:state_pressed="true"/>
	<item android:drawable="@drawable/selector2"/>
selector>
动态Vector
动态Vector才是Android Vector Drawable的精髓所在
具体可参见 http://www.jianshu.com/p/e3614e7abc03
git项目位置:https://github.com/xuyisheng/VectorDemo
animated-vector: 只能5.+才能使用
如果是两个SVG进行动画,要注意两个SVG的节点一定要一样多(命令数要一样)
下面举一个例子
初始状况path_tick.xml,这里定义了一张vector图片
<vector xmlns:android="http://schemas.android.com/apk/res/android"
    android:width="120dp"
    android:height="120dp"
    android:viewportHeight="24"
    android:viewportWidth="24">
    <group>
        <path
            android:name="tickCrossGroup"
            android:pathData="M19.6,7 L10.4,16.2 M4.8,13.4 L9,17.6"
            android:strokeColor="#000"
            android:strokeWidth="2" />
    group>
vector>
动画集合anim_path_tick2cross.xml,指定具体动画过程
<set xmlns:android="http://schemas.android.com/apk/res/android">
    <objectAnimator
        android:duration="300"
        android:propertyName="pathData"
        android:valueFrom="M19.6,7 L10.4,16.2 M4.8,13.4 L9,17.6"
        android:valueTo="M17.6,6.4 L6.4,17.6 M6.4,6.4 L17.6,17.6"
        android:valueType="pathType" />
set>
移动方式path_tick2cross_anim.xml
<animated-vector xmlns:android="http://schemas.android.com/apk/res/android"
    android:drawable="@drawable/path_tick">
    <target
        android:name="tickCrossGroup"
        android:animation="@anim/anim_path_tick2cross" />
animated-vector>
然后使用一个ImageView设置src
<LinearLayout xmlns:android="http://schemas.android.com/apk/res/android"
    android:layout_width="match_parent"
    android:layout_height="match_parent">

    <ImageView
        android:layout_width="wrap_content"
        android:layout_height="wrap_content"
        android:onClick="startAnim"
        android:src="@drawable/path_tick2cross_anim" />
LinearLayout>
设置点击事件
public void startAnim(View view) {
    ImageView iv = (ImageView) view;
    Drawable drawable = iv.getDrawable();
    if(drawable instanceof Animatable){
        ((Animatable)drawable).start();
    }
}
VectorDrawable的性能问题:
Bitmap的绘制效率并不一定会比Vector高,它们有一定的平衡点,当Vector比较简单时,其效率是一定比Bitmap高的,所以,为了保证Vector的高效率,Vector需要更加简单,PathData更加标准、精简,当Vector图像变得非常复杂时,就需要使用Bitmap来代替了Vector适用于ICON、Button、ImageView的图标等小的ICON,或者是需要的动画效果,由于Bitmap在GPU中有缓存功能,而Vector并没有,所以Vector图像不能做频繁的重绘Vector图像过于复杂时,不仅仅要注意绘制效率,初始化效率也是需要考虑的重要因素
使用实例
首先在 https://editor.method.ac/ 生成一张svg格式的图片,然后下载下来,可以看到下载下来的是一个svg格式的文件

然后将下载的svg格式文件拖入到 http://inloop.github.io/svg2android/ 中,此时便生成了android可用的图片格式

在这个网站使用的时候,能看到Android Studio已经集成了这个功能,也就是说Android Studio可以直接使用工具转化SVG,这个后面讲
经过上述步骤,便已经生成Android可用的svg了,此时将其内容拷贝到项目中
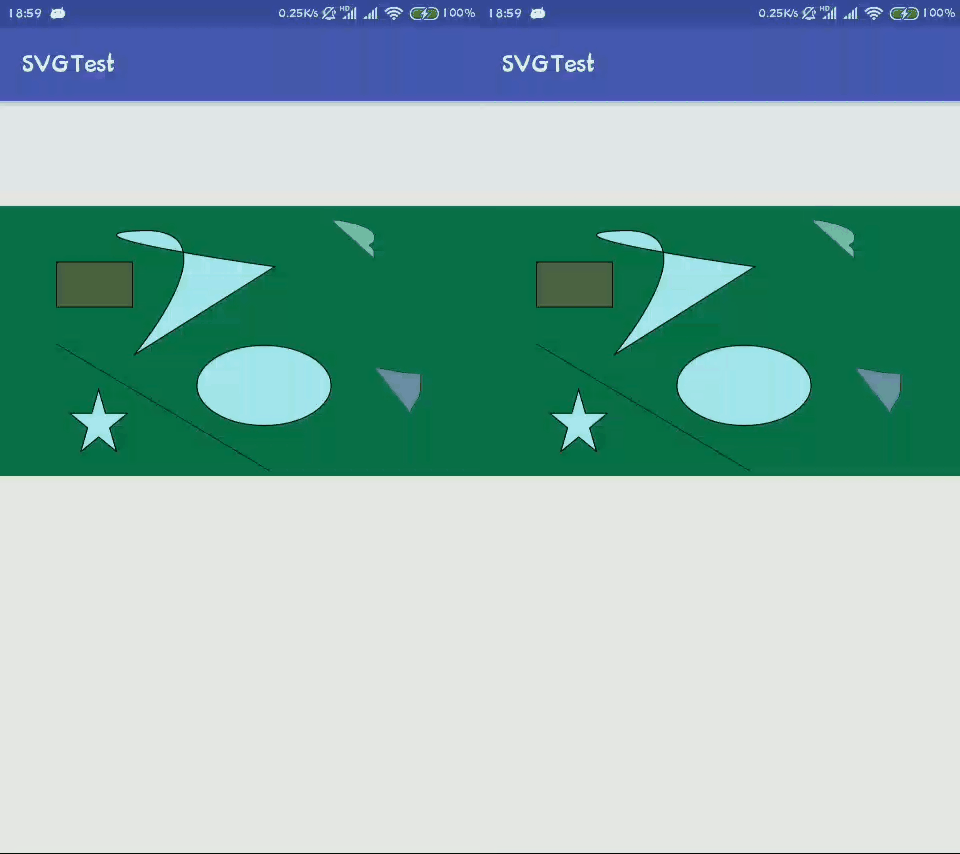
此时在预览时侯就能看到生成的图像了

导入的svg和平时的png使用方法一样,就当成一张png来使用就可以了
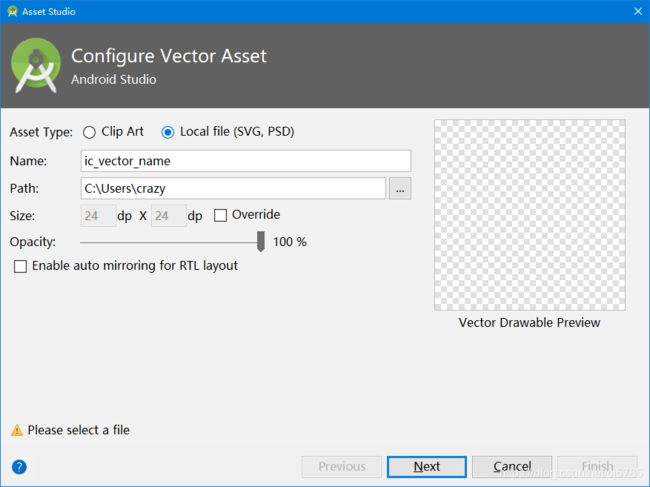
再来看看Android Studio是怎么转换SVG的,New -> Vector Asset -> local file
然后就可以生成Android可用的资源了,刚才我导出的那张SVG,在网站上转换没问题,但这这里却转换不成功,说明在这个功能上,Studio还有一定欠缺,当已经够用了

详细说明参照Android官网
其实ic_launcher_background.xml这个文件也是使用的这种方式
使用时候发现,仍有地方会报错,这其实是引用链接出的错,经过思考,这里直接在网站上复制而不要下载就可以解决这个情况
error: 'url(#gridpattern)' is incompatible with attribute android:fillColor (attr) color.
将其适当修改便可以了
将android:fillColor="url(#gridpattern)"改为合适的填充颜色
顺利使用

