Android 发布自己的library到Jcenter
转载请注明出处:http://blog.csdn.net/CoderYue/article/details/51744830 来自Coderyue的博客
开篇声明
使用Android studio的伙伴知道它可以一行代码引入库
compile 'com.jinguangyue.addwordlib:addwordLib:1.0.0'我用的时候就好奇这是这么来的, 要是简单的话, 那我也能写个库给别人引入(用小沈阳的语调来读: 要是那样能行的话, 那我也行), 所以我也尝试着上传一个自己的库, 网上有很多教程, 大家懂的, 自己实践时候肯定会有其他错误的, 这里我把我在上传过程中遇到的错误总结出来。
申请账号
Bintray传送门 这里我使用github账号登陆的, 没有github账号的赶快申请
生成JavaDoc和source JARs
上传到Jcenter仓库需要这俩个东东, 这里需要android-maven-plugin插件,所以我们需要在项目的build.gradle, 是最外层的build.gradle
buildscript {
    repositories {
        jcenter()
    }
    dependencies {
        classpath 'com.android.tools.build:gradle:2.0.0'
        classpath 'com.jfrog.bintray.gradle:gradle-bintray-plugin:1.0'
        classpath 'com.github.dcendents:android-maven-gradle-plugin:1.3'

        // NOTE: Do not place your application dependencies here; they belong
        // in the individual module build.gradle files
    }
}

allprojects {
    repositories {
        jcenter()
    }
}
module的build.gradle:
apply plugin: 'com.android.library'
apply plugin: 'com.github.dcendents.android-maven' //you add
apply plugin: 'com.jfrog.bintray' //you add

version = "1.0.0" //your version

android {
    compileSdkVersion 23
    buildToolsVersion "23.0.2"

    defaultConfig {
        minSdkVersion 16
        targetSdkVersion 23
        versionCode 1
        versionName "1.0.0"
    }
    buildTypes {
        release {
            minifyEnabled false
            proguardFiles getDefaultProguardFile('proguard-android.txt'), 'proguard-rules.pro'
        }
    }
}

dependencies {
    compile fileTree(dir: 'libs', include: ['*.jar'])
    testCompile 'junit:junit:4.12'
    compile 'com.android.support:appcompat-v7:23.1.1'

}

def siteUrl = 'https://github.com/jinguangyue/AddwordLib'    // github project homepage
def gitUrl = 'https://github.com/jinguangyue/AddwordLib.git' // github project git
group = "com.jinguangyue.addwordlib"
//如果你的group 是这样的 那么上传后是这样的: compile 'com.jinguangyue.addwordlib:addwordLib:1.0.0'
//addwordLib:1.0.0 是后面设置(名字和版本号)

install {
    repositories.mavenInstaller {
        // This generates POM.xml with proper parameters
        pom {
            project {
                packaging 'aar'
                name 'This is the vertical TextView lib For Android' //这里是简单介绍
                url siteUrl
                licenses {
                    license {
                        name 'The Apache Software License, Version 2.0'
                        url 'http://www.apache.org/licenses/LICENSE-2.0.txt'
                    }
                }
                developers {
                    developer {
                        id 'jinguangyue' //开发者id
                        name 'jinguangyue' //开发者 名字
                        email '[email protected]'
                    }
                }
                scm {
                    connection gitUrl
                    developerConnection gitUrl
                    url siteUrl
                }
            }
        }
    }
}

task sourcesJar(type: Jar) {
    from android.sourceSets.main.java.srcDirs
    classifier = 'sources'
}
task javadoc(type: Javadoc) {
    source = android.sourceSets.main.java.srcDirs
    classpath += project.files(android.getBootClasspath().join(File.pathSeparator))
}
task javadocJar(type: Jar, dependsOn: javadoc) {
    classifier = 'javadoc'
    from javadoc.destinationDir
}
artifacts {
    archives javadocJar
    archives sourcesJar
}

Properties properties = new Properties()
//将User和apikey写到local.properties中 然后git提交的时候将local.properties忽略掉, 这样安全
properties.load(project.rootProject.file('local.properties').newDataInputStream())
bintray {
    user = properties.getProperty("bintray.user")
    key = properties.getProperty("bintray.apikey")
    configurations = ['archives']
    pkg {
        repo = "maven"
        name = "addwordlib"
        websiteUrl = siteUrl
        vcsUrl = gitUrl
        licenses = ["Apache-2.0"]
        publish = true
    }
}
local.properties:
## This file is automatically generated by Android Studio.
# Do not modify this file -- YOUR CHANGES WILL BE ERASED!
#
# This file must *NOT* be checked into Version Control Systems,
# as it contains information specific to your local configuration.
#
# Location of the SDK. This is only used by Gradle.
# For customization when using a Version Control System, please read the
# header note.
#Tue Jun 07 16:03:54 CST 2016
ndk.dir=D\:\\sdk\\ndk-bundle
sdk.dir=D\:\\sdk
bintray.user=Your Name
bintray.apikey=6666666666666(apikey是你登陆了bintray之后点击右上角小三角号 Your profile, 附下面截图, 然后点击Edit, 之后在最下面会有APIKEY, 复制出来填写到这里, over)
填写了这么久终于要开始测试了, 此时studio会提示你Sync now, 如果你Sync now失败了要根据错误重新检查你填写的了
没有错误的话恭喜你, 我们马上就要接近胜利了!
gradlew install
接下来很重要的一步, 我上传的时候没执行这个, 结果一直提示我
Add a POM file to the latest version of your package
一定要执行 gradlew install 这个命令 执行的位置就在:

执行的时候你就等着吧, 我执行的前俩次都失败了, 有这么俩点原因:
1 我用了中文的注释, 就是说你的库里不能有中文
2 不能有中文数字, 比如1,2,3…., 不能有一, 二, 三….
都删除掉之后终于可以了, 最后提示build successfull!
build successfull之后我们就得真正的上传上去了, 就等这一刻呢
gradlew bintrayUpload
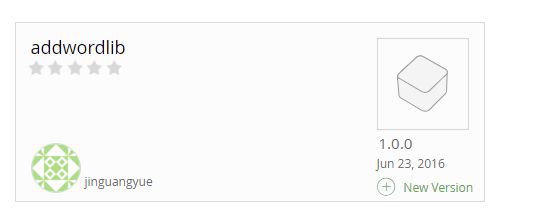
也是在Terminal里面执行gradlew bintrayUpload 执行完成之后刷新以下bintray界面的Your ProFile里可以看到:

1 package, 点进去…
此时你已经上传成功了, 还差最后一步, 点击进入这个库, 之后Add to Jcenter:
填一些Message 之后Send 即可, 然后我们就等着吧, 过了几个小时会有邮件发过来, 如果有什么问题会在邮件里通知你, 没有那你的库就可以用啦!

