Servlet 发送电子邮件
Servlet 发送电子邮件
使用 Servlet 发送一封电子邮件是很简单的,但首先您必须在您的计算机上安装 JavaMail API 和 Java Activation Framework)JAF)。
- 您可以从 Java 标准网站下载最新版本的 JavaMail(版本 1.2)。
- 您可以从 Java 标准网站下载最新版本的 JAF(版本 1.1.1)。
下载并解压缩这些文件,在新创建的顶层目录中,您会发现这两个应用程序的一些 jar 文件。您需要把 mail.jar 和 activation.jar 文件添加到您的 CLASSPATH 中。
发送一封简单的电子邮件
下面的实例将从您的计算机上发送一封简单的电子邮件。这里假设您的本地主机已连接到互联网,并支持发送电子邮件。同时确保 Java Email API 包和 JAF 包的所有的 jar 文件在 CLASSPATH 中都是可用的。
package com;

import java.io.IOException;
import java.io.PrintWriter;
import java.util.Properties;

import javax.servlet.ServletException;
import javax.servlet.annotation.WebServlet;
import javax.servlet.http.HttpServlet;
import javax.servlet.http.HttpServletRequest;
import javax.servlet.http.HttpServletResponse;
import javax.mail.*;
import javax.mail.internet.*;
import javax.activation.*;

/**
 * Servlet implementation class SendEmail
 */
@WebServlet("/SendEmail")
public class SendEmail extends HttpServlet {
	private static final long serialVersionUID = 1L;

    /**
     * @see HttpServlet#HttpServlet()
     */
    public SendEmail() {
        super();
        // TODO Auto-generated constructor stub
    }

	/**
	 * @see HttpServlet#doGet(HttpServletRequest request, HttpServletResponse response)
	 */
	protected void doGet(HttpServletRequest request, HttpServletResponse response) throws ServletException, IOException {
		// TODO Auto-generated method stub


        Properties props = new Properties();
        // 表示SMTP发送邮件,必须进行身份验证
        props.put("mail.smtp.auth", "true");
        //此处填写SMTP服务器
        props.put("mail.smtp.host", "smtp.qq.com");
        //端口号,QQ邮箱给出了两个端口,但是另一个我一直使用不了,所以就给出这一个587
        props.put("mail.smtp.port", "25");
        // 此处填写你的账号
        props.put("mail.user","[email protected]");
        // 此处的密码就是前面说的16位STMP口令
        props.put("mail.password","segpcfwwzsuugjjc");

        // 构建授权信息,用于进行SMTP进行身份验证
        Authenticator authenticator = new Authenticator() {

            protected PasswordAuthentication getPasswordAuthentication() {
                // 用户名、密码
                String userName = props.getProperty("mail.user");
                String password = props.getProperty("mail.password");
                return new PasswordAuthentication(userName, password);
            }
        };
        // 使用环境属性和授权信息,创建邮件会话
        Session mailSession = Session.getInstance(props, authenticator);
        // 创建邮件消息
        MimeMessage message = new MimeMessage(mailSession);
        // 设置发件人
        InternetAddress form;
		try {
			form = new InternetAddress(
			        props.getProperty("mail.user"));

			message.setFrom(form);


        // 设置收件人的邮箱
        InternetAddress to = new InternetAddress("[email protected]");
        message.setRecipient(Message.RecipientType.TO, to);

        // 设置邮件标题
        message.setSubject("测试邮件");

        // 设置邮件的内容体
        message.setContent("这是一封测试邮件", "text/html;charset=UTF-8");

        // 最后当然就是发送邮件啦
        Transport.send(message);
	} catch (AddressException e) {
			// TODO Auto-generated catch block
			e.printStackTrace();
		}catch (MessagingException e) {
			// TODO Auto-generated catch block
			e.printStackTrace();
		}
	}

	/**
	 * @see HttpServlet#doPost(HttpServletRequest request, HttpServletResponse response)
	 */
	protected void doPost(HttpServletRequest request, HttpServletResponse response) throws ServletException, IOException {
		// TODO Auto-generated method stub
		doGet(request, response);
	}

}
现在让我们来编译上面的 Servlet,并在 web.xml 文件中创建以下条目:
....

     SendEmail
     SendEmail


     SendEmail
     /SendEmail

....
现在通过访问 URL http://localhost:8080/SendEmail 来调用这个 Servlet。这将会发送一封电子邮件到给定的电子邮件 ID [email protected],并将显示下面所示的响应:
发送电子邮件成功发送消息... |
如果您想要发送一封电子邮件给多个收件人,那么请使用下面的方法来指定多个电子邮件 ID:
void addRecipients(Message.RecipientType type,
                   Address[] addresses)
throws MessagingException
下面是对参数的描述:
- type:这将被设置为 TO、CC 或 BCC。在这里,CC 代表抄送,BCC 代表密件抄送。例如 Message.RecipientType.TO。
- addresses:这是电子邮件 ID 的数组。当指定电子邮件 ID 时,您需要使用 InternetAddress() 方法。
发送一封 HTML 电子邮件
下面的实例将从您的计算机上发送一封 HTML 格式的电子邮件。这里假设您的本地主机已连接到互联网,并支持发送电子邮件。同时确保 Java Email API 包和 JAF 包的所有的 jar 文件在 CLASSPATH 中都是可用的。
本实例与上一个实例很类似,但是这里我们使用 setContent() 方法来设置第二个参数为 "text/html" 的内容,该参数用来指定 HTML 内容是包含在消息中的。
使用这个实例,您可以发送内容大小不限的 HTML 内容。
package com;
import java.io.IOException;
import java.io.PrintWriter;
import java.util.Properties;
import javax.servlet.ServletException;
import javax.servlet.annotation.WebServlet;
import javax.servlet.http.HttpServlet;
import javax.servlet.http.HttpServletRequest;
import javax.servlet.http.HttpServletResponse;
import javax.mail.*;
import javax.mail.internet.*;
import javax.activation.*;
/**
* Servlet implementation class SendEmail
*/
@WebServlet("/SendEmail")
public class SendEmail extends HttpServlet {
private static final long serialVersionUID = 1L;
/**
* @see HttpServlet#HttpServlet()
*/
public SendEmail() {
super();
// TODO Auto-generated constructor stub
}
/**
* @see HttpServlet#doGet(HttpServletRequest request, HttpServletResponse response)
*/
protected void doGet(HttpServletRequest request, HttpServletResponse response) throws ServletException, IOException {
// TODO Auto-generated method stub
Properties props = new Properties();
// 表示SMTP发送邮件,必须进行身份验证
props.put("mail.smtp.auth", "true");
//此处填写SMTP服务器
props.put("mail.smtp.host", "smtp.qq.com");
//端口号,QQ邮箱给出了两个端口,但是另一个我一直使用不了,所以就给出这一个587
props.put("mail.smtp.port", "25");
// 此处填写你的账号
props.put("mail.user","[email protected]");
// 此处的密码就是前面说的16位STMP口令
props.put("mail.password","segpcfwwzsuugjjc");
// 构建授权信息,用于进行SMTP进行身份验证
Authenticator authenticator = new Authenticator() {
protected PasswordAuthentication getPasswordAuthentication() {
// 用户名、密码
String userName = props.getProperty("mail.user");
String password = props.getProperty("mail.password");
return new PasswordAuthentication(userName, password);
}
};
// 使用环境属性和授权信息,创建邮件会话
Session mailSession = Session.getInstance(props, authenticator);
// 创建邮件消息
MimeMessage message = new MimeMessage(mailSession);
// 设置发件人
InternetAddress form;
try {
form = new InternetAddress(
props.getProperty("mail.user"));
message.setFrom(form);
// 设置收件人的邮箱
InternetAddress to = new InternetAddress("[email protected]");
message.setRecipient(Message.RecipientType.TO, to);
// 设置邮件标题
message.setSubject("测试邮件");
// 设置实际的 HTML 消息,内容大小不限
message.setContent("This is actual message
",
"text/html" );
// 发送消息
Transport.send(message);
String title = "发送电子邮件";
String res = "成功发送消息...";
String docType =
"\n";
out.println(docType +
"\n" +
"" + title + " \n" +
"\n" +
"" + title + "
\n" +
"" + res + "
\n" +
"");
// 最后当然就是发送邮件啦
Transport.send(message);
} catch (AddressException e) {
// TODO Auto-generated catch block
e.printStackTrace();
}catch (MessagingException e) {
// TODO Auto-generated catch block
e.printStackTrace();
}
}
/**
* @see HttpServlet#doPost(HttpServletRequest request, HttpServletResponse response)
*/
protected void doPost(HttpServletRequest request, HttpServletResponse response) throws ServletException, IOException {
// TODO Auto-generated method stub
doGet(request, response);
}
}
编译并运行上面的 Servlet ,在给定的电子邮件 ID 上发送 HTML 消息。
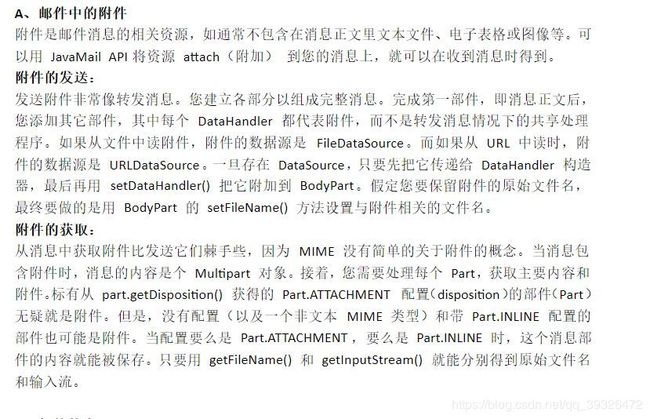
在电子邮件中发送附件
下面的实例将从您的计算机上发送一封带有附件的电子邮件。这里假设您的本地主机已连接到互联网,并支持发送电子邮件。同时确保 Java Email API 包和 JAF 包的所有的 jar 文件在 CLASSPATH 中都是可用的。
package com;
import java.io.IOException;
import java.io.PrintWriter;
import java.util.Properties;
import javax.servlet.ServletException;
import javax.servlet.annotation.WebServlet;
import javax.servlet.http.HttpServlet;
import javax.servlet.http.HttpServletRequest;
import javax.servlet.http.HttpServletResponse;
import javax.mail.*;
import javax.mail.internet.*;
import javax.activation.*;
/**
* Servlet implementation class SendEmail
*/
@WebServlet("/SendEmail")
public class SendEmail extends HttpServlet {
private static final long serialVersionUID = 1L;
/**
* @see HttpServlet#HttpServlet()
*/
public SendEmail() {
super();
// TODO Auto-generated constructor stub
}
/**
* @see HttpServlet#doGet(HttpServletRequest request, HttpServletResponse response)
*/
protected void doGet(HttpServletRequest request, HttpServletResponse response) throws ServletException, IOException {
// TODO Auto-generated method stub
Properties props = new Properties();
// 表示SMTP发送邮件,必须进行身份验证
props.put("mail.smtp.auth", "true");
//此处填写SMTP服务器
props.put("mail.smtp.host", "smtp.qq.com");
//端口号,QQ邮箱给出了两个端口,但是另一个我一直使用不了,所以就给出这一个587
props.put("mail.smtp.port", "25");
// 此处填写你的账号
props.put("mail.user","[email protected]");
// 此处的密码就是前面说的16位STMP口令
props.put("mail.password","segpcfwwzsuugjjc");
// 构建授权信息,用于进行SMTP进行身份验证
Authenticator authenticator = new Authenticator() {
protected PasswordAuthentication getPasswordAuthentication() {
// 用户名、密码
String userName = props.getProperty("mail.user");
String password = props.getProperty("mail.password");
return new PasswordAuthentication(userName, password);
}
};
// 使用环境属性和授权信息,创建邮件会话
Session mailSession = Session.getInstance(props, authenticator);
// 创建邮件消息
MimeMessage message = new MimeMessage(mailSession);
// 设置发件人
InternetAddress form;
try {
form = new InternetAddress(
props.getProperty("mail.user"));
message.setFrom(form);
// 设置收件人的邮箱
InternetAddress to = new InternetAddress("[email protected]");
message.setRecipient(Message.RecipientType.TO, to);
// 设置邮件标题
message.setSubject("测试邮件");
// 创建消息部分
BodyPart messageBodyPart = new MimeBodyPart();
// 填写消息
messageBodyPart.setText("This is message body");
// 创建一个多部分消息
Multipart multipart = new MimeMultipart();
// 设置文本消息部分
multipart.addBodyPart(messageBodyPart);
// 第二部分是附件
messageBodyPart = new MimeBodyPart();
String filename = "file.txt";
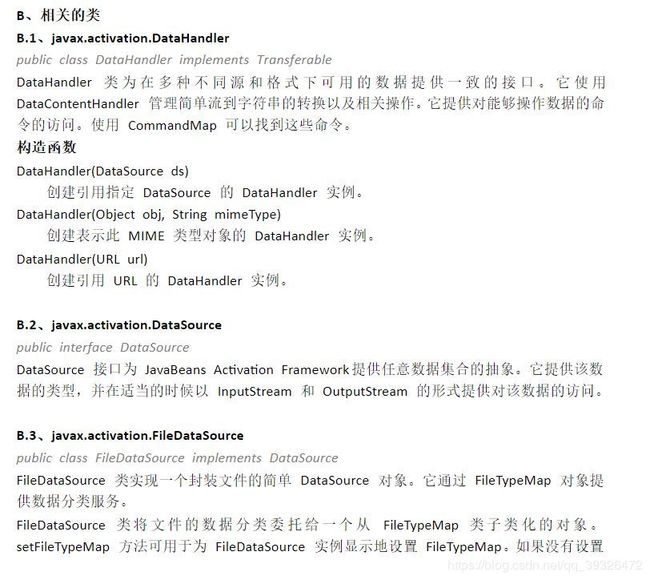
DataSource source = new FileDataSource(filename);
messageBodyPart.setDataHandler(new DataHandler(source));
messageBodyPart.setFileName(filename);
multipart.addBodyPart(messageBodyPart);
// 发送完整的消息部分
message.setContent(multipart );
// 发送消息
Transport.send(message);
String title = "发送电子邮件";
String res = "成功发送电子邮件...";
String docType =
"\n";
out.println(docType +
"\n" +
"" + title + " \n" +
"\n" +
"" + title + "
\n" +
"" + res + "
\n" +
"");
}catch (MessagingException mex) {
mex.printStackTrace();
}
}
}
编译并运行上面的 Servlet ,在给定的电子邮件 ID 上发送带有文件附件的消息。
用户身份认证部分
如果需要向电子邮件服务器提供用户 ID 和密码进行身份认证,那么您可以设置如下属性:
 props.setProperty("mail.user", "myuser");
 props.setProperty("mail.password", "mypwd");
电子邮件发送机制的其余部分与上面讲解的保持一致。
身份验证
- 要把qq的smtp服务打开!!!如果用qq邮箱服务器的话,记住验证码,在写代码的时候密码是这个验证码!!!
- DataSource
由于javamail 的包里默认的对javax.activation.datasource只有两个实现:
分别是:filedatasource和urldatasource。
因此在webapp里为了不把上传的文件再保存为本地文件,然后再使用filedatasource,
- DataHandler
- 所以该接口只有一个函数,该函数提供了将原始数据格式转为业务所需数据格式,框架提供了常用接口处理器实现,若以下的处理器无法满足需求可以自己实现一个处理器。

