Android 自定义View 使用Matrix(矩阵)操作图片
1.Matrix中的几个常用的变换方法
setTranslate(float dx, float dy):控制Matrix进行平移。

setRotate(float degrees, float px, float py):旋转,参数依次是:旋转角度,轴心(x,y)。

setScale(float sx, float sy, float px, float py):缩放, 参数依次是:X,Y轴上的缩放比例;缩放的轴心。

setSkew(float kx, float ky):倾斜(扭曲),参数依次是:X,Y轴上的缩放比例。
在为Matrix设置了上面的变换后,调用Canvas的 drawBitmap()方法调用矩阵即可。
![]()
2.Canvas的 drawBitmap方法Demo
2.1.自定义View
public class MyViews extends View {


    private Bitmap mBitmap;
    private Matrix matrix = new Matrix();
    private float sx = 0.0f; //设置倾斜度
    private int width,height;//位图宽高
    private float scale = 1.0f;//缩放比例
    private int method = 0;


    public MyViews(Context context) {
        this(context, null);
    }


    public MyViews(Context context, AttributeSet attrs) {
        super(context, attrs);
        init();
    }


    public MyViews(Context context, AttributeSet attrs, int defStyleAttr) {
        super(context, attrs, defStyleAttr);
    }


    private void init() {
        mBitmap = BitmapFactory.decodeResource(getResources(), R.mipmap.index_listattachment);
        width = mBitmap.getWidth();
        height = mBitmap.getHeight();
    }


    @Override
    protected void onDraw(Canvas canvas) {
        super.onDraw(canvas);
        switch (method){
            case 0:
                matrix.reset();
                break;
            case 1:
                sx += 0.1;
                matrix.setSkew(sx,0);
                break;
            case 2:
                sx -= 0.1;
                matrix.setSkew(sx,0);
                break;
            case 3:
                if(scale < 2.0){
                    scale += 0.1;
                }
                matrix.setScale(scale,scale);
                break;
            case 4:
                if(scale > 0.5){
                    scale -= 0.1;
                }
                matrix.setScale(scale,scale);
                break;
        }
        //根据原始位图与Matrix创建新图片
        Bitmap bitmap = Bitmap.createBitmap(mBitmap,0,0,width,height,matrix,true);
        canvas.drawBitmap(bitmap,matrix,null);    //绘制新位图
    }


    public void setMethod(int i){
        method = i;
        postInvalidate();
    }


}
2.2.布局
2.3.Java代码
public class MyViewActivity extends AppCompatActivity{


    private MyViews myViews;
    private TextView textView1;
    private TextView textView2;
    private TextView textView3;
    private TextView textView4;
    private TextView textView5;


    @Override
    protected void onCreate(Bundle savedInstanceState) {
        super.onCreate(savedInstanceState);
        setContentView(R.layout.activity_myview);


        myViews= (MyViews) findViewById(R.id.activity_myview_myview);


        //重置
        textView1= (TextView) findViewById(R.id.activity_myview_textview1);
        textView1.setOnClickListener(new View.OnClickListener() {
            @Override
            public void onClick(View view) {
                myViews.setMethod(0);
            }
        });


        //左倾
        textView2= (TextView) findViewById(R.id.activity_myview_textview2);
        textView2.setOnClickListener(new View.OnClickListener() {
            @Override
            public void onClick(View view) {
                myViews.setMethod(1);
            }
        });


        //右倾
        textView3= (TextView) findViewById(R.id.activity_myview_textview3);
        textView3.setOnClickListener(new View.OnClickListener() {
            @Override
            public void onClick(View view) {
                myViews.setMethod(2);
            }
        });


        //放大
        textView4= (TextView) findViewById(R.id.activity_myview_textview4);
        textView4.setOnClickListener(new View.OnClickListener() {
            @Override
            public void onClick(View view) {
                myViews.setMethod(3);
            }
        });


        //缩小
        textView5= (TextView) findViewById(R.id.activity_myview_textview5);
        textView5.setOnClickListener(new View.OnClickListener() {
            @Override
            public void onClick(View view) {
                myViews.setMethod(4);
            }
        });


    }


}
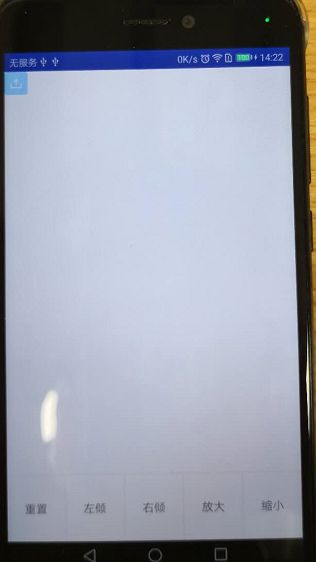
2.4.效果
2.4.1.原始
2.4.2.左倾
2.4.3.右倾
2.4.4.放大
2.4.5.缩小
3.Canvas的 drawBitmapMesh()Demo
![]()
参数:
bitmap:需要扭曲的原位图。
meshWidth/meshHeight:在横/纵向上把原位图划分为多少格。
verts:长度为(meshWidth+1)*(meshHeight+2)的数组,他记录了扭曲后的位图各顶点(网格线交点) 位置,虽然他是一个一维数组,但是实际上它记录的数据是形如(x0,y0),(x1,y1)..(xN,Yn)格式的数据, 这些数组元素控制对bitmap位图的扭曲效果。
vertOffset:控制verts数组从第几个数组元素开始对bitmap进行扭曲(忽略verOffset之前数据 的扭曲效果)。
Demo
3.1.自定义View
public class MyViews extends View {


    //将水平和竖直方向上都划分为20格
    private final int WIDTH = 20;
    private final int HEIGHT = 20;
    private final int COUNT = (WIDTH + 1) * (HEIGHT + 1);  //记录该图片包含21*21个点
    private final float[] verts = new float[COUNT * 2];    //扭曲前21*21个点的坐标
    private final float[] orig = new float[COUNT * 2];    //扭曲后21*21个点的坐标
    private Bitmap mBitmap;
    private float bH, bW;


    public MyViews(Context context) {
        this(context, null);
    }


    public MyViews(Context context, AttributeSet attrs) {
        super(context, attrs);
        init();
    }


    public MyViews(Context context, AttributeSet attrs, int defStyleAttr) {
        super(context, attrs, defStyleAttr);
    }


    private void init() {
        mBitmap = BitmapFactory.decodeResource(getResources(), R.mipmap.fristshow1);
        bH = mBitmap.getWidth();
        bW = mBitmap.getHeight();
        int index = 0;
        //初始化orig和verts数组。
        for (int y = 0; y <= HEIGHT; y++) {
            float fy = bH * y / HEIGHT;
            for (int x = 0; x <= WIDTH; x++) {
                float fx = bW * x / WIDTH;
                orig[index * 2 + 0] = verts[index * 2 + 0] = fx;
                orig[index * 2 + 1] = verts[index * 2 + 1] = fy;
                index += 1;
            }
        }
        //设置背景色
        setBackgroundColor(Color.WHITE);
    }


    @Override
    protected void onDraw(Canvas canvas) {
        canvas.drawBitmapMesh(mBitmap, WIDTH, HEIGHT, verts
                , 0, null, 0, null);
    }


    //工具方法,用于根据触摸事件的位置计算verts数组里各元素的值
    private void warp(float cx, float cy) {
        for (int i = 0; i < COUNT * 2; i += 2) {
            float dx = cx - orig[i + 0];
            float dy = cy - orig[i + 1];
            float dd = dx * dx + dy * dy;
            //计算每个座标点与当前点(cx、cy)之间的距离
            float d = (float) Math.sqrt(dd);
            //计算扭曲度,距离当前点(cx、cy)越远,扭曲度越小
            float pull = 80000 / ((float) (dd * d));
            //对verts数组(保存bitmap上21 * 21个点经过扭曲后的座标)重新赋值
            if (pull >= 1) {
                verts[i + 0] = cx;
                verts[i + 1] = cy;
            } else {
                //控制各顶点向触摸事件发生点偏移
                verts[i + 0] = orig[i + 0] + dx * pull;
                verts[i + 1] = orig[i + 1] + dy * pull;
            }
        }
        //通知View组件重绘
        invalidate();
    }


    @Override
    public boolean onTouchEvent(MotionEvent event) {
        //调用warp方法根据触摸屏事件的座标点来扭曲verts数组
        warp(event.getX(), event.getY());
        return true;
    }


}
3.2.布局文件
3.3.代码使用
myViews= (MyViews) findViewById(R.id.activity_myview_myview);
3.4.效果


