centos7+nginx+rtmp+ffmpeg搭建流媒体服务器
安装nginx和rtmp模块
首先进入local目录
cd /usr/local
下载nginx(没有安装wget的请安装,安装命令:yum -y install wget)
wget http://nginx.org/download/nginx-1.9.9.tar.gz
解压
tar zxvf nginx-1.9.9.tar.gz
mv nginx-1.9.9 nginx
创建nginx安装目录与模块目录
mkdir -p /usr/local/nginx/module
创建视频数据存放位置
mkdir -p /usr/local/nginx/myapp
进入到/usr/local/nginx/module目录
cd /usr/local/nginx/module
下载nginx-rtmp-module,下载后的文件夹名叫nginx-rtmp-module
git clone https://github.com/arut/nginx-rtmp-module.git
进入解压后的nginx目录中,指定nginx安装目录并且指定了安装的模块
cd /usr/local/nginx/
./configure --prefix=/usr/local/nginx --add-module=/usr/local/nginx/module/nginx-rtmp-module --conf-path=/usr/local/nginx/nginx.conf
编译并安装
make && make install
启动nginx
/usr/local/nginx/sbin/nginx &
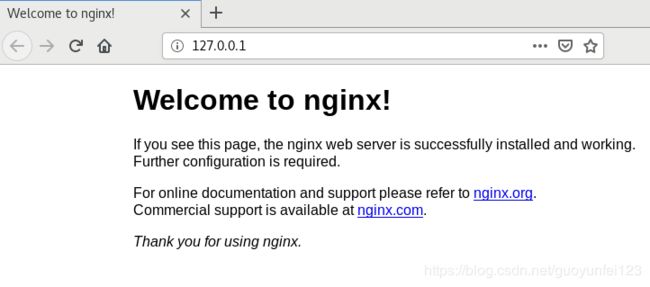
此时如果没有问题,那么你就可以访问http://127.0.0.1了,会出现welcome界面。
配置nginx与nginx-rtmp-module
在nginx-rtmp-module中带有一个nginx.conf的配置文件,把它覆盖到nginx中的配置文件
cp /usr/local/nginx/module/nginx-rtmp-module/test/nginx.conf /usr/local/nginx/conf编辑nginx配置文件,使用vim打开
vim conf/nginx.conf
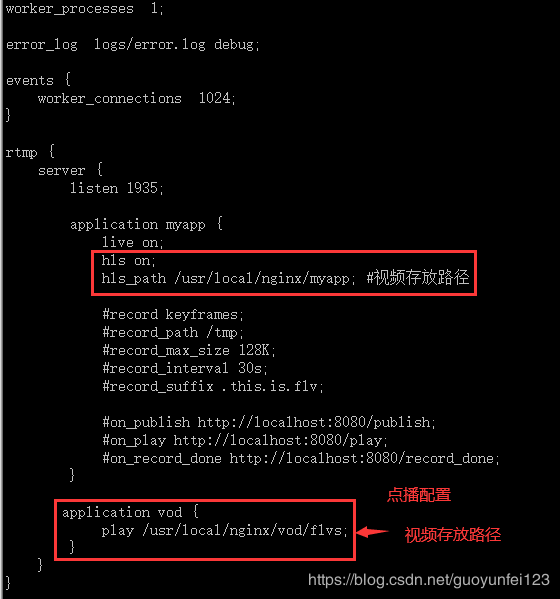
rtmp节点下,在myapp下面添加:
hls on;
hls_path /usr/local/nginx/myapp; #视频存放路径
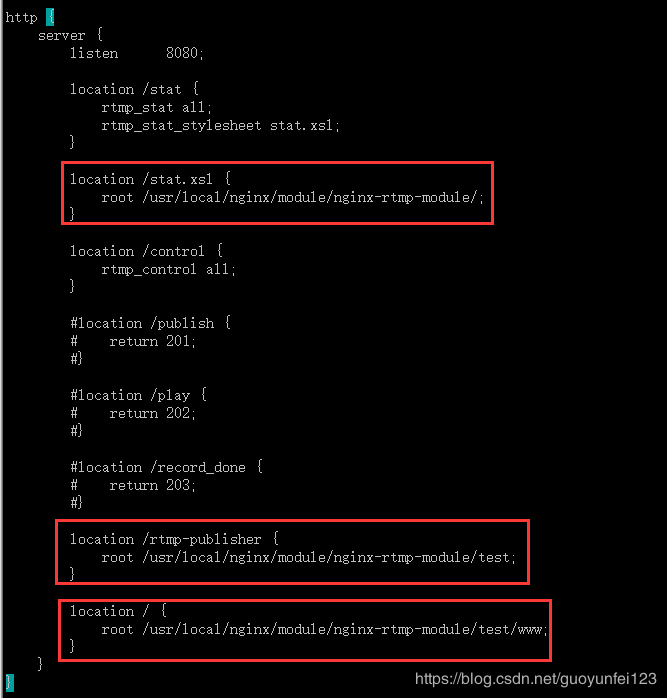
在http 节点下,修改两个root的路径
location /rtmp-publisher {
root /usr/local/nginx/module/nginx-rtmp-module/test;
}
location / {
root /usr/local/nginx/module/nginx-rtmp-module/test/www;
}
修改之后保存即可。
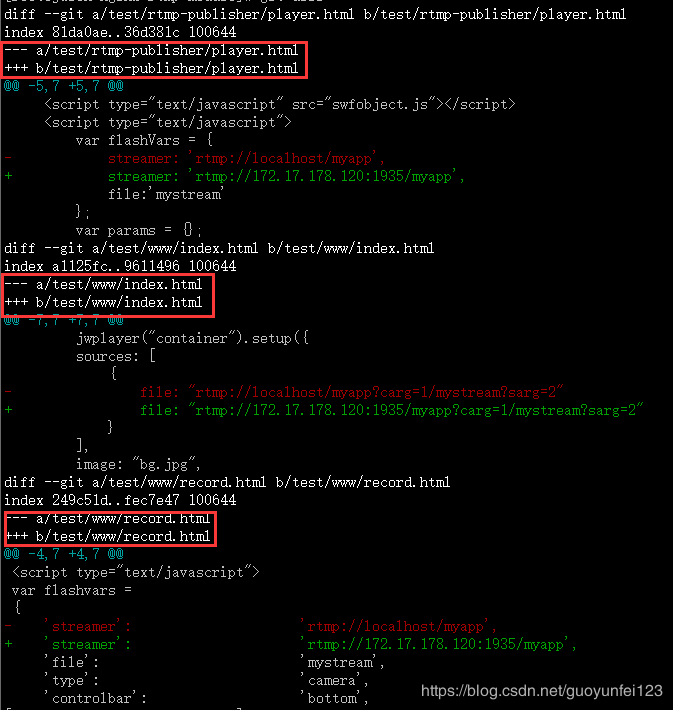
接下来修改web界面
第一个页面
修改文件/usr/local/nginx/module/nginx-rtmp-module/test/www/index.html,修改ip以及端口
第二个页面
修改文件/usr/local/nginx/module/nginx-rtmp-module/test/www/record.html,修改ip以及端口
第三个页面(点播配置)
创建视频存放位置
mkdir -p /usr/local/nginx/vod/flvs
上传一个mp4格式的视频到/usr/local/nginx/vod/flvs下(以input.mp4为例)
修改文件/usr/local/nginx/module/nginx-rtmp-module/test/rtmp-publisher/player.html,修改ip以及端口
这时需要重新加载配置,使用命令
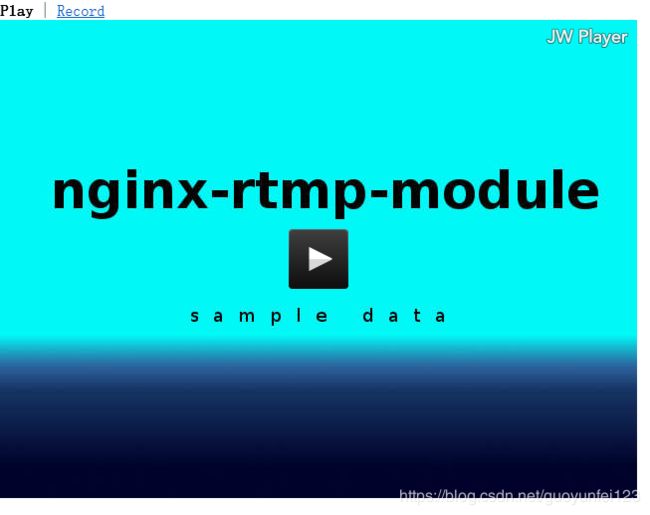
/usr/local/nginx/sbin/nginx -s reload如果启动没有问题,那么访问端口刚才已经修改为8080那么你看到的界面应该是下图
验证
FFmpeg验证
执行推流命令
ffmpeg -re -i input.flv -c copy -f flv rtmp://172.17.178.120/myapp执行收流命令
ffplay rtmp://172.17.178.120:1935/myappOBS+VLC验证
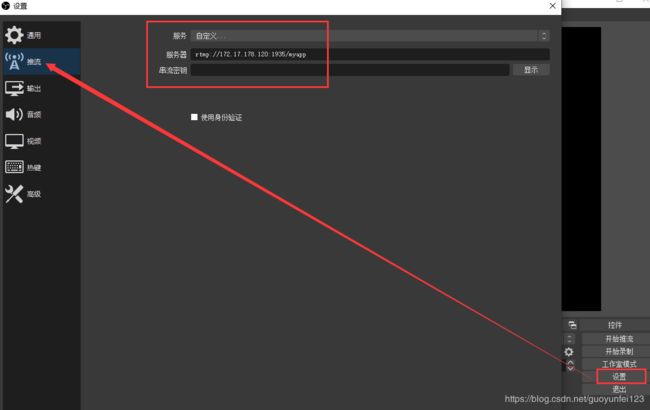
OBS执行推流设置
下载软件
https://obsproject.com/
配置
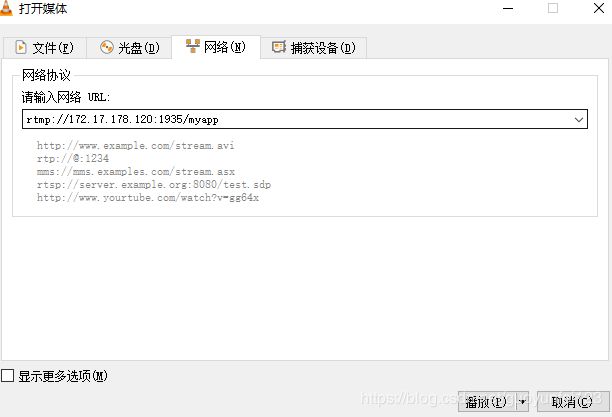
VLC执行收流设置
下载软件
https://www.videolan.org/
配置
媒体->打开网络串流
播放
问题总结
出错1:
RTMP_Connect0, failed to connect socket. 111 (Connection refused)
解决办法:启动nginx的时候,指定配置文件的路径
/usr/local/nginx/sbin/nginx -c /usr/local/nginx/conf/nginx.conf
出错2:
使用FFmpeg推流的时候报错:
Failed to update header with correct duration
Failed to update header with correct filesize
解决办法:
ffmpeg -re -i input.mp4 -c copy -f flv -flvflags no_duration_filesize rtmp://172.17.178.120:1935/myapp
-flvflags no_duration_filesize 这个参数是关键,这个参数告诉ffmpeg不要抛出duration_filesize警告
参考
https://www.cnblogs.com/leisure_chn/p/10623968.html
https://www.cnblogs.com/360minitao/p/12039707.html
https://blog.csdn.net/jinwanmeng/article/details/90773802
